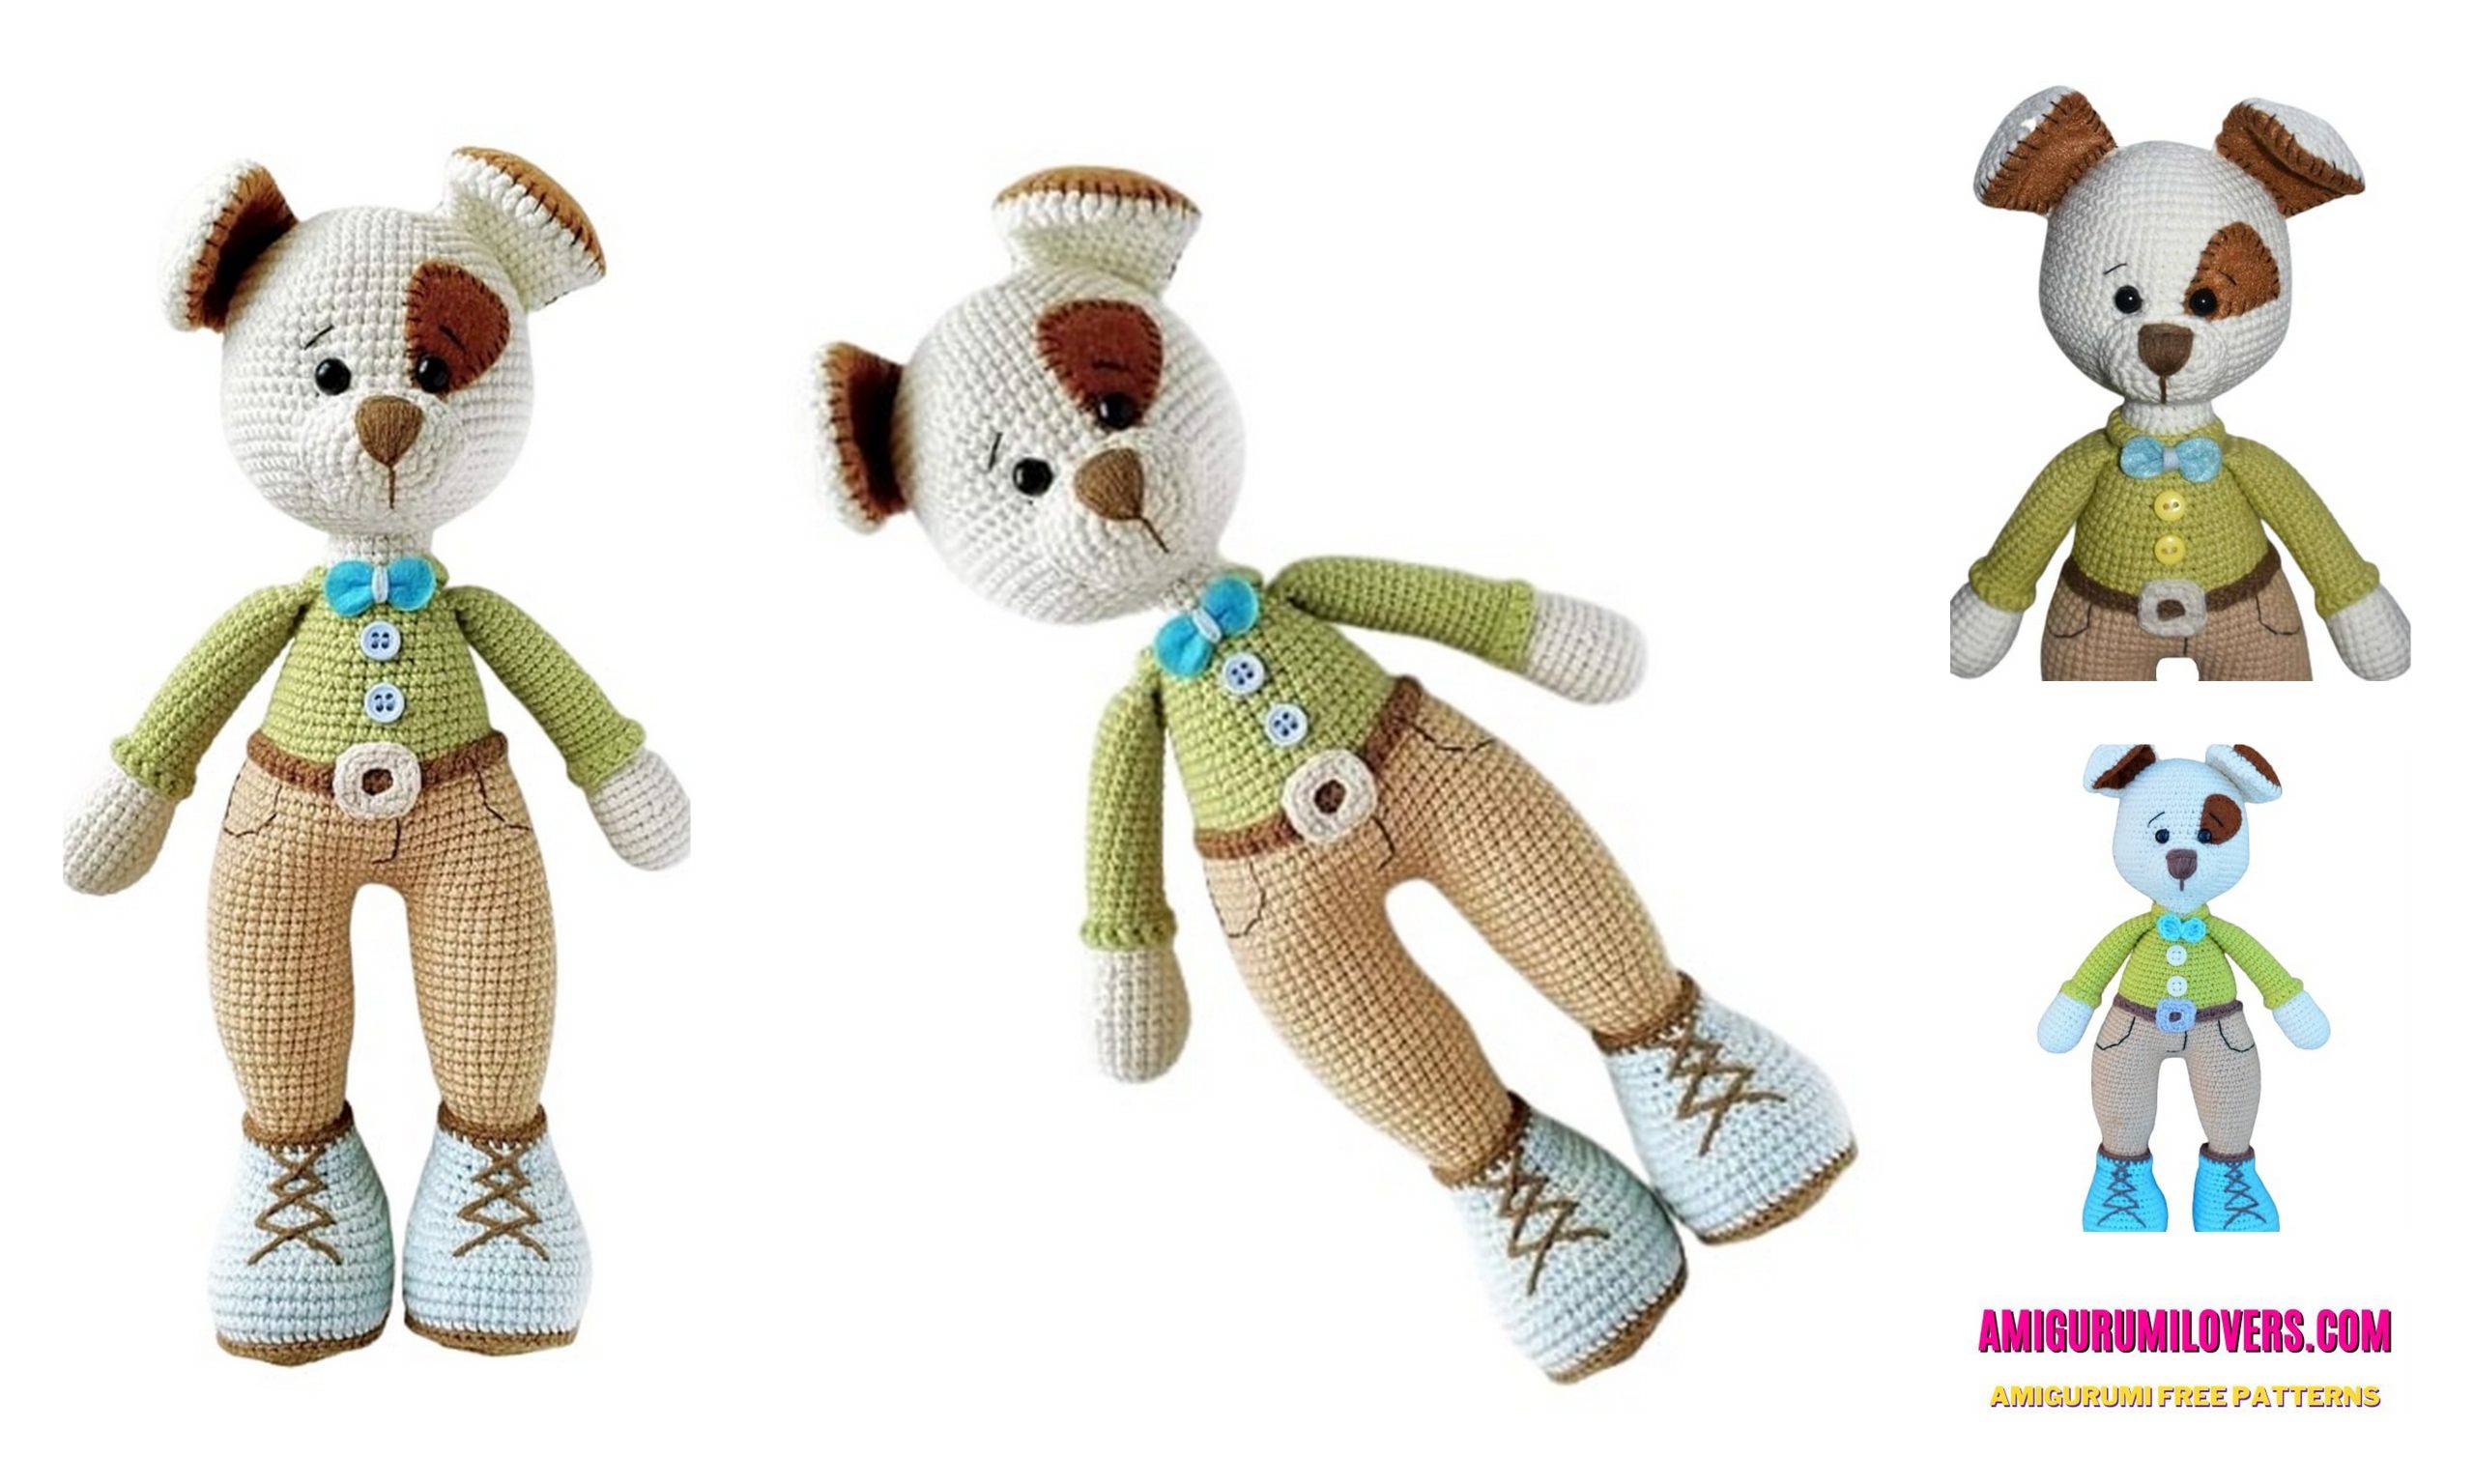
Amigurumi Dog Bruno – Free Crochet Pattern
You may also enjoy exploring our free amigurumi patterns and other popular amigurumi animal patterns available on our website.
Welcome to our cozy corner of the crochet world! If you’ve ever found yourself enchanted by the charming shapes and adorable features of amigurumi, you’re in for a treat. In this blog post, we’ll guide you through crafting an irresistibly cute amigurumi dog named Bruno. This free crochet pattern is designed especially for beginners, making it an ideal project if you’re just starting your crochet journey or if you’re looking to add a charming piece to your collection of handmade treasures.
Amigurumi, the Japanese art of crocheting stuffed toys, combines creativity with a sense of accomplishment that can brighten anyone’s day. The process of transforming simple yarn into an endearing little character is not only rewarding but also enjoyable. With just a hook, some yarn, and a sprinkle of imagination, you can create your very own cuddly companion. Bruno, with his floppy ears and wagging tail, is sure to bring smiles and warmth to friends and family alike.
In this post, we’ll provide you with a detailed, step-by-step guide to crocheting Bruno, complete with helpful tips and techniques that will enhance your skills. From selecting the right materials to achieving the perfect stitch, we’ll walk you through each stage of the process, ensuring that you feel confident and inspired. You don’t need to be a crochet expert to create this delightful dog; all you need is a passion for crafting and a willingness to learn!
Throughout the pattern, you’ll find clear instructions that help demystify the art of amigurumi, breaking down each section for easy understanding. Whether you are preparing a handmade gift for a loved one, decorating your own space, or simply indulging in a therapeutic crafting session, this project is perfect for unleashing your creativity. With a few basic stitches and some simple sewing techniques, you’ll quickly bring Bruno to life.
As you embark on this journey, we encourage you to personalize your amigurumi dog. Feel free to experiment with different yarn colors and textures to make Bruno truly your own. Each stitch you create adds a unique touch, turning a basic pattern into a beloved masterpiece. We can’t wait to see your creative flair shine through as you crochet your very own furry friend!
So grab your yarn and hook, and let’s get started on making your very own amigurumi dog Bruno. Dive into the enchanting world of crochet and discover the joy of crafting a cute companion, all while honing your skills and enjoying the process. Happy crocheting!
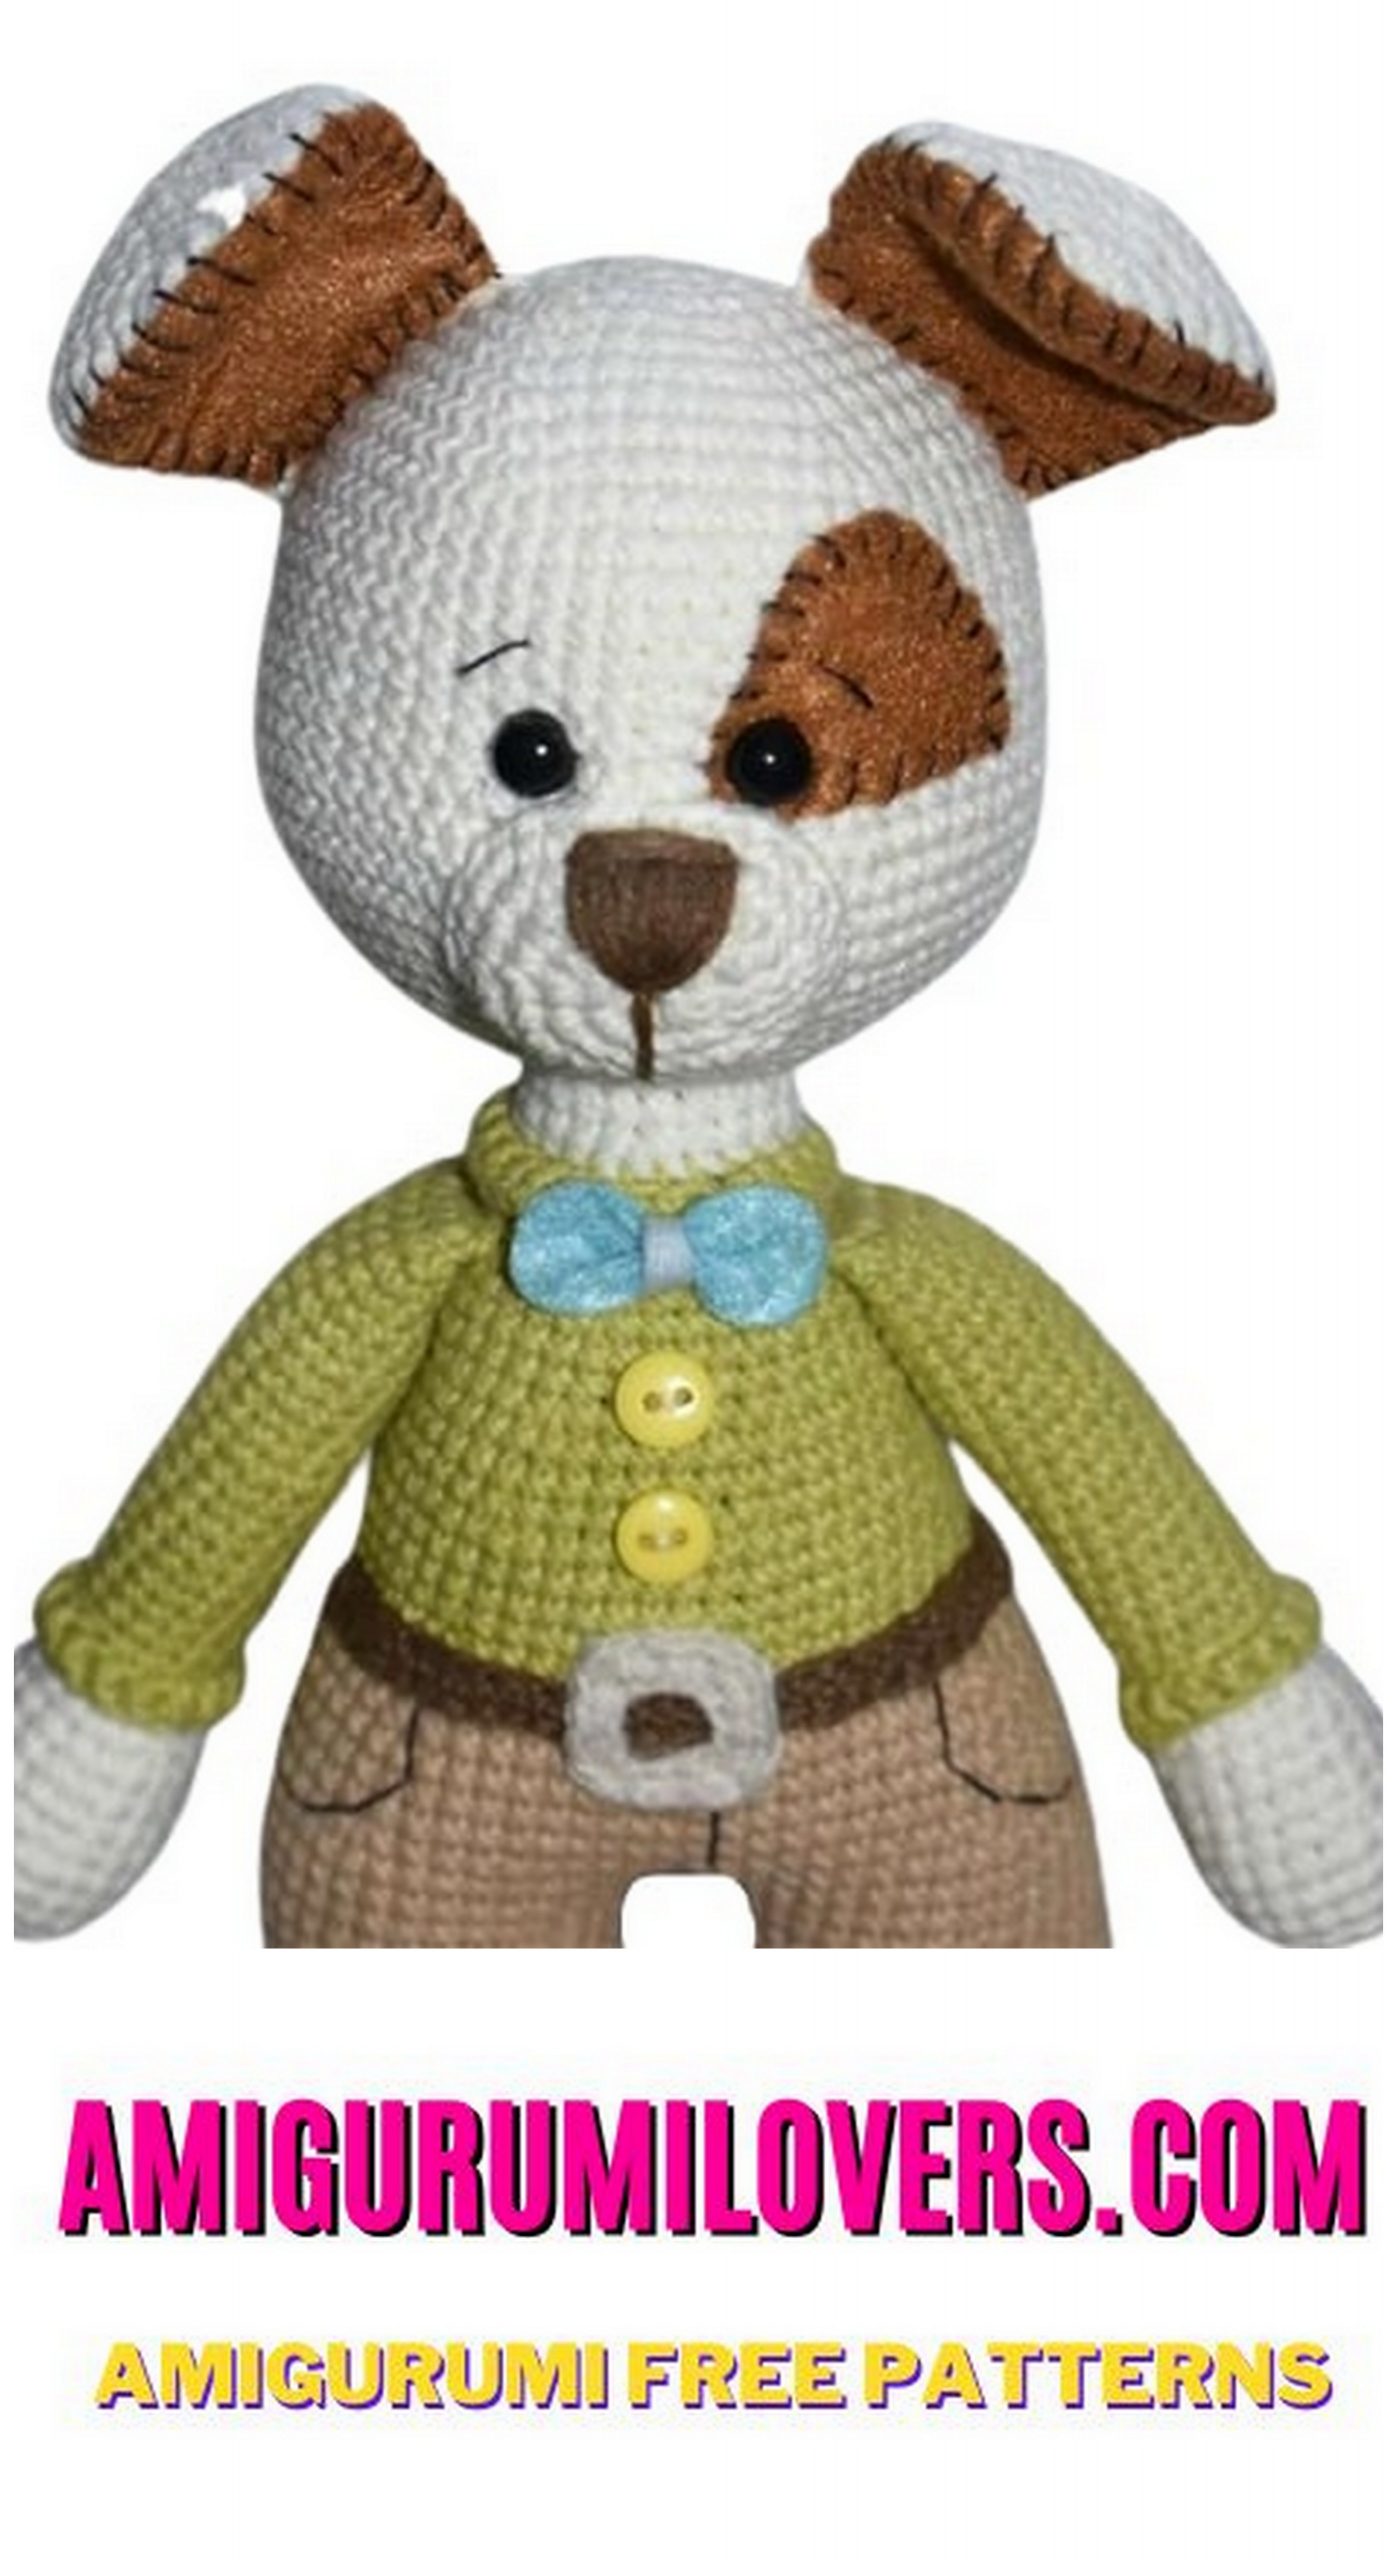
Looking for your next cute and cuddly crochet companion? Meet Bruno, the lovable little pup you can make yourself with this free Amigurumi Dog pattern! With his floppy ears, cheerful face, and wagging tail, Bruno is sure to become a favorite in your handmade collection.
This easy-to-follow pattern includes everything you need to get started: a full list of materials, commonly used amigurumi abbreviations, and step-by-step instructions with helpful photos. Whether you’re new to crochet or have years of experience, you’ll find the process both fun and relaxing.
Bruno is perfect as a gift for dog lovers, a child’s toy, or even a sweet shelf decoration. You can personalize him with different yarn colors, add a collar or name tag, or even crochet a matching dog bed!
So grab your hook and your favorite soft yarn, and start creating your very own Bruno the dog. Don’t forget to share your finished pup with the crochet community!
1000+ free amigurumi patterns, you can download our application from this link!
TOOLS AND MATERIALS
1. Yarn Art Jeans brown (40), blue (14), beige (07), lettuce (29) and milk (03) flowers. A little gray yarn for buckle.
2. Filler – holofiber;
3. Hook number 2;
4. Screw eyes 7 mm;
5. Felt 1.5 mm brown and blue;
6. Plastic buttons for decor;
7. Cardboard for insoles;
8. Sewing thread in brown and black;
9. A large needle for stitching.
Abbreviations:
ch -chain
sc – single crochet;
BLO – back half loop;
inc – increase (two columns from one);
dec – decrease (two columns together).
PATTERN – Amigurumi Dog
LEGS – Amigurumi Dog
We start with a brown thread
1 row – 10 ch + 1 ch
2 row – 9 sc, 5 sc in 1 loop, 8 sc, inc (24)
3 row – inc, 8 sc, 5 inc, 8 sc, 2 inc (32)
4th row – 1 sc, inc, 8 sc, (1 sc, inc) * 5, 8 sc, (1 sc, inc) * 2 (40)
5 row – 2 sc, inc, 8 sc, (2 sc, inc) * 5, 8 sc, (2 sc, inc) * 2 (48)
6 row – (7 sc, inc) * 6 (54)
On the resulting sole, cut out the insoles
Change the thread to blue, we knit the 7th row for BLO.
7-11 row – 54 sc
Insert insoles
12 row – 8 sc, (2 sc, dec) * 8, 14 sc (46)
13 row – 46 sc
14th row – 8 sc, (1 sc, dec) * 8, 14 sc (38)
15 row – 38 sc
16 row – 8 sc, 8 dec, 14 sc (30)
17 row – 30 sc
18 row – (3 sc, dec) * 6 (24)
19 row – 24 sc
We fill
Change the thread to beige, We knit the 20th row for BLO
20-21 row – 24 sc
22 row – (2 sc, dec) * 6 (18)
23-25 row – 18 sc
26 row – (2 sc, inc) * 6 (24)
27-29 row – 24 sc
30 row – (3 sc, inc) * 6 (30)
31-40 row – 30 sc.
Finish knitting cut the thread. We fill.
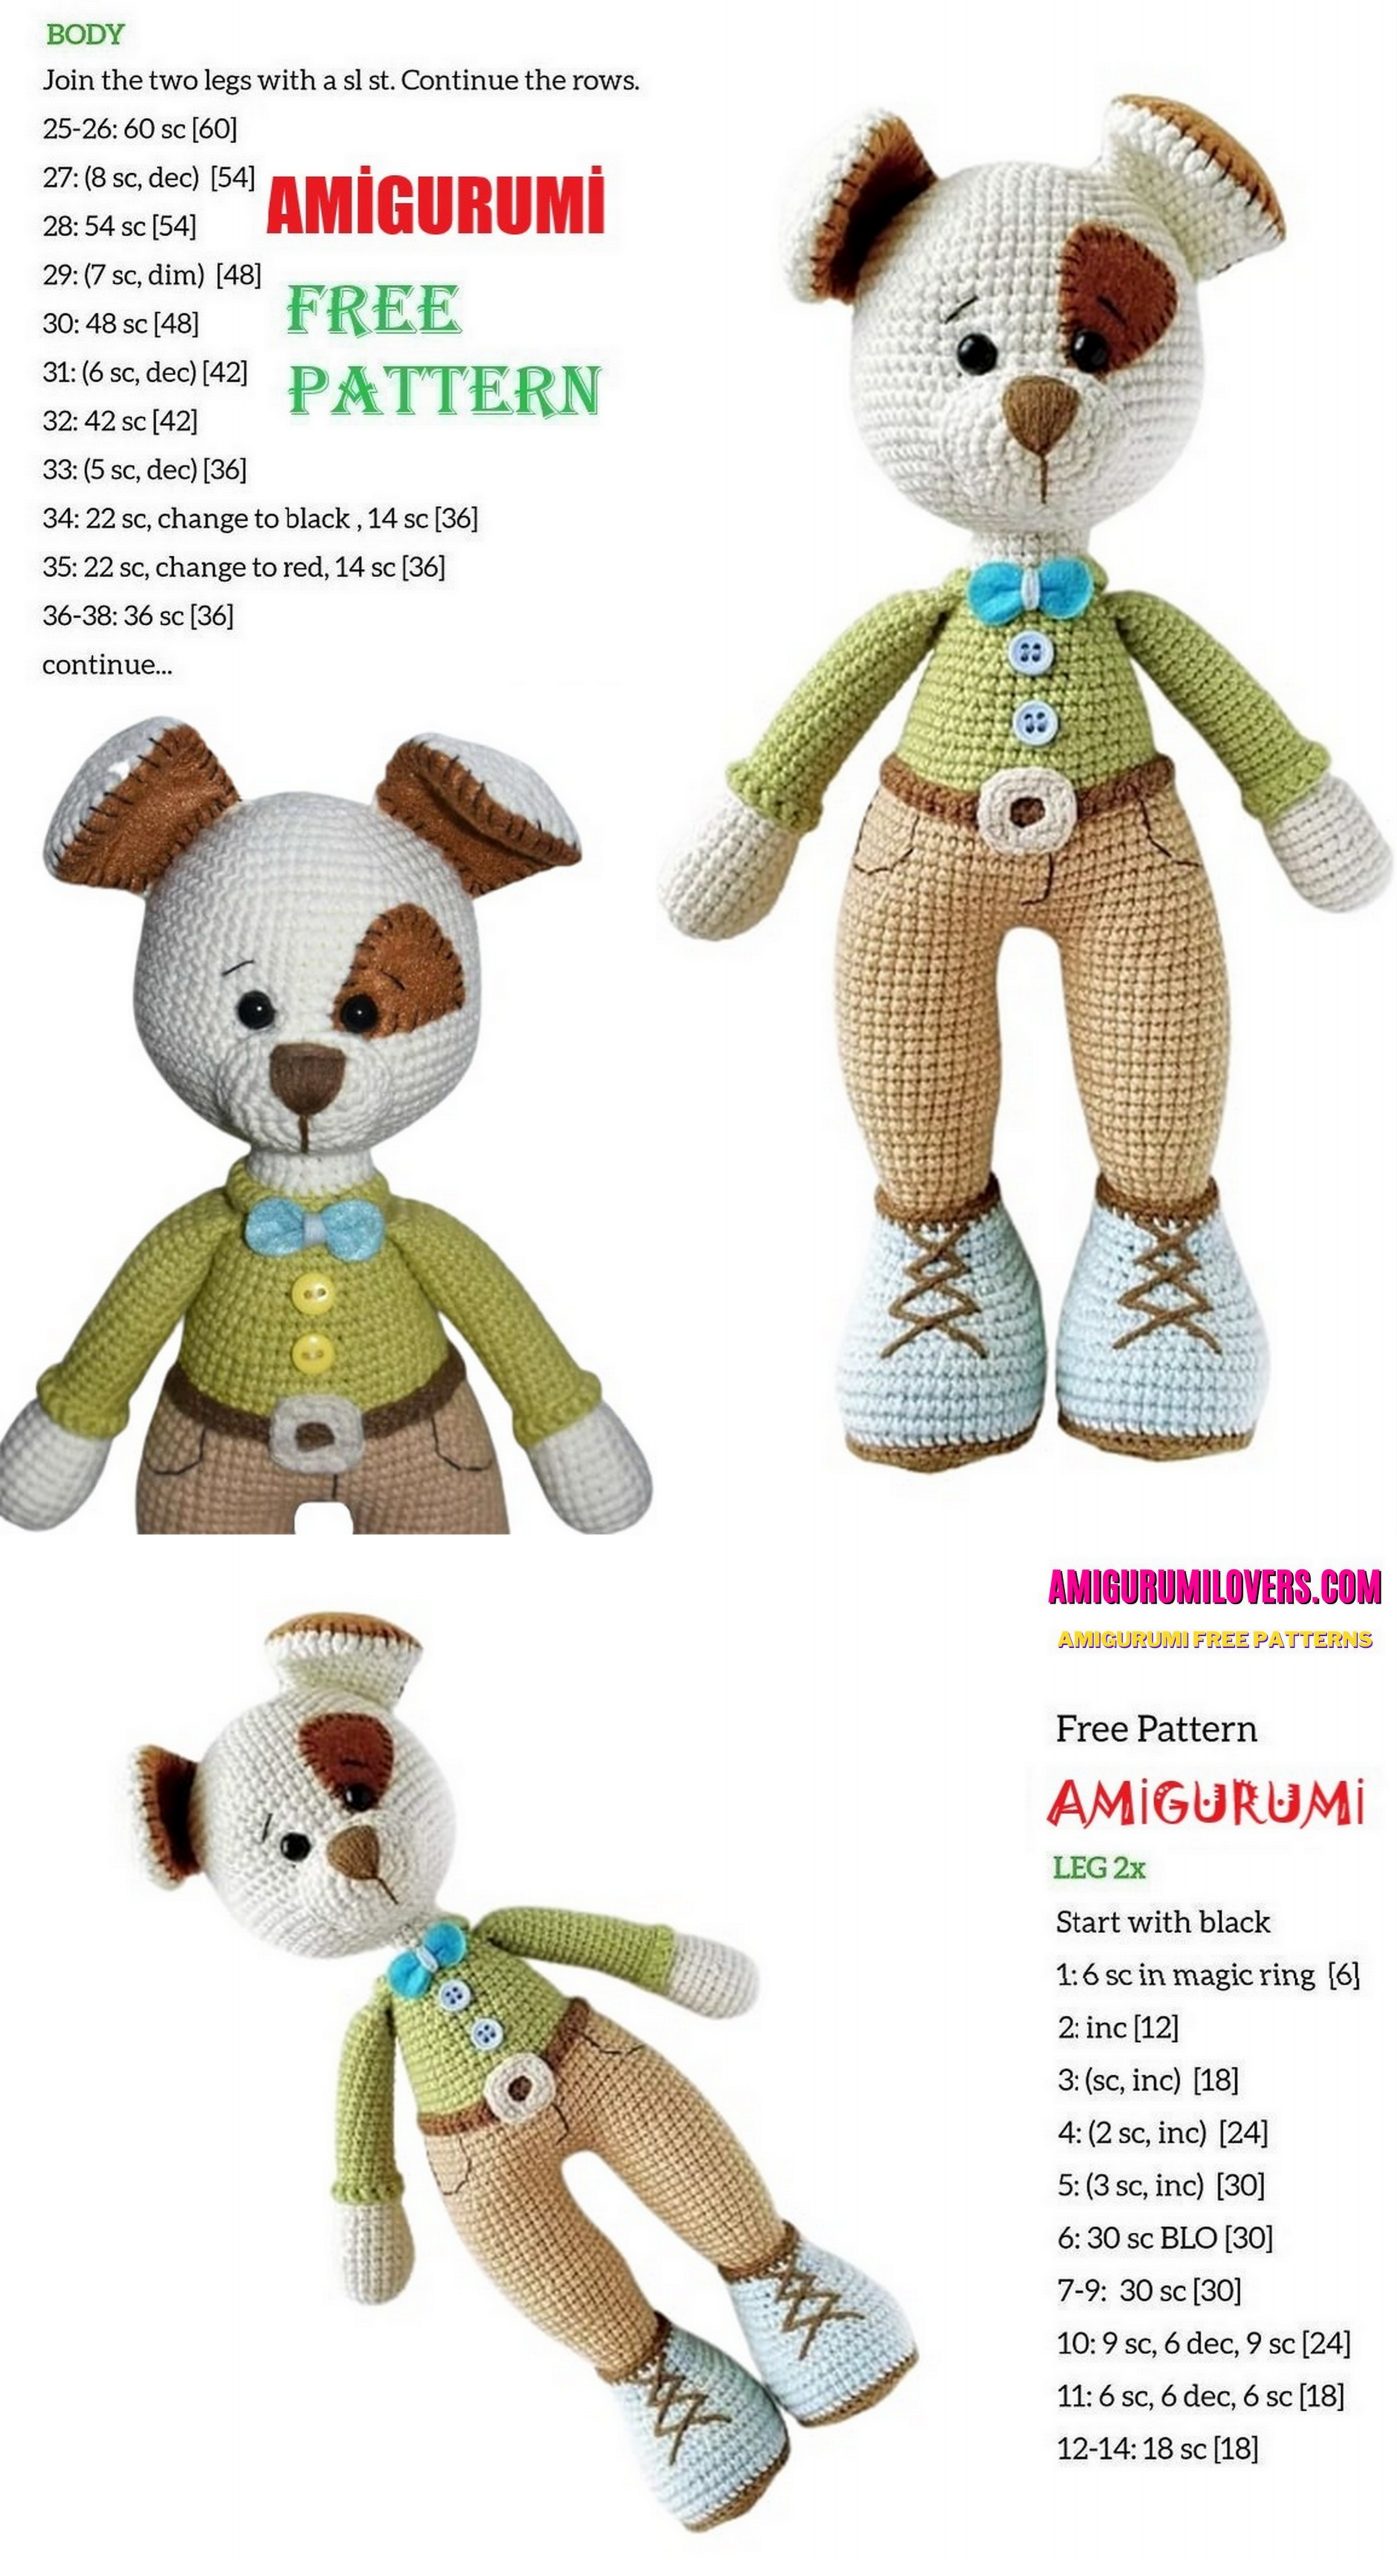
LEGS – Amigurumi Dog
Next, we return to the 20th row associated for BLO. We find the first column of the row, attach the blue thread.
1-2 row – 24 sc.
Change the thread to brown.
3 row – 24 sc.
Finish knitting, hide the thread.
We return to the 7th row, which we knitted for BLO. Find the last column of the row, we attach the brown thread and tie the sole with half columns without nakida (ss), hide the thread. We embroider the shoelaces. Similarly we knit the second part. At the completion of the second leg the thread do not cut.
BODY – Amigurumi Dog
On the second leg, type 3 ch and connect the legs together sc. We put a marker in this place, this will be the beginning of the row.
41 row – 66 sc (30 sc along the 1st leg + 3 sc along the chain, 30 sc along
2nd leg + 3 sc in the chain)
42-44 row – 66 sc 60 row – (5 sc, dec) * 6 (36)
45 row – (9 sc, dec) * 6 (60) 61-62 row – 36 sc
46-48 row – 60 sc 63 row – (4 sc, dec) * 6 (30)
49 row – (8 sc, dec) * 6 (54) 64-65 row – 30 sc
50-51 row – 54 sc 66 row – (3 sc, dec) * 6 (24)
Change the thread to salad 67 row – 24 sc
52 row – 54 sc Change the thread to dairy,
53 row – (7 sc, dec) * 6 (48) The 68th row is knitted for BLO.
54-56 row – 48 sc 68 row – 24 sc
57 row – (6 sc, dec) * 6 (42) 69 row – (6 sc, dec) * 3 (21)
58-59 row – 42 sc 70 row – 21 sc.
Finish knitting, cut the thread, leaving a long end for stitching.
We knit a collar. To do this, we return to the 68th row associated for BLO. We knit this row cn, leaving 2 loops in the center untied. Hide the thread.

BODY – Amigurumi Dog
Next, we knit the belt with a brown thread.
1 row – 55 ch we close in the ring with the help of ss.
2 row – 1 ch, 55 sc, ss.
Cut the thread, leaving a long end, sew.
We knit a buckle with a gray thread.
1 row – 12 ch we close in the ring with the help of ss.
2 row – 1 ch, (2 sc, 3 sc in 1) * 3, 2 sc, 2 sc in 1, ss.
Cut the thread, leaving a long end, sew.
To make a butterfly, take a blue felt, cut it out
from it an elongated oval, we pull it together in the middle with a blue thread, sew it to the body.
Decorate the body with buttons. Embroider sewing brown thread pockets and fly.
PENS – Amigurumi Dog
We start with a milky thread
1 row – 6 sc into magic ring 12 row – (4 sc, dec) * 3 (15)
2 row – 6 inc (12) 13 row – 15 sc
3 row – (3 sc, 3 inc) * 2 (18) Change the thread to salad
4th row – (5 sc, inc) * 3 (21) 14th row – 15 sc
5 – 7 row – 21 sc 15 row – 15 sc per BLO
8 row – (5 sc, dec) * 3 (18) 16 – 34 row – 15 sc
9 – 11 row – 18 sc
Connect the edges with single crochet. Back to 15 row associated for BLO. Find the last column of the row, attach the thread and tie a row with double crochets.
Finish knitting, hide the thread. We knit the second part in the same way. Sew hands to our torso.

HEAD – Amigurumi Dog
1 row – 6 sc into magic ring
2 row – 6 inc (12)
3 row (1 sc, inc) * 6
4 row – (2 sc, inc) * 6 (24)
5 row – (3 sc, inc) * 6 (30)
6 row – (4 sc, inc) * 6 (36)
7 row – (5 sc, inc) * 6 (42)
8 row – (6 sc, inc) * 6 (48)
9 row – (7 sc, inc) * 6 (54)
10-17 row – 54 sc
18 row – (8 sc, inc) * 6 (60)
19 row – (9 sc, inc) * 6 (66)
20-22 row – 66 sc
Insert the eyes between 17 and 18 in rows, leaving 7 sc between them
23 row – (9 sc, dec) * 6 (60)
23 row – (9 sc, dec) * 6 (60)
24 row – (8 sc, dec) * 6 (54)
25 row – (7 sc, dec) * 6 (48)
26 row – (6 sc, dec) * 6 (42)
27 row – (5 sc, dec) * 6 (36)
28 row – (4 sc, dec) * 6 (30)
29 row – (3 sc, dec) * 6 (24)
30 row – (2 sc, dec) * 6 (18)
31 row – (1 sc, dec) * 6 (12)
32 row – (6 dec) * 6 (6)
We tighten the hole, hide a thread. Make a little tightening peephole, sew a speck of felt, embroider the eyebrows.
DRAWING
Muzzle – Amigurumi Dog
1 row – 6 sc into magic ring
2 row – 6 inc (12)
3 row – (3 sc, 3 inc) * 2 (18)
4th row – (3 sc, (1 sc, inc) * 3) * 2 (24)
5 row – (3 sc, (2 sc, inc) * 3) * 2 (30)
6 row – 30 sc
Sew the muzzle to the head, fill the sewing trip. We embroider a nose.


EARS – Amigurumi Dog
1 row – 6 sc into magic ring 9 row – (3 sc, dec) * 6 (24)
2 row – 6 inc (12) 10 row – 24 sc
3 row – (1 sc, inc) * 6 (18) 11 row – (10 sc, dec) * 2 (22)
4th row – (2 sc, inc) * 6 (24) 12th row – 22 sc
5th row – (3 sc, inc) * 6 (30) 13th row – (9 sc, dec) * 2 (20)
6-8 row – 30 sc 14 row – 20 sc
Connect the edges with single crochet. We knit the second part in the same way. Cut ears from felt, sew to knitted and sew to the head as you like. Me this time
I wanted to make both ears brown side inward) Who not yet sewn his head – it’s time to do it =)
Before you leave, make sure to check out more free amigurumi crochet patterns and discover new ideas for your next project.
You can also browse our full amigurumi pattern archive for hundreds of beginner-friendly designs.