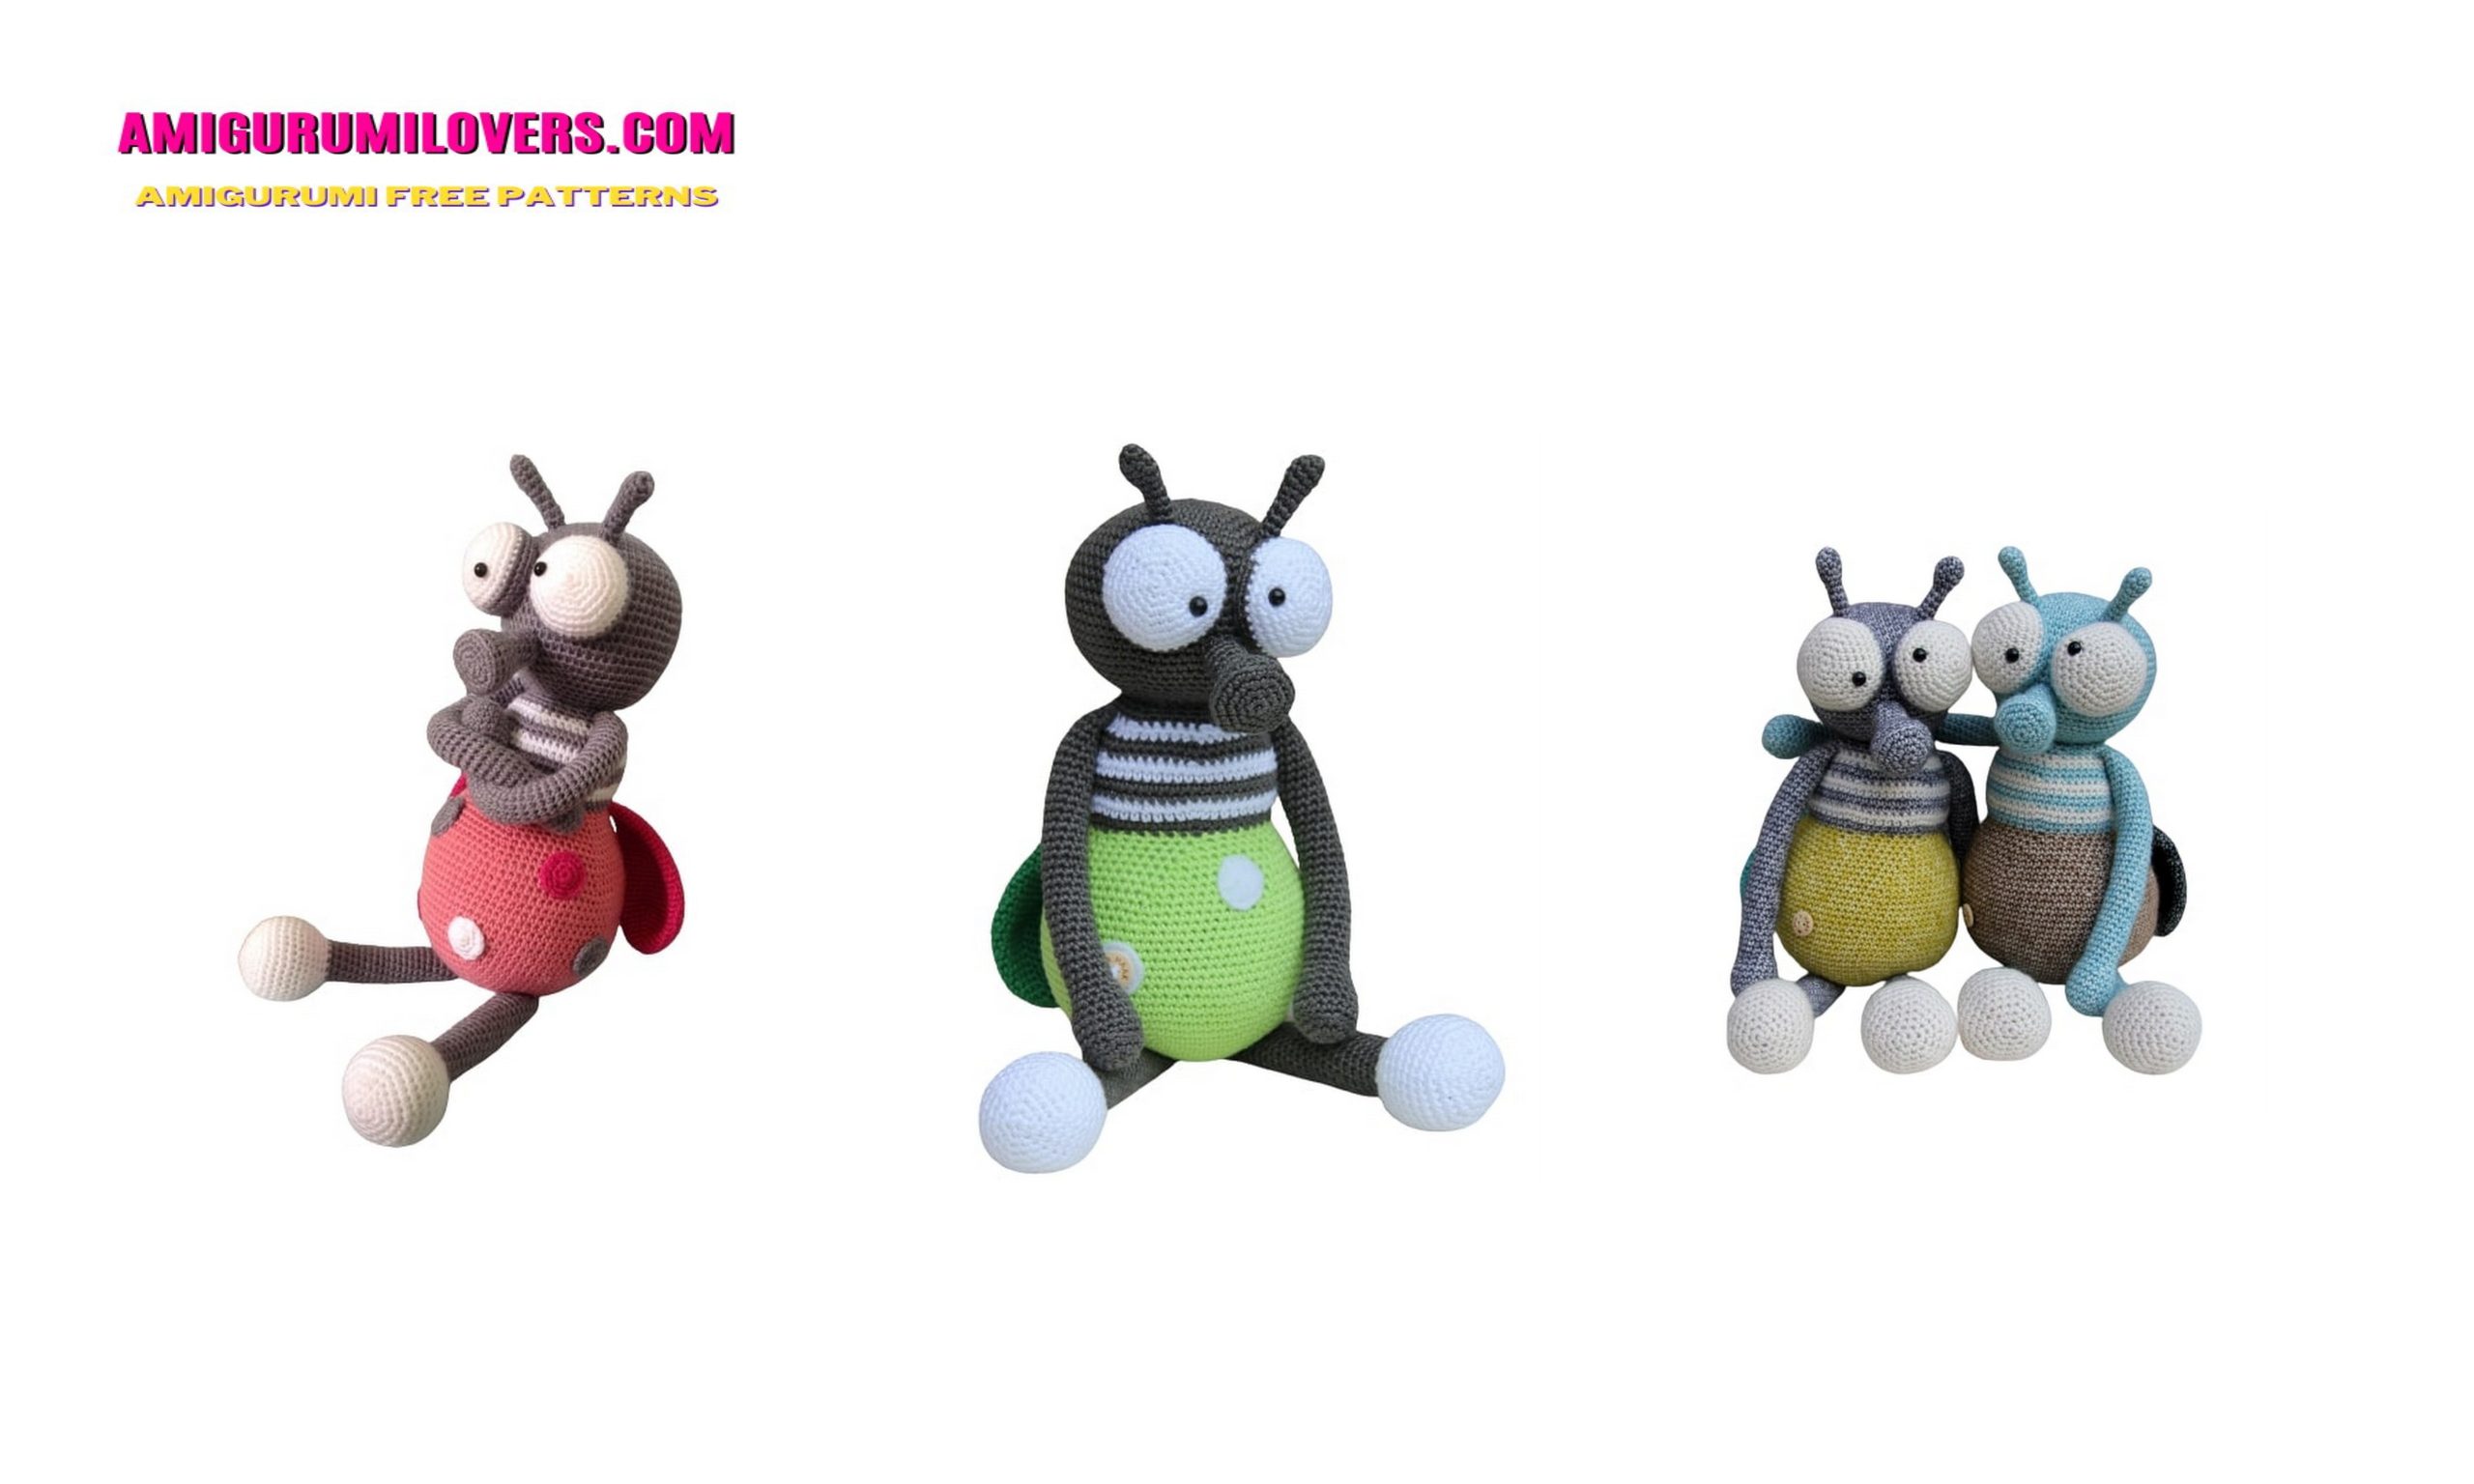
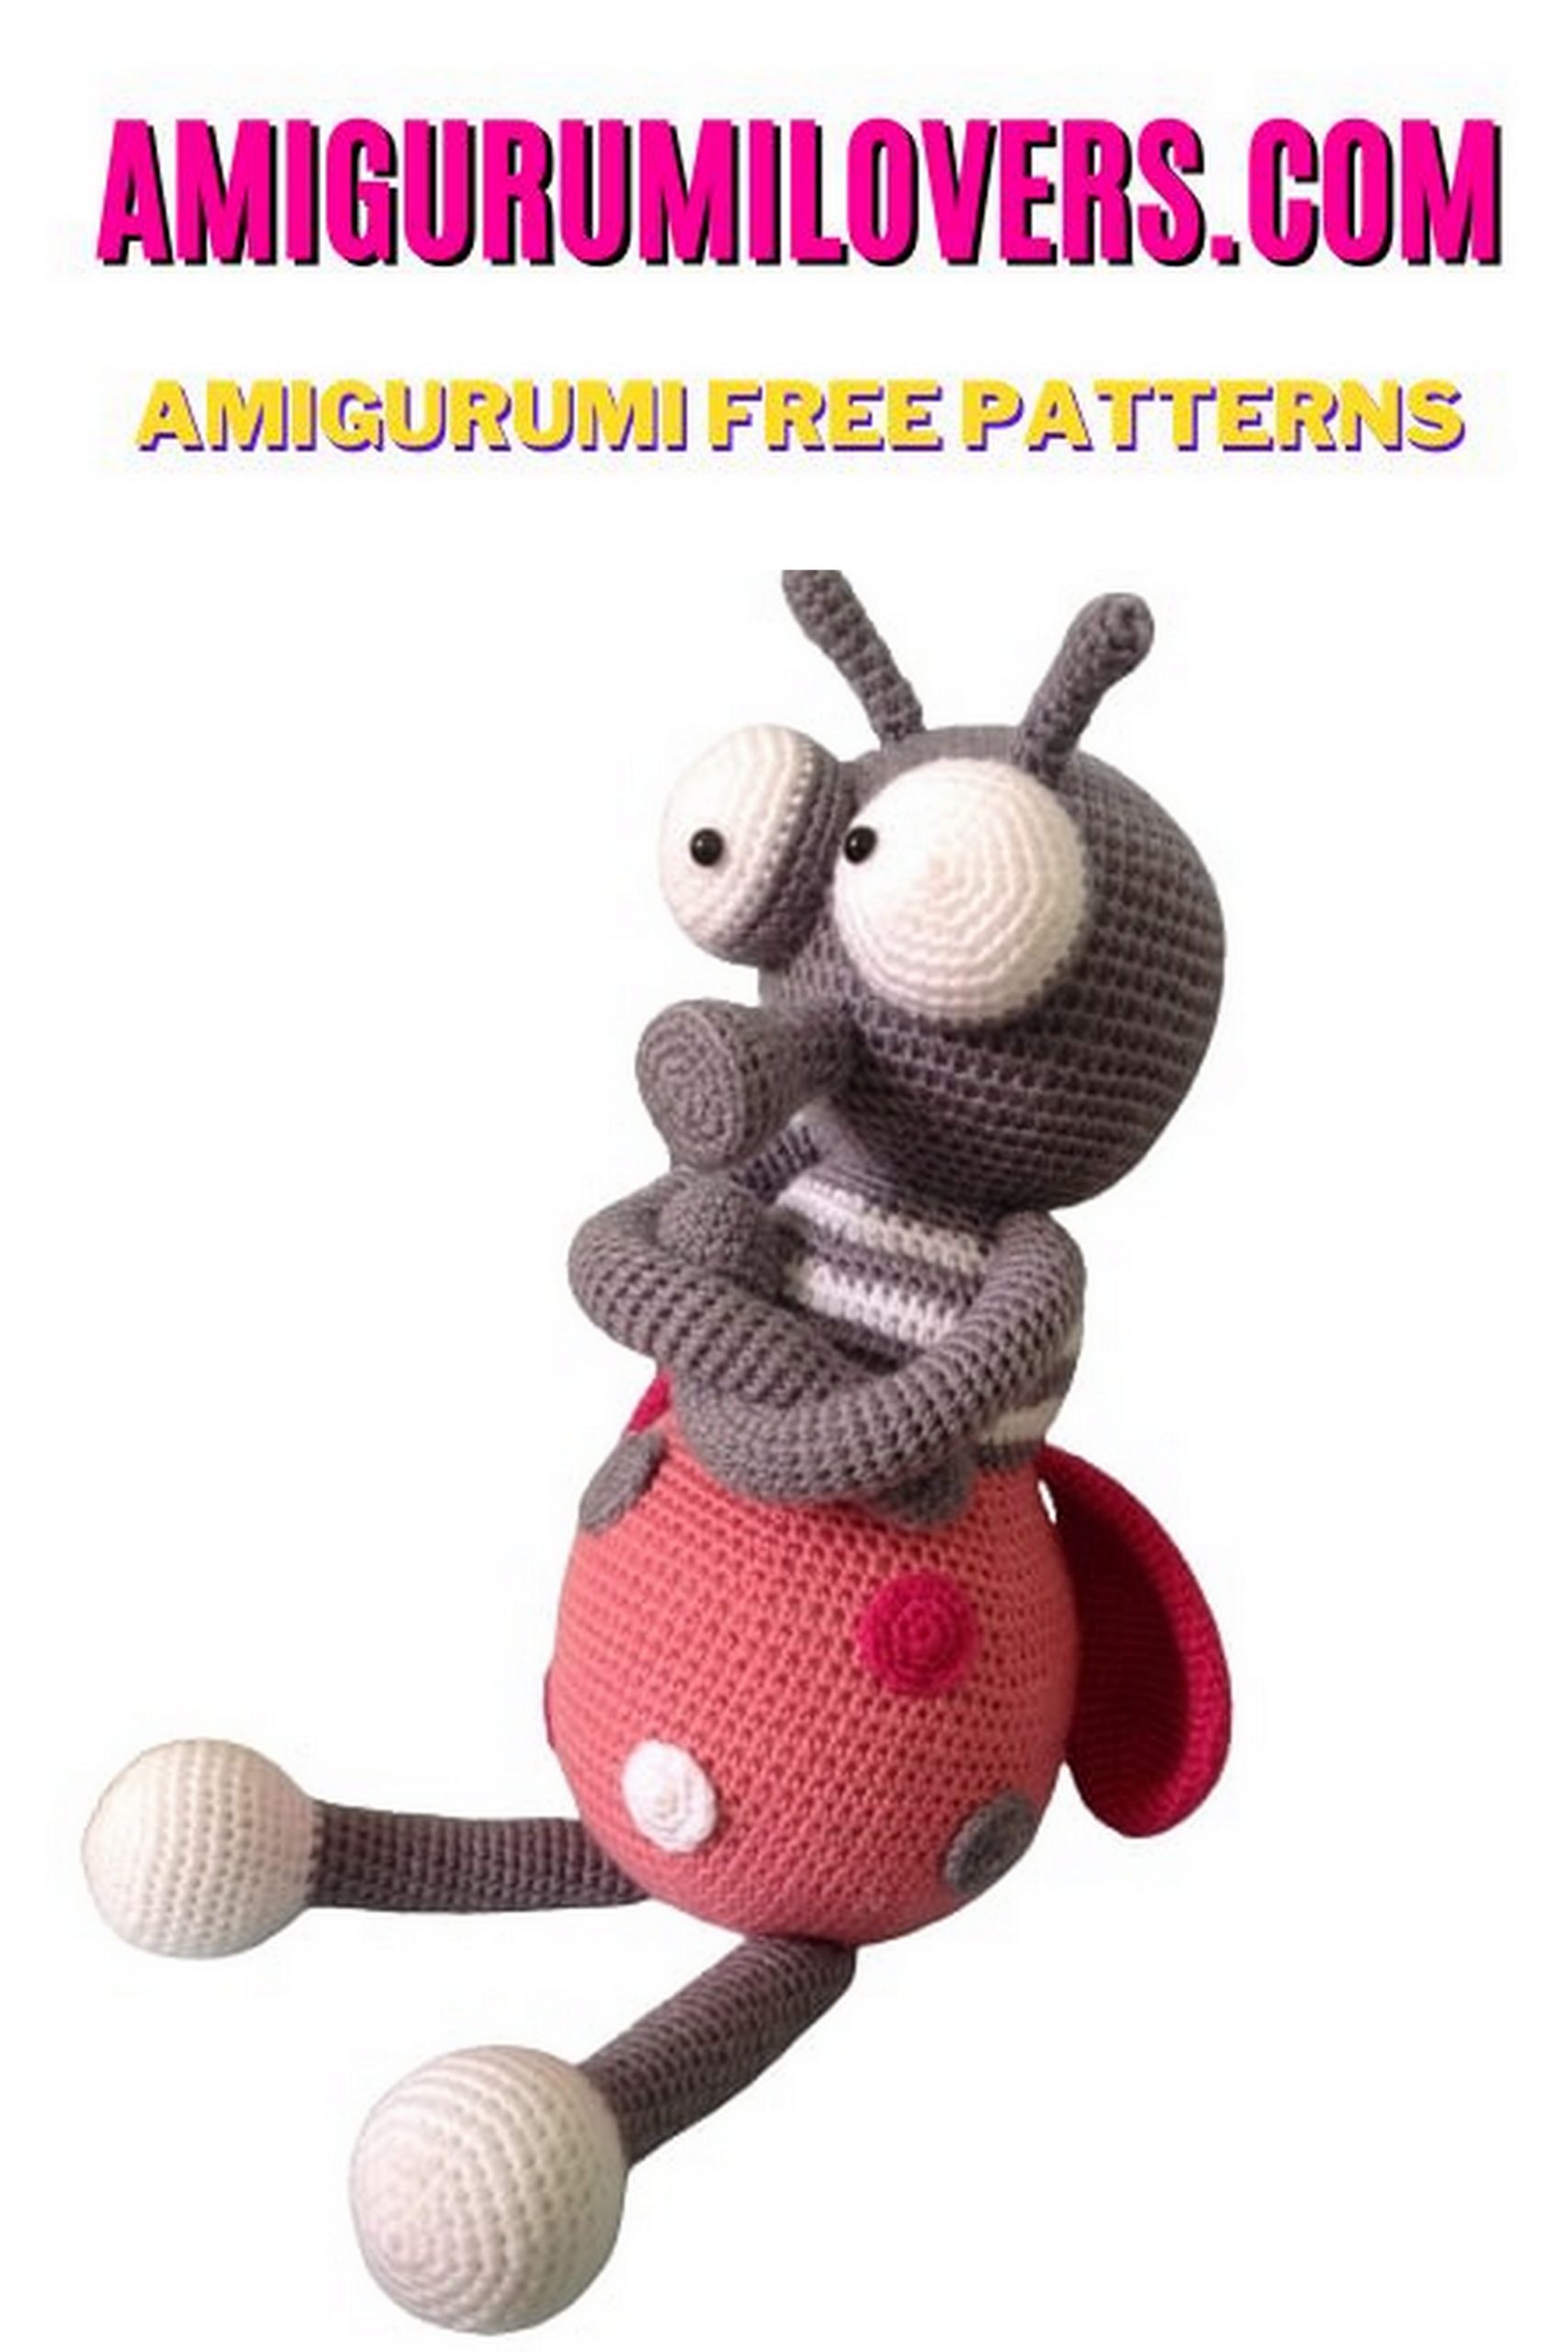
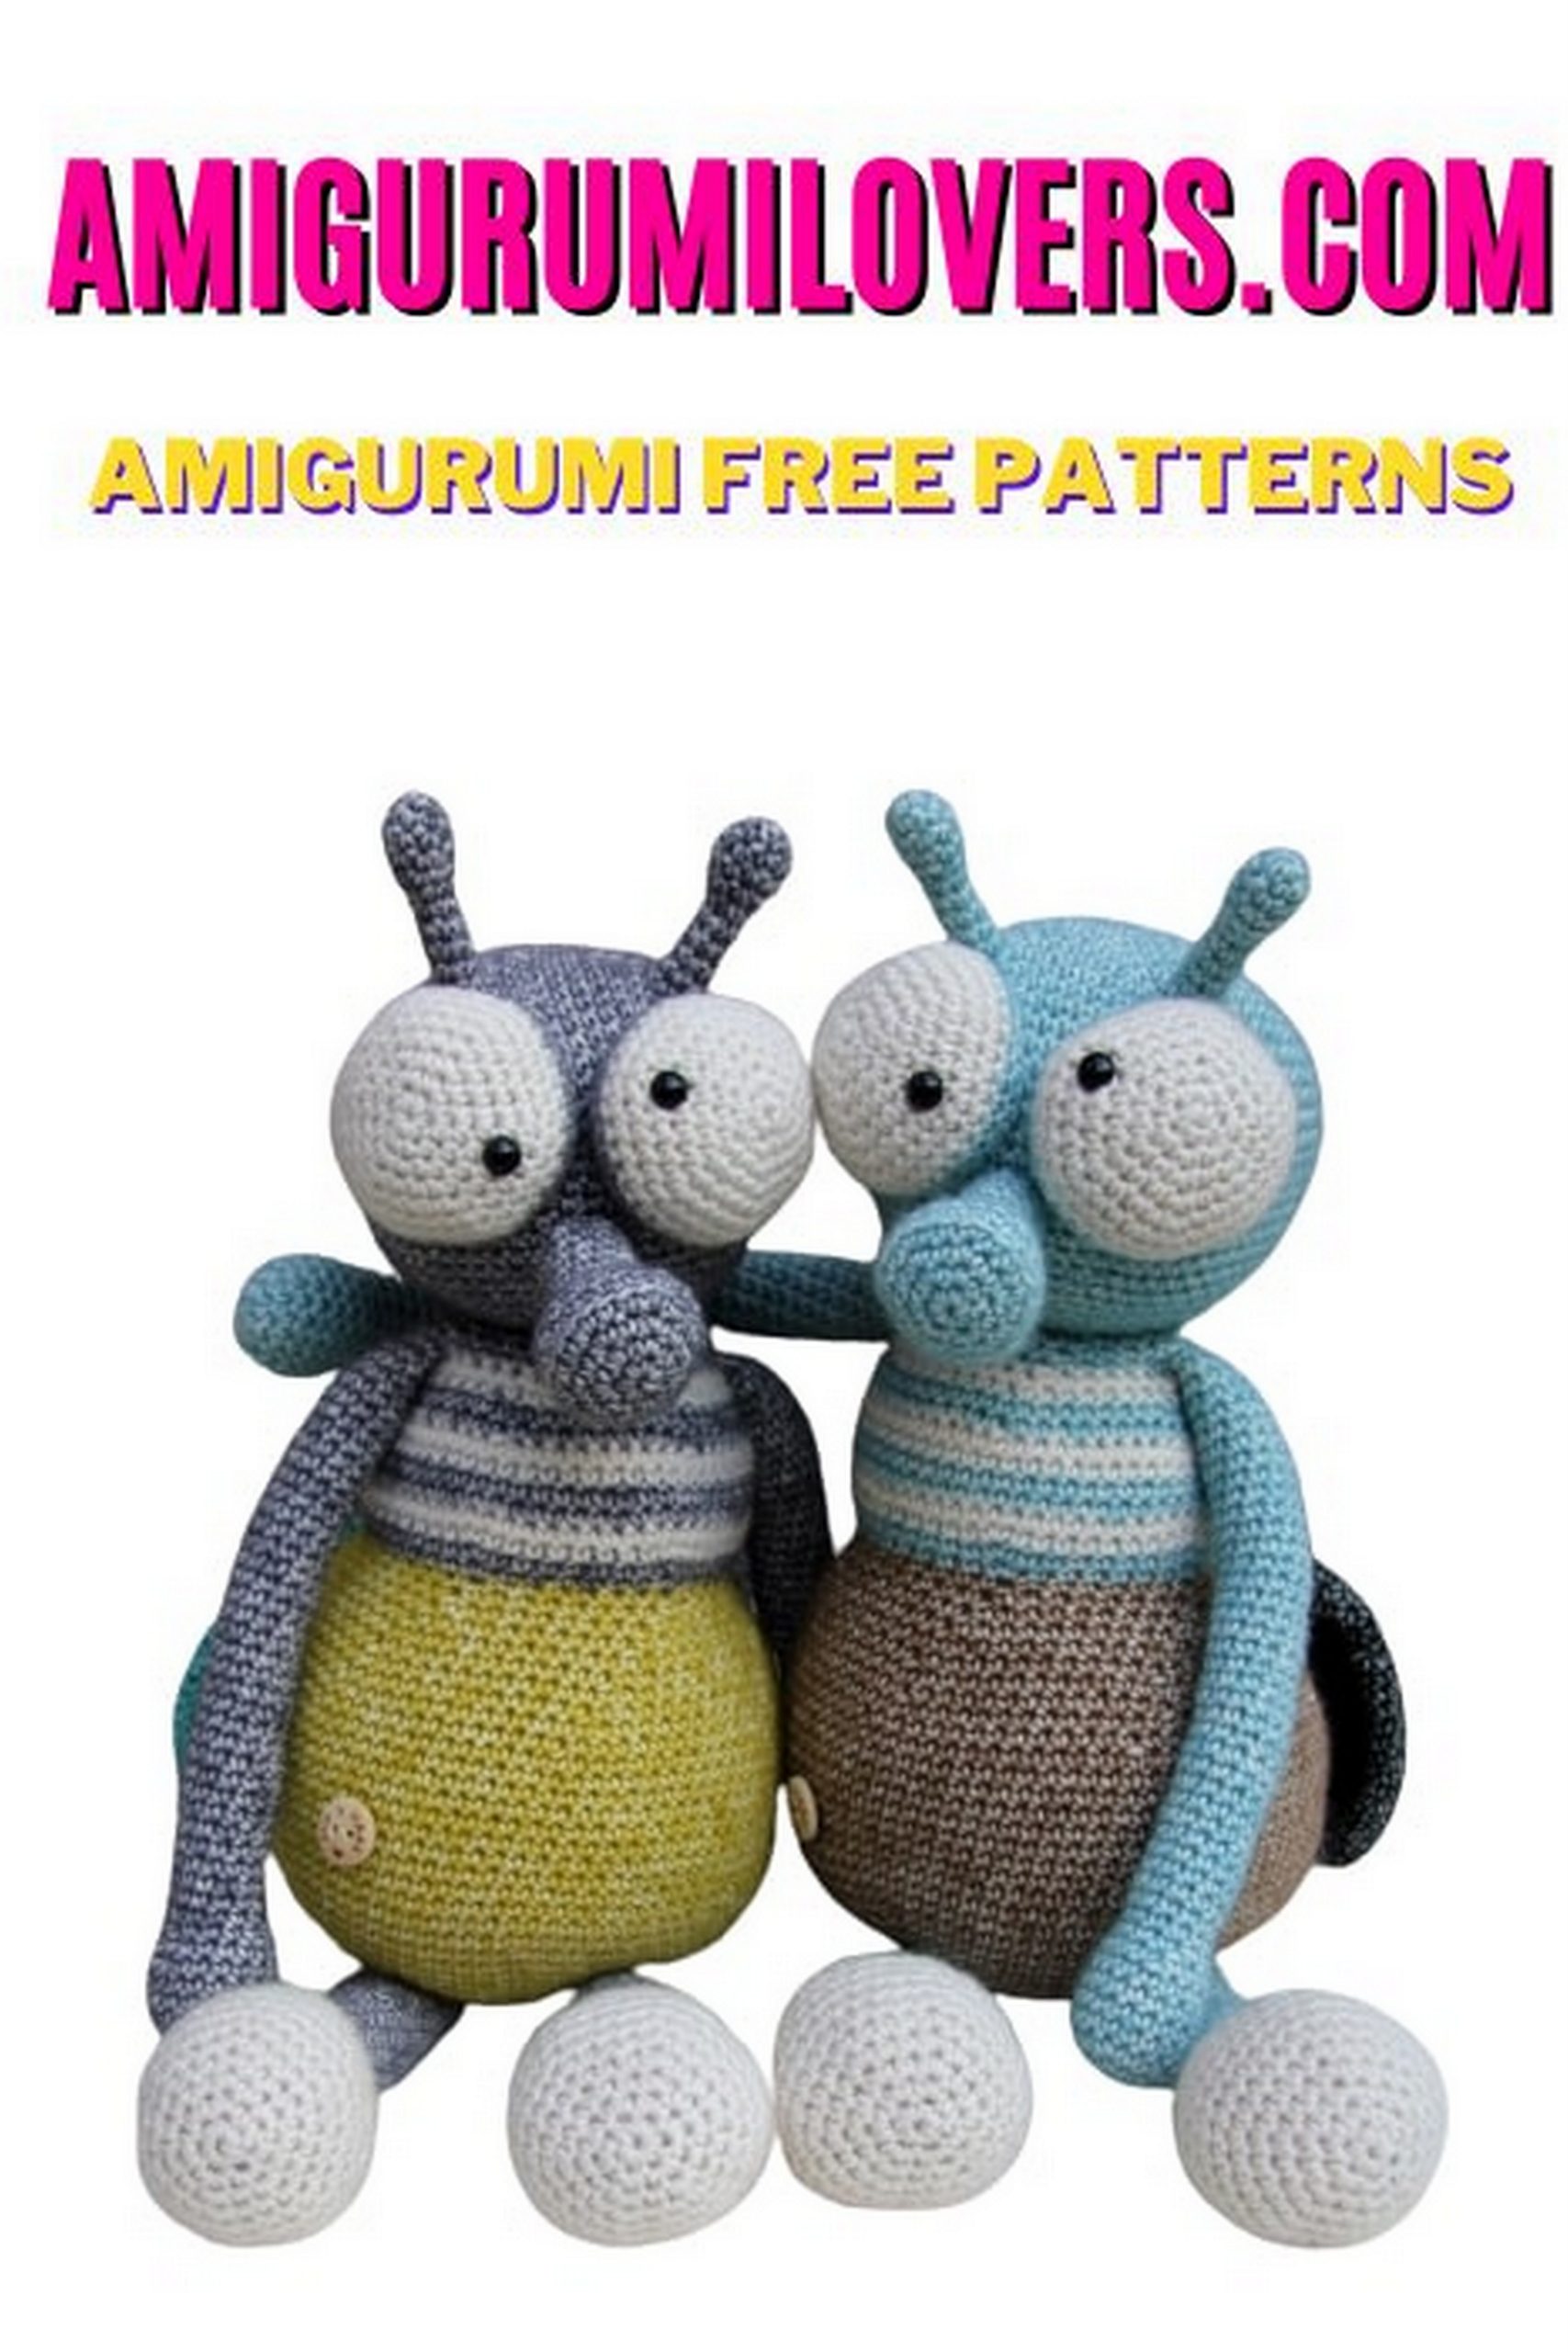
Amigurumi Fly Free Pattern
You may also enjoy exploring our free amigurumi patterns and other popular amigurumi animal patterns available on our website.
Welcome to our crochet corner! If you’re searching for a delightful and engaging project to hone your crochet skills, you’re in the right place. Today, we’re excited to share a free amigurumi pattern for a charming fly that’s perfect for crocheters of all levels, including beginners. Amigurumi, the Japanese art of knitting or crocheting small, stuffed animals and creatures, offers a fun way to unleash your creativity and add a touch of whimsy to your home. This fly pattern is not only easy to follow but also a fantastic introduction to the world of amigurumi, allowing you to practice essential crochet techniques while creating an adorable character.
Whether you’re looking to make a playful toy for a child, a quirky decoration, or just want to try something new, this amigurumi fly will have you buzzing with excitement. The beauty of amigurumi lies in its versatility; you can easily customize your creation by choosing different yarn colors or incorporating a variety of embellishments. As you crochet, you’ll enjoy the satisfaction that comes from transforming simple yarn into a lovable little bug. This project is perfect for using up leftover yarn scraps, making it a sustainable choice for your crafting endeavors.
This pattern is designed with beginners in mind, featuring step-by-step instructions that are clear and concise. Even if you’re new to crochet, you’ll find that the techniques involved are straightforward, making it a great opportunity to build your confidence. We’ve included helpful tips along the way to ensure you feel supported throughout your crafting journey. The amigurumi fly is not only a quick project to complete but also an excellent way to develop your skills and gain familiarity with techniques like increasing, decreasing, and working in the round.
Before you dive into the crochet hook and yarn, make sure you have your supplies handy. This pattern is adaptable so you can use any worsted weight yarn, along with a corresponding crochet hook. We’ll guide you through the journey of creating your very own amigurumi fly, from the initial stitches to the final touches, ensuring that you enjoy every moment of this creative process. So, gather your materials and prepare to be amazed at how this simple pattern can evolve into a cute and whimsical creation that you can be proud of. Let’s get started on this adorable adventure and bring your amigurumi fly to life!
Amigurumi related to each other, we continue to bring you beautiful shares. In this article, amigurumi fly free pattern is waiting for you.
Abbreviations
sc: single crochet
inc: Increase
dec: decrease
hdc: half double crochet
dc: double crochet
blo: Knitting from the back loop
flo: Knitting from the front loop
ch: Chain
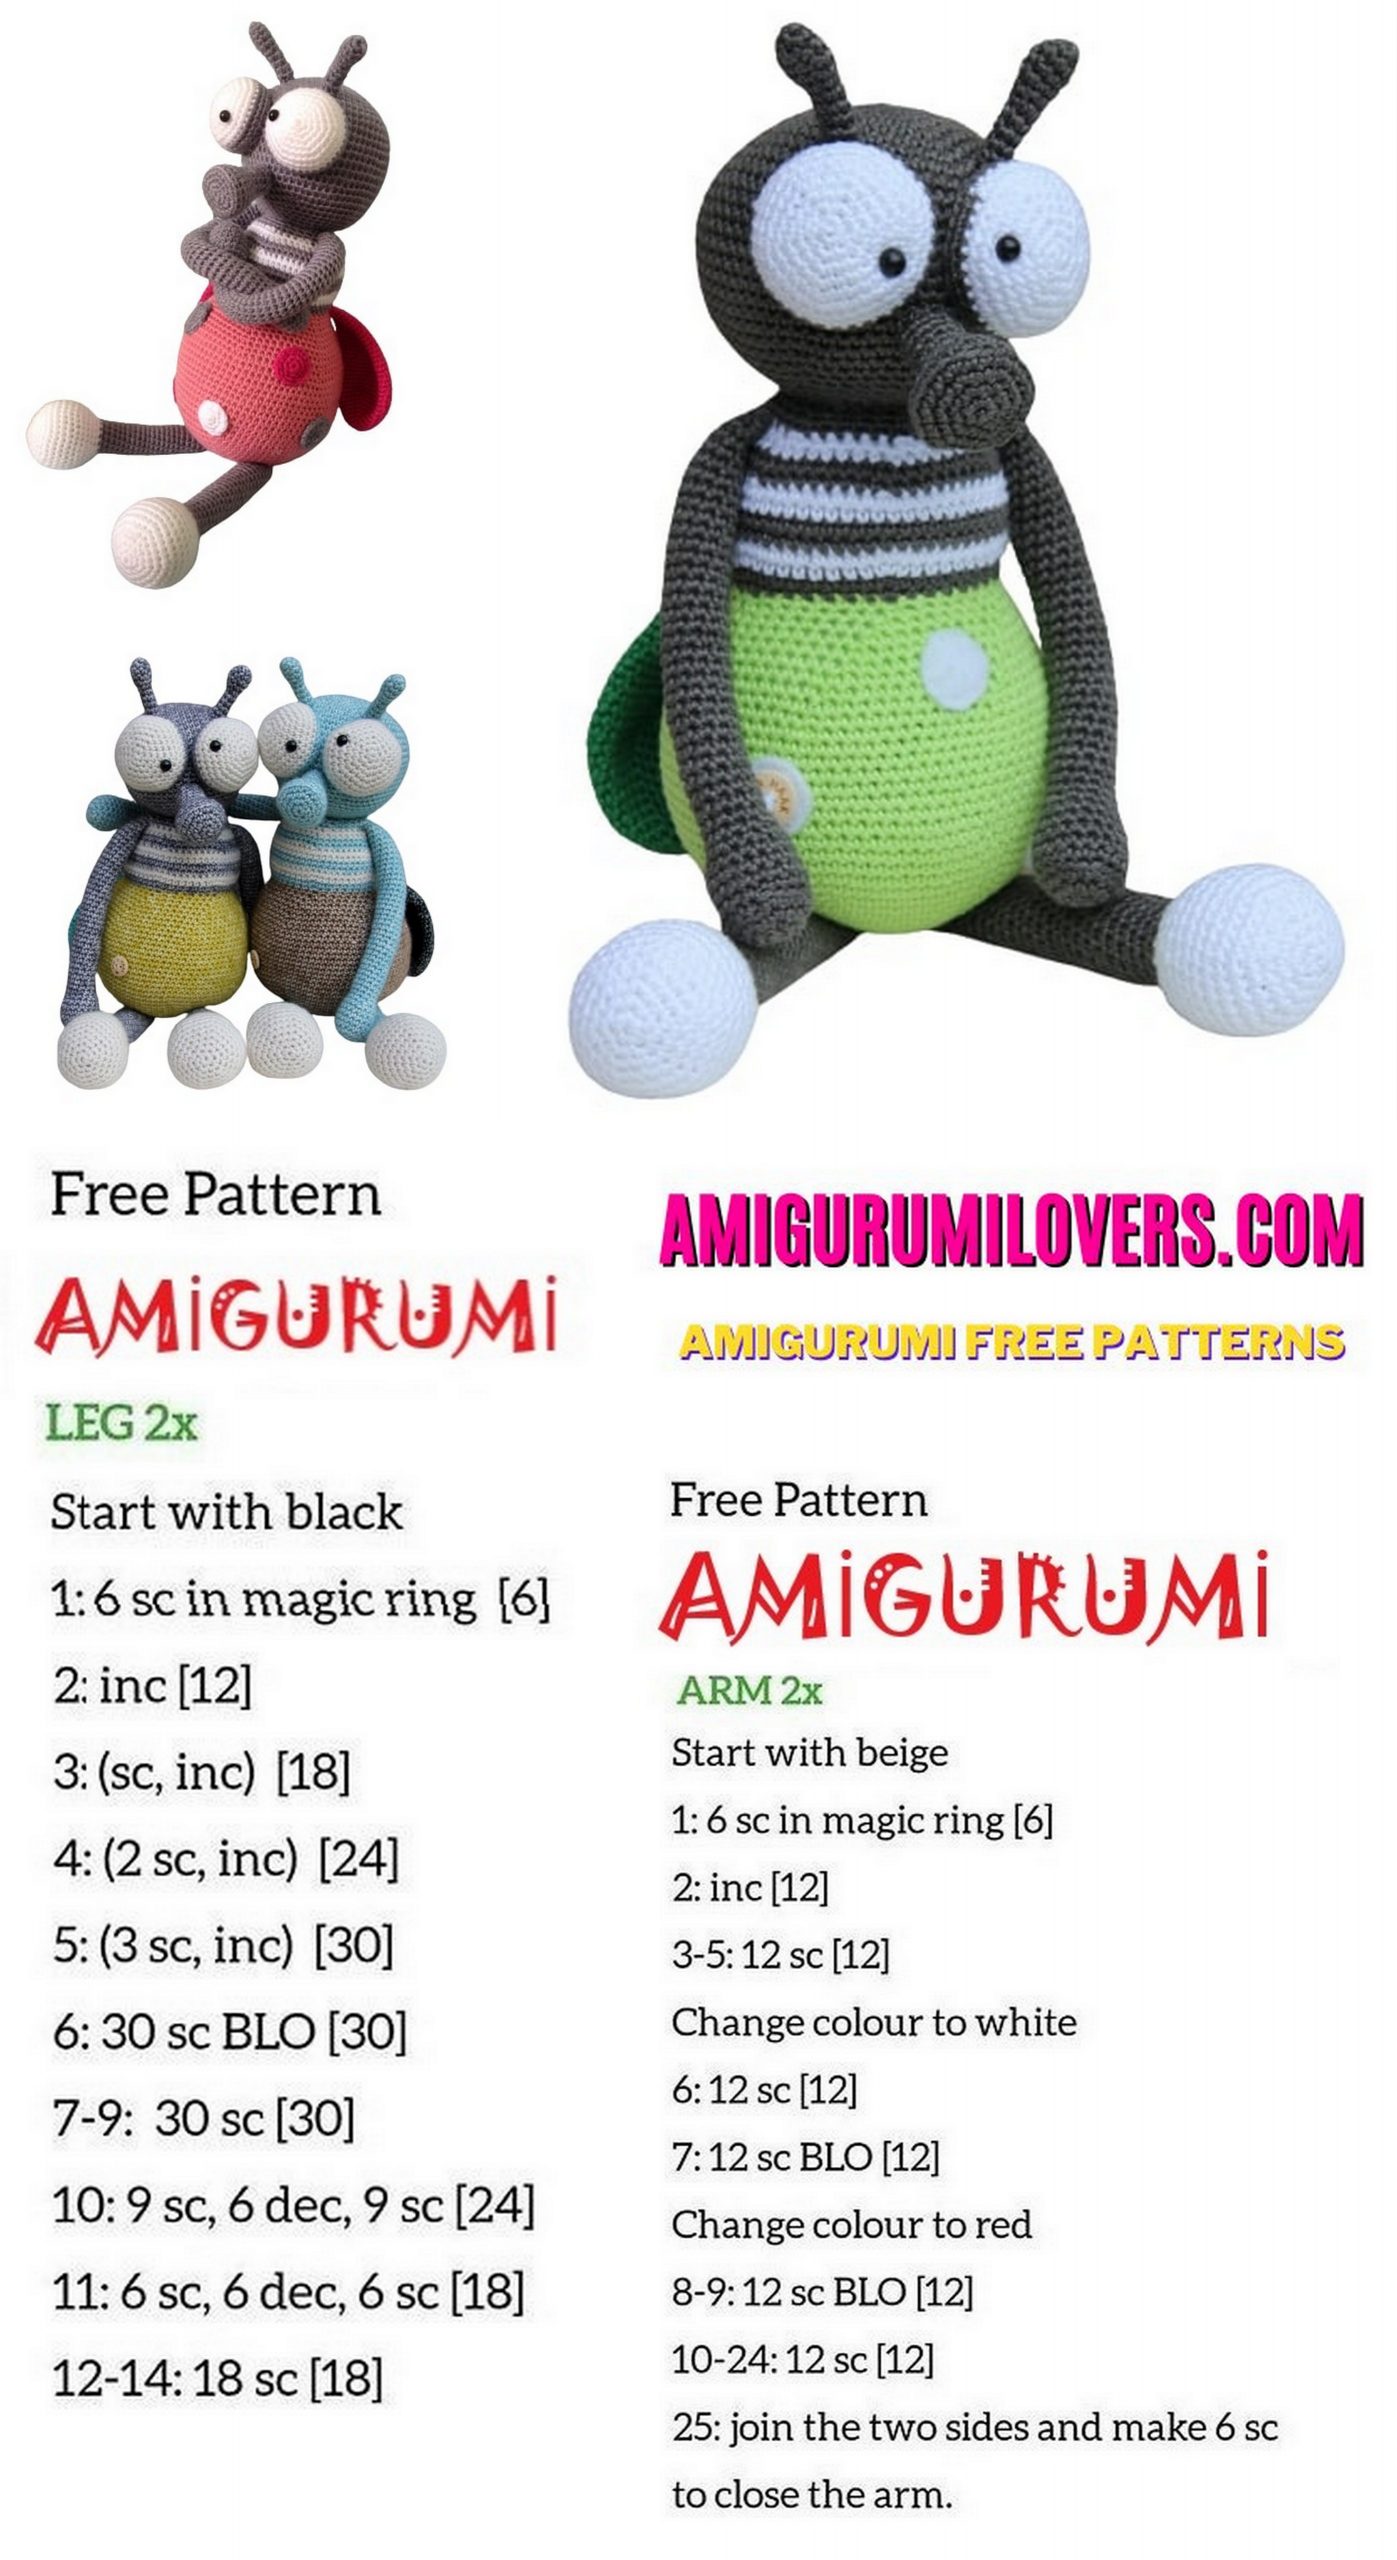
Fly Pattern
BODY:
1 6sc into Magic ring (6)
2 6 inc (12)
3 sc, inc(18)
4 2sc, inc(24)
5 3sc, inc(30)
6 4sc, inc(36)
7 5sc, inc(42)
8 6sc, inc(48)
9 7sc, inc(54)
10 8СБ, inc (60)
11 9sc, inc(66)
12 10sc, inc(72)
13 11sc, inc(78)
14 12sc, inc(84)
15 — 26 84sc
27 12sc,dec (78)
28 78sc
29 11sc,dec(72)
30 72 sc
31 10 sc, dec(66)
32 66sc
33 9sc, dec(60)
34 8sc, dec(54)
35 7sc, dec(48)
36 6sc, dec(42)
1 OPTION: Upper body.
Change color and alternate every 1 or 3 rows.
37 6sc, inc(48)
38 7sc, inc(54)
39 8sc, inc(60)
40 — 44 60sc
45 8sc, dec(54)
46 54sc
47 7sc, dec(48)
48 6sc, dec(42)
49 5sc, dec(36)
50 4sc, dec(30)
51 3sc, dec(24)
Tightly stuff.
2 OPTION: Upper body.
We use two types of yarn, but the same or similar in color. For example acrylic and weed.
We start with a smooth thread.
37 6sc, inc (48)
!!! KNIT BACK TO THE BACK WALL !!!
38 7sc, inc(54)
39 8sc, inc(60)
40 — 44 60sc
45 8sc, dec(54)
46 54sc
47 7sc, dec(48)
48 6sc, dec(42)
49 5sc, dec(36)
50 4sc, dec(30)
51 3sc, dec(24)
We take the “grass” yarn and knit a row for the external half loops of the 37th row.
Next, we knit according to the scheme, as it were, the second layer of the upper body, shaggy.
Cut the thread and fill it tight.

HEAD:
1 6sc into Magic ring (6)
2 6 inc (12)
3 sc, inc(18)
4 2sc, inc(24)
5 3sc, inc(30)
6 4sc, inc(36)
7 5sc, inc(42)
8 6sc, inc(48)
9 7sc, inc(54)
10 8sc, inc (60)
11 9sc, inc (66)
12 — 21 66sc
22 9sc, dec(60)
23 8sc, dec(54)
24 7sc, dec(48)
25 6sc, dec(42)
26 5sc, dec(36)
27 4sc, dec(30)
28 3sc, dec(24)
Tightly stuff.
Sew the head to the torso.
EYE: 2pcs
We start from the front of the eye and white.
1 6sc into Magic ring (6)
2 6 inc (12)
3 sc, inc (18)
4 2sc, inc (24)
5 3sc, inc (30)
6 4sc, inc (36)
7 – 8 36sc
CHANGE COLOR
9 – 10 36sc
11 4sc, dec (30)
!!! FOR THE BACK WALL !!!
12 3sc, dec (24)
If the eyes with a screw-in mechanism attach them m / y 5 and 6 side by side.
13 2sc, dec (18)
Fill a little
14 sc, dec (12)
15 6 dec (6)
Fill to the end.
Sewn in at level 9 or 11 of the head row (see photo)
NOSE:
1 6sc into Magic ring (6)
2 6 inc (12)
3 sc, inc (18)
4 2sc, inc (24)
5 24 sc (24)
!!! FOR THE BACK WALL !!!
6 6 sc, dec (21)
7 5 sc, dec (18)
8 4 sc, dec (15)
Stuff detail
9 3sc, dec (12)
10 – 14 12sc
Fill to the end.
Sew the nose under the eyes (see photo)
Mustache (ANTENNA):
1 6sc into Magic ring (6)
2 sc, inc (9)
3 – 4 9sc
5 sc, dec (6)
6 – 10 6sc
Sew on the antennae just above the eyes (see photo)
FRONT FEET 2 PCS:
1 6sc into Magic ring (6)
2 6inc (12)
3 sc, inc (18)
4 – 7 18sc
8 4sc, dec (15)
9 3sc, dec (12)
10 – 44 12sc
Stuff
Fold in half and knit 6 sc.
Sew m / y 48 and 49 rows of torso.

BACK PAW 2PCS:
1 6sc into Magic ring (6)
2 6inc (12)
3 sc, inc (18)
4 2sc, inc (24)
5 3sc, inc (30)
6 4 sc, inc (36)
7 – 11 36sc
12 10sc, dec (33)
13 9sc, dec (30)
14 3sc, dec (24)
15 2sc, dec (18)
16 4sc, dec (15).
CHANGE COLOR
17 – 40 15sc
To fill.
Fold in half and knit 7sc.
WING 2PCS:
1 6sc into Magic ring (6)
2 6inc (12)
3 sc, inc (18)
4 5sc, inc (21)
5 6sc, inc (24)
6 7sc, inc (27)
7 8sc, inc (30)
8 9sc, inc (33)
9 10sc, inc (36)
10 – 14 36sc
15 10sc, dec (33)
16-17 33sc.
18 9sc, dec (30)
19 – 20 30sc
21 8 sc, dec (27)
22 27sc
23 7sc, dec (24)
24 24sc
25 6sc, dec (21)
26 21sc
27 5sc, dec (18)
28 18sc
29 4sc, dec (15)
To fill.
Fold and knit 7sc.
Sew on the border of the upper and lower torso.
Sew multi-colored circles on the body.
Before you leave, make sure to check out more free amigurumi crochet patterns and discover new ideas for your next project.
You can also browse our full amigurumi pattern archive for hundreds of beginner-friendly designs.