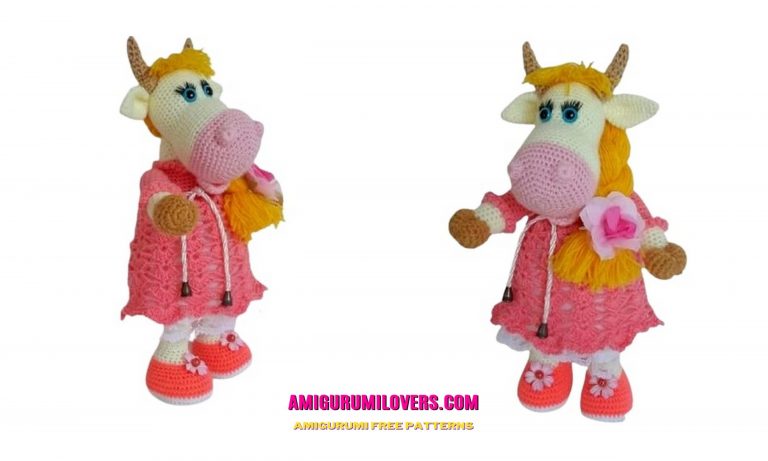
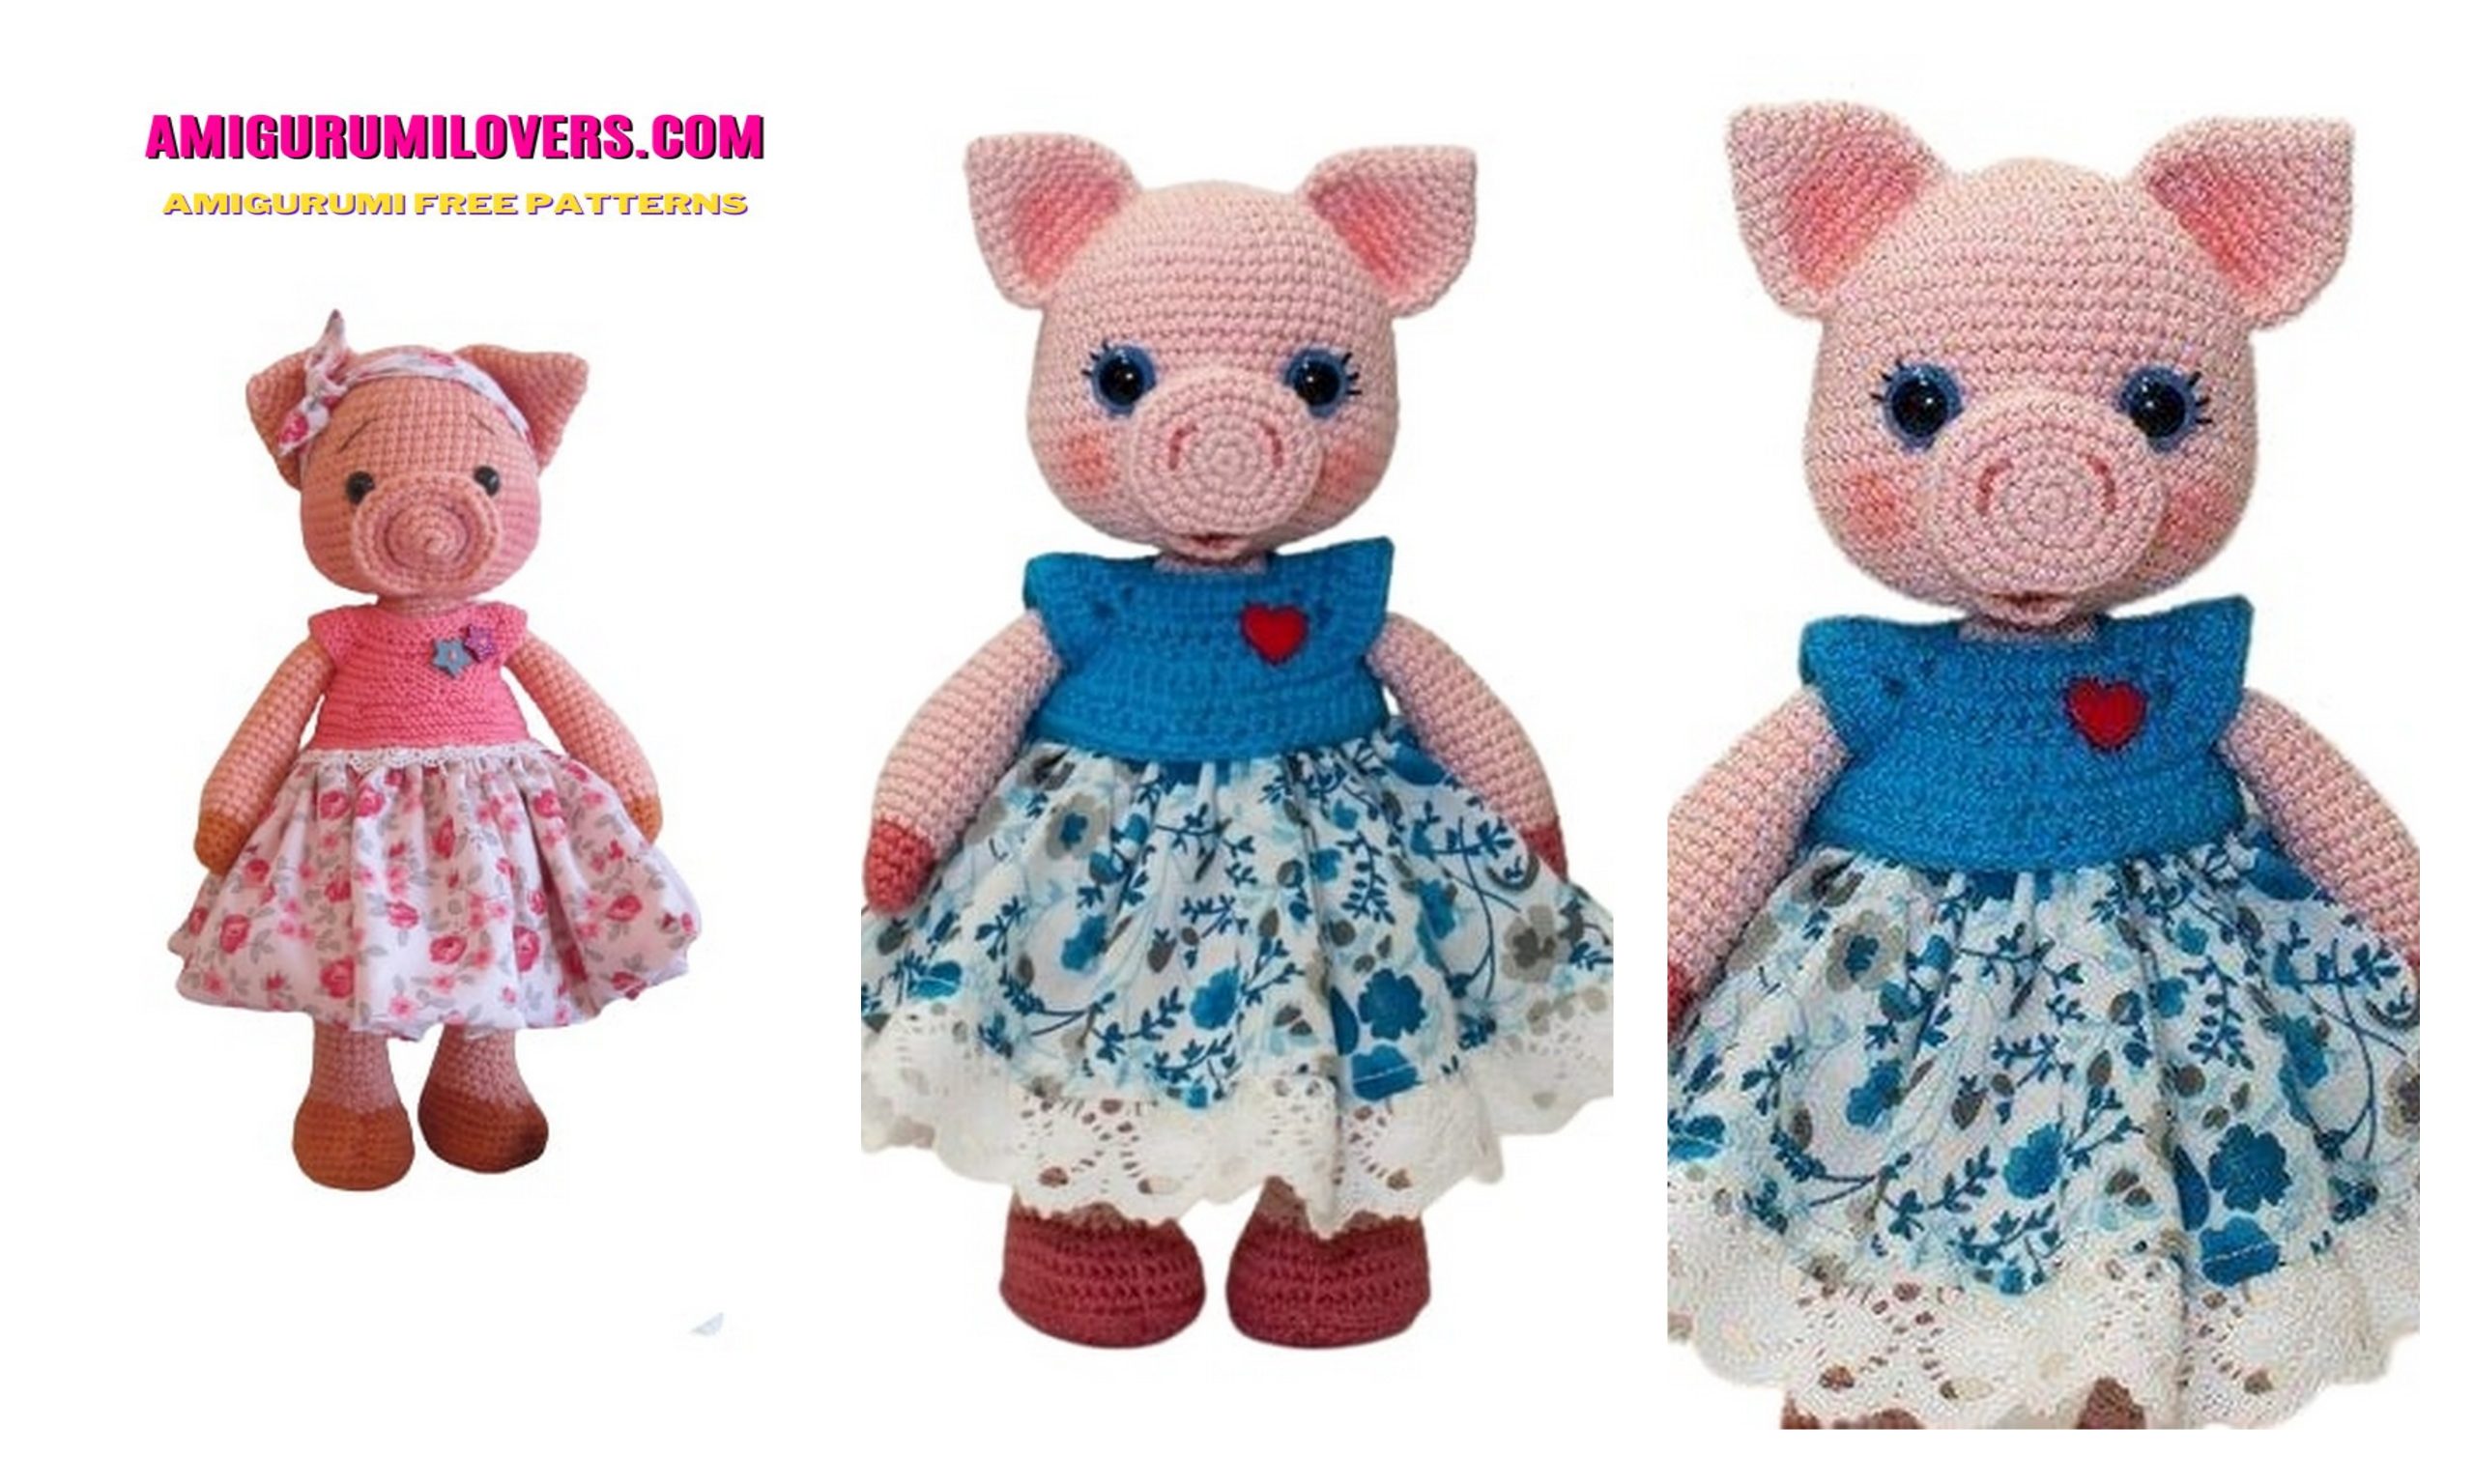
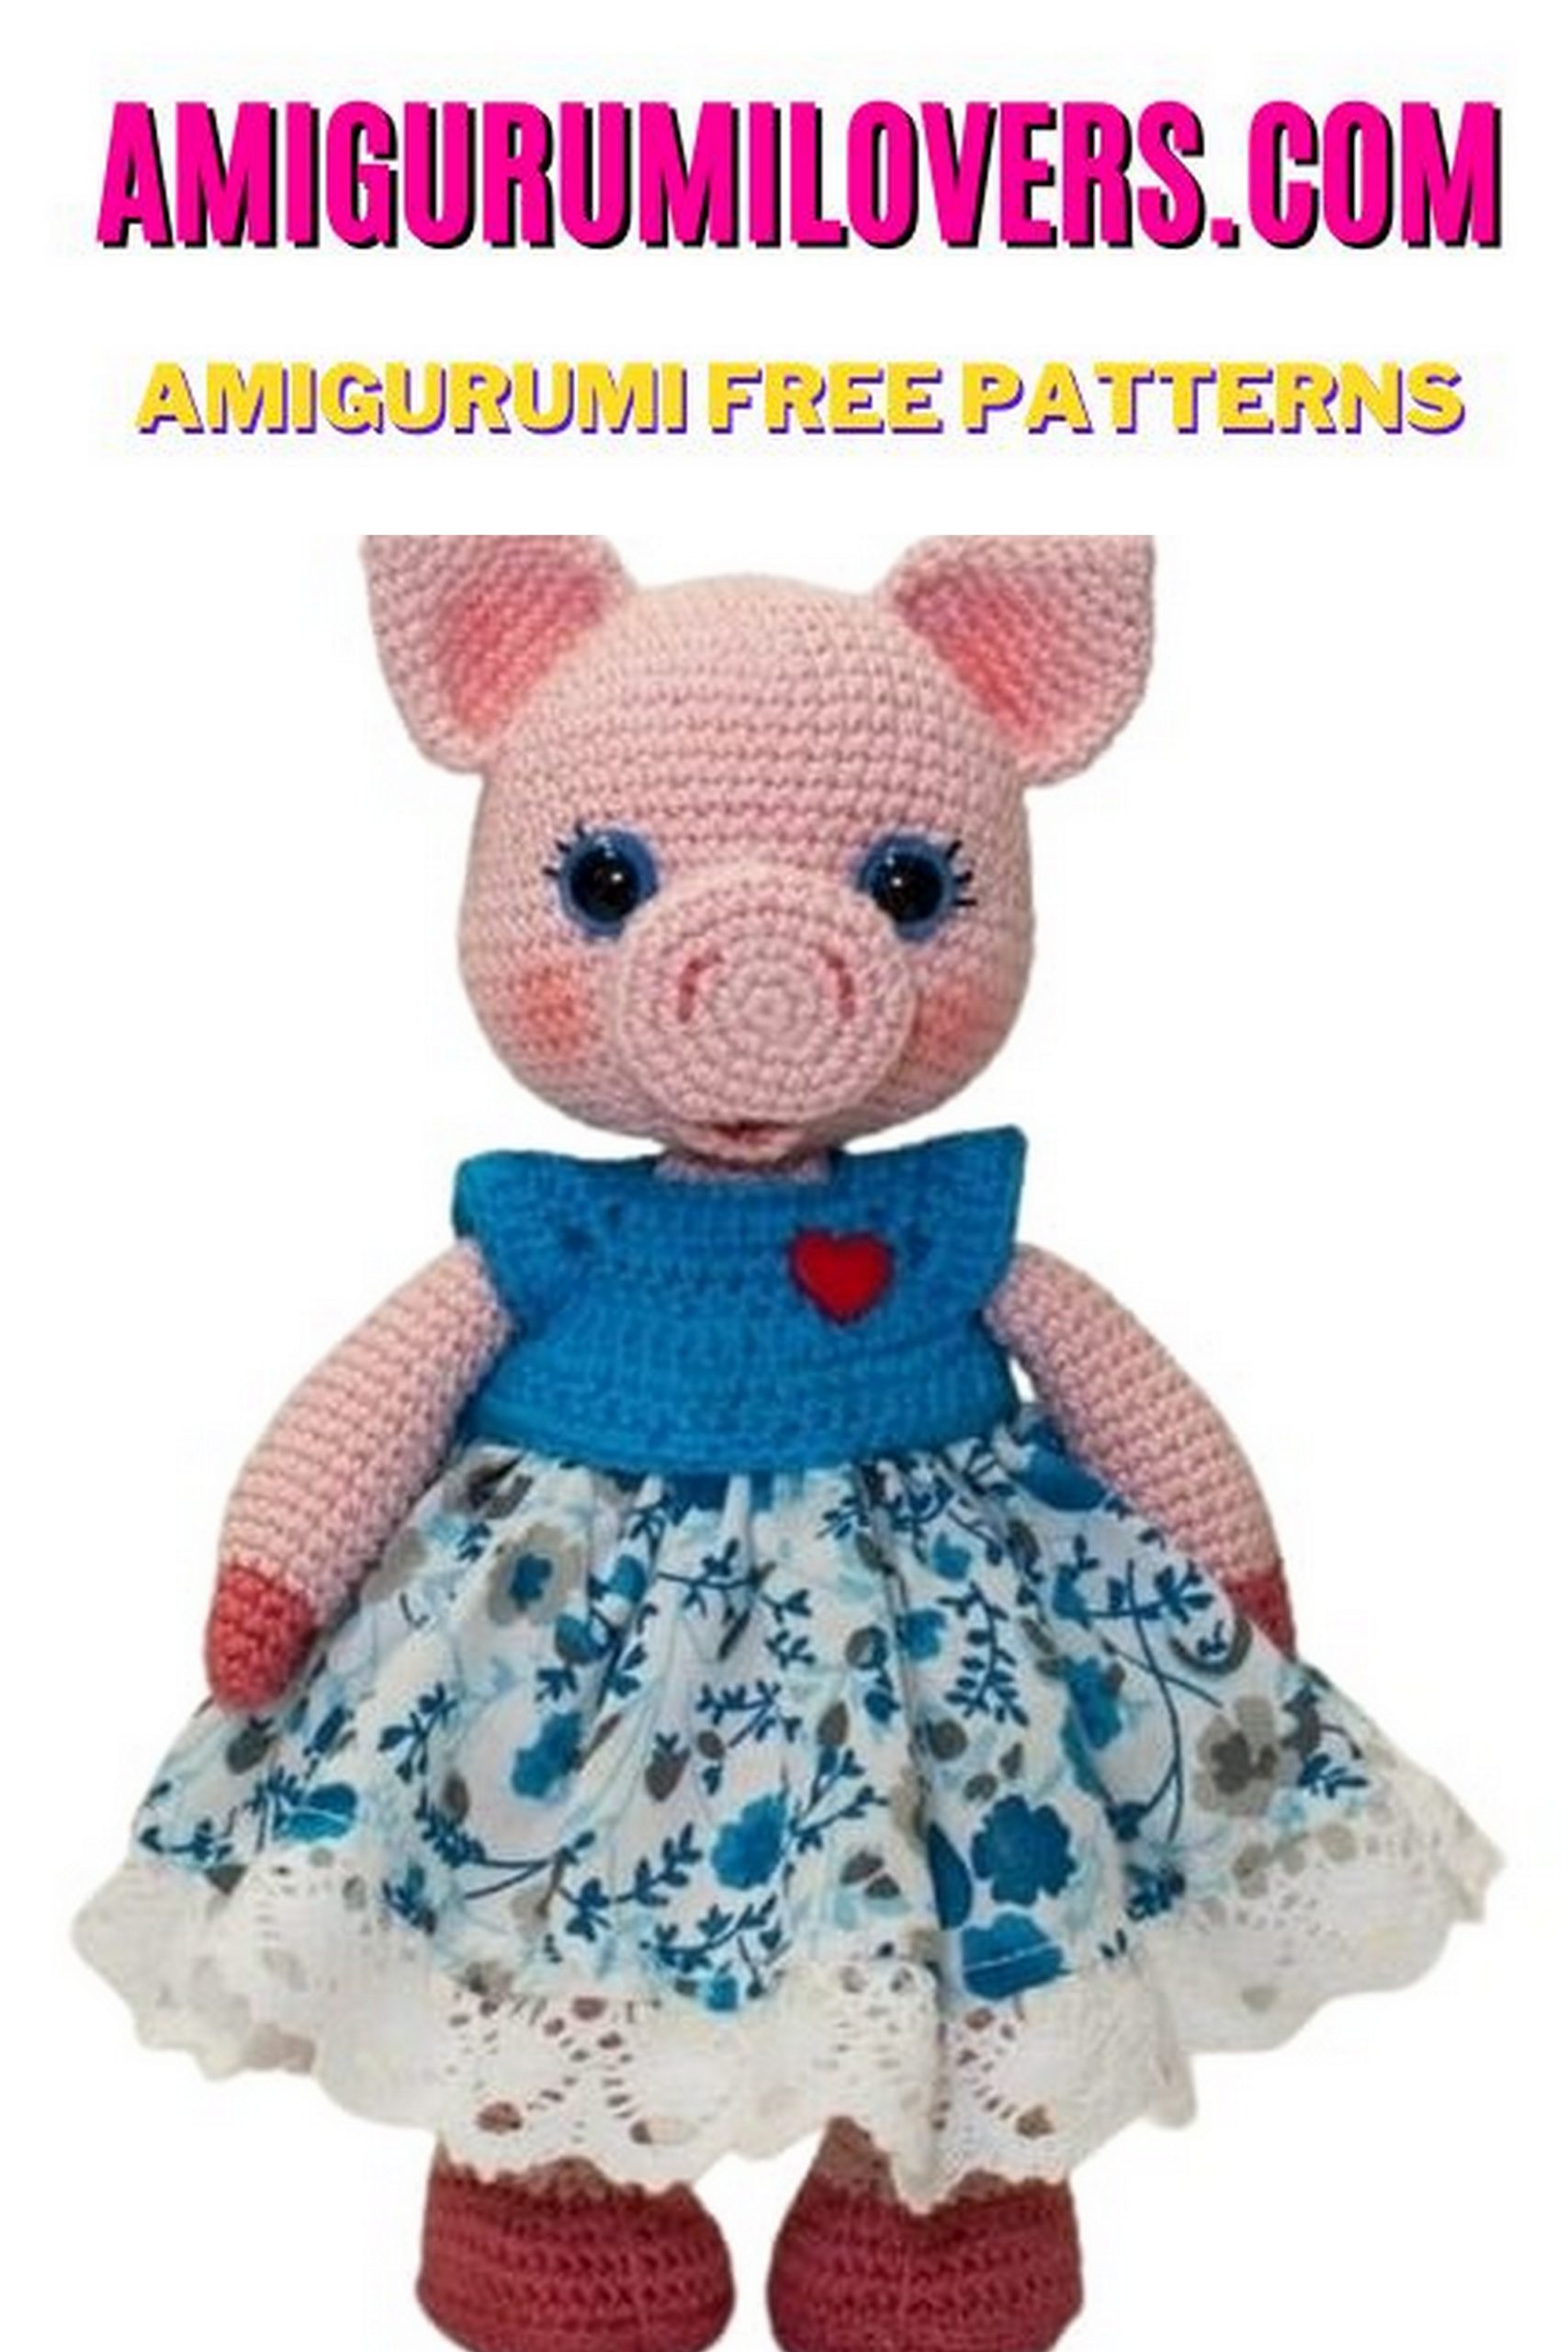
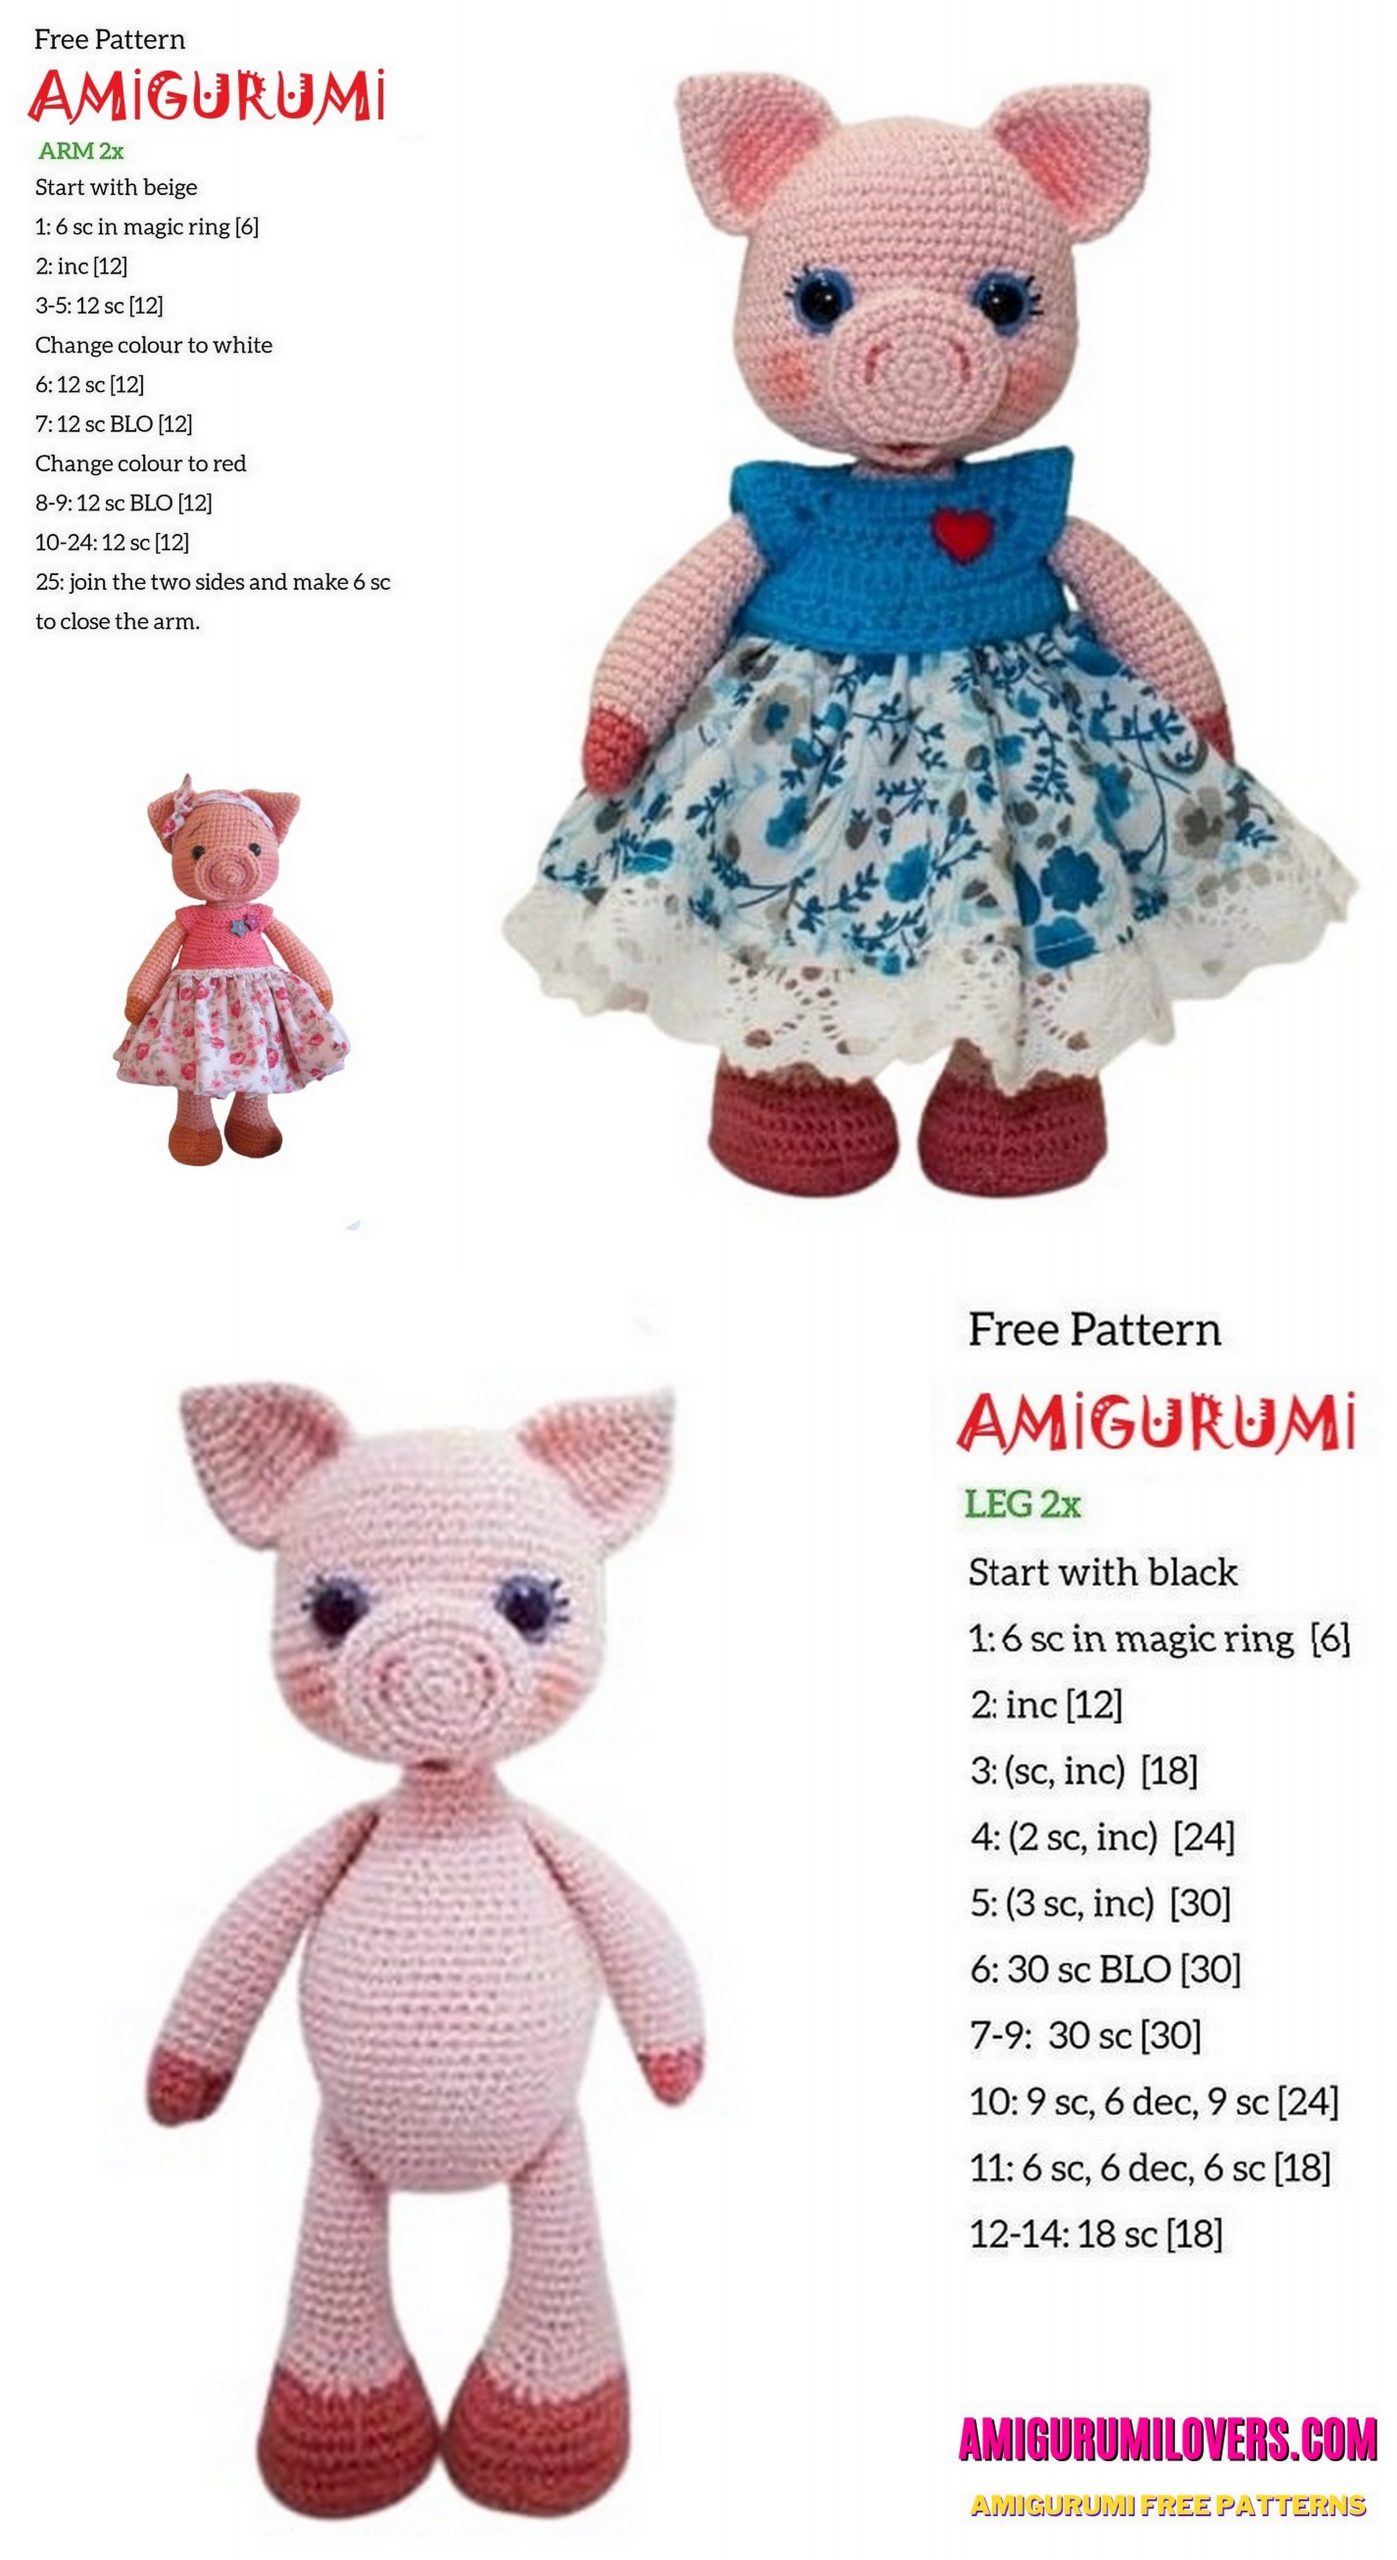
Amigurumi Miss Piggy Free Pattern
You may also enjoy exploring our free amigurumi patterns and other popular amigurumi animal patterns available on our website.
Welcome to our crochet community, where creativity thrives and yarn becomes magic in your hands! If you’ve been searching for a delightful project to hone your skills and bring a bit of joy into your crafting routine, you’re in the right place. Today, we’re excited to share a fun and free amigurumi crochet pattern featuring none other than the beloved Miss Piggy! This charming character, known for her glamorous style and big personality, is sure to add a touch of whimsy to your crochet collection.
Amigurumi is a Japanese art form that involves creating plush, stuffed toys from yarn. It’s an excellent way for crocheters of all levels—especially beginners—to explore their creativity while producing adorable and cuddly companions. Our amigurumi Miss Piggy pattern is designed with simplicity in mind, allowing even those new to crochet to create a beautiful piece without feeling overwhelmed.
Throughout this post, you’ll find a detailed, step-by-step guide on how to make your very own Miss Piggy, complete with tips and tricks to ensure your project goes smoothly. From selecting the right yarn to mastering basic crochet stitches, we’ll provide you with all the information you need to succeed. Our friendly and supportive community is here to answer any questions that may arise as you work on your creation.
This pattern is not just a fun project; it’s also a fantastic way to learn the basics of amigurumi, including how to work in the round, use a magic ring, and create simple increases and decreases. With our clear instructions, you’ll quickly gain confidence in your crochet abilities while bringing Miss Piggy to life, stitch by stitch. Plus, once you complete this pattern, you’ll have the foundational skills needed to tackle more complex amigurumi creations in the future.
As you embark on this journey, remember that the joy of crochet lies in the process itself. Enjoy the rhythmic motions of your hook and yarn, and don’t stress over perfection. Each stitch carries your unique touch, and each misstep is just a stepping stone on your crafting adventure. Whether you’re making Miss Piggy for yourself, gifting her to a friend, or adding her to your collection of crocheted characters, the experience will be both fulfilling and fun.
So grab your crochet hook, pick out your favorite shades of yarn, and let’s dive into the wonderful world of amigurumi! Your very own Miss Piggy awaits, and we can’t wait to see what you create. Stay tuned for the complete free pattern, and let’s make some crochet magic together!
Welcome to our website where you can find the most beautiful and highest quality samples of Amigurumi patterns.
Materials:
Catania / Alize Bahar Cotton Yarn
hook 2.25 mm
eyes 10 mm
Abbreviations:
dc – double crochet
ch – chain
inc – increase
sl-st – slip-stitch
dec – decrease
sc – single crochet
() x? – repeat description between brackets
1. HEAD
R1: 6 sc into magic ring = (6)
R2: 6 inc = (12)
R3: (1 sc, 1 inc) x6 = (18)
R4: (2 sc, 1 inc) x6 = (24)
R5: (3 sc, 1 inc) x6 = (30)
R6: (4 sc, 1 inc) x6 = (36)
R7: (5 sc, 1 inc) x6 = (42)
R8: (6 sc, 1 inc) x6 = (48)
R9: (7 sc, 1 inc) x6 = (54)
R10-16: 54 sc = (54)
R17:9 sc, (1 sc, 1 inc) x6, 1ch, 1 loop skip, 10 sc, 1ch,1 loop skip, (1 inc, 1 sc) x6, 9 sc =(66)
(later insert the eyes into the holes from ch)
R18-20: 66 sc = (66)
R21: (9 sc, 1 dec) x6 = (60)
R22: (8 sc, 1 dec) x6 = (54)
R23: (7 sc, 1 dec) x6 = (48)
R24: (6 sc, 1 dec) x6 = (42)
R25: (5 sc, 1 dec) x6 = (36)
R26: (4 sc, 1 dec) x6 = (30)
R27: (3 sc, 1 dec) x6 = (24)
R28: (2 sc, 1 dec) x6 = (18)
R29: (1 sc, 1 dec) x6 = (12)
R30: 6 dec = (6)
Fasten, leave a long thread for sewing.
2. EARS (2 pcs)
R1: 6 sc into magic ring = (6)
R2: 6 sc = (6)
R3: 6 inc = (12)
R4: 12 sc = (12)
R5: (1 sc, 1 inc) x6 = (18)
R6: 18 sc = (18)
R7: (2 sc, 1 inc) x6 = (24)
R8: 24 sc = (24)
R9: (3 sc, 1 inc) x6 = (30)
R10: 30 sc = (30)
R11: Fold the ears with their edges to each other and tie 14 sc together on both sides.
3. Muzzle
R1: 6 sc into magic ring = (6)
R2: (1 sc, 1 inc) x6 = (12)
R3: 1 sc, 3 inc, 4 sc, 3 inc, 1 sc = (18)
R4: 1 sc, (1 sc, 1 inc) x3, 4 sc, (1 sc, 1 inc) x3, 1 sc (24)
R5: 1 sc, (2 sc, 1 inc) x3, 4 sc, (2 sc, 1 inc) x3, 1 sc (30)
R6: behind the hinge rear wall: 30 sc
R7: 30 sc
Fasten, leave a long thread for sewing.

4. BODY
R1: 6 sc into magic ring = (6)
R2: 6 inc = (12)
R3: (1 sc, 1 inc) x6 = (18)
R4: (2 sc, 1 inc) x6 = (24)
R5: (3 sc, 1 inc) x6 = (30)
R6: (4 sc, 1 inc) x6 = (36)
R7: (5 sc, 1 inc) x6 = (42)
R8: (6 sc, 1 inc) x6 = (48)
R9: (7 sc, 1 inc) x6 = (54)
R10-19: 54 sc = (54)
R20: (7 sc, 1 dec) x6 = (48)
R21-22: 48 sc = (48)
R23: (6 sc, 1 dec) x6 = (42)
R24-25: 42 sc = (42)
R26: (5 sc, 1 dec) x6 = (36)
R27-28: 36 sc = (36)
R29: (4 sc, 1 dec) x6 = (30)
R30-31: 30 sc = (30)
R32: (3 sc, 1 dec) x6 = (24)
R33-34: 24 sc = (24)
R35: (1 sc, 1 dec) x6 = (18)
5. HANDS (2 pcs)
R1: 6 sc into magic ring = (6)
R2: (1 sc, 1 inc) x3 = (9)
R3: 9 sc = (9) change color
R4-5: 9 inc = (18)
R6-10: 18 sc = (18)
R11: 8 sc, 1 dec, 8 sc = (17)
R12: 17 sc = (17)
R13: 8 sc, 1 dec, 7 sc = (16)
R14: 16 sc = (16)
R15: 8 sc, 1 inc, 6 sc = (15)
R16: 15 sc = (15)
R17: 8 sc, 1 dec, 5 sc = (14)
R18: 14 sc = (14)
R19: 7 sc, 1 dec, 5 sc = (13)
R20: 13 sc = (13)
R21: 7 sc, 1 dec, 4 sc = (12)
R22: 7 sc, 1 dec, 3 sc = (11)
R23: 6 sc, 1 dec, 3 sc = (10)
R24: 6 sc, 1 dec, 2 sc = (9)
R25: fold the top of the hand with its edges to each other and tie sc together two sides, to sew more conveniently to the body. Leave a long thread for sewing.
6. LEGS (2 pcs)
R1: 7 ch
R2: in the 2nd loop from the hook, 5 sc, 6 sc in the last loop, 5 sc = (16)
R3: 5 sc, 6 inc, 5 sc = (22)
R4: 3 sc in the first loop, 4 sc, (1 sc, 1 inc) x6, 5 sc = (30)
R5: 1 inc, 1 sc, 1 inc, 4 sc, (2 sc, 1 inc) x6, 5 sc = (38)
R6: 1 sc, 1 inc, 2 sc, 1 inc, 33 sc = (40)
R7: 40 sc, the thread is at the back
R8: 40 sc, 2 offset loops
R9-10: 40 sc = (40)
R11: 4 sc, 1 dec, 13 sc, 1 dec, (1 sc, 1 dec) x4, 7 sc, change color
R12: attach the thread at the back, 13 sc, 5 dec, 11 sc = (29)
R13: 11 sc, 4 dec, 10 sc = (25)
R14: 1 dec, 10 sc, 1 dec, 11 sc = (23)
R15: 9 sc, 3 dec, 8 sc = (20)
R16-18: 20 sc = (20)
R19: 1 dec, 18 sc = (19)
R20: 19 sc = (19)
R21: 1 dec, 17 sc = (18)
R22: 18 sc = (18)
R23: 1 dec, 16 sc = (17)
R24: 17 sc = (17)
R25: 1 dec, 15 sc = (16)
R26: 16 sc = (16)
R27: 1 dec, 14 sc = (15)
[left leg]
R28: 11 sc, 1 dec, 2 sc = (14)
R29: 10 sc, 1 dec, 2 sc = (13)
R30: 9 sc, 1 dec, 2 sc = (12)
R31: 6 dec, close.
[right leg]
R28: 3 sc, 1 dec, 10 sc = (14)
R29: 3 sc, 1 dec, 9 sc = (13)
R30: 3 sc, 1 dec, 8 sc = (12)
R31: 6 dec, close.

7. DRESS
The dress that was put on my Miss Piggy was designed by me, so I present to you this version. For the original version, please check out Jana’s tutorial here here.
R1: 32 ch, turn, 1 sl-st into 6th loop
R2: 2 ch (counts as dc), 3 dc, [1 dc, 1 ch, 1 dc] in the next ch, 2 dc, [1 dc, 1 ch, 1 dc] in the next ch, 8 dc, [1 dc, 1 ch, 1 dc] in the next ch, 2 dc, [1 dc, 1 ch, 1 dc] next ch, 6 dc, turn
R3: 2 ch (counts as dc), 1 dc, 2 inc dc, 2 dc, 5 ch, 8 loops skip, 1 dc, 1 inc dc, (2 dc, 1 inc dc) x3, 1 dc, 5 ch, 8 loops skip, 2 dc, 2 inc dc, 4 dc, turn
R4: 2 ch (counts as dc), 2 dc, 1 inc dc, 3 dc, 1 inc dc, 1 dc, 6 dc by ch) x2, 2 dc, 1 inc dc, 3 dc, 1 inc dc, 2 dc, 1 inc sl-st, 3 dc, 1 inc dc, 2 dc, 6 dc by ch, 1 dc, 1 inc dc, 3 dc, 1 inc dc, 2 dc, 6 ch, turn,
R5: tie sc around
Sleeves: attach the thread to the 3rd row: 4 dc in ch, 2 dc, 2 inc dc, 2 dc, 4 dc in ch.
Piggy is ready!
Before you leave, make sure to check out more free amigurumi crochet patterns and discover new ideas for your next project.
You can also browse our full amigurumi pattern archive for hundreds of beginner-friendly designs.