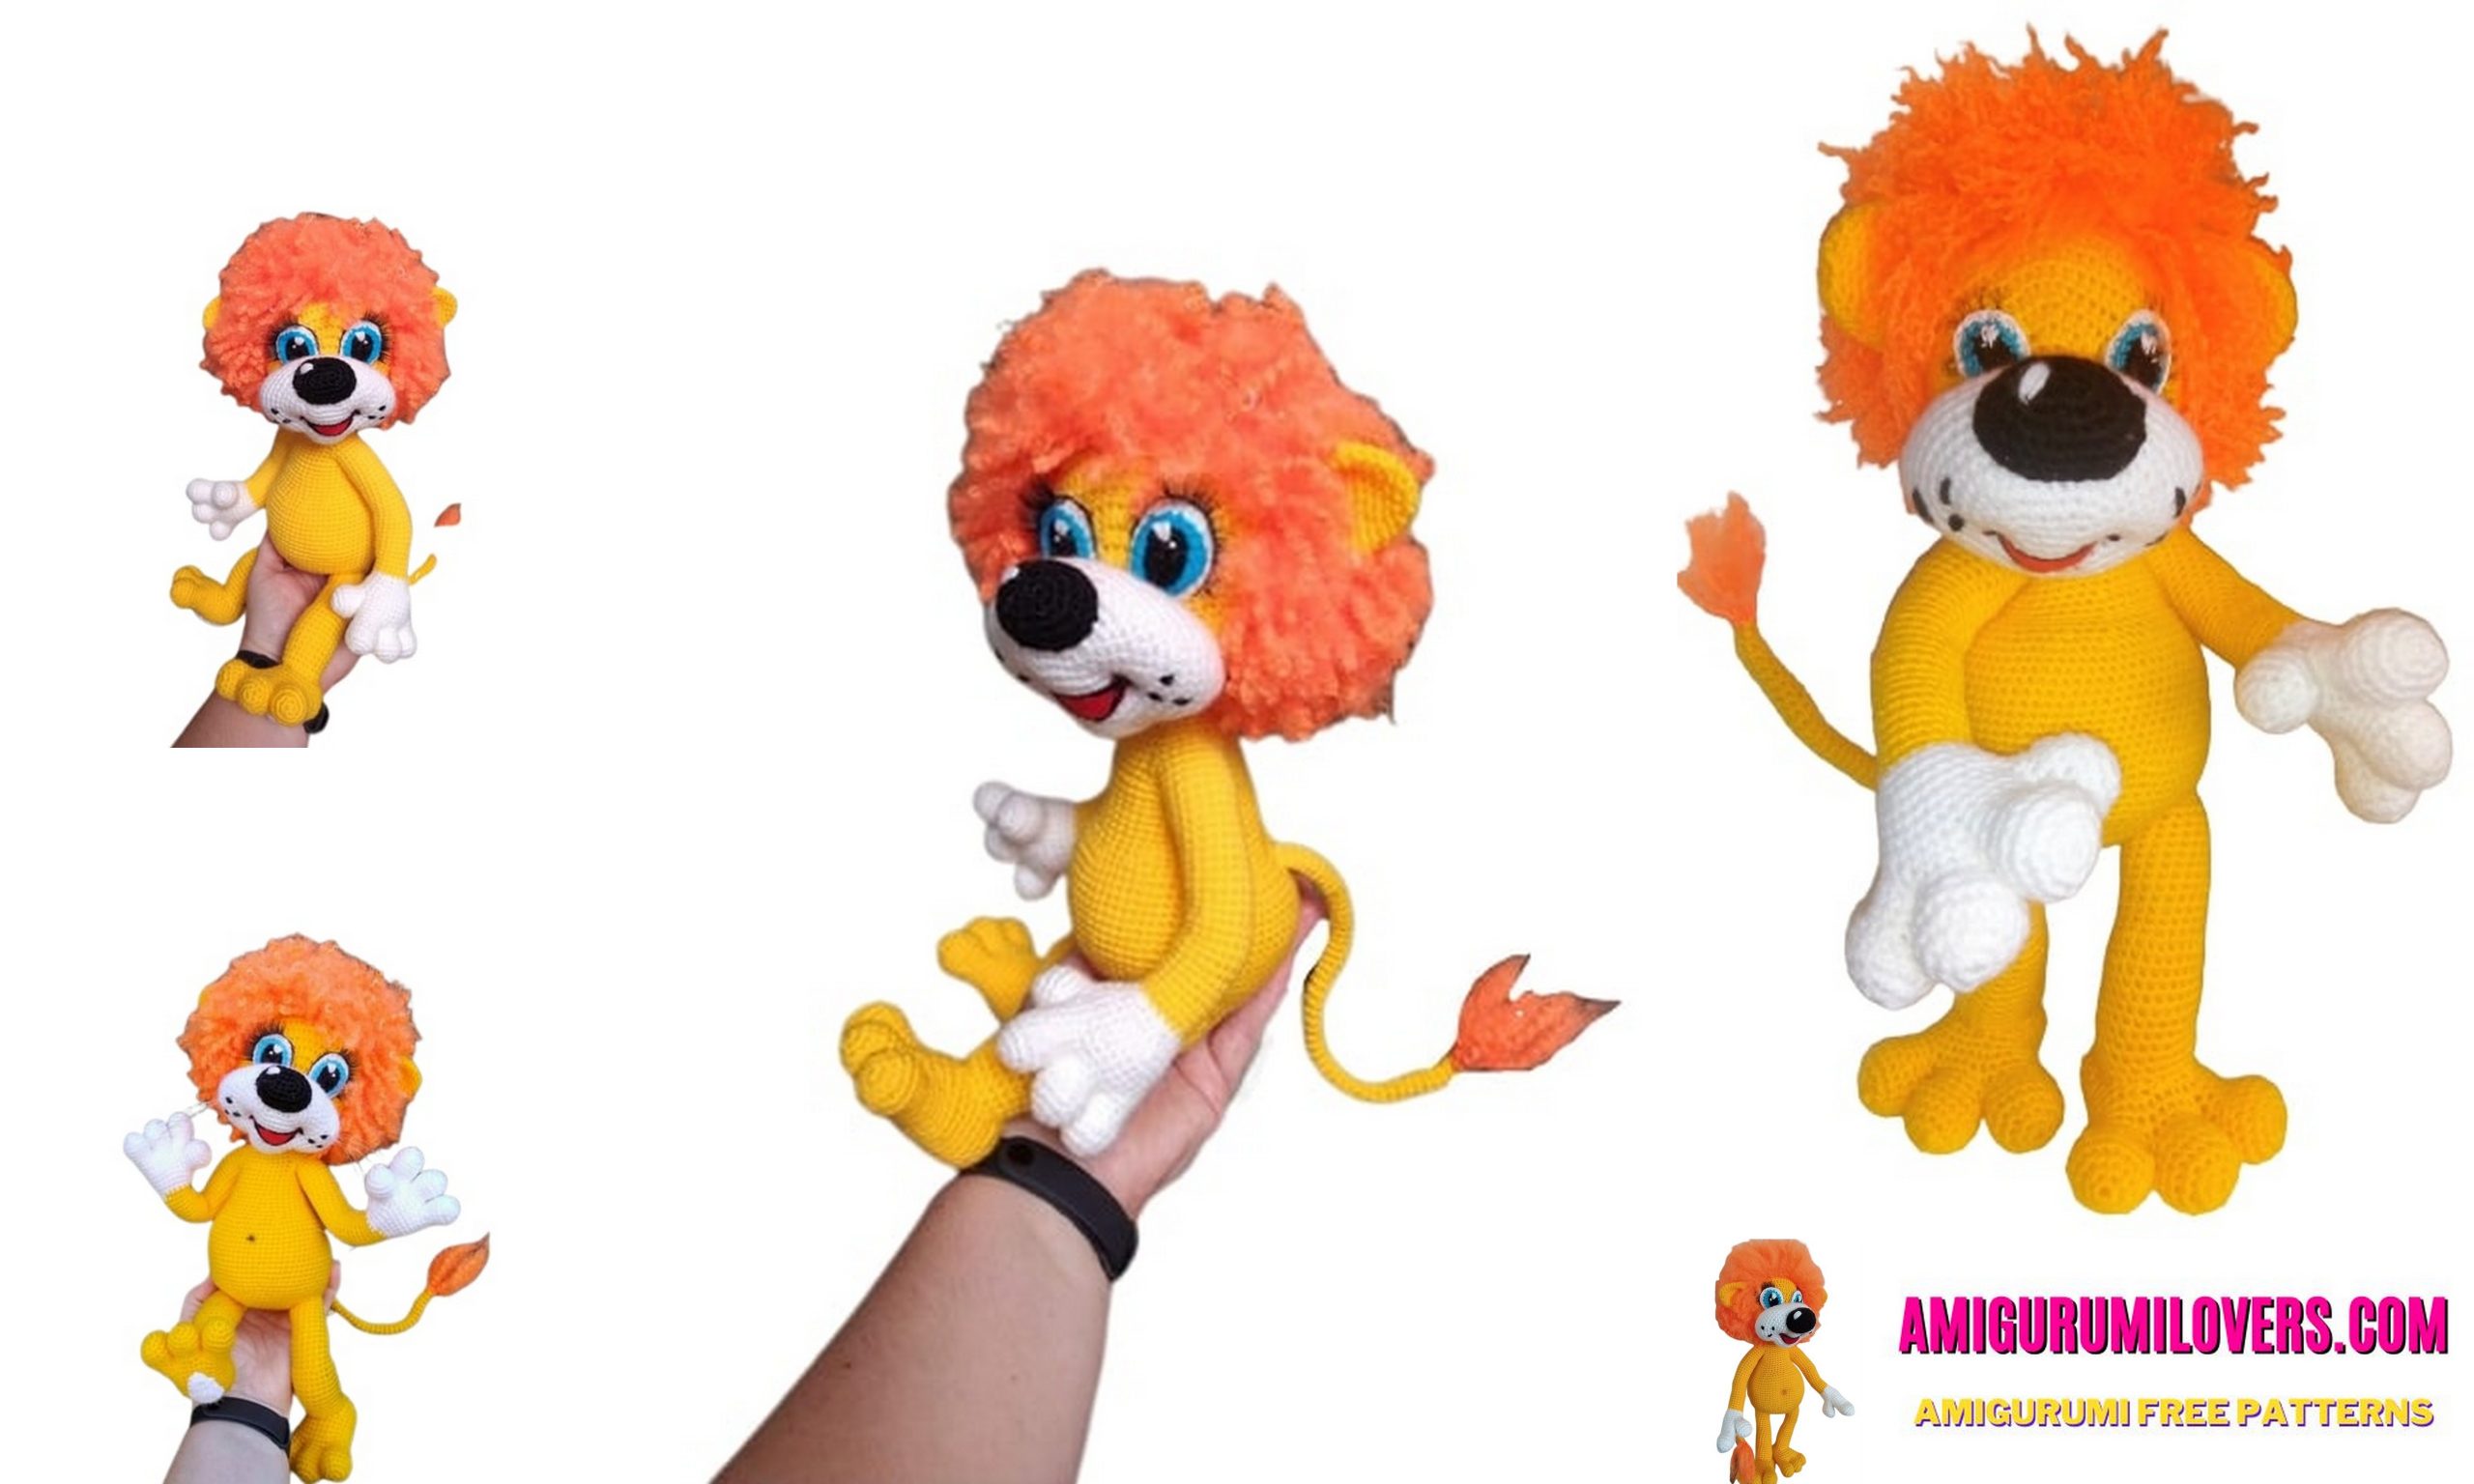
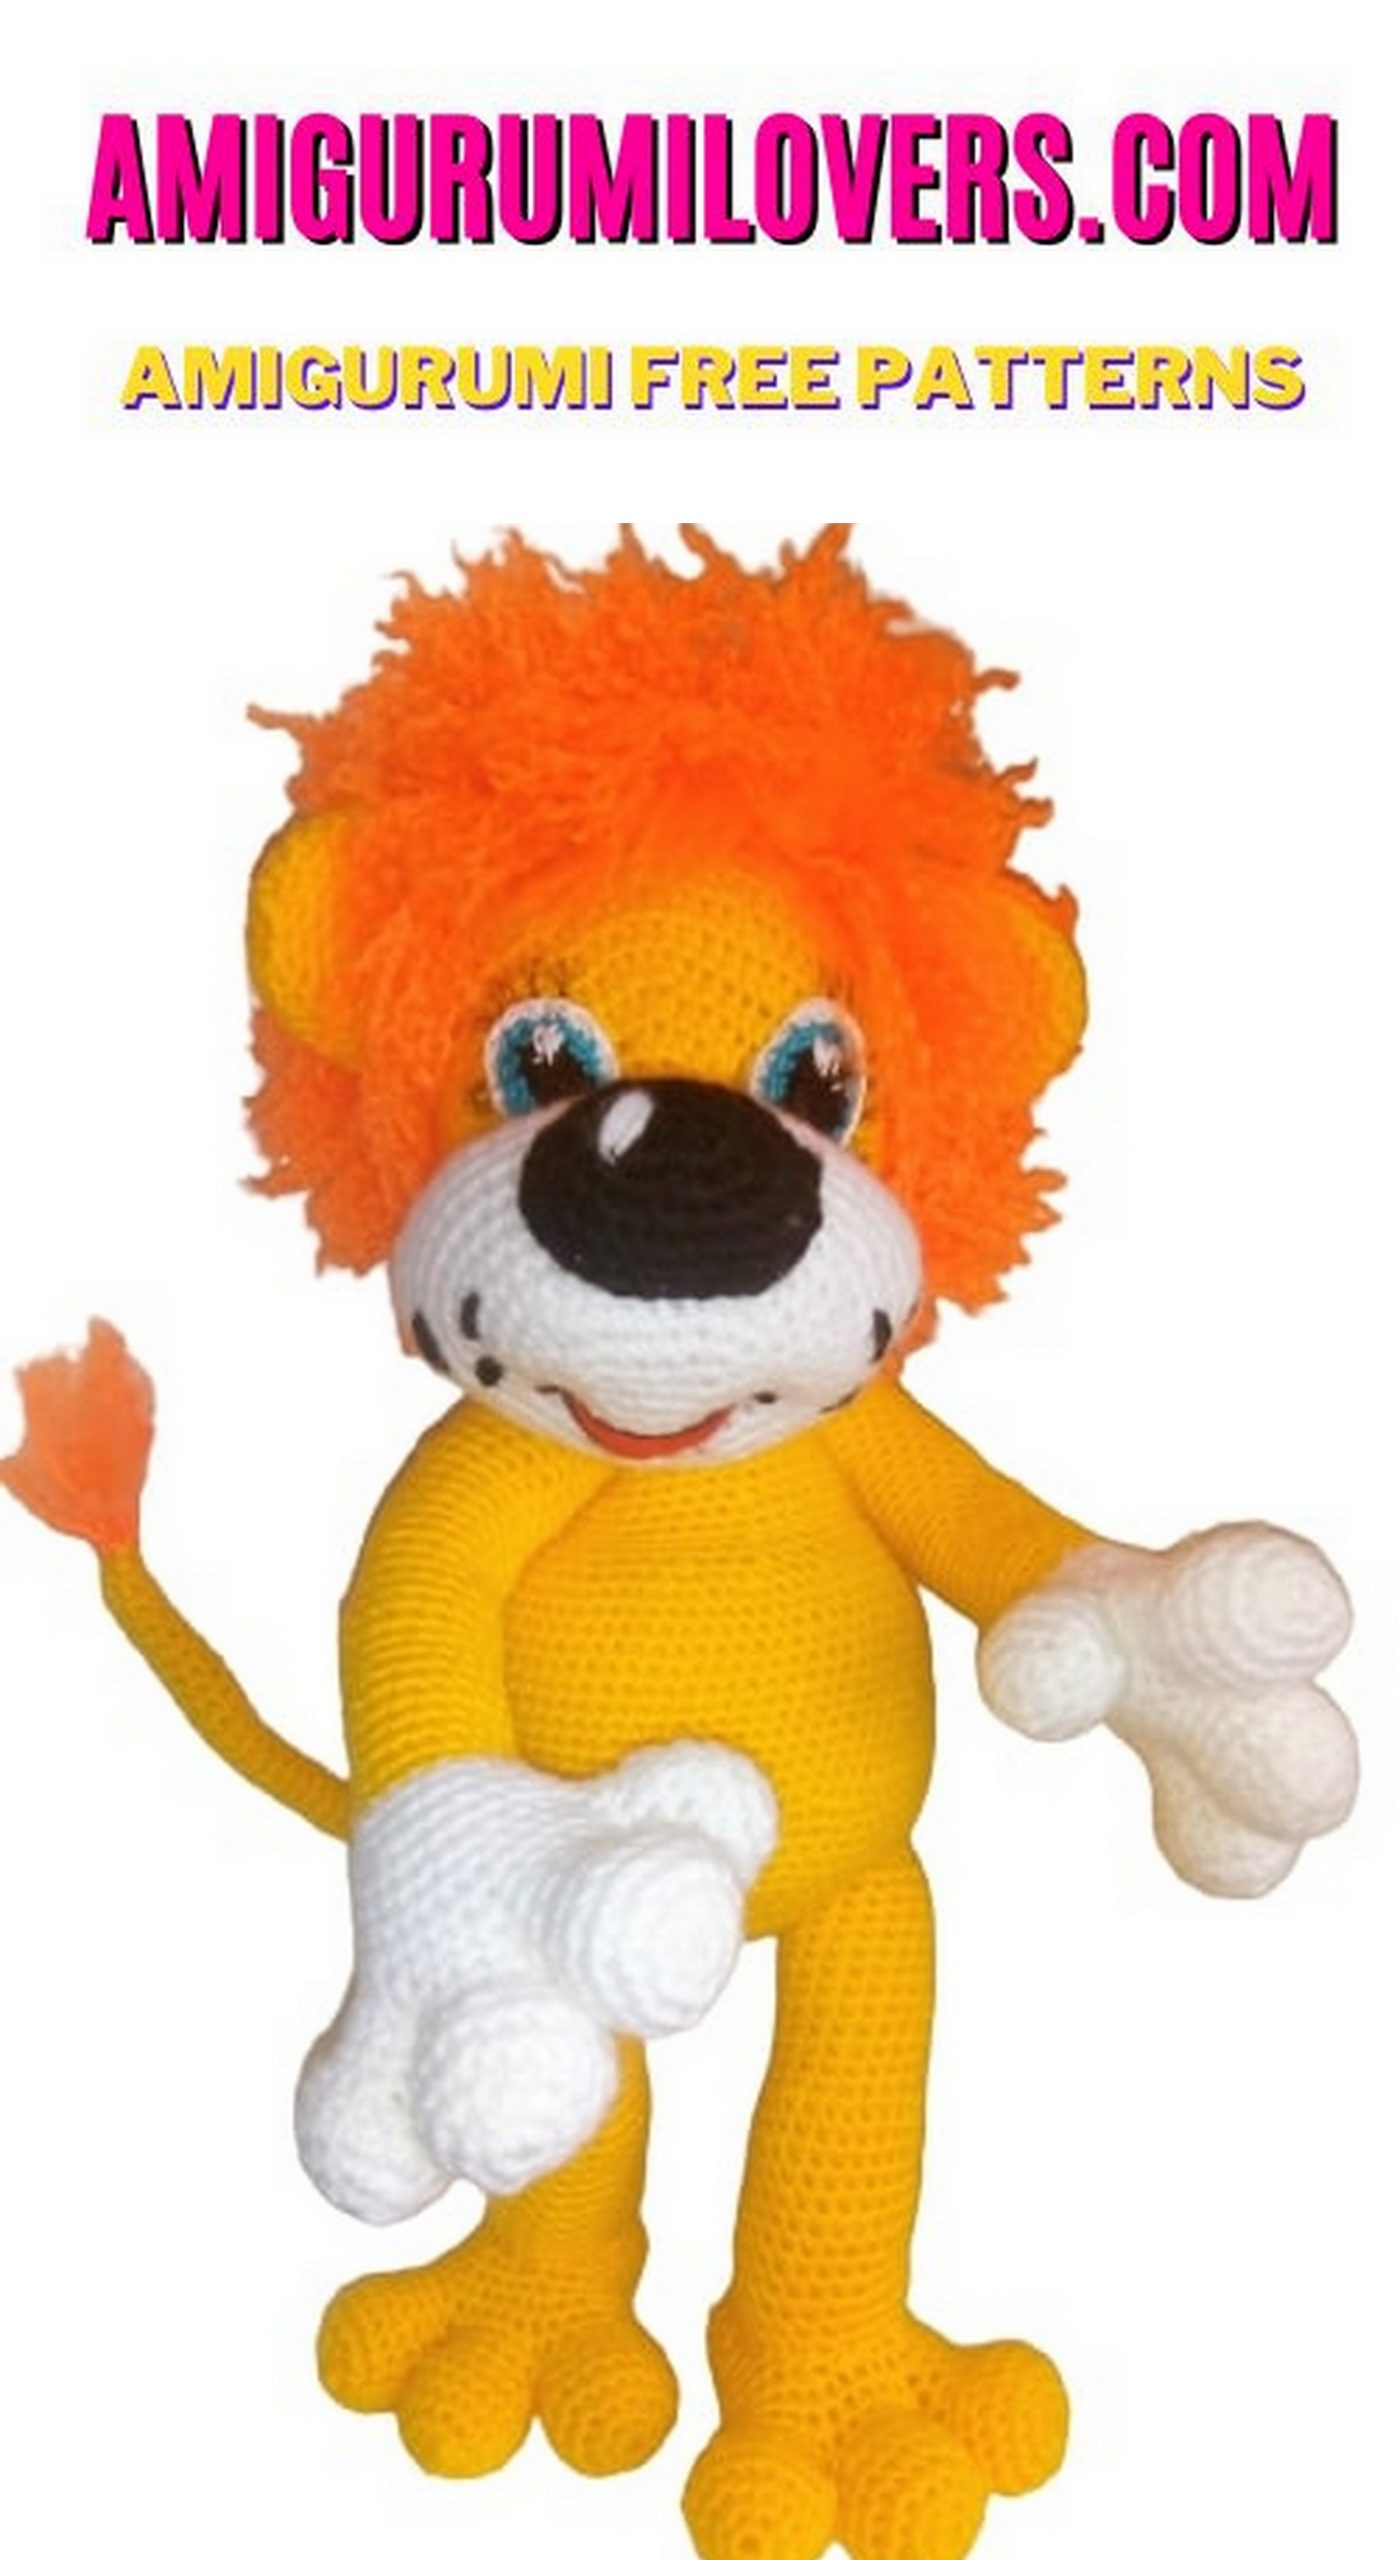
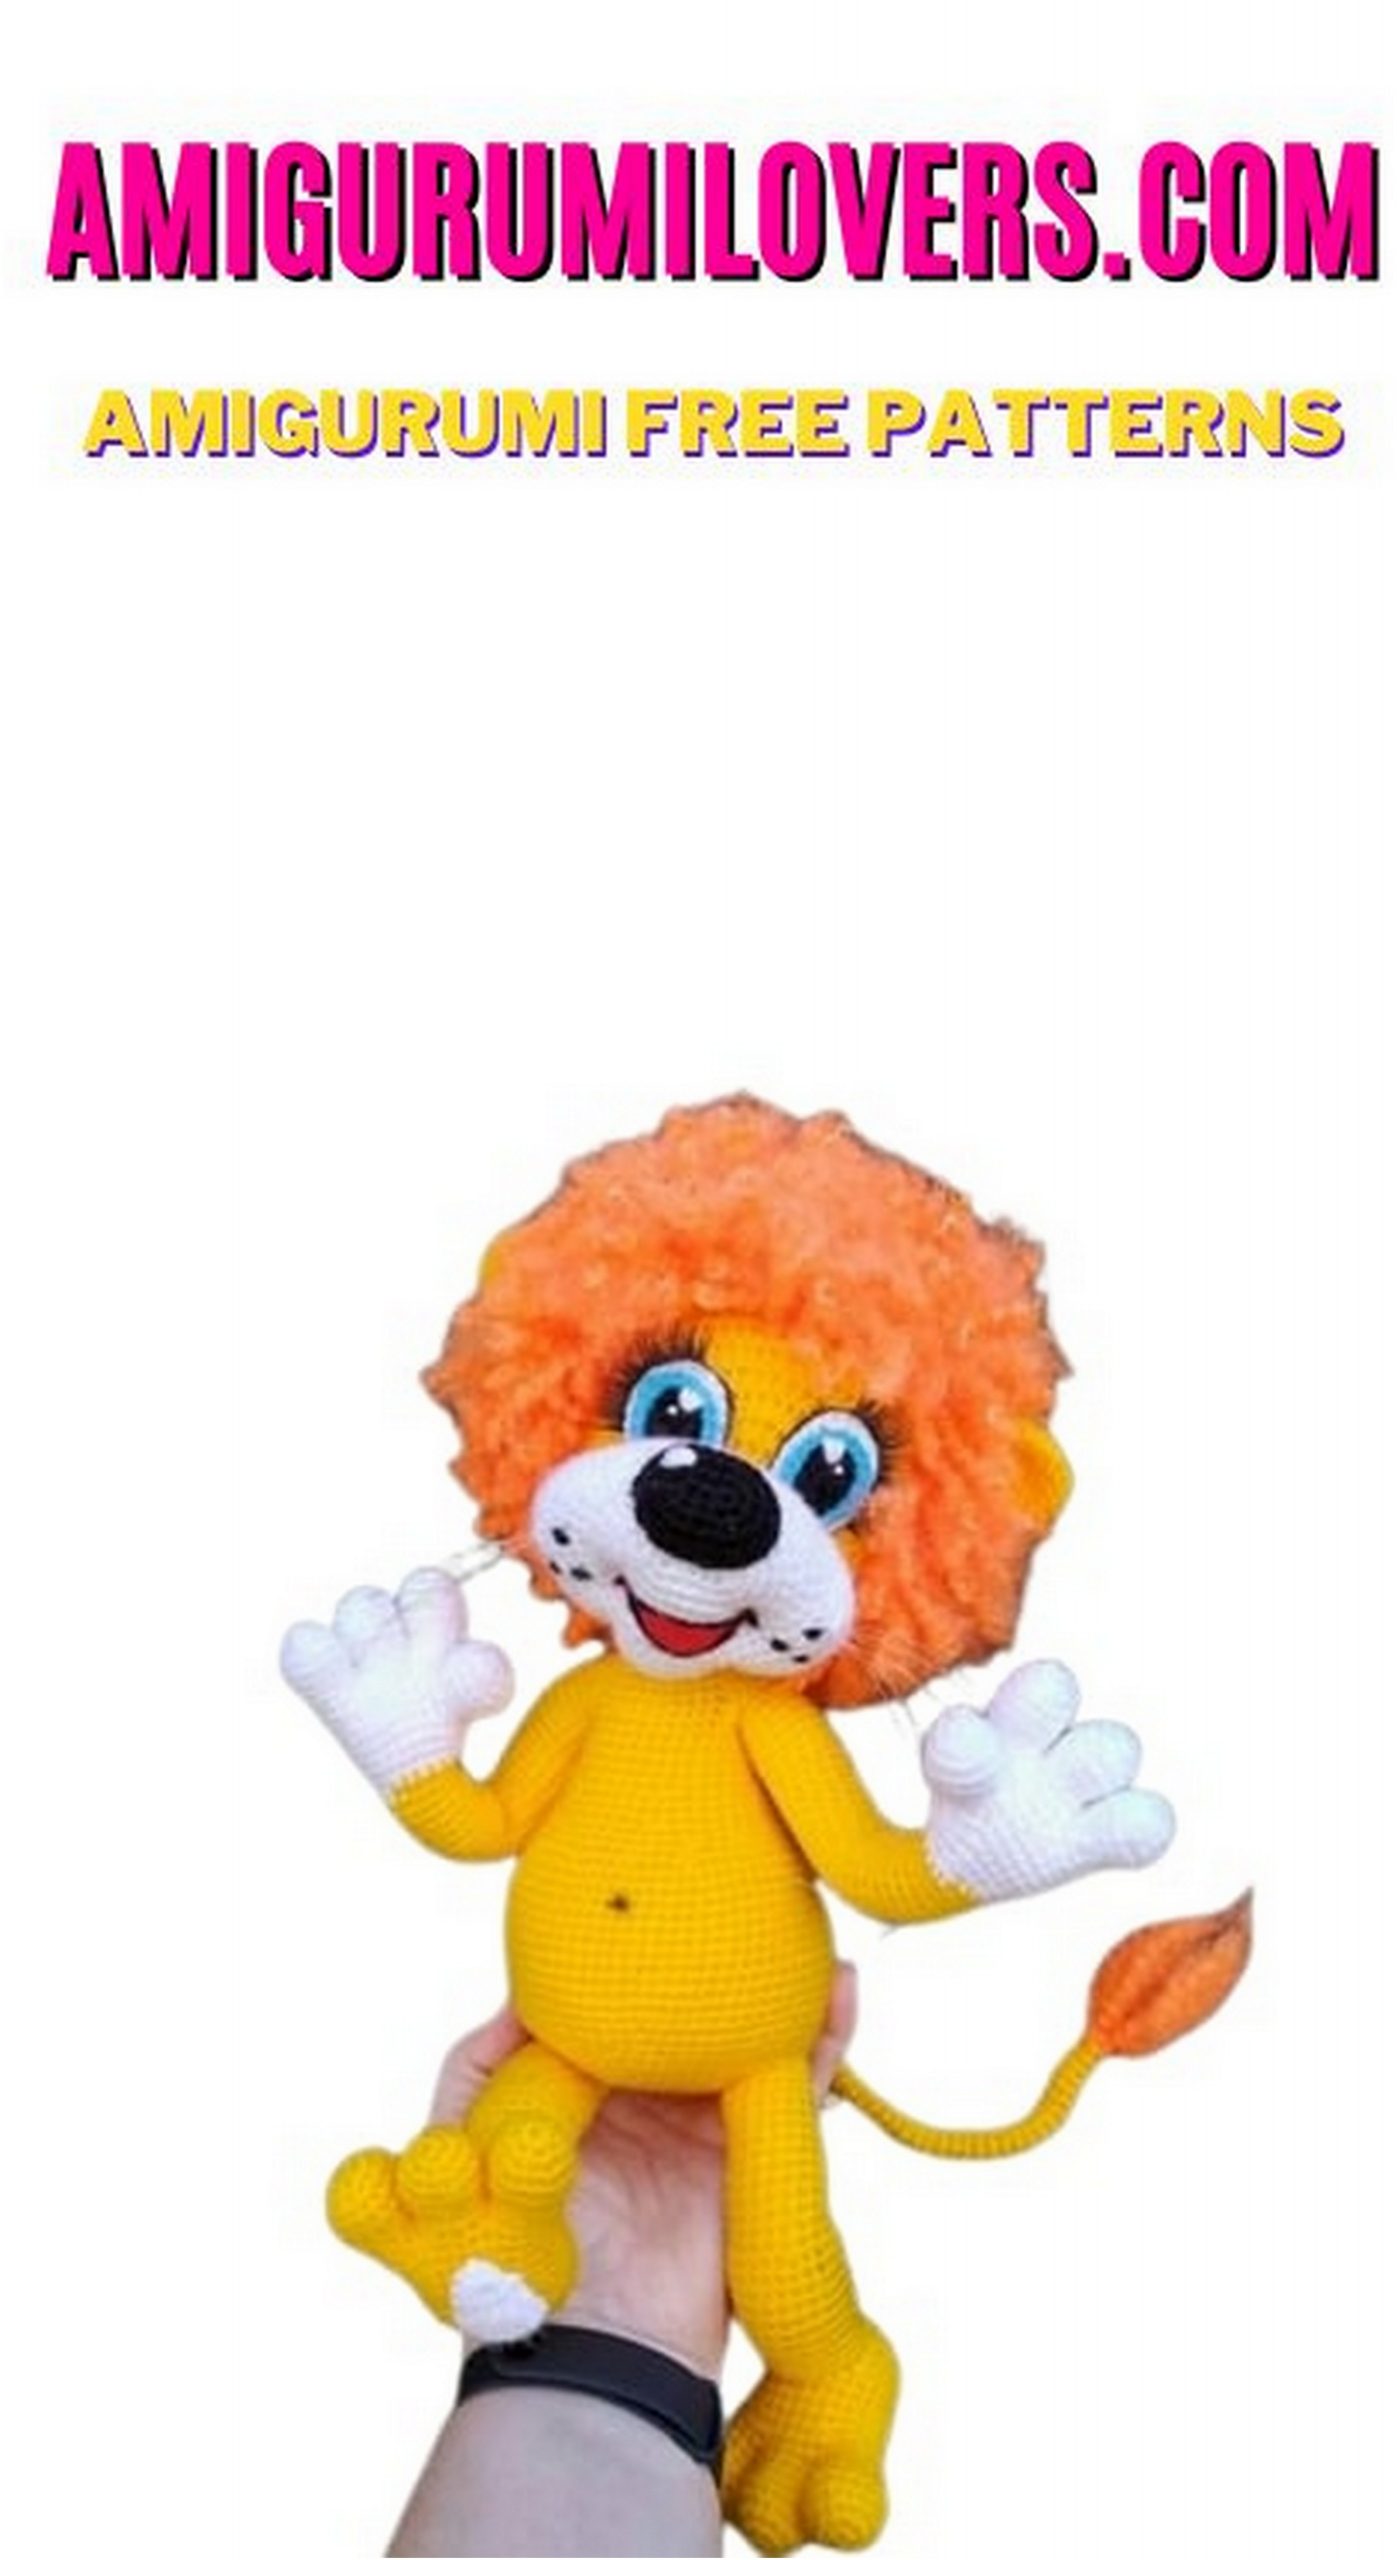
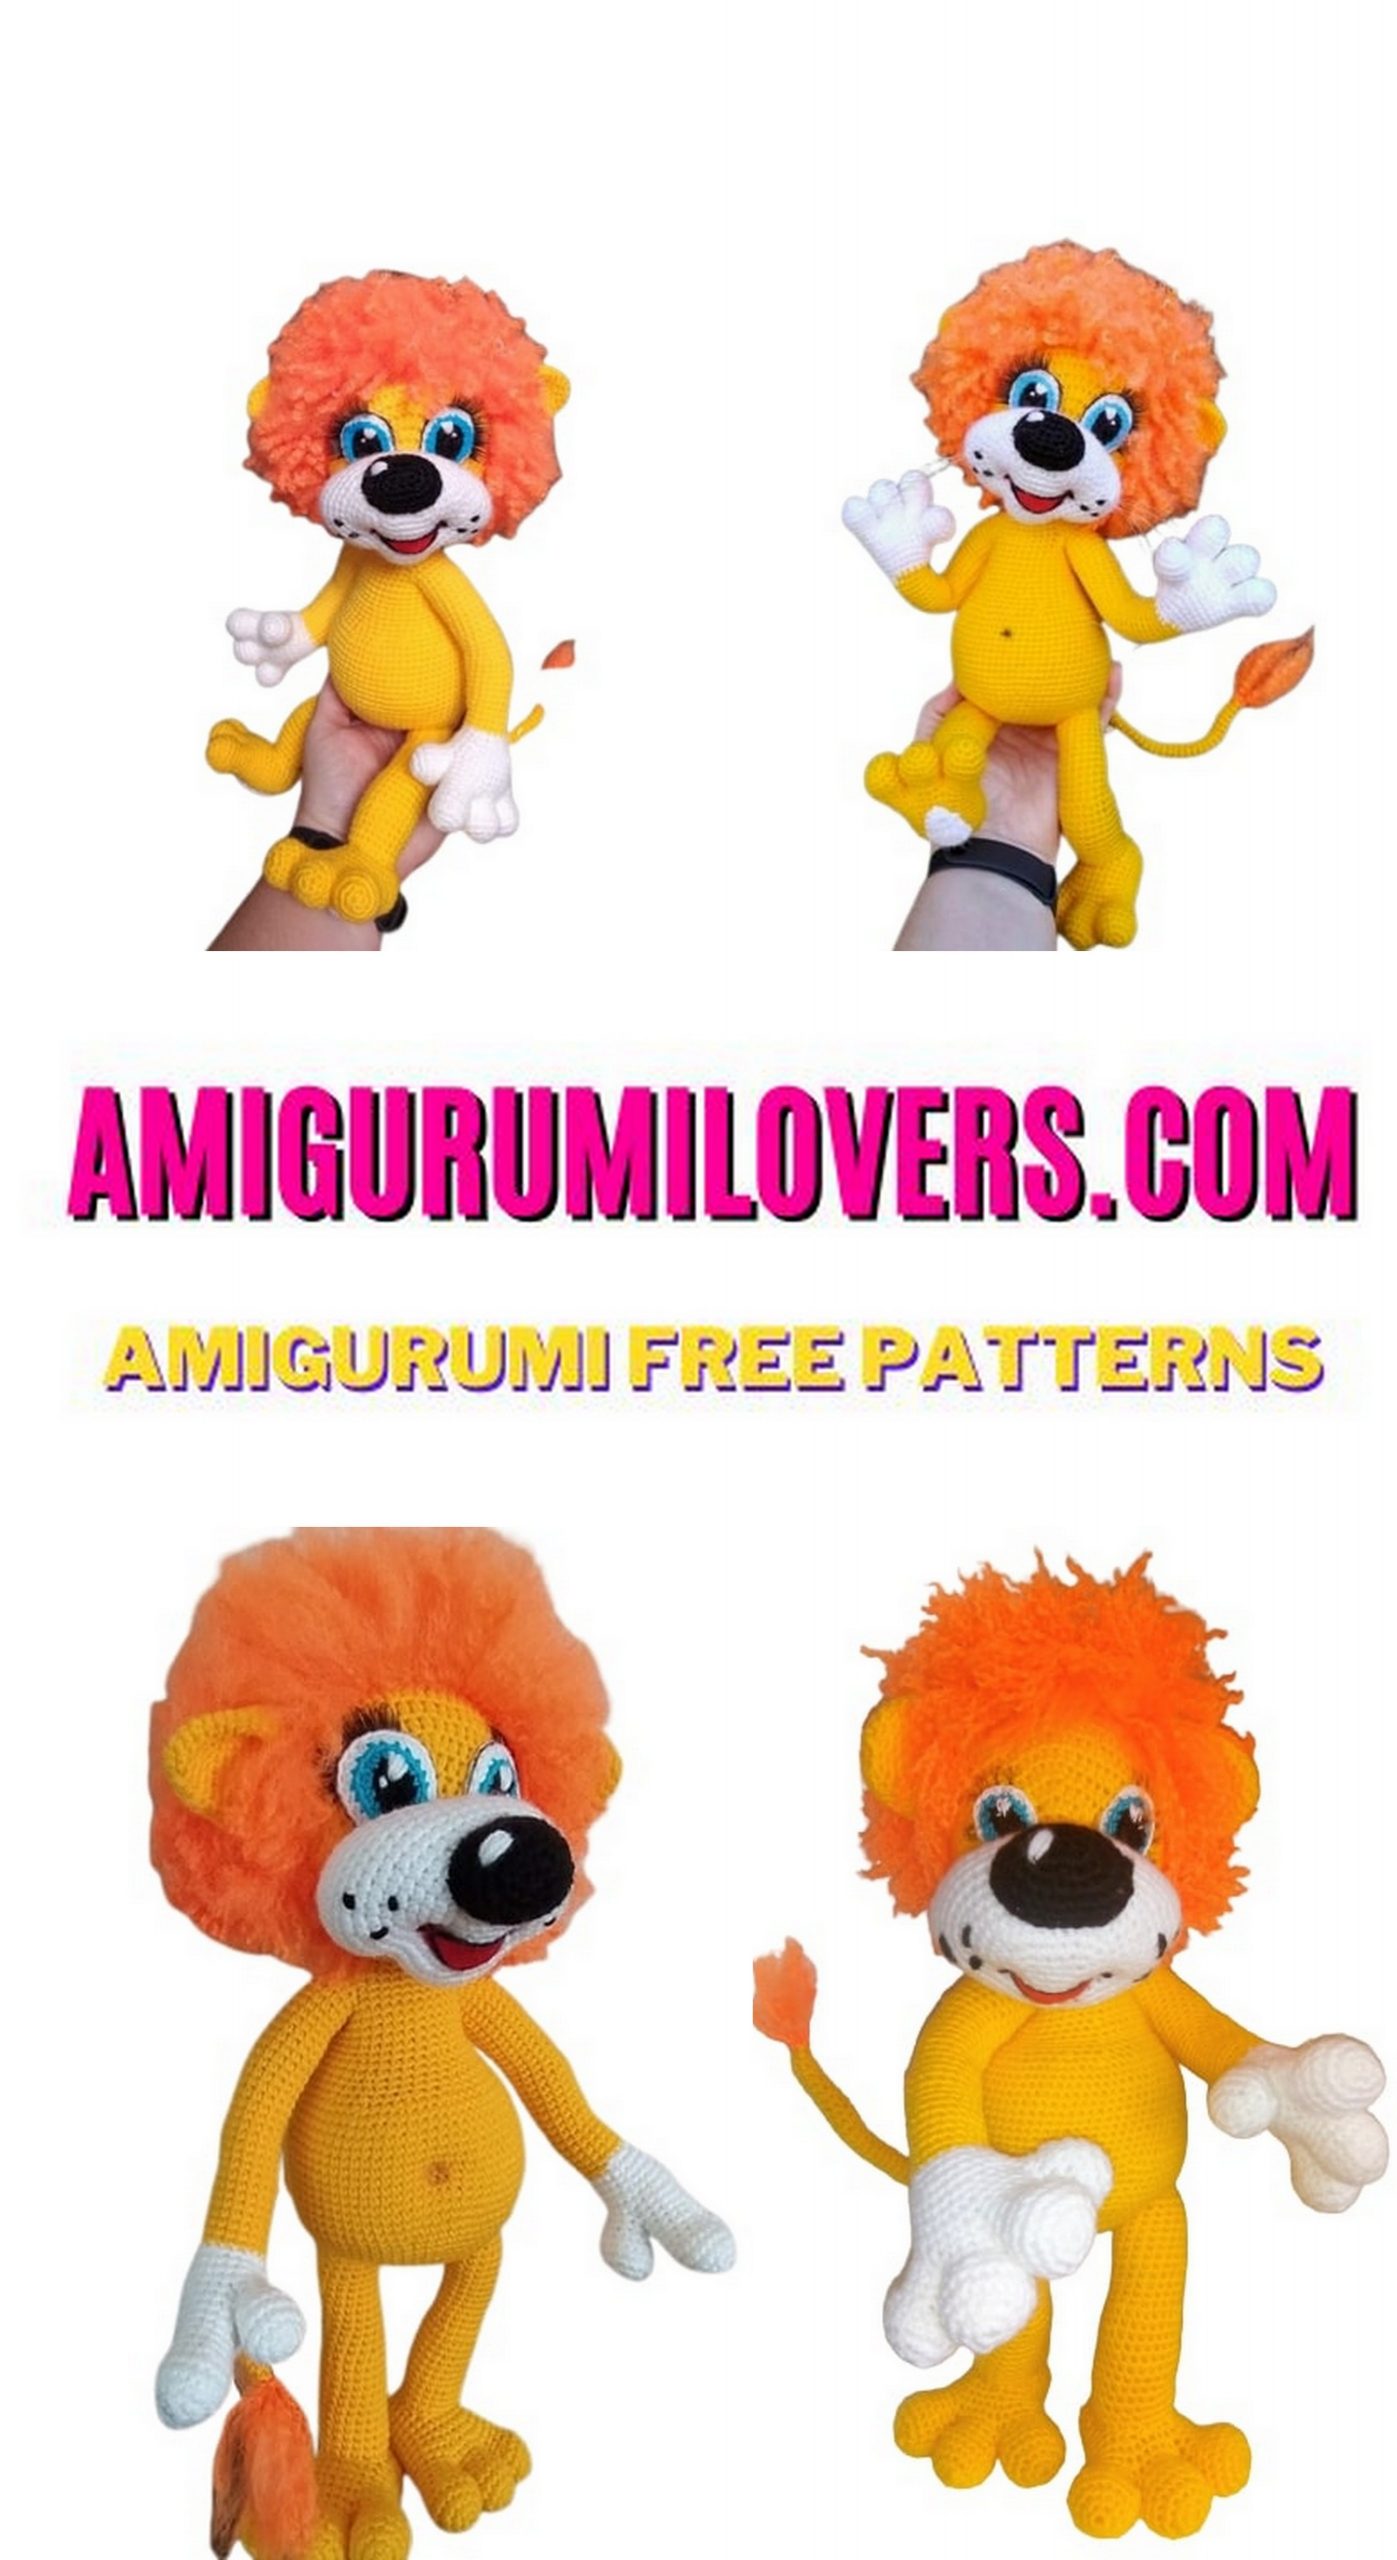
Circus Lion Amigurumi Free Pattern
You may also enjoy exploring our free amigurumi patterns and other popular amigurumi animal patterns available on our website.
Welcome to our creative corner of the crochet world! If you’ve ever marveled at the delightful art of amigurumi, you’re in for a treat. Today, we’re diving into a captivating project that’s perfect for both beginners and seasoned crafters alike: a charming Circus Lion amigurumi. This free pattern will guide you step by step, helping you bring to life a cute and cuddly lion that’s sure to become a favorite among kids and adults alike. Amigurumi is an enjoyable way to explore your creativity while honing your crochet skills, and this lion pattern adds a whimsical touch to your collection.
Whether you’re looking for a fun gift, a decorative piece, or simply a new project to challenge your skills, this Circus Lion is a fantastic choice. With its vibrant colors and playful features, creating this adorable amigurumi will not only improve your crocheting abilities but will also provide great joy as you watch your lion come to life stitch by stitch. Each round will draw you closer to completing this delightful creature, making it an engaging experience for your crochet journey.
As you follow along with our straightforward instructions, you’ll learn various techniques that will enhance your amigurumi skills, from basic stitches to increasing and decreasing. Don’t be intimidated if you’re new to crochet; this blog post is designed to be beginner-friendly. We’ll break down each step, ensuring you feel confident as you progress through the pattern. Plus, we’ll offer helpful tips along the way, making it easier to tackle any challenges you might encounter.
This Circus Lion amigurumi not only allows you to express your creativity but also serves as a wonderful way to connect with others in the crochet community. Imagine the joy of sharing your finished piece with friends and family, or even gifting it to a loved one. It’s these little moments that make crocheting so rewarding. So gather your supplies, get comfy, and prepare for a fun crafting experience. Whether you’re planning to display your lion, gift it, or simply enjoy the process, this free pattern will surely inspire you to explore the enchanting world of amigurumi even further.
In the following sections, we’ll provide you with all the necessary details, including a list of materials and a comprehensive, easy-to-follow pattern. Let’s get started on your journey to create an adorable Circus Lion that will surely bring a smile to anyone who sees it. Happy crocheting!
We continue to share amigurumi free patterns with you.In this article, I will share with you the circus lion amigurumi free pattern.
34 CM
Necessary materials.
* hook 2
* children’s novelty yarn yellow 1.5 skeins, 0.5 skeins white and a little black
* yarn kamtex karakul stretch orange 068 (you can make a mane from a children’s novelty, but fasten it thicker)
* synthetic fluff
* wide eye needle
* for the frame, copper wire 2.5 mm cross section 1 meter 20 cm
ABBREVATİONS
sc – single crochet
ch- air loop
hdc – half-column with one crochet (not to be confused with a column)
inc- increase
dec- decrease
(….) * – repeat what is in parentheses as many times as indicated after the asterisk.
inchdc- increase in half-columns with a crochet (that is, we knit two hdc in one loop)
PATTERN
Muzzle.
White.
1. We collect a chain of 6 ch and Knit around the chain on both sides, starting in the second loop from the hook inc, 3sc, in one loop knit 4sc (this is the first loop of the chain), 3sc, inc = 14
2.inc, inc, 3sc, (inc) * 4, 3 sc, inc, inc = 22
3. (1sc, inc) * 2, 3sc, (1sc, inc) * 4, 3 sc, (inc, 1sc) * 2 = 30
4. (2sc, inc) * 2, 3 sc, (inc, 2sc) * 4, 3 sc, (2sc, inc) * 2 = 38
5-6.38sc
MAKE SURE the side marker is centered by folding the piece in half along the chain.
7. (1sc, inc) * 2, 11sc, (1sc, inc) * 4, 11sc, (1sc, inc) * 2 = 46
8.31sc, inc, 5sc, inc, 8sc = 48
9.1sc, inc, 19sc, (1sc, inc) * 2, 6sc, inc, 7sc, inc, 6sc, inc, 1sc = 54
10.1sc, inc, 21sc, (1sc, inc) * 2.12sc, inc, inc, inc, (this will chin), 10sc, inc, 1sc = 61
CHECK MARKER
11-14. 61sc (4 ROWS)
15.42sc, dec, dec, dec, 13sc = 58
16.dec, 25sc, dec, dec, 25sc, dec = 54
17. (7sc, dec) * 6 = 48
18. (dec, 6sc) * 6 = 42
Change the thread to body color. I have yellow.
19. Knit 33 sc, put a marker here, this is the center of the bottom of the head (see that this is the center of the chin, that is, the place where we did three increases in a row, and then three decreases.
It is possible that you need 31 sc or 34sc, from whom, how did the loops shift. The beginning and end of the row will go from here. Watch the marker in the future so that it runs smoothly and does not move to the right or left.
20.11 sc, (increase hdc, 3hdc) * 2, inchdc, 2hdc, (inc hdc, 3hdc) * 2, inchdc, 11sc = 48 part.)
21.12sc, 24hdc, 12sc = 48
22.12sc, (5hdc, inchdc) * 2, (inchdc, 5hdc) * 2, 12sc = 52
23.12sc, (6hdc, inchdc) * 2, (inchdc, 6hdc) * 2, 12 sc = 56
24.12sc, (7hdc, inchdc) * 2, (inchdc, 7sc) * 2, 10 sc, 2ch, 2 sc skip, marker (knit a hole for the frame. = 60
24.2 ch, 2 sc skip, 10 sc, 3hdc, inchdc, 8 hdc, inchdc, 10hdc, inchdc, 8 hdc, inchdc, 3 hdc, 10 sc, 2sc chain, marker = 64
25.2sc daisy-chained, 16 sc, 2hdc, inchdc, 7hdc, inchdc, 6hdc, inchdc, 7hdc, inchdc, 2 hdc, 18 sc = 68
26.10 sc, dec, 2sc, dec, 5sc, 10hdc, inchdc, 4hdc, inc hdc, 10hdc, 5sc, dec, 2sc, dec, 10sc = 66
27.23 sc, 20 hdc, 23 sc = 66
28-32. 66 sc
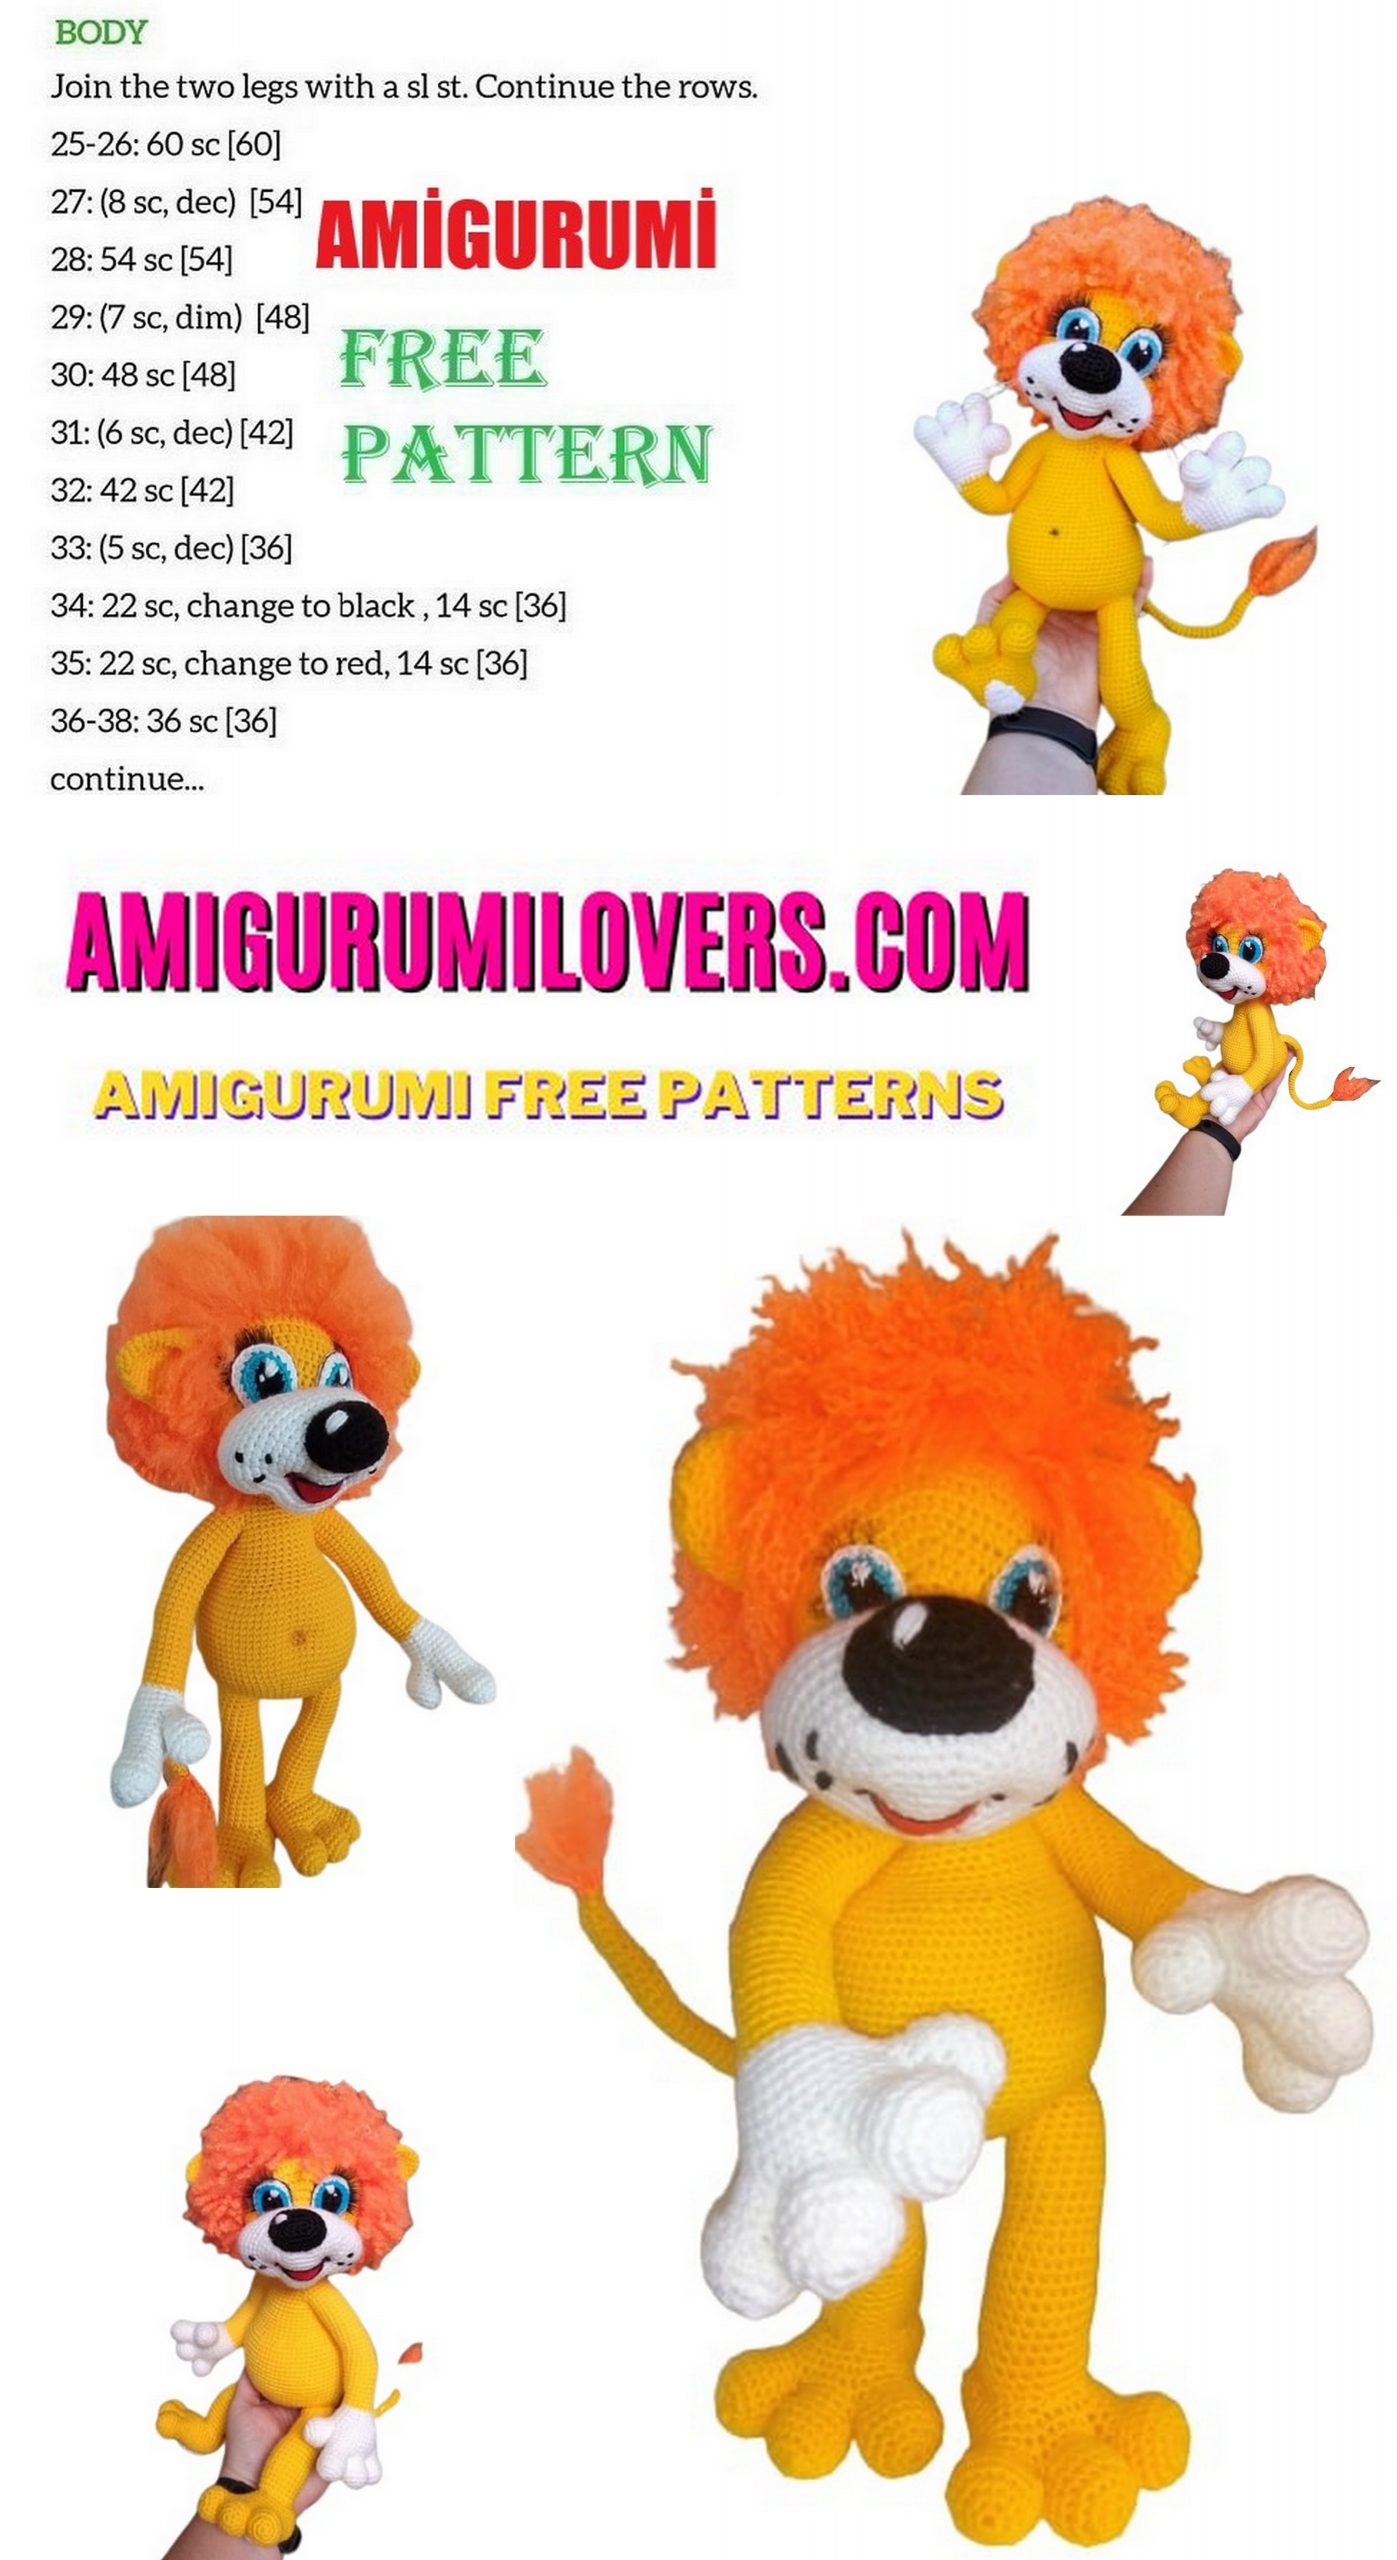
33. (9sc, dec) * 6 = 60
34. (8sc, dec) * 6 = 54
35. (7sc, dec) * 6 = 48
36. (6sc, dec) * 6 = 42
37. (5sc, dec) * 6 = 36
We stuff the nose pushing the synthetic winterizer apart more on the sides and highlight the chin with the synthetic winterizer. When stuffing the head, highlight the forehead by adding more padding polyester there.
38. (4sc, dec) * 6 = 30
39. (3sc, dec) * 6 = 24
40. (2sc, dec) * 6 = 18
41. (1sc, dec) * 6 = 12
42. (Dec) * 6 = 6
Pull off the hinges.
Eye tightening.
Insert the needle under the chin between white and yellow (1), bring it into the eye area (2) (in the first yellow row), grab a pair of sc (3) and go back. Tighten (4). The second is similar
Face tightening.
We introduce the needle into the eye area, where the eye tightening was done, (1), bring it into the face in row 4, two columns to the right of the chain of 6 ch, from which we started knitting (1), grab a couple of rows vertically and go back ( 2). Tighten. The second is similar, only to the left of the chain.
Take a red or black thread, insert it into the bridge of the nose, bring it to the right point of tightening the cheeks, throw it to the left point, make a smile and bring it out to the bridge of the nose. Then do everything in the same way with the lower part of the smile. Then fasten the bobbin thread in the center so that it does not dangle.
Chin tightening at will.
We introduce the needle into the eye area, bring it out near the chin in the 11th row, grab 3 rows vertically and go back.
Tighten slightly. On the other hand, it is the same. Between the ties approximately 13sc
Nose.
In black.
1. Dial a chain of 4ch. Knit around the chain, starting from the second loop from the hook Inc, 1sc, in one loop 4 sc, 1sc, inc = 10
2.inc, inc, 1sc, (inc) * 4, 1sc, inc, inc = 18
3. (1sc, inc) * 2, 1sc, (1sc, inc) * 4, 1sc, (1sc, inc) * 2 = 26
4-5. 26 sc
Fill a little Sew on.
Pour a white highlight on the nose
Eyes.
Right
Let’s start with black
1. Chain of 4 ch, Knit around the chain, starting from the second st from the hook inc, 1sc, in one st 4sc, 1 sc, inc = 10
Change to blue, Knit for the back half-loops
2.inc, inc, 1sc, (inc) * 2, (inchdc) * 2, 1 hdc, inchdc, inc sc = 18
Change to white
3. (1sc, inc) * 2, 1sc, 1hdc, inchdc, (1hdc, inchdc) * 3, 2hdc, inchdc, 1sc, inc = 26
Left.
1.Chain of 4 ch Inc, 1sc, in one loop 4 sc, 1 sc, inc
Change to blue
2.inc sc, inchdc, 1hdc, (inchdc) * 2, (inc sc) * 2, 1 sc, inc, inc
Change to white
3.inc, 1sc, inchdc, 2hdc, (inchdc, 1hdc) * 3, inc, 1sc, 1sc, (inc, 1sc) * 2
Embroider highlights
Ears.
Yellow
1. Into magic ring 6 sc
2. (inc) * 6 = 12
3.12sc
4. (1sc, inc) * 6 = 18
5-6. 18sc
7. (2sc, inc) * 6 = 24
8.24 sc
9. (3sc, inc) * 6 = 30
10.30sc
11. (inc, 14sc) * 2 = 32
12. (inc, 15sc) * 2 = 34
13.34 sc
Fold over and knit on both sides 14 sc Sew on ears, tucking slightly at top.
Sew on the eyes. Along the contour, glue the eyelashes with crystal moment glue.
The inner part of the protein is tinted with a thin black alcohol marker (optional)
Strong mane according to the fringe principle.
Cut off pieces of yarn 9cm and strong in a circle, through one loop and through one row in a checkerboard pattern. let’s finish at the top of the head. I wind the thread on three fingers and cut on one side, it turns out just 9 cm

Tail
Yellow.
1.into magic ring 6 sc
2-25. 6 sc
26. Inc, 5 sc = 7
27-40. 7sc
41. Inc, 6sc = 8
42- 50.8 sc
At the tip of the tail, attach the yarn with a fringe, as well as on the mane of the lower paws.
Yellow
1.Take a chain of 16 ch, close in a ring and knit in a circle
2- 14.16 sc (13 rows)
15. (3sc, inc) * 4 = 20
16- 25.20 sc
Leave the thread to be sewn to the foot.
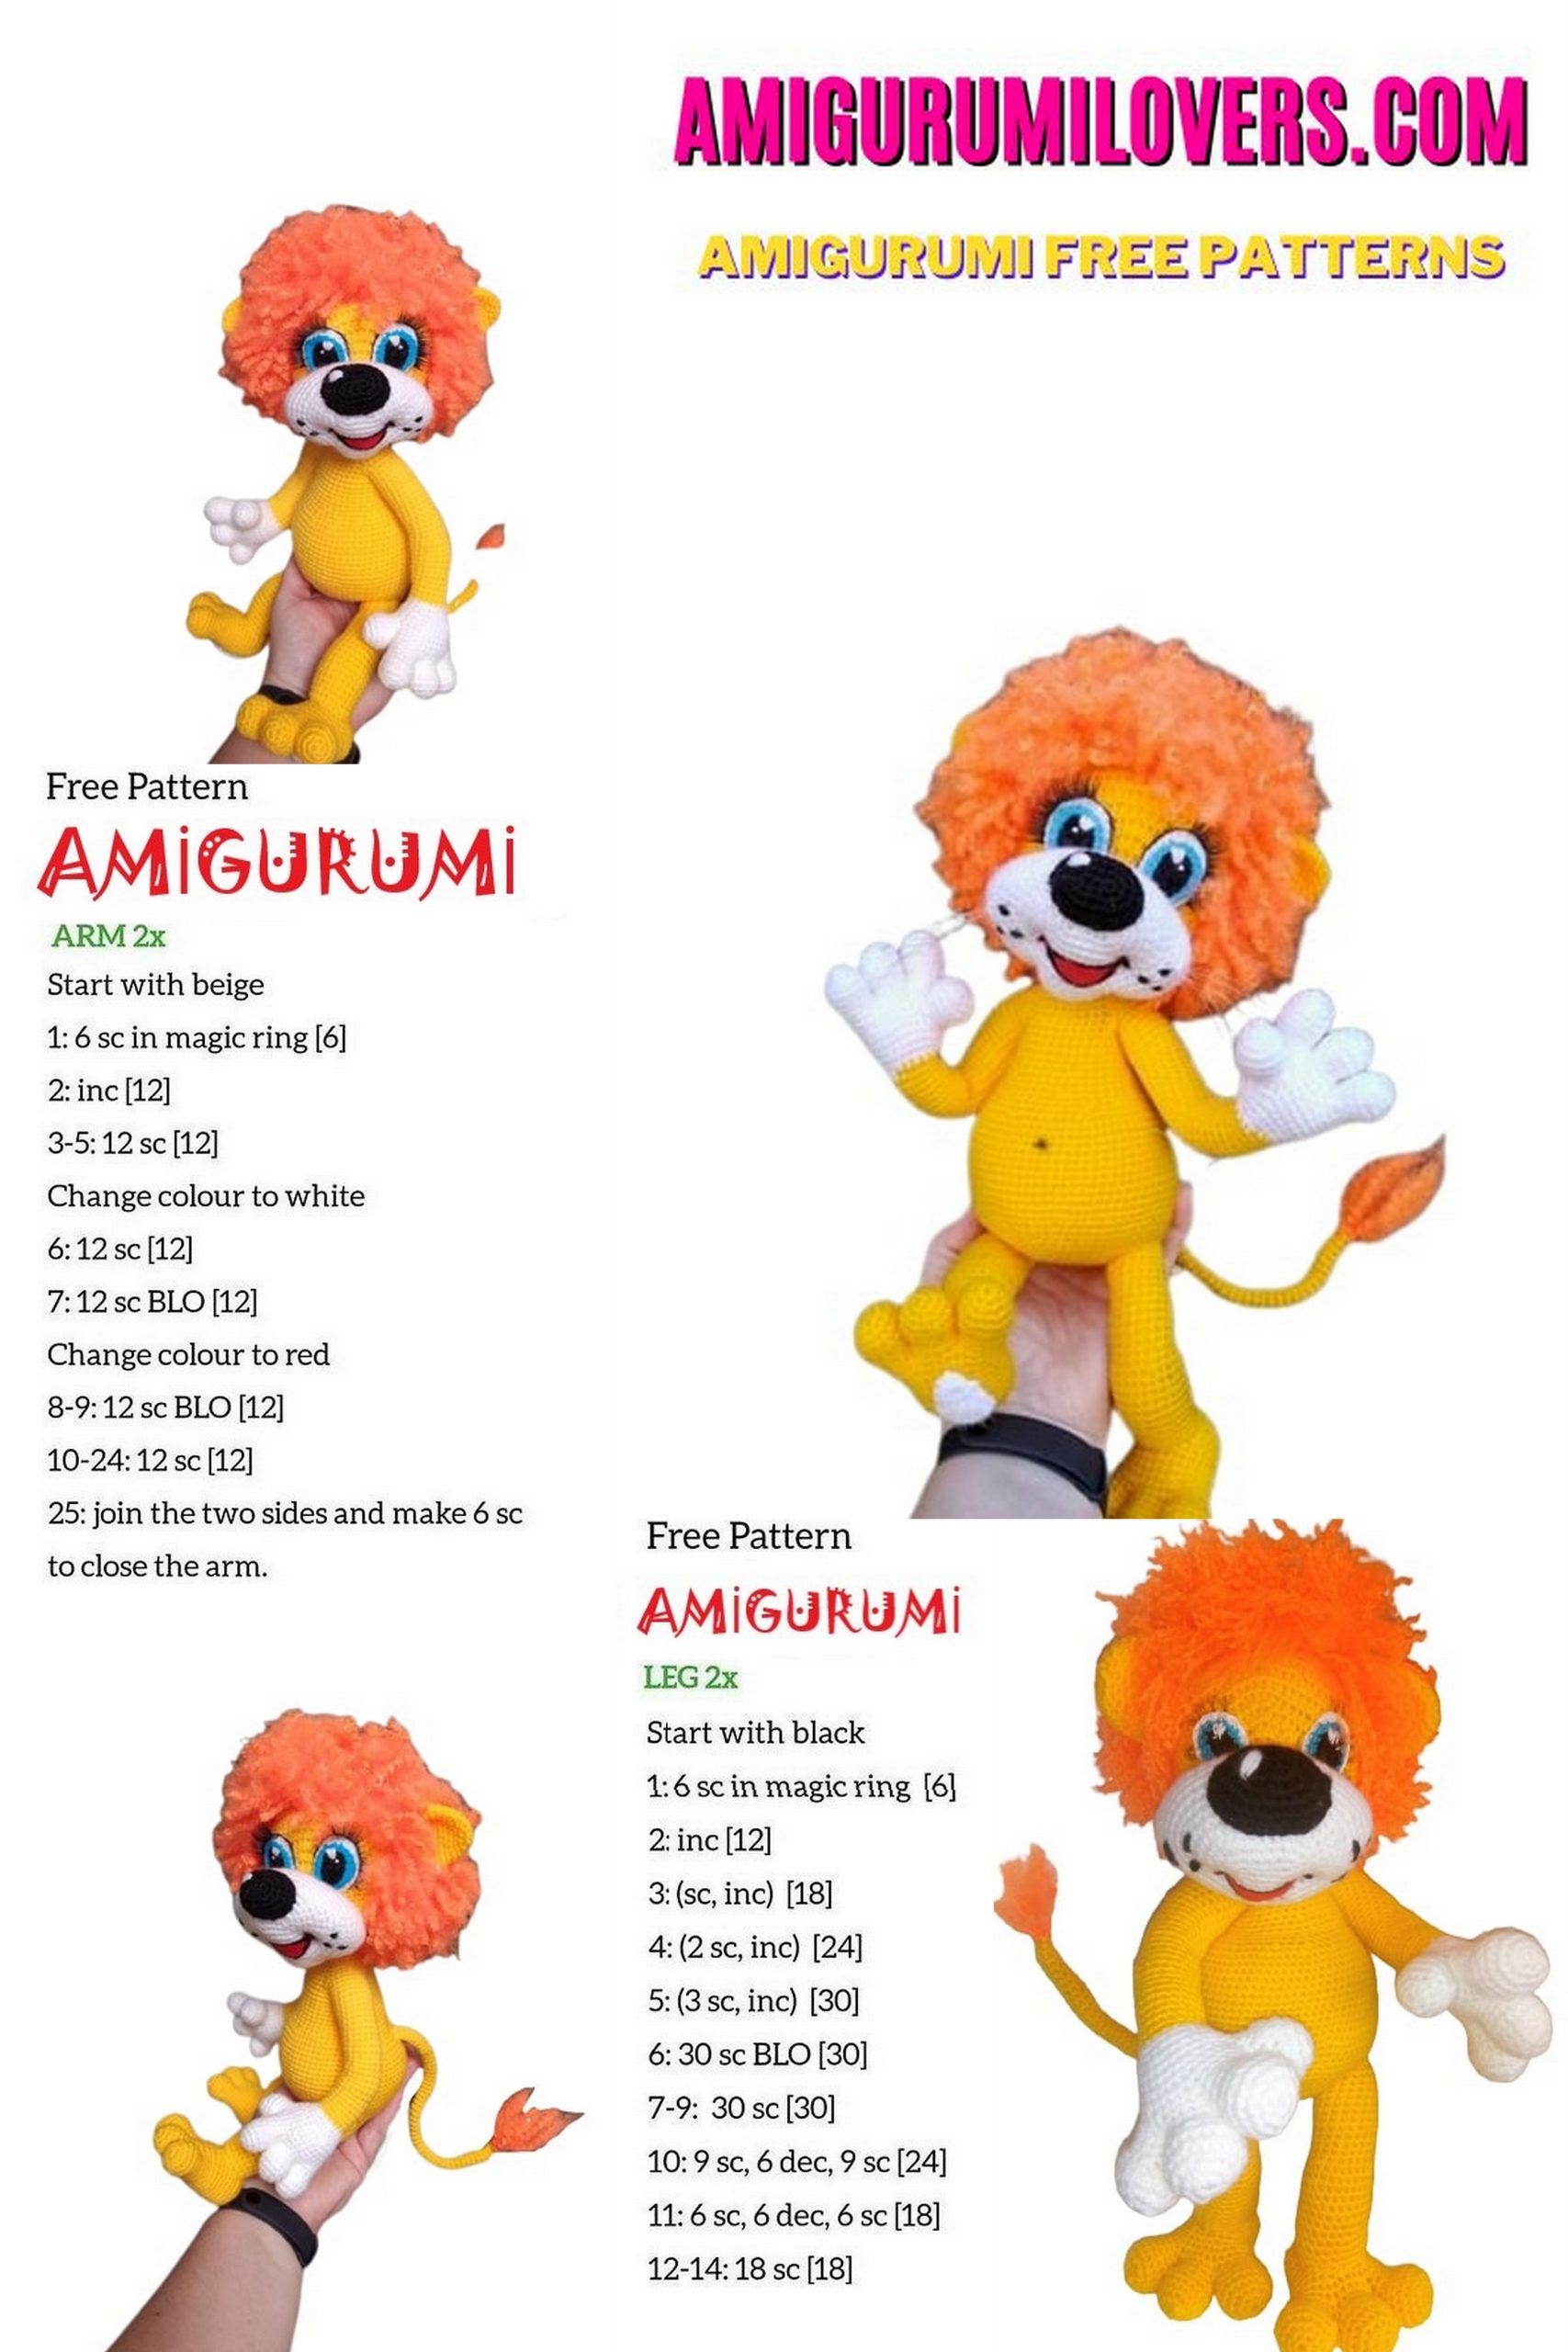
Foot.
We start with the fingers. Three jokes.
1. Into magic ring 6 sc
2. (inc) * 6 = 12
3. (1sc, inc) * 6 = 18
4-5. 18 sc
6. (1sc, dec) * 6 = 12
7.12 sc
On the third finger, we do not break the thread and begin to connect together.
8. Knit 6 sc on the last finger, 6 sc on the second, 12 sc on the third, 6 sc on the second and 6 sc on the first = 36
put a marker
9.5sc, dec, 4sc, dec, 10sc, dec, 4sc, dec, 5sc = 32
10.32 sc
11.4sc, dec, 4sc, dec, 8sc, dec, 4sc, dec, 4sc = 28
12-18 .28sc
19. (5sc, dec) * 4 = 24
20. (2sc, dec) * 6 = 18
21. (1sc, dec) * 6 = 12
22. (dec) * 6 = 6
Pull off the hinges
Sole overlay
1. Into magic ring 6 sc
2. (Inc) * 6 = 12
3.3sc, 1 ch, turn
4.3sc, 1ch, turn
5.Dec, 1sc, 1ch, turn
6.dec
Tie in a circle sc. So that the part does not constrict, make increments at the turns. Two increments were enough for me.
Sew the overlay with a wide edge to the heel. Sew the leg to the feet so that the heel protrudes quite a bit beyond the leg.
Upper paws.
4 fingers.
White.
1.into magic ring 6sc
2. (inc) * 6 = 12
3. (1sc, inc) * 6 = 18
4-5.18sc
6. (1sc, dec) * 6 = 12
7.12sc
Do not break the thread at the last one. We connect our fingers.
8.6sc on the last toe, 6sc on the second toe, 12sc on the third toe, 6 sc on the second toe, 6sc on the first toe = 36
9.5sc, dec, 4sc, dec, 10sc, dec, 4sc, dec, 5sc = 32
10.4sc, dec, 4sc, dec, 8sc, dec, 4sc, dec, 4sc = 28.
11.28sc
Attaching the fourth toe for the left foot
12. Place finger on palm and knit by finger and palm 6 sc, 22sc = 28
13.6 sc over remaining toe loops, 22sc = 28
Attach the toe for the right foot.
12.8 sc, apply finger and knit over it and palms 6sc, 14 sc.
13.8sc, 6sc on the remaining loops of the toe, 14 sc
Further, it is the same for both paws.
14.28 sc
15. (5sc, dec) * 4 = 24
16.24sc
17. (2sc, dec) * 6 = 18
Change the thread to yellow.
18-29. 18 sc (12 rows)
30. (7sc, dec) * 2 = 16
31-46. 16 sc (16 rows) Elena Kuznetsova (Frank)
Body.
1. Into magic ring 6 sc
2. (inc) * 6 = 12
3. (1sc, inc) * 6 = 18
4. (2sc, inc) * 6 = 24
5. (3 sc, inc) * 6 = 30
6. (4sc, inc) * 6 = 36
Attaching the legs
The marker goes down the back
7.6sc, place the foot on the body with the toes facing forward and the heels towards you, tie the leg and body together 6 sc, 12 sc over the body, 6 sc over the body and leg, 6 sc over the body = 36
8. (2sc, inc) * 2, leg remaining 10 sc, body (2sc, inc) * 2, (inc, 2sc) * 2, 10 sc leg, (2sc, inc) * 2 = 52
9.52 sc
10.7sc, inc, (8sc, inc) * 4, 7sc, inc = 58
11.14 sc, inc, 28sc, inc, 14sc = 60
12. (9sc, inc) * 6 = 66
13.66sc
14.30 sc, inc, 4sc, inc, 30 sc = 68
15.31sc, inc, 4sc, inc, 31sc = 70
16-22. 70sc (7 rows)
We attach the tail.
23.68 sc, attach tail and tie by tail and body 2 sc, marker
24.2sc along the body and tail, 66sc, 2sc along the remaining loops of the tail, marker
25.2sc along remaining tail loops, 68 sc = 70
26. (3sc, dec) * 3, 40sc, (dec, 3sc) * 3 = 64
27. (3sc, dec) * 3, 34sc, (dec, 3sc) * 3 = 58
28.19sc, (3sc, dec) * 4, 19sc = 54
29.15sc, (2sc, dec) * 6, 15sc = 48
30.48sc
31. (6sc, dec) * 6 = 42
32-33.42sc
34. (5sc, dec) * 6 = 36
35-39. 36sc
We make a frame in the legs, body, neck.
Cut the wire for the legs 38 cm each.Tail 25 cm
Bend the wire 1.5 cm on one side and wrap it with adhesive tape.
Push the wire into the legs, stuff them.
Wind the wire together in the area of the priests.
Insert the wire into the tail and tie it to the main frame and insulate.
Insert the frame, fill the body, highlighting the ass and zhiotic with padding polyester.
We attach the paws.
40.5 sc, apply left paw and knit over body and foot 8 sc, 10 sc over body, 8 sc over body and foot, 5 sc = 36
41.5 sc, 8 sc along remaining leg loops, 10 sc, 8 sc along remaining leg loops, 5 sc = 36
Mark the wire in the hands of 30 cm. Insulate the ends and insert perpendicular to the main frame – from palm to palm.
Stuff your hands.
42. (4sc, dec) * 6 = 30
43. (3sc, dec) * 6 = 24
44. (2sc, dec) * 6 = 18
45-48. 18 sc.
Thread the remaining wire through the head and sew the head to the neck
Before you leave, make sure to check out more free amigurumi crochet patterns and discover new ideas for your next project.
You can also browse our full amigurumi pattern archive for hundreds of beginner-friendly designs.