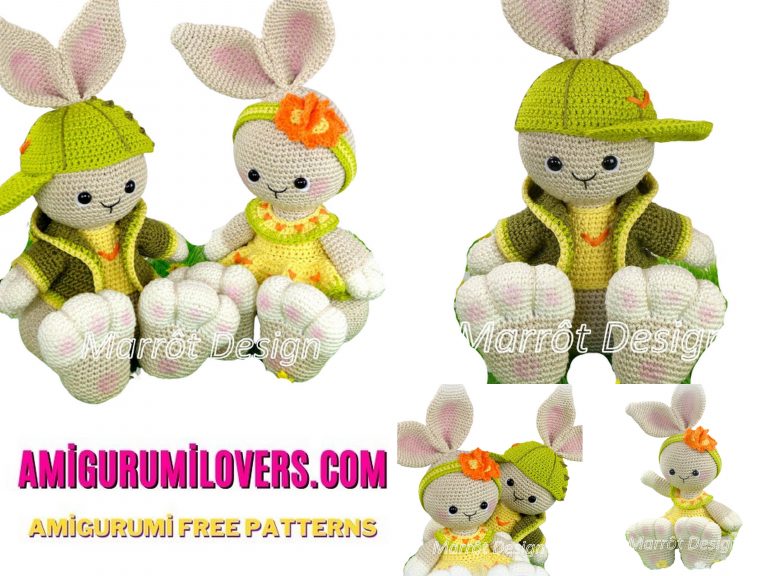
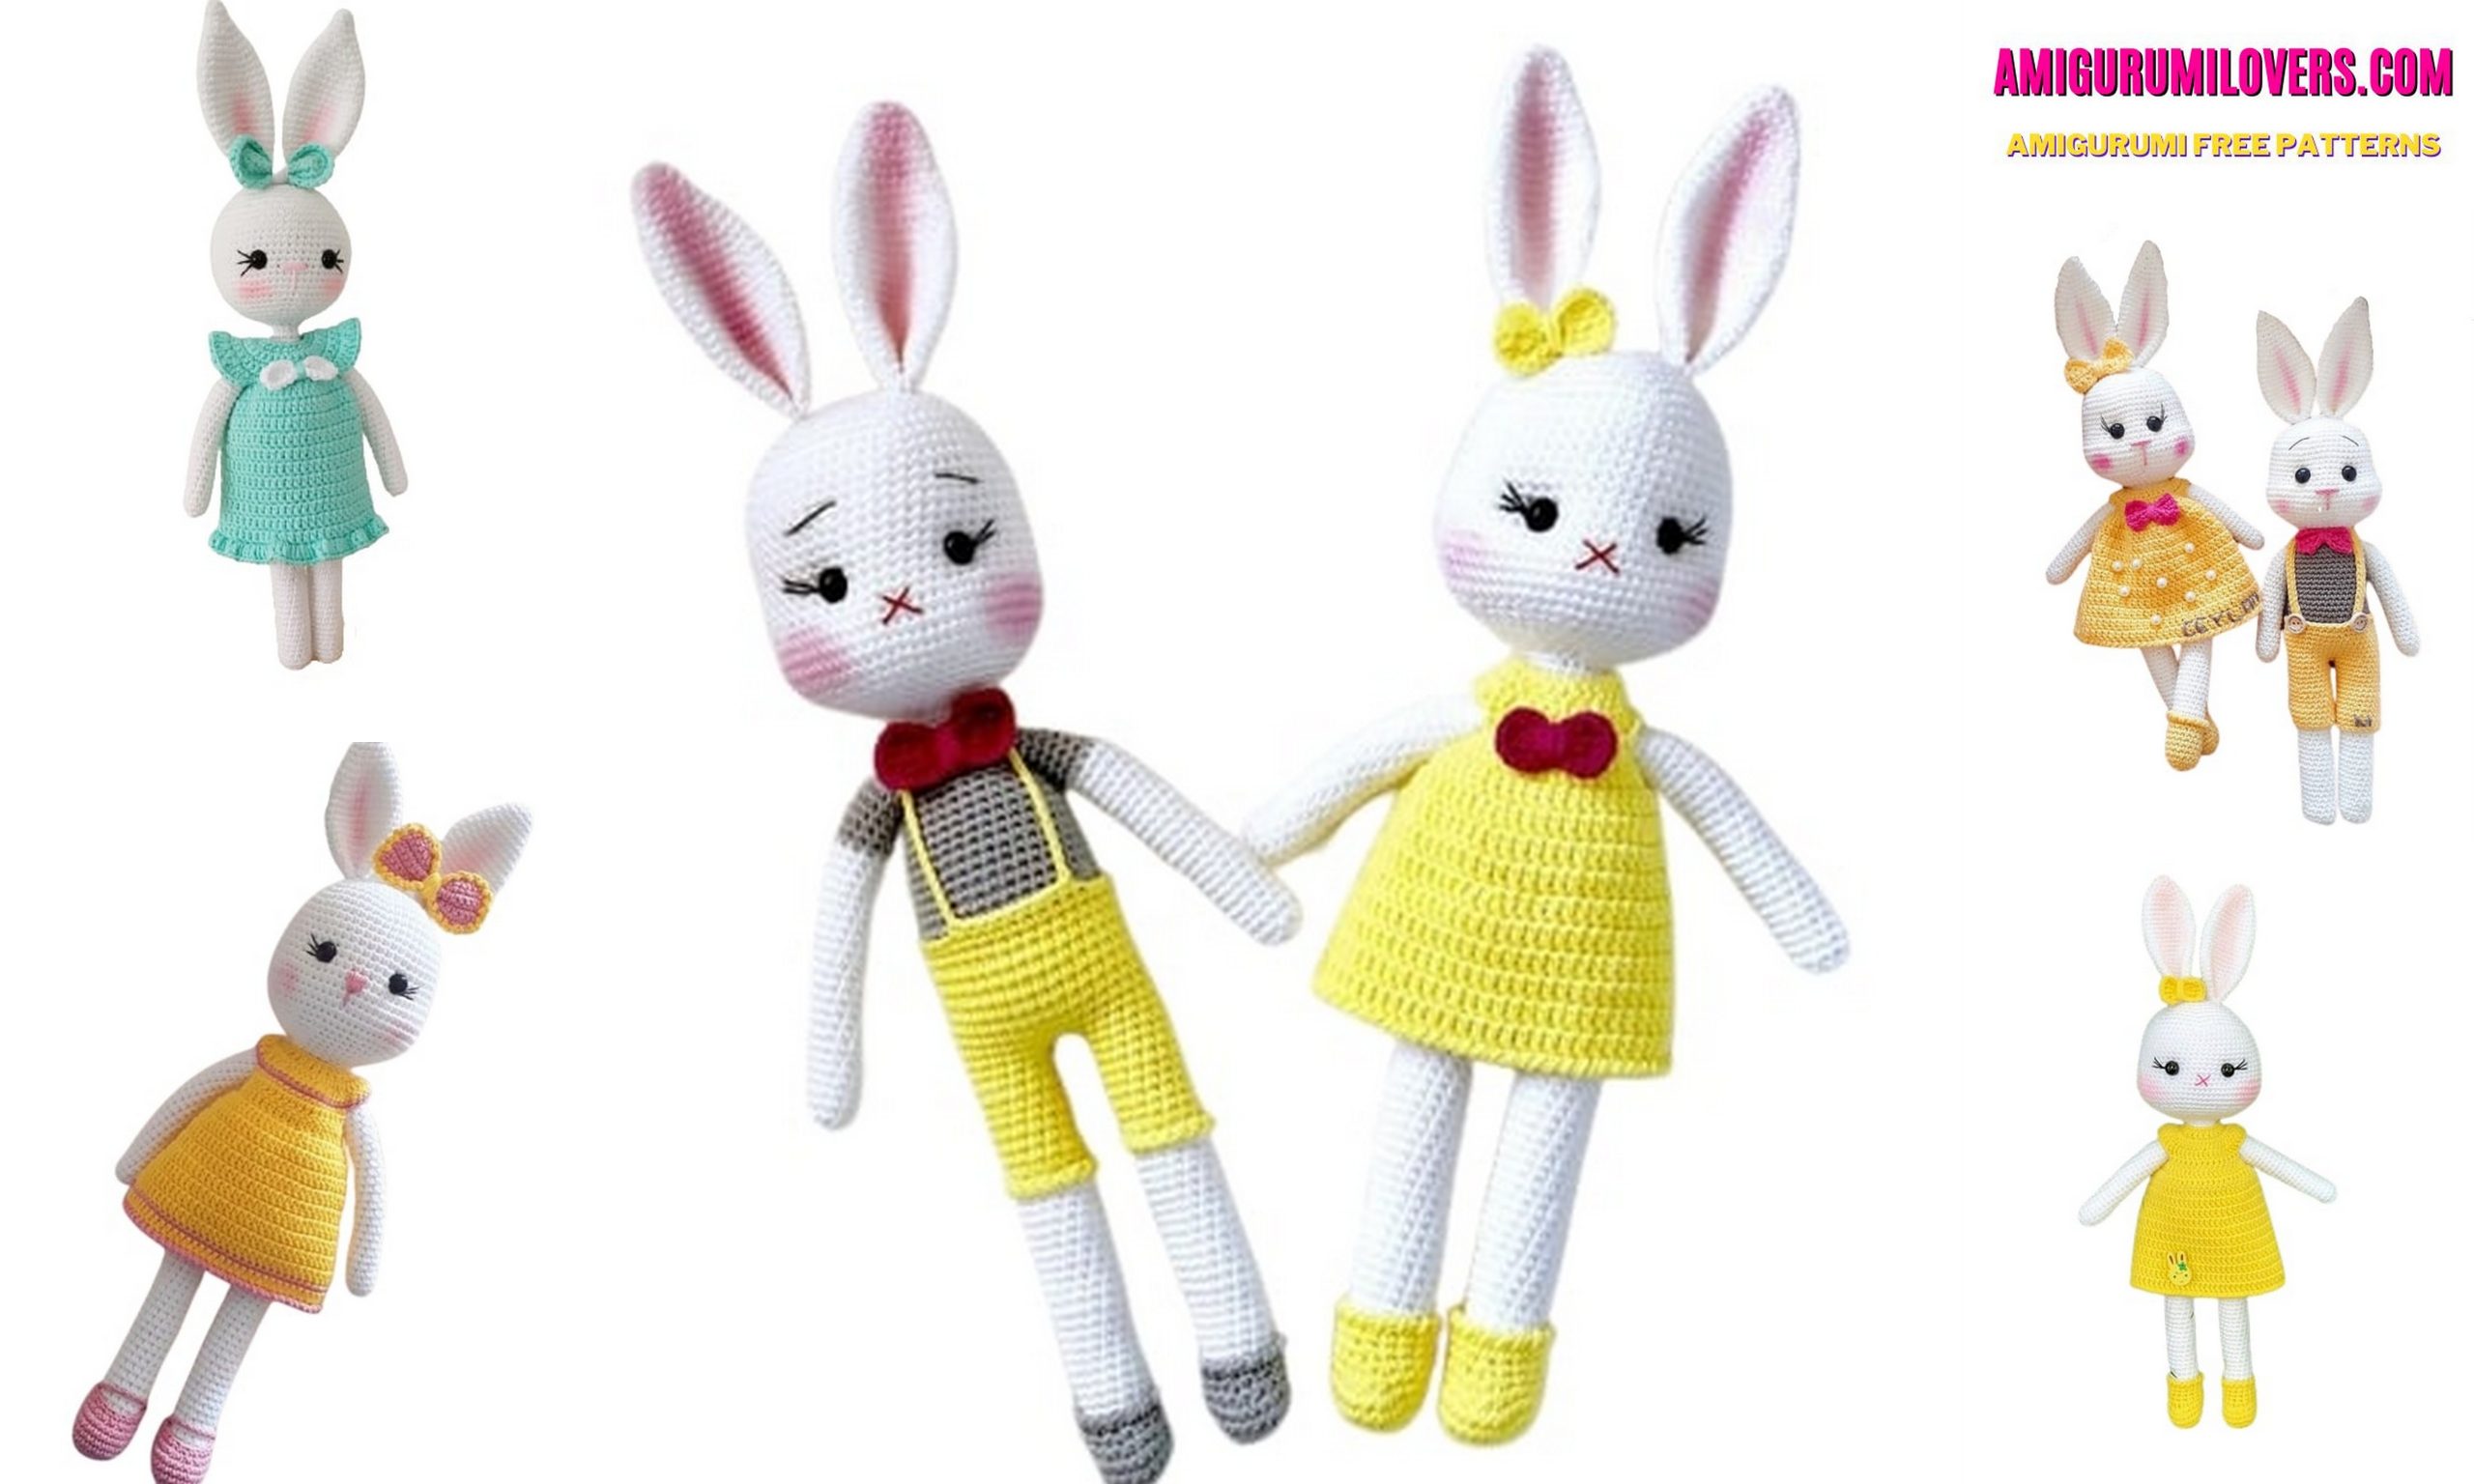
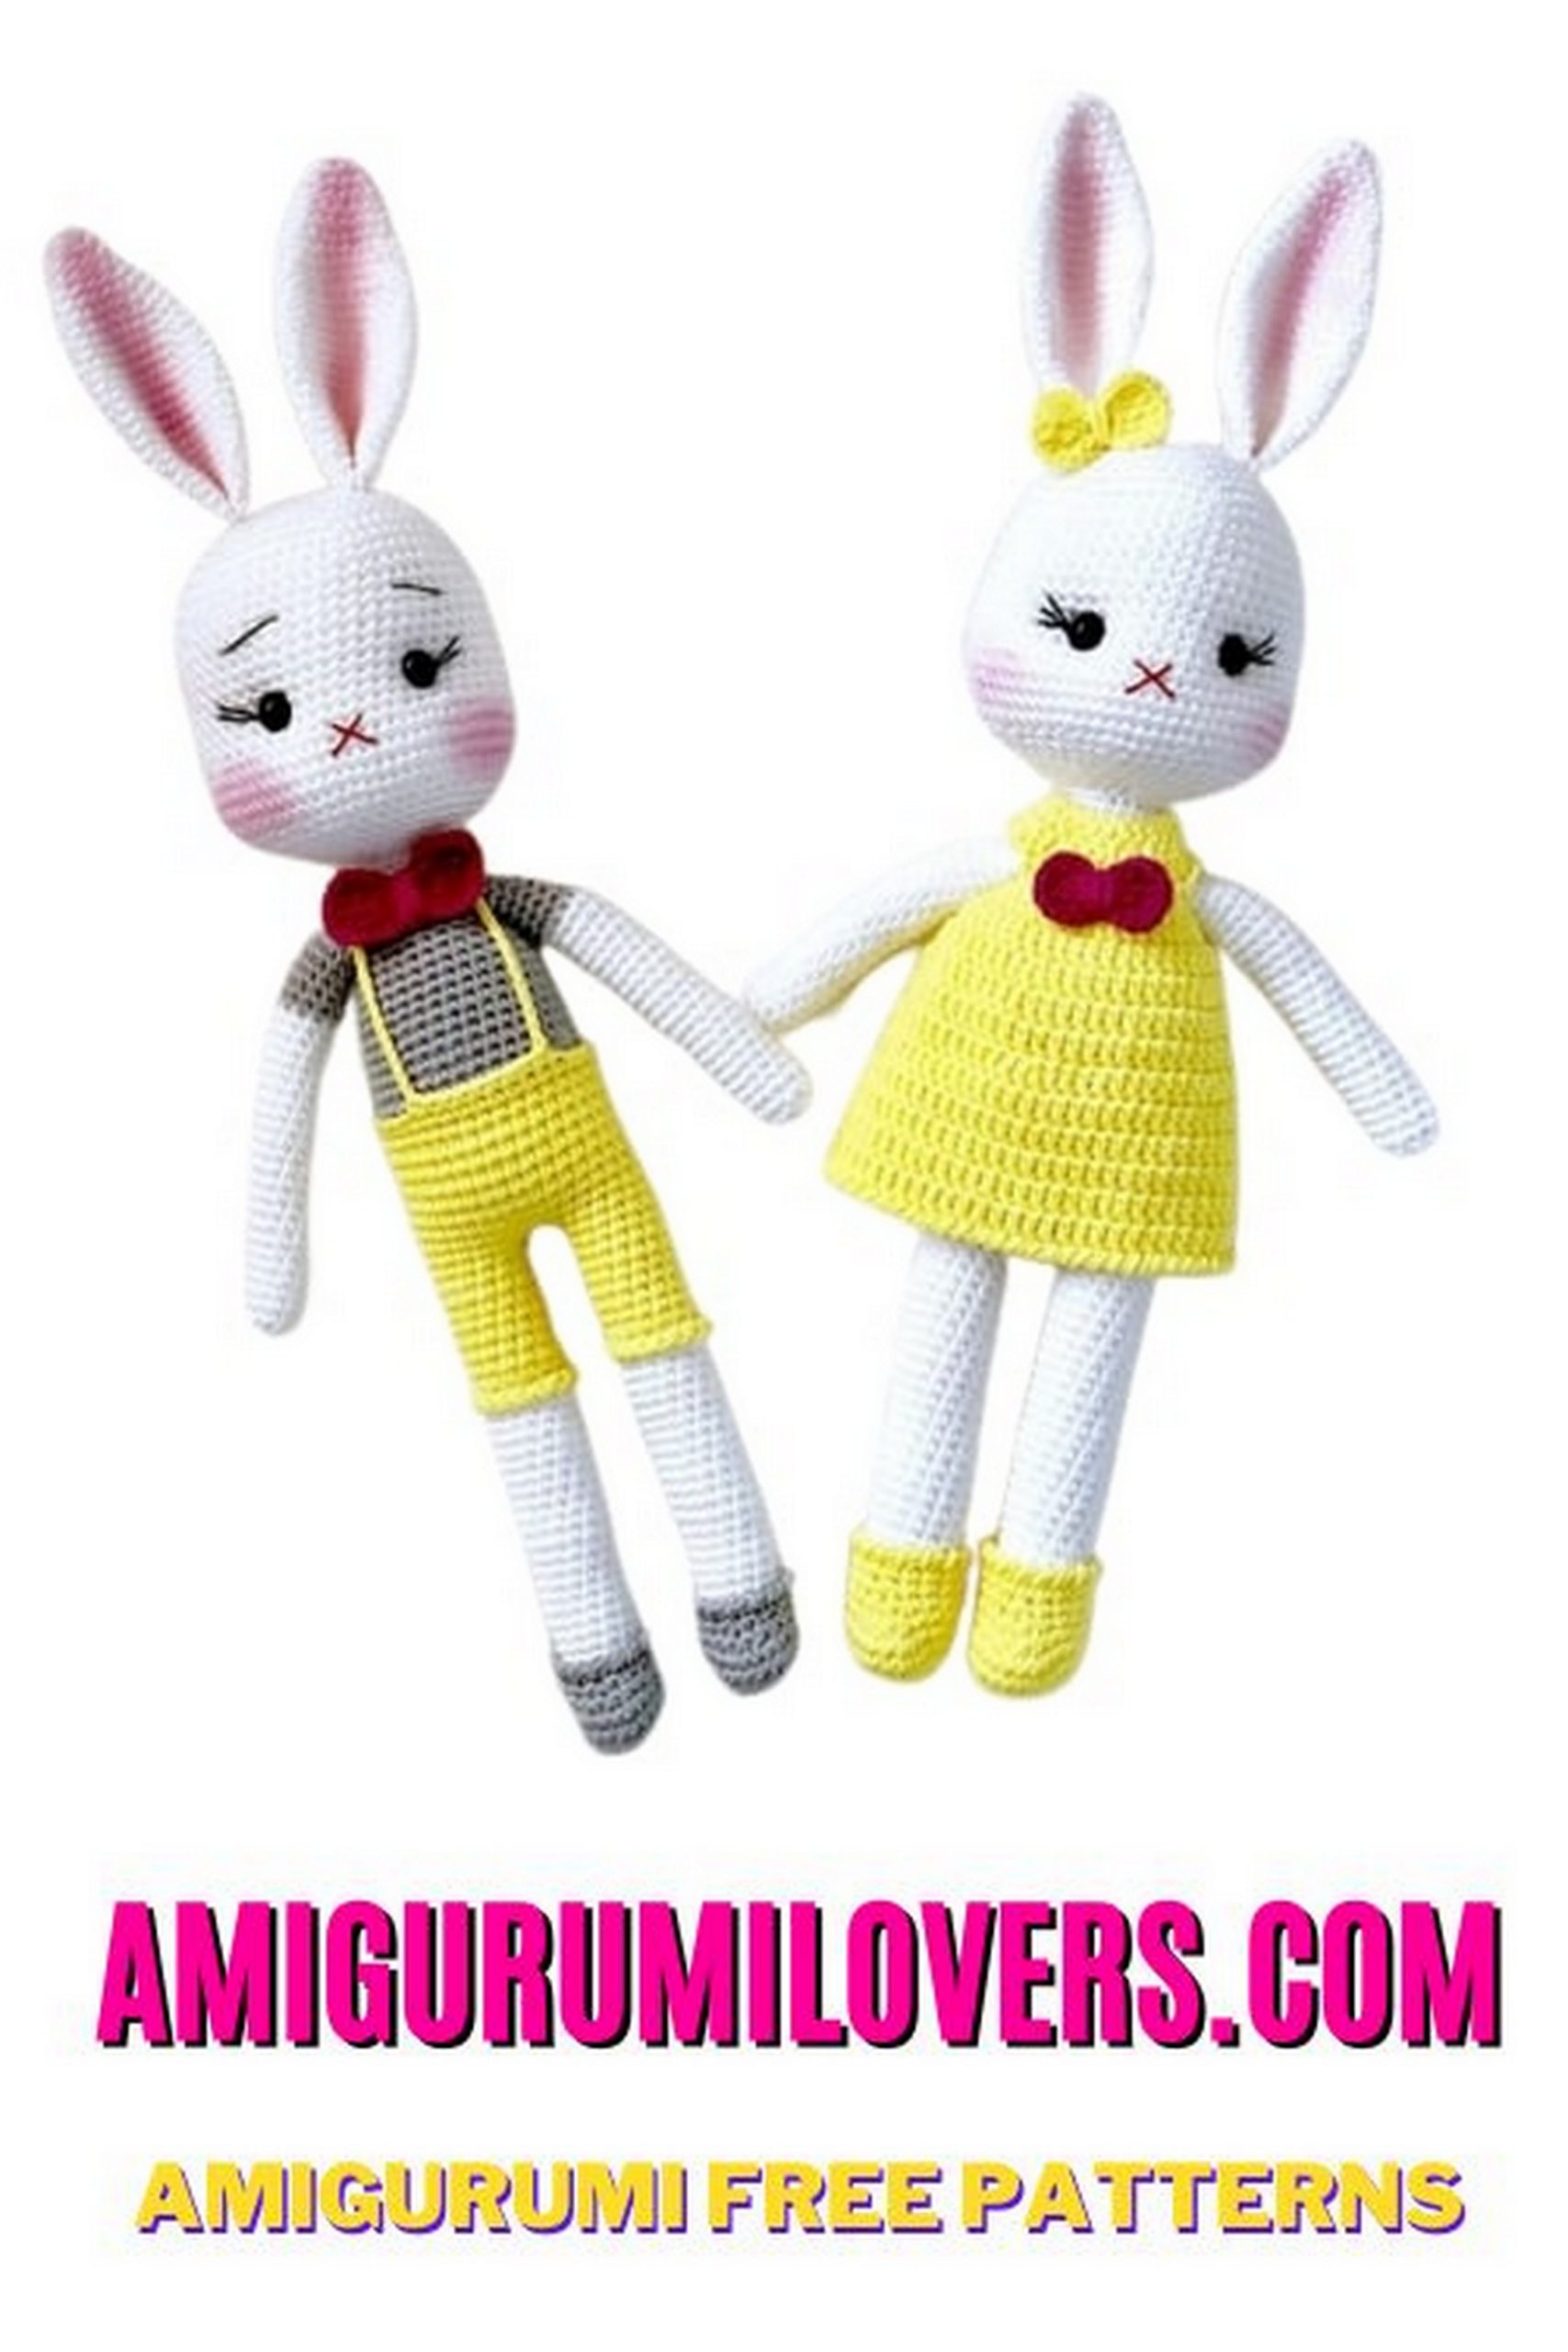
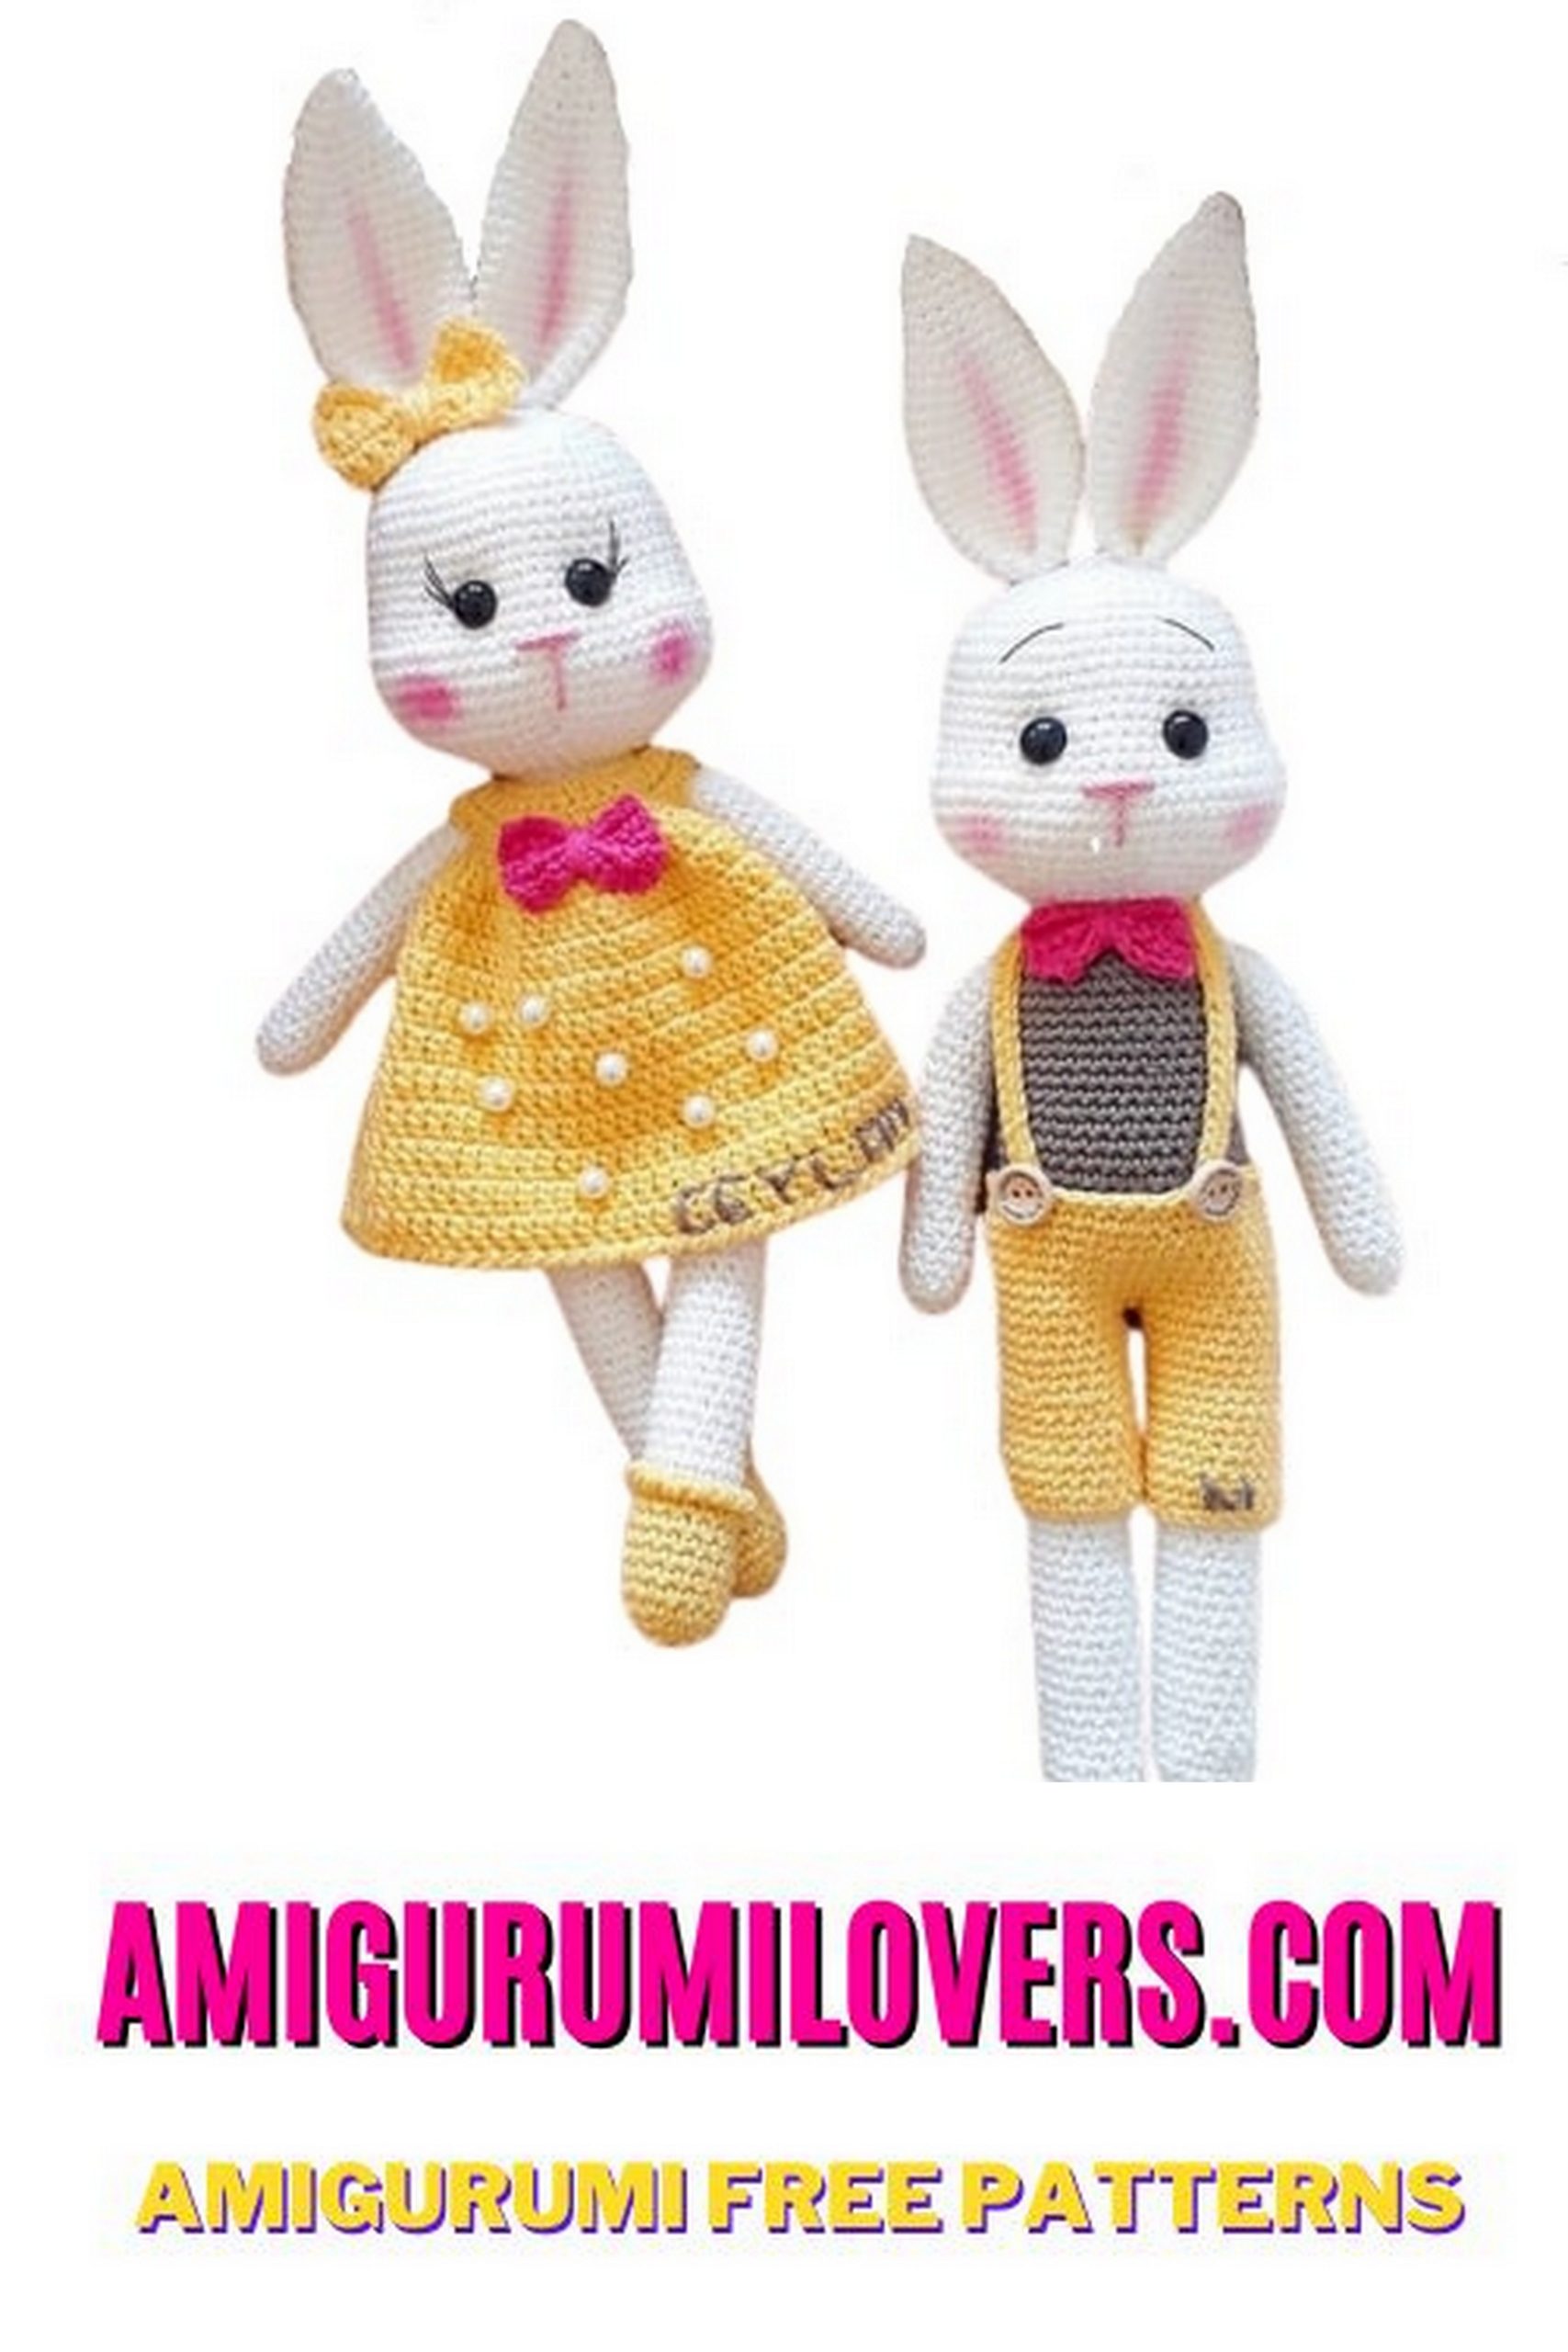
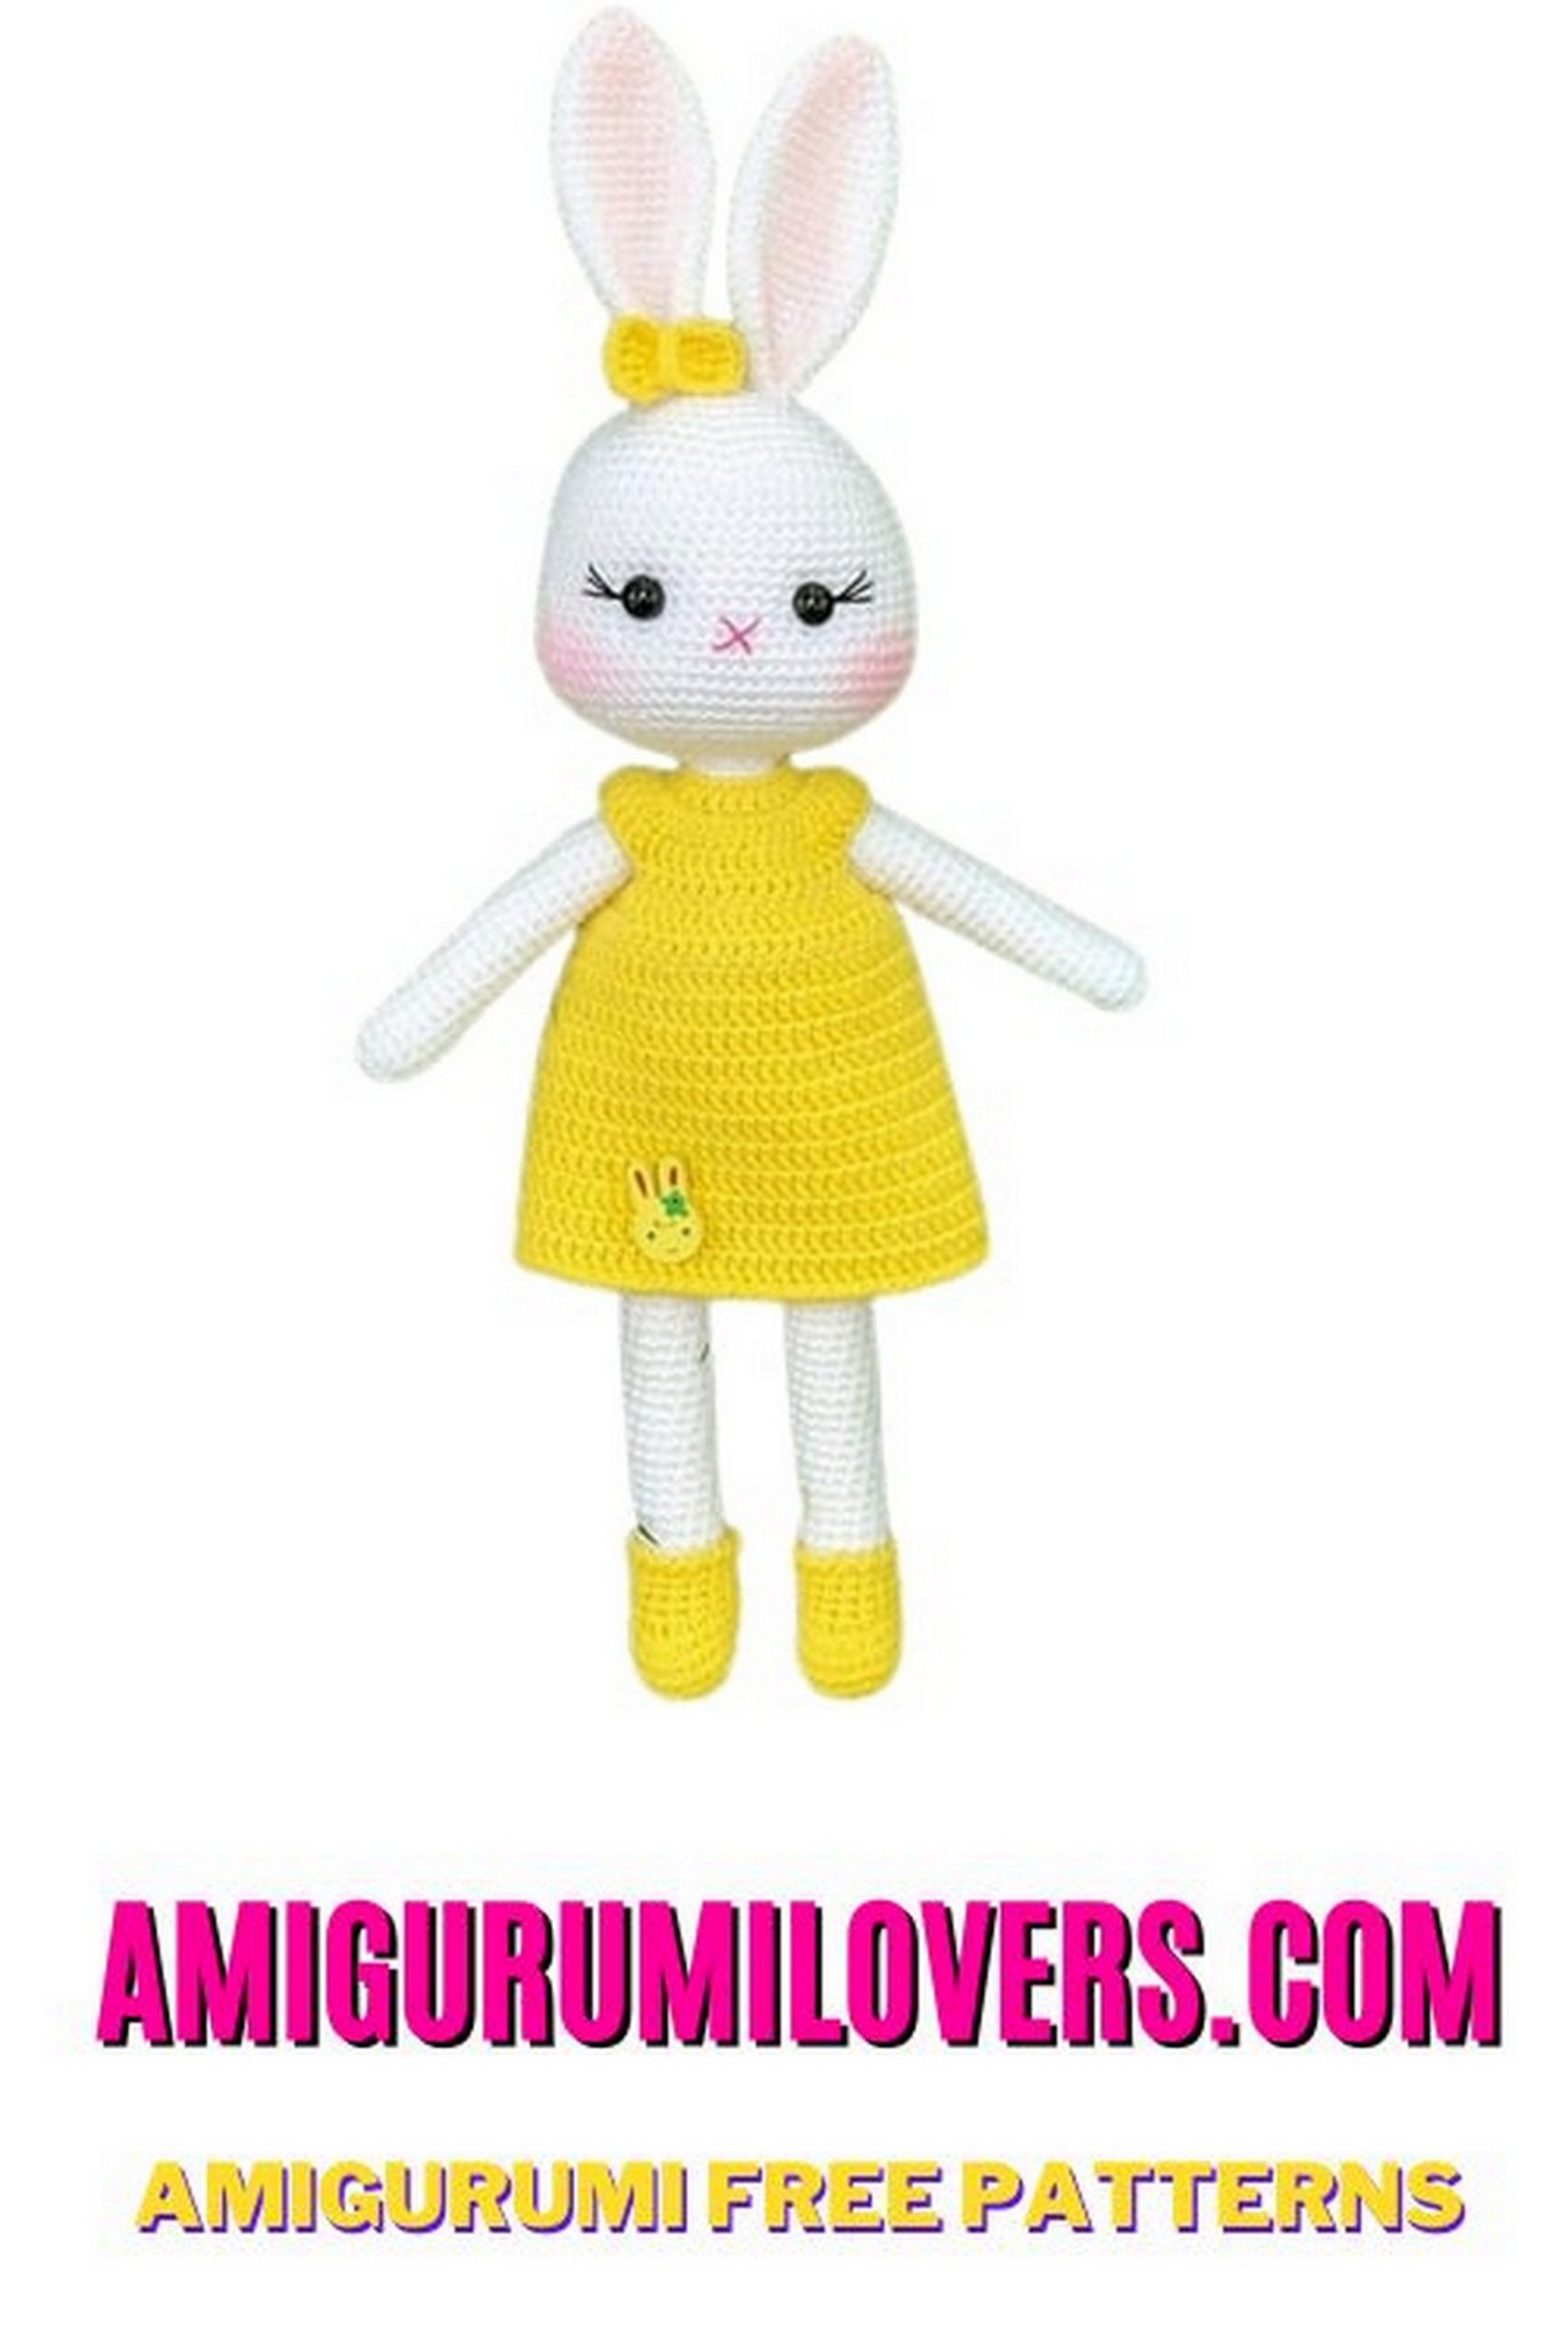
Cute Bunny Amigurumi Free Pattern: Craft Your Adorable Crochet Bunny Buddy
You may also enjoy exploring our free amigurumi patterns and other popular amigurumi animal patterns available on our website.
Welcome to our delightful crochet corner, where crafting magic happens one stitch at a time! If you’re here, it’s likely that you share a love for all things cozy and cute, and what could be cuter than a hand-crocheted bunny? In this blog post, we’re thrilled to share a free amigurumi pattern that will help you create your very own adorable crochet bunny buddy. Amigurumi, the Japanese art of crocheting small, stuffed toys, has taken the crafting world by storm, and with this easy-to-follow pattern, you’ll be well on your way to making a huggable, charming bunny that’s perfect for both children and adults alike.
This bunny amigurumi pattern is designed with beginners in mind, offering clear instructions that will guide you through each step of the process. Whether you’re new to crochet or have some experience under your belt, this project is ideal for anyone looking to improve their skills while creating something truly special. You don’t need to be an expert crocheter to enjoy the satisfaction of crafting your very own plush companion. With a few basic crochet stitches, a touch of creativity, and some fun yarn, you’ll be amazed at what you can accomplish.
Imagine snuggling up with your finished bunny or gifting it to a loved one. Handmade items carry a personal touch that store-bought toys simply can’t match. Not only will your bunny make for a compelling addition to your home decor, but it will also serve as a wonderful source of comfort and joy for anyone lucky enough to receive it. In our modern world, where digital devices dominate our lives, taking the time to create something with your hands can be incredibly rewarding, promoting mindfulness and relaxation.
In this post, you’ll find a complete guide to making your crochet bunny buddy, including materials needed, along with detailed instructions that will walk you through the entire process from start to finish. We’ll also provide helpful tips along the way to ensure your crafting experience is as enjoyable as possible. Whether you opt for soft pastels or vibrant colors, you can customize your bunny’s appearance to reflect your unique style. The only limit is your imagination!
So grab your crochet hook, set aside some yarn, and let’s embark on a crafting adventure that will not only hone your crochet skills but also bring a smile to your face. Join the community of crochet enthusiasts and discover the joy of creating your very own bunny amigurumi. We can’t wait to see what you create!
Welcome to the enchanting world of crochet, where you can bring a fluffy friend to life with our Cute Bunny Amigurumi free pattern. This delightful project is perfect for crafters of all levels, from beginners seeking a charming introduction to crochet to experienced hands looking for a fun and rewarding project. Join us as we unravel the steps to create your very own cuddly bunny buddy!
The Cute Bunny Amigurumi free pattern is your ticket to creating an irresistibly adorable crochet bunny. This pattern provides step-by-step instructions and tips to guide you through the crafting process. Whether you want to add a handmade touch to your home decor, create a heartfelt gift, or simply enjoy the therapeutic art of crocheting, this bunny is the perfect project. From its floppy ears to its fluffy tail, your finished amigurumi bunny will radiate charm and cuteness. Start crocheting today and hop into the world of handmade magic with your new bunny companion!
Abbreviations
Magic ring: Magic ring
SC: Single Crochet
Inc: Increase
Dec: Decrease
Blo: Knitting from the back lobe
Flo: Knitting from the front lobe
Ch: Chain
PATTERN
Head
1) Magic ring into 6sc
2) 6inc 12sc
3) (1sc 1inc) * 6 18sc
4) (2sc 1inc) * 6 24sc
5) (3sc 1inc) * 6 30sc
6) (4sc 1inc) * 6 36sc
7) (5sc 1inc) * 6 42sc
8) (6sc 1inc) * 6 48sc
9) (7sc 1inc) * 6 54sc
10-20) 54sc
21) 13sc (1sc 1inc) * 5 7sc (1sc 1inc) * 5 14sc 64sc
22-26) 64sc
27) 13sc (1sc 1dec) * 5 7sc (1sc 1dec) * 5 14sc 54sc
More of your head
28) (7sc 1dec) * 6 48sc
29) (6sc 1dec) * 6 42sc
30) (5sc 1dec) * 6 36sc
31) (4sc 1dec) * 6 30sc
32) (3sc 1dec) * 6 24sc
33) (2sc 1dec) * 6 18sc
10 mm eyes to be fitted between rows 18 and 19
Ears
1) Magic ring into 6sc
2) (1sc 1inc) * 3 9sc
3) (2sc 1inc) * 3 12sc
4) (3sc 1inc) * 3 15sc
5) (4sc 1inc) * 3 18sc
6) (5sc 1inc) * 3 21sc
7-9) 21sc
10) (6sc 1inc) * 3 24sc
11-21) 24sc
22) (6sc 1dec) * 3 21sc
23-25) 21sc
26) (5sc 1dec) * 3 18sc
27) (4sc 1dec) * 3 15sc
28) 15sc
(Tear off the rope long)
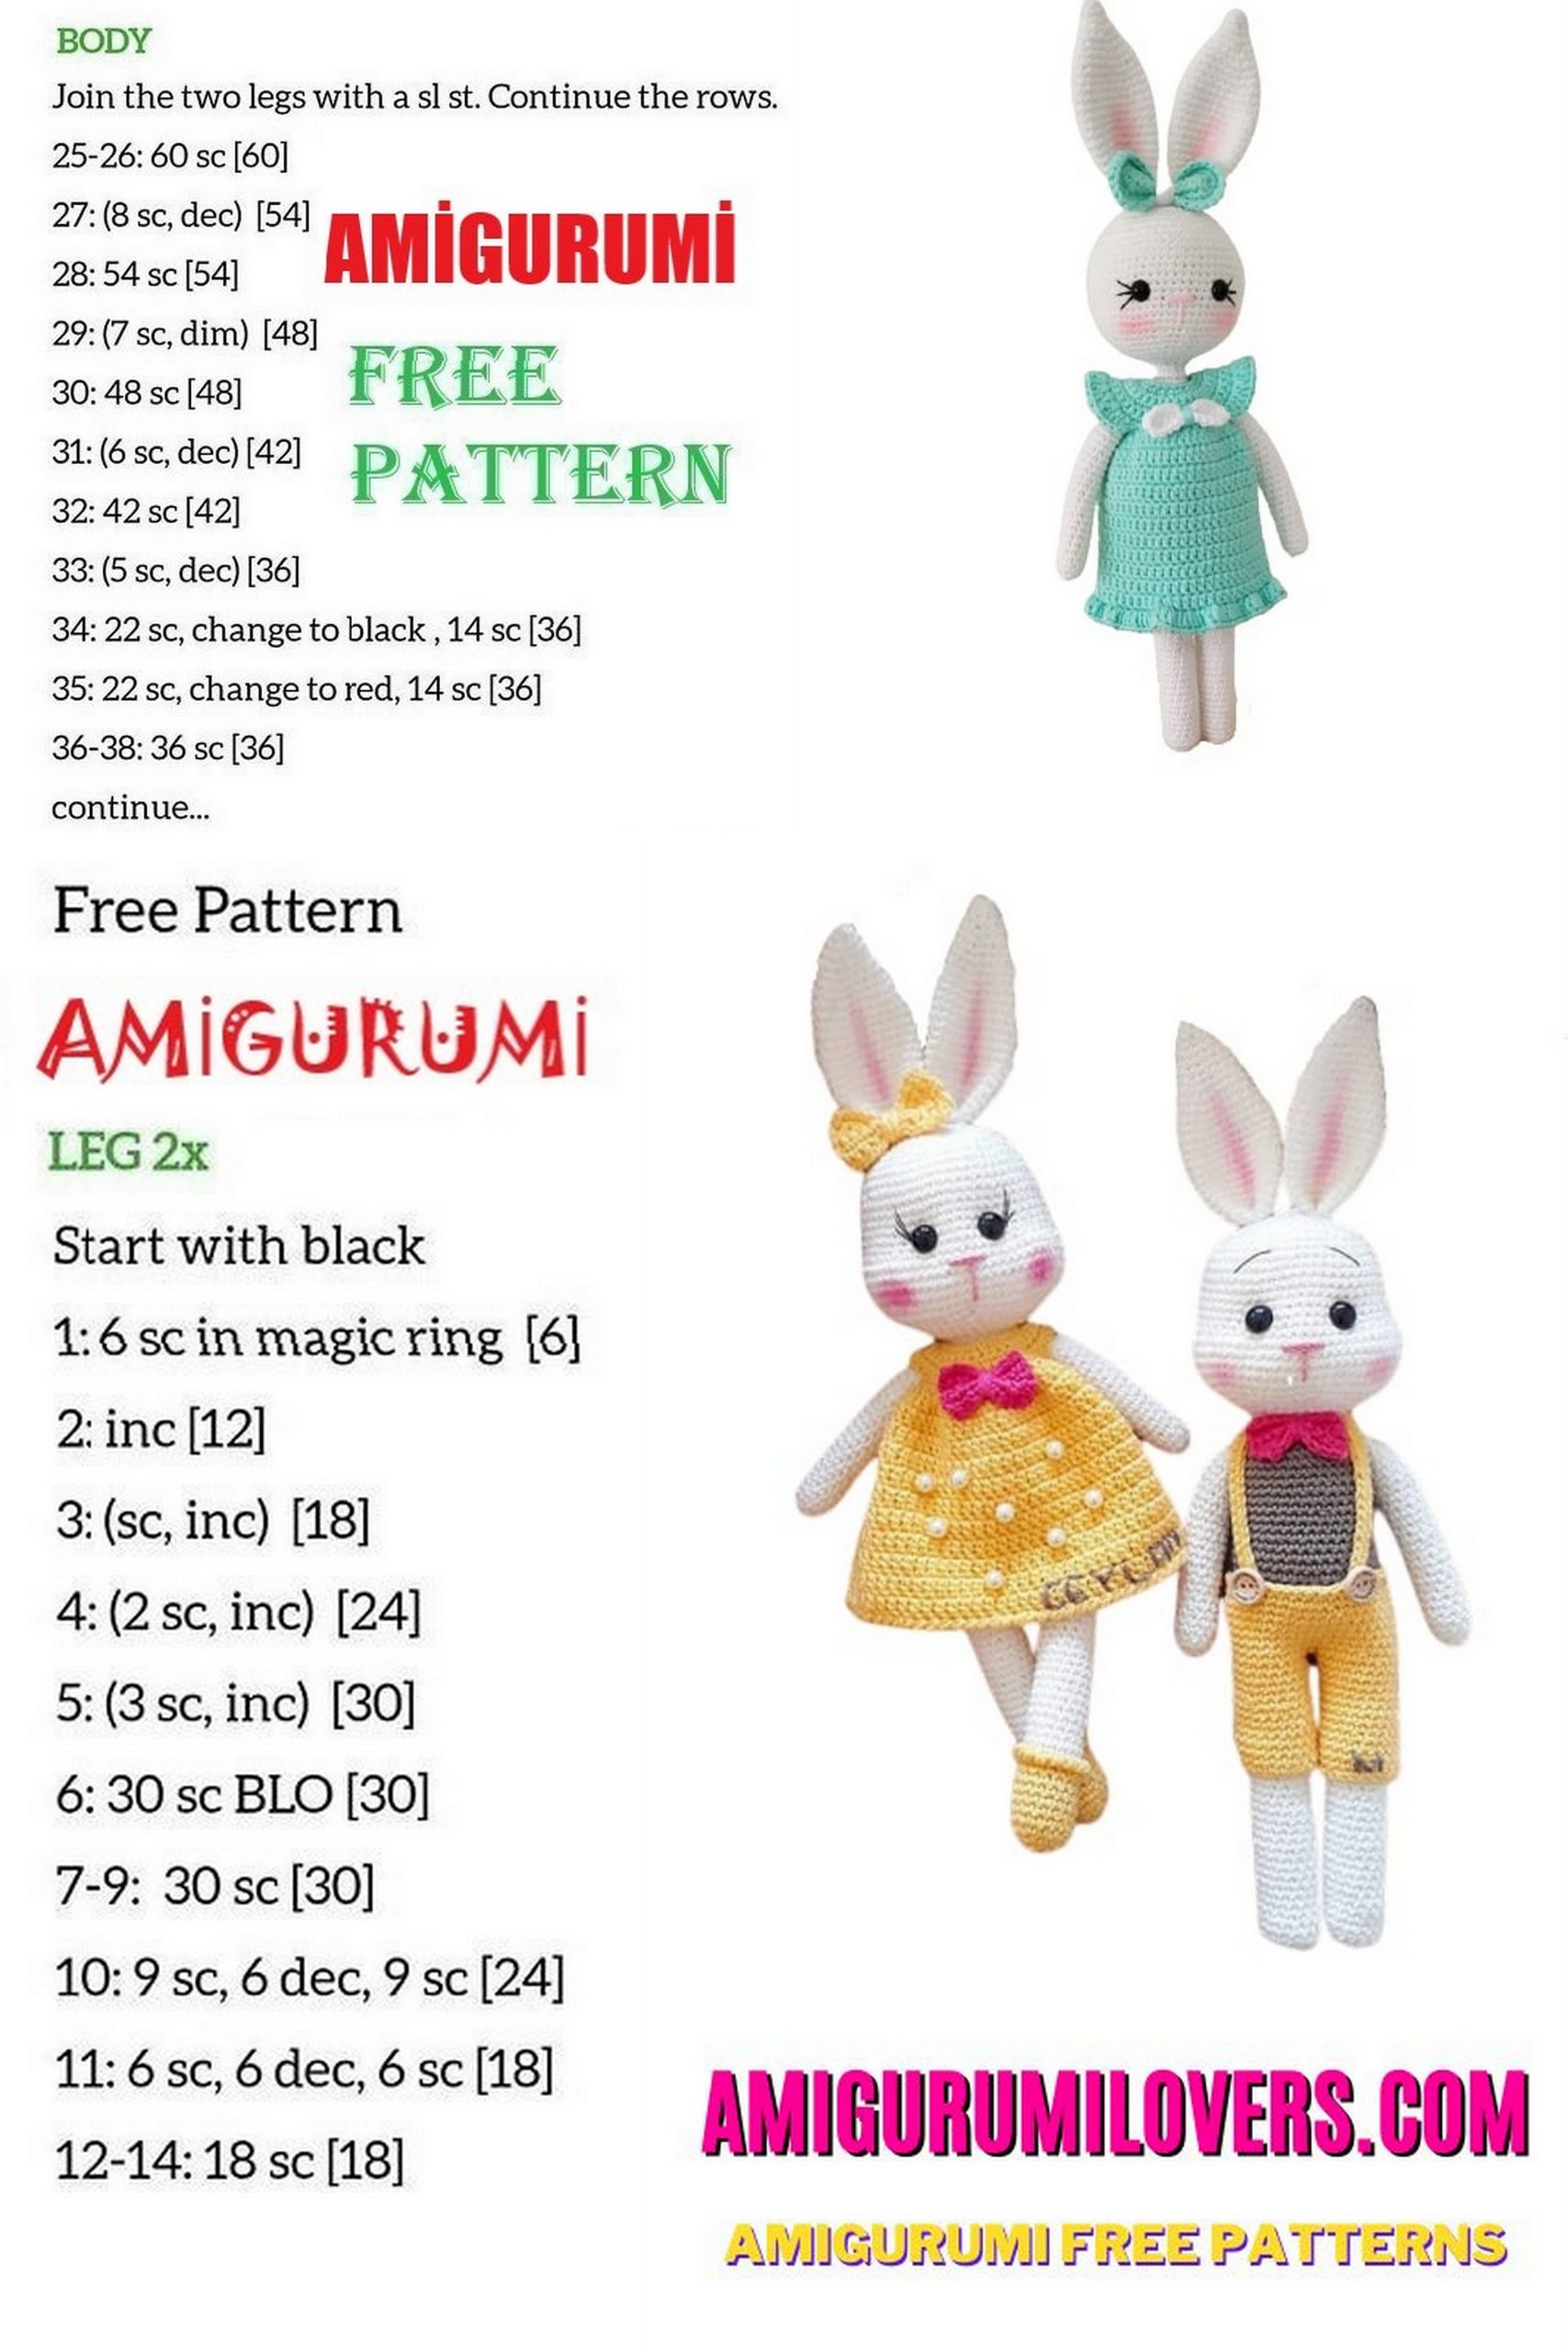
Leg and body
1) Magic ring into 6sc
2) 6inc 12sc
3) (3sc 1inc) * 3 15sc
4-27) 15sc Change color (switch to yellow)
28) 15sc
29) 15 sc as flo
30-40) 15sc
41) The second leg will be knitted in the same way and we will connect 4 chains.
42) 38sc
43-50) 38sc
51) 38sc as blo
Change color (switch to gray)
Continue where Blo is held
52-60) 38sc
61) 1dec 36sc from the sides
62) 1dec 34sc from the sides
63) Sides from 1dec to 32sc
64) Sides from 1dec to 30sc
65) 1dec 28sc from the sides
66) 1dec 26sc from the sides
67) 1dec 24sc from the sides
68) Put the arms on the sides and work together 24sc
69) 1dec 22sc from the sides
70) sides from 1dec to 20sc
71) 1dec 18sc from the sides (Cut the rope)
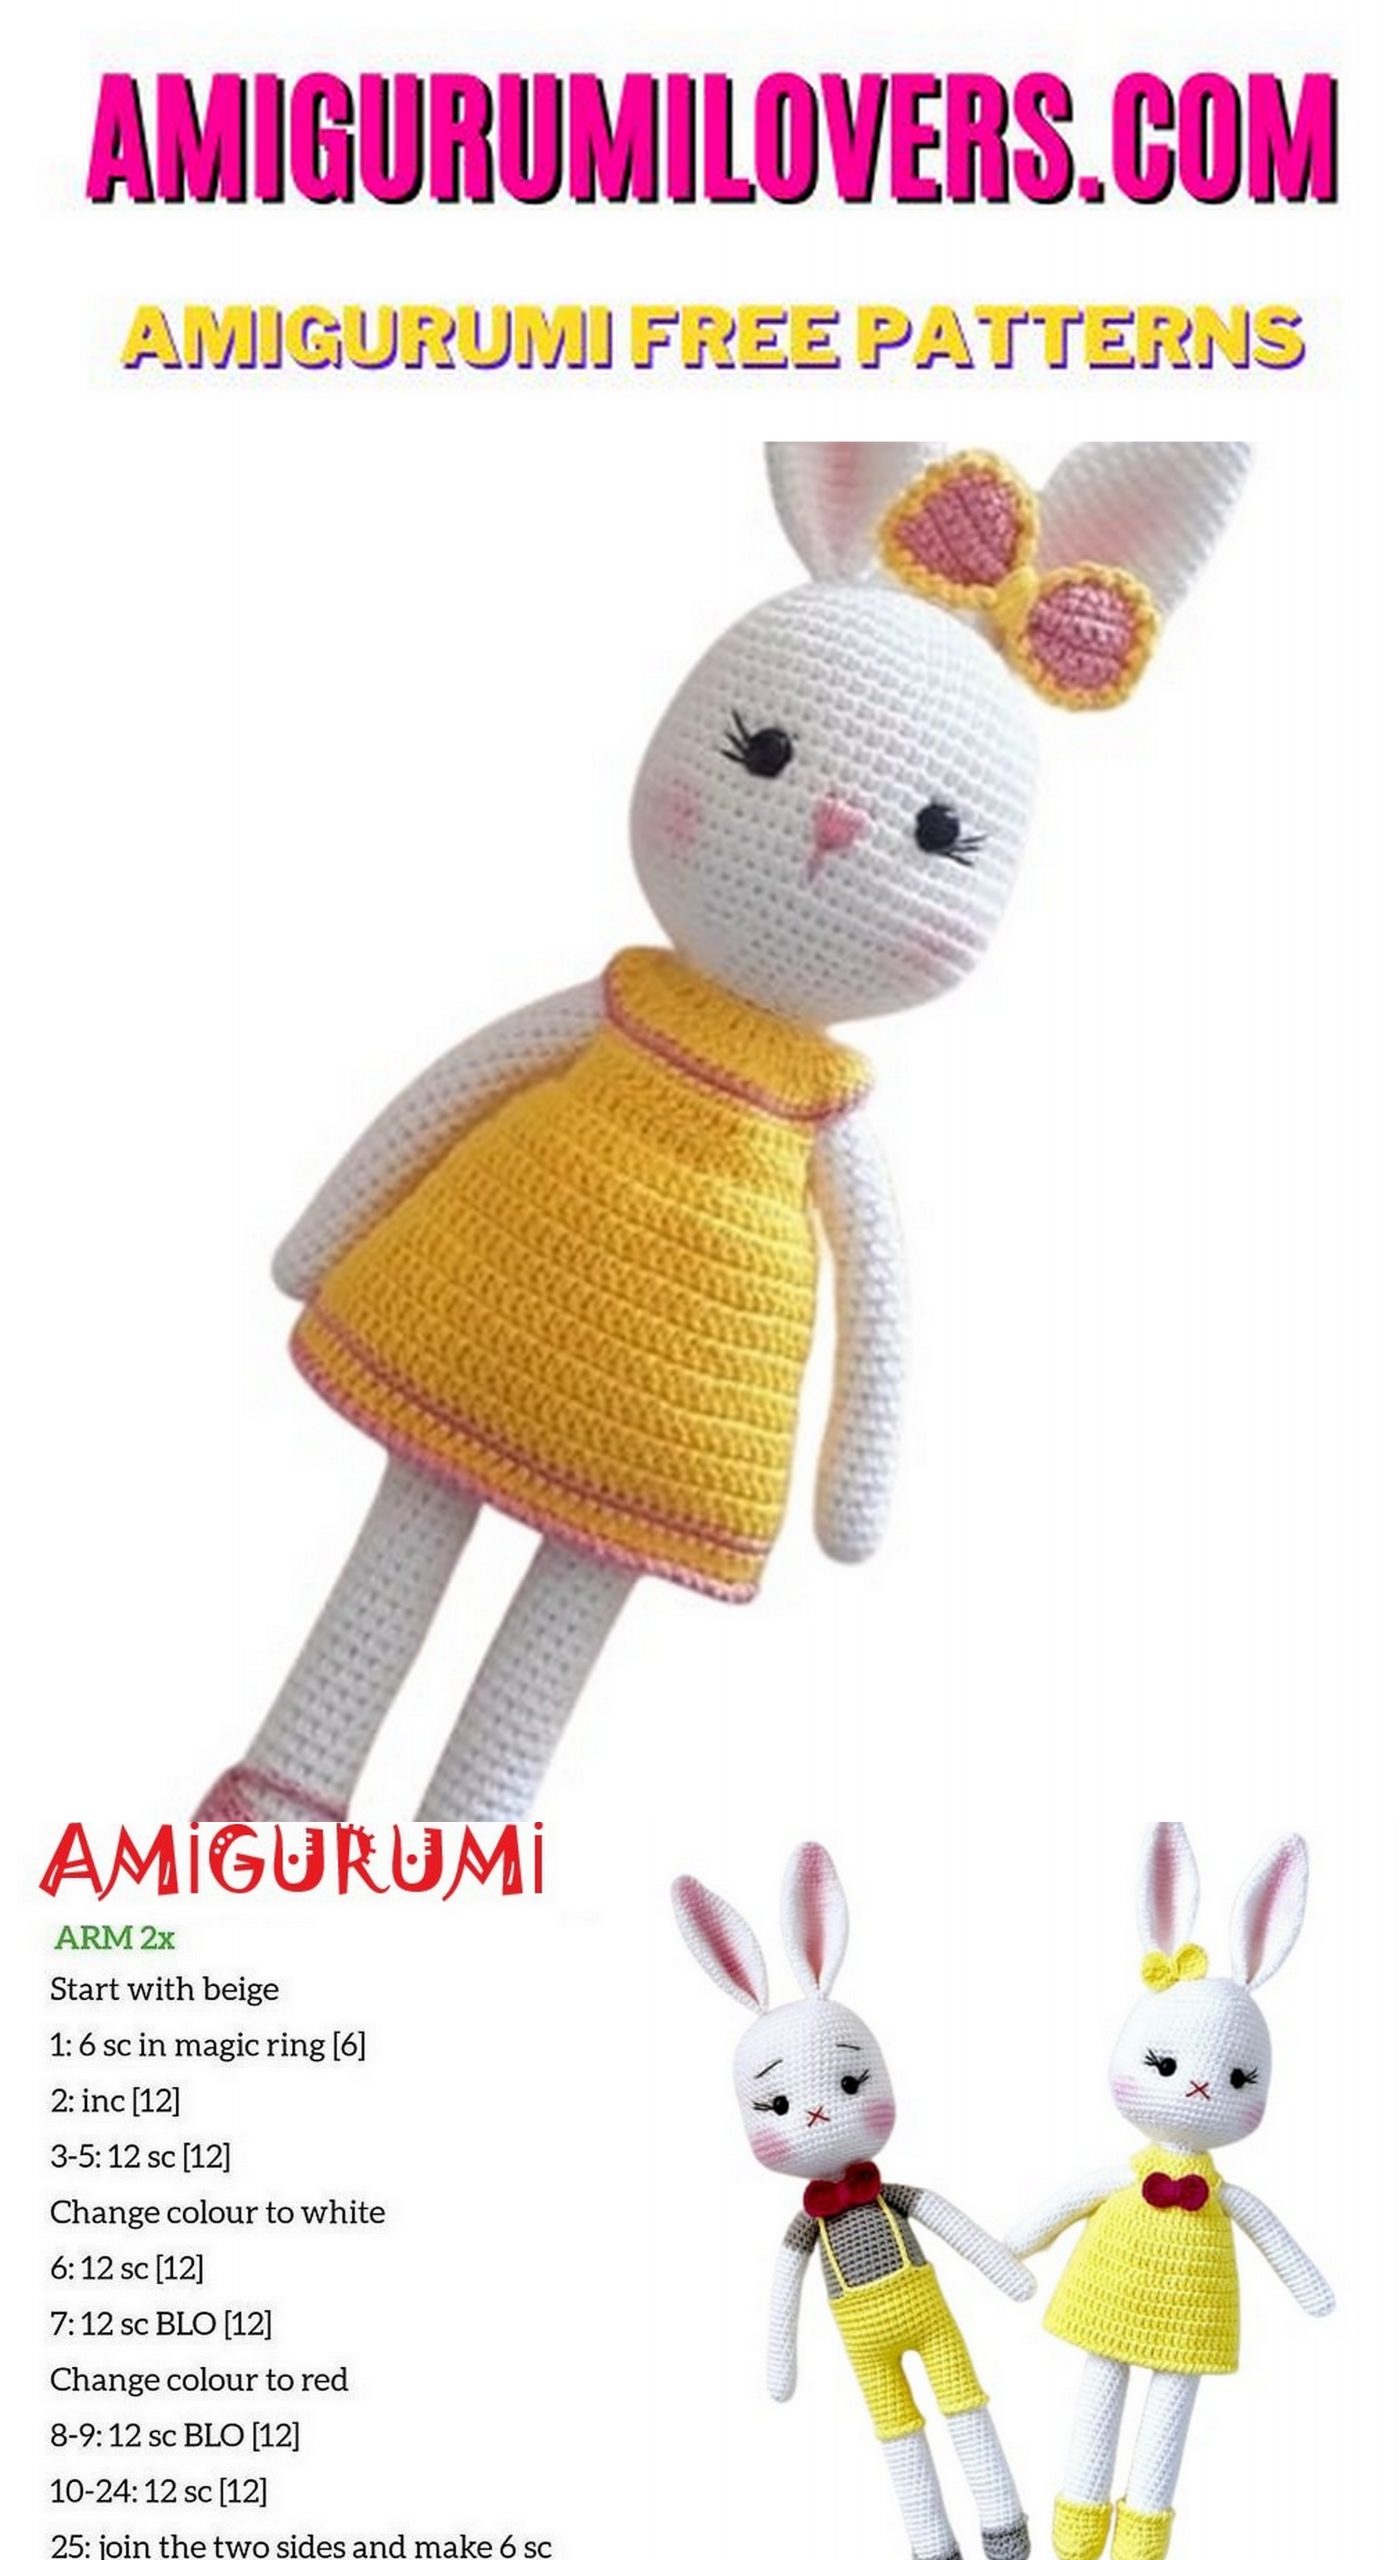
Arms
1) Magic ring into 6sc
2) 6inc 12sc
3-23) 12sc Change color (switch to gray)
24-28) 12sc
Cut and finish the rope)
Note: yellow HDC will be done on the flo on the leg)
Note: when the head is finished eye contouring will be done)
Straps Finally, starting with the center of the back of the rabbit sl-st by starting the front side of the chain by pulling the front part by adjusting the single crochet and 10sc or back to the back of the chain and sl-st pull.
Shoe
1) Magic ring into 6sc
2) 6inc 12 sc
3) (1sc 1inc) * 6 18sc
4) (2sc 1inc) * 6 24sc
5-6) 24sc
7) 8sc (4dec) 8sc 20sc
8) 6sc (4dec) 6sc 16sc
9-10) 16sc
11) Make the reverse single crochet leave the rope long.
Put your feet up and upright. If the tip of the shoe is filled with a little fiber looks better.
Before you leave, make sure to check out more free amigurumi crochet patterns and discover new ideas for your next project.
You can also browse our full amigurumi pattern archive for hundreds of beginner-friendly designs.