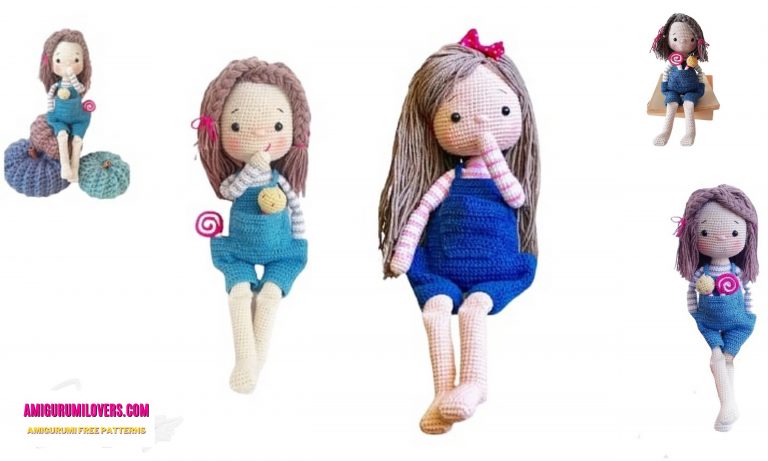
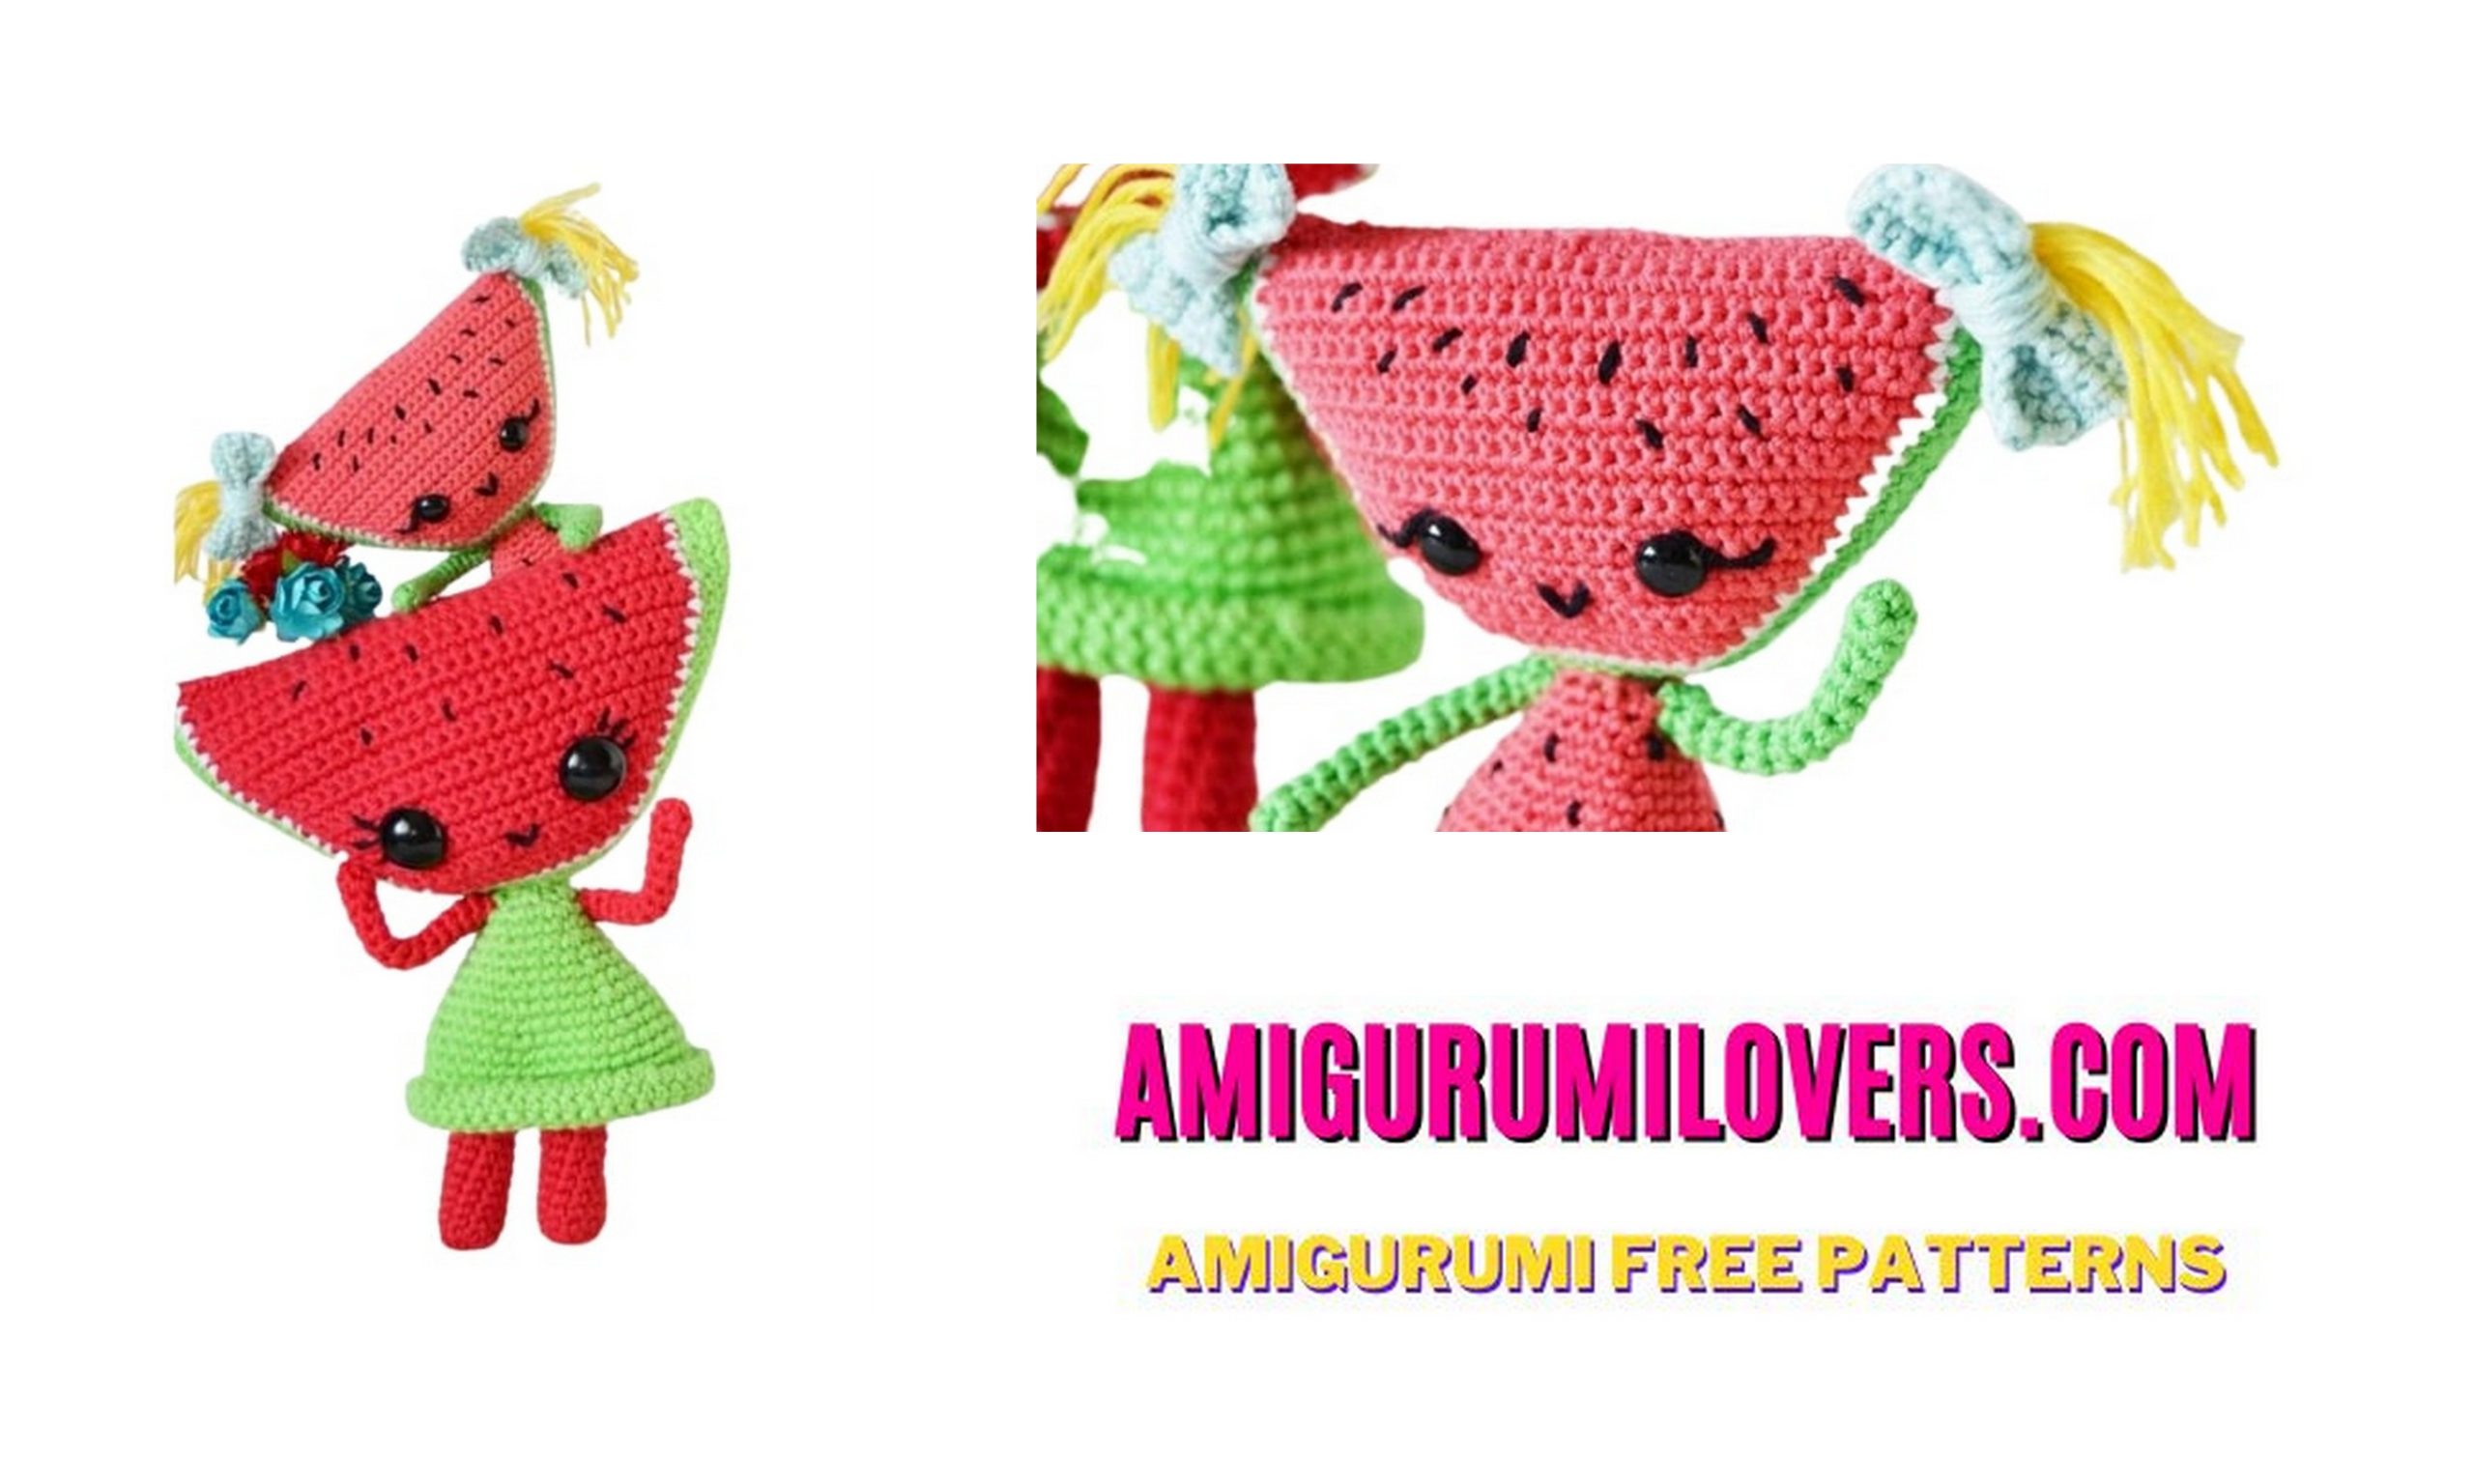
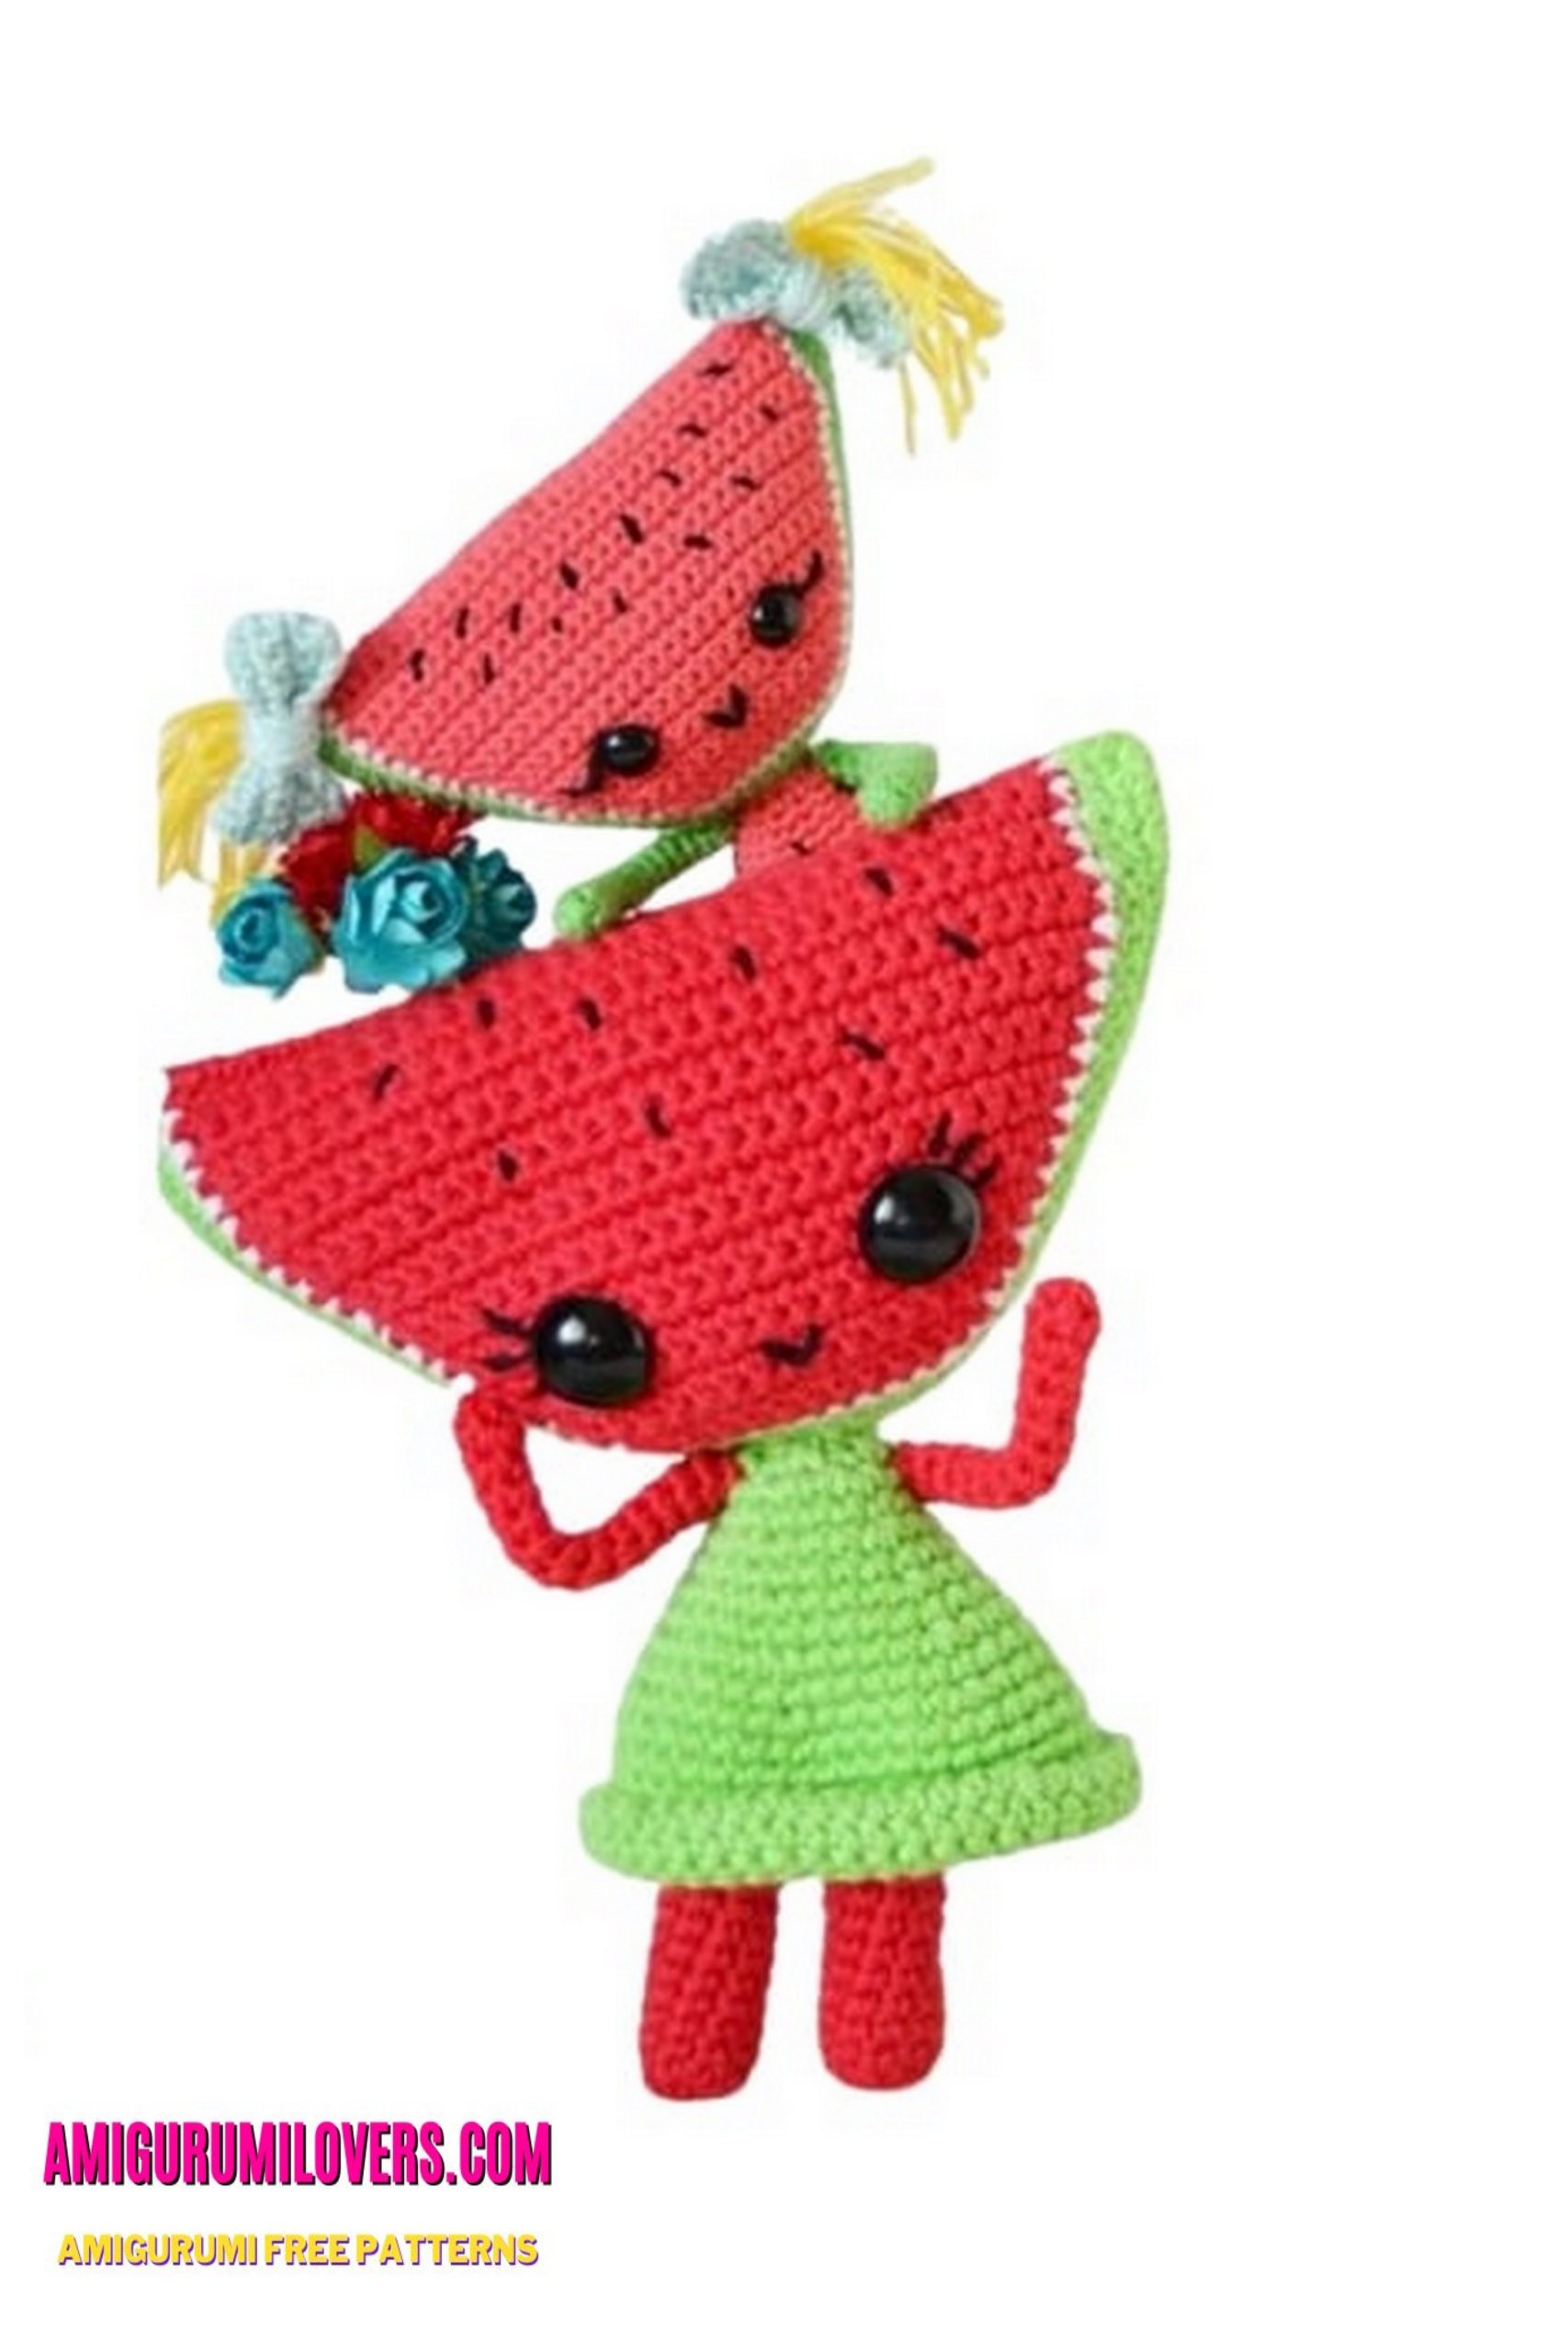
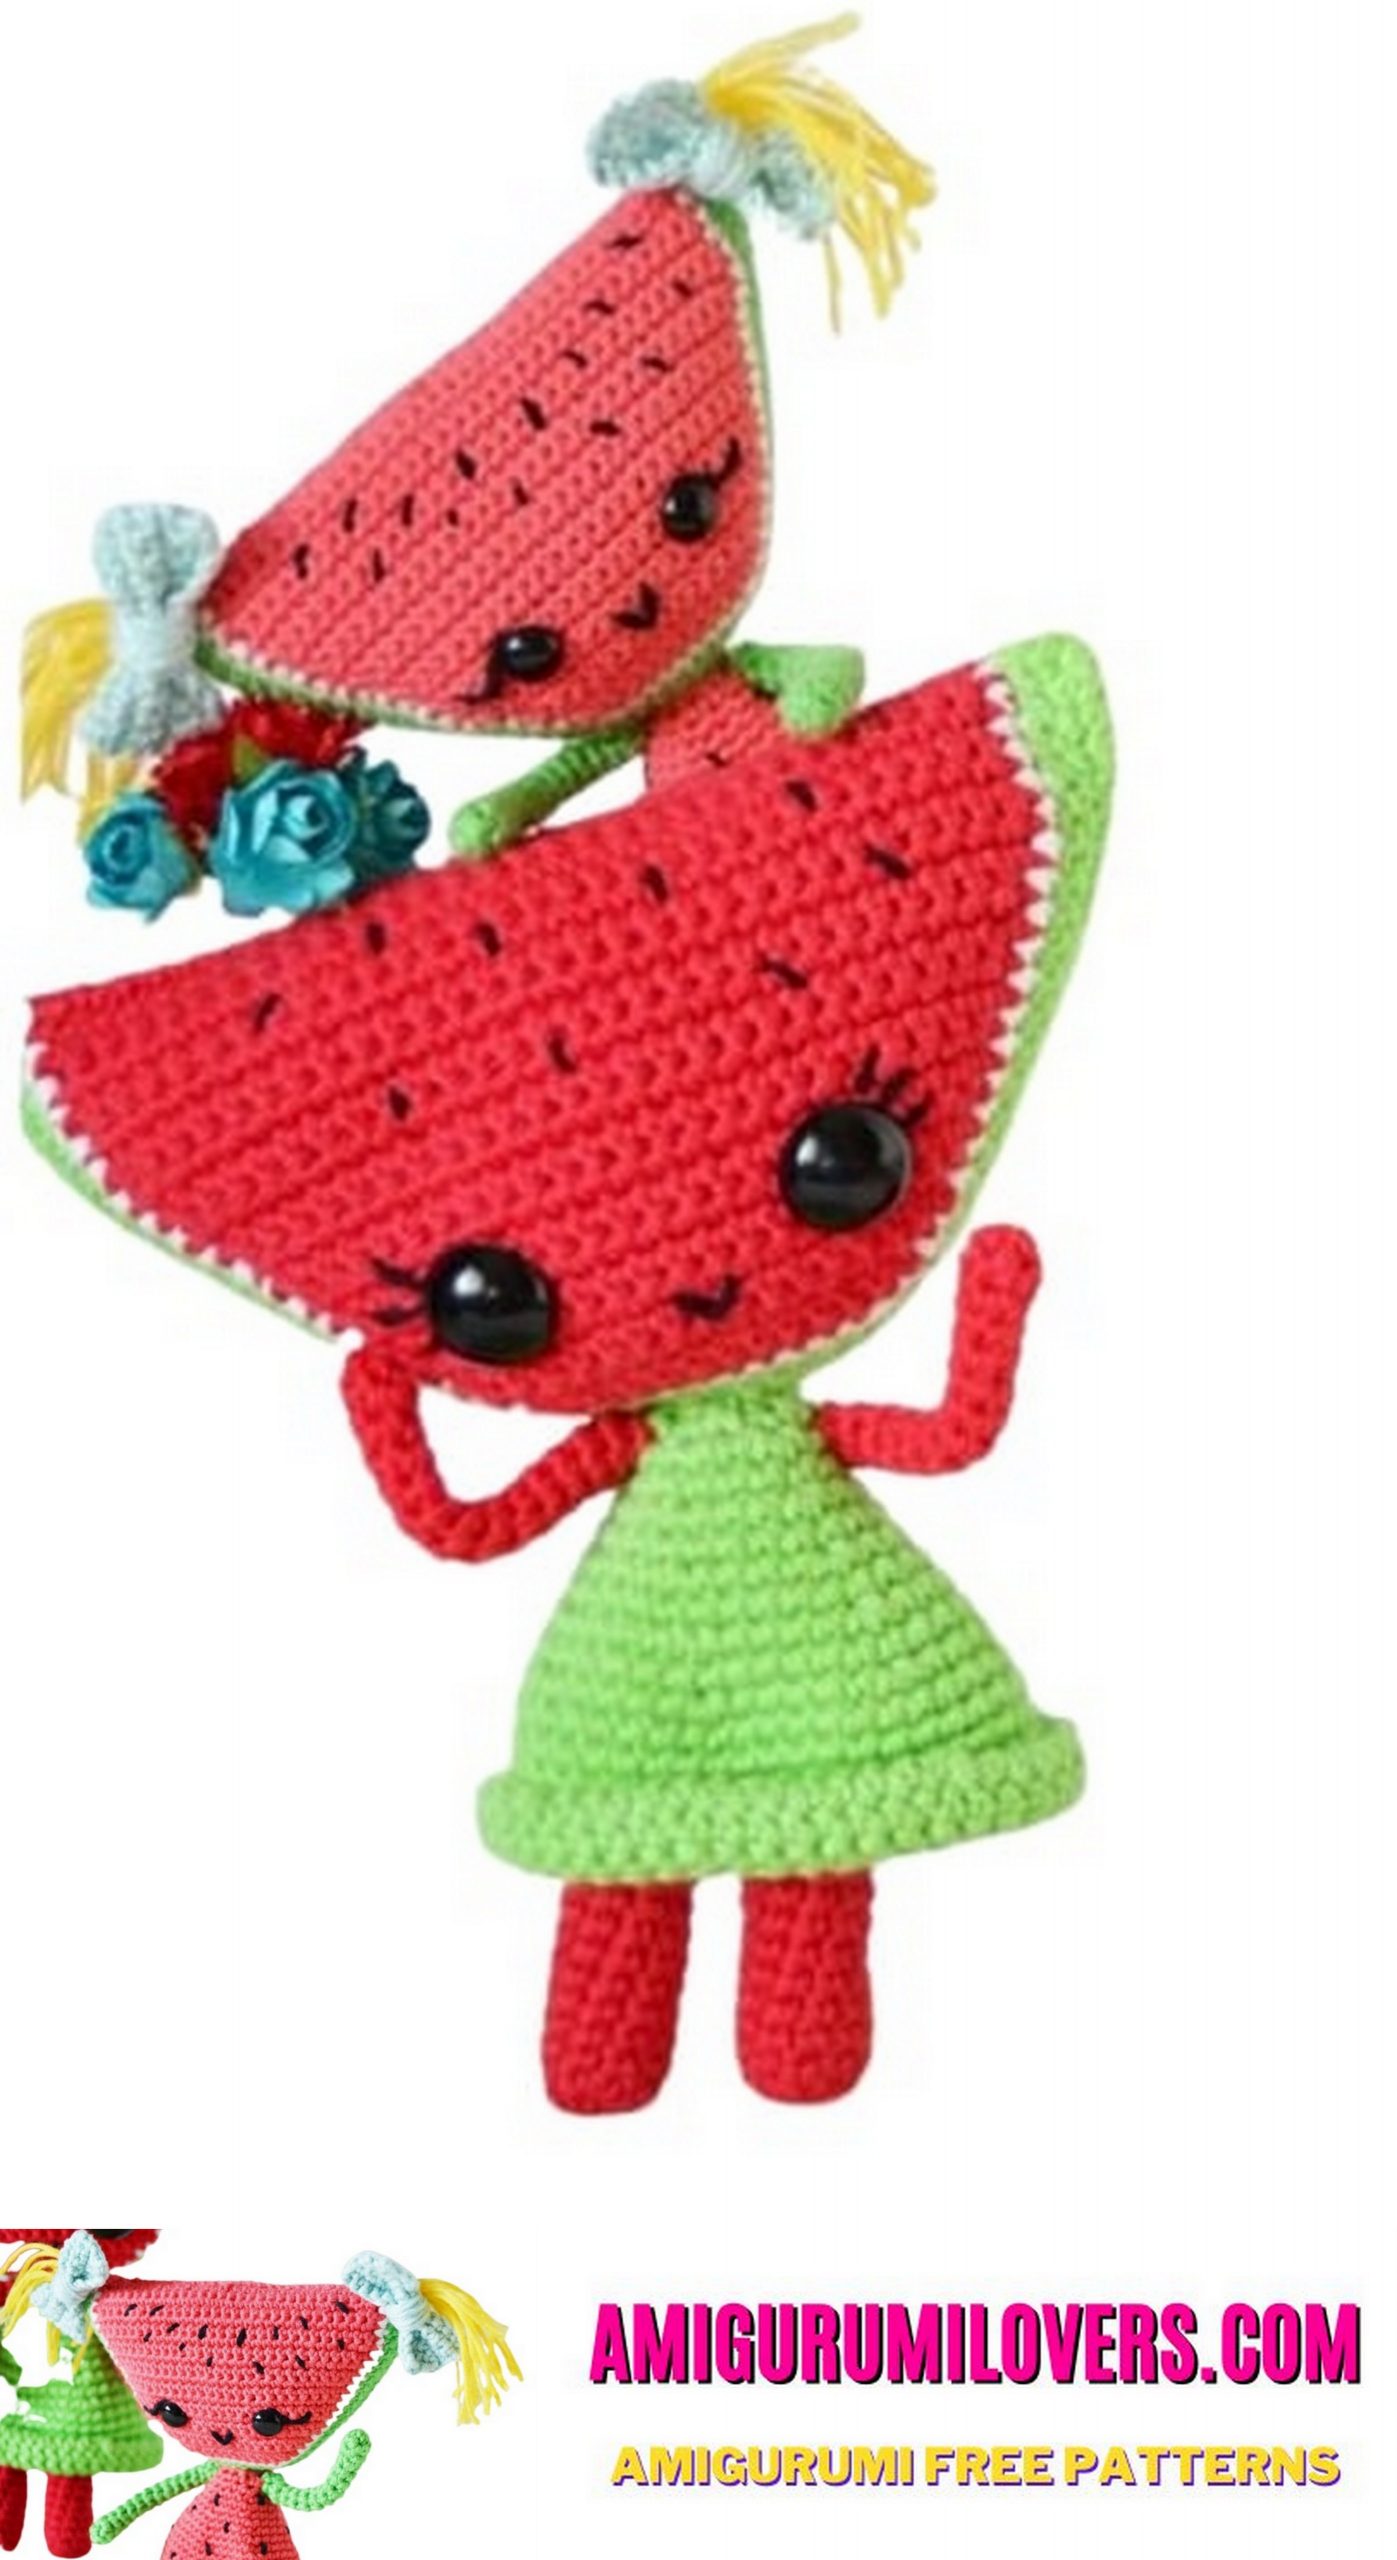
Amigurumi Watermelon Girl Free Crochet Pattern
You may also enjoy exploring our free amigurumi patterns and other popular amigurumi animal patterns available on our website.
Welcome to our crochet haven where creativity meets relaxation! If you’re searching for a delightful and engaging project to add to your amigurumi collection, you’ve come to the right place. Today, we’re excited to share a free crochet pattern for the “Amigurumi Watermelon Girl.” This charming little character captures the essence of summer and is perfect for anyone looking to brighten their day or add a handcrafted touch to their home. Whether you are an experienced crocheter or just starting out, this pattern is designed to be simple and enjoyable, making it perfect for beginners and seasoned crafters alike.
The Amigurumi Watermelon Girl is not just an adorable addition to your crochet repertoire; she’s also an excellent way to practice and hone your skills. With basic stitches and easy-to-follow instructions, our pattern allows you to explore various crochet techniques at your own pace. Plus, the vibrant colors of watermelon and the whimsical design of our little character will inspire your creativity and motivate you to complete the project. There’s something satisfying about creating a 3D piece that’s both fun and functional, and we believe this pattern could be the perfect introduction to the world of amigurumi for you.
One of the best parts about crocheting the Amigurumi Watermelon Girl is how customizable she can be. While we provide a detailed pattern, feel free to add your personal touch by experimenting with different colors or accessories. This not only enhances your crocheting experience but also allows you to create a truly unique piece. Whether you choose to make her a playful companion for your children or a charming decoration for your home, this project is both fulfilling and versatile.
As you dive into this project, keep in mind that the joy of crocheting comes not just from the finished product but from the creative process itself. Our detailed instructions are designed to guide you smoothly from start to finish, ensuring that every stitch brings you closer to creating your lovely watermelon girl. We encourage you to embrace any mistakes that might occur as part of your learning journey. Crocheting is an art, and like any art form, it flourishes with practice and patience.
So, grab your crochet hook, some yarn, and let’s get started on this fun and satisfying adventure! Be sure to follow along, and don’t hesitate to reach out if you have any questions or need guidance along the way. We can’t wait to see your finished Amigurumi Watermelon Girl proudly displayed in your home or gifted to someone you love. Happy crocheting!
Abbreviations:
ch – chain
sc – single crochet
inc – increase
dec – decrease
sl st – slip stitch
Watermelon girl
Head (x2):
It is woven in rows.
F1 : 31c., 1 sc in 2nd from crochet, 29 sc, 1c and g.
F2 – 7:30 sc 1c and g.
F8 : skip 1pt, 27 sc, skip 1pt, 1 sc, 1c and g. (28)
F9 : 28 sc 1c and g.
F10 : skip 1pt, 25sc, skip 1pts, 1sp, 1c and g. (26)
F11 : 26 sc 1c and g.
F12 : skip 1pt, 23sc, skip 1pts, 1sp, 1c and g. (24)
F13 : 24 sc 1c and g.
F14 : skip 1pt, 21sc, skip 1pts, 1sp, 1c and g (22)
F15 : 22bp, 1c and g. 1c and g.
F16 : skip 1pt, 19 sc, skip 1pt, 1 sc, 1c and g. (twenty)
F17 : skip 1pt, 17 sc, skip 1pt., 1 sc, 1c and g (18)
F18 : skip 1pt, 15pb, skip 1pto, 1pb, 1c and g. (16)
F19 : skip 1pt, 13sc, skip 1pts, 1sp, 1c and g. (14)
F20 : skip 1pt, 11sc, skip 1pts, 1sp, 1c and g. (12)
F21 : skip 1pt, 9 sc, skip 1pt, 1 sc (10)
Finish off and cut. To knit the edge we will hook the strand in the upper corner, the corner of chain number 30 at the beginning of the head piece.
Edge:
V1: we hook with white color with 1c. and 1 sc in the same point, 20 sc, 1 inc in the corner, 8 sc, 1 inc, 20 sc (53)
Change to green color.
V2: 1c and g, 53bp and 1c. and g.
V3: 53bp.
Cast off and cut the 1st piece, and cast off and cut the 2nd piece leaving a long strand to sew. On one of the pieces of the head place the safety eyes, more or less on the
F15 – 16, with approximately 7 points of separation. It is also useful to embroider the eyelashes, the mouth and the seeds. Also embroider the seeds on the other piece of the head before sewing them.
To sew them, face the two pieces and join the edges. You can help with markers or safety pins to hold the pieces. Sew with the green thread around the green edge. For the corners you can use white thread, although you can also sew them with green, since in those corners the hairs will go and it will not be seen.
Before you finish sewing the two pieces of the head, fill it in.
Legs (x2):
In green:
V1 : 5 sc in am
V2 : 5aum (10)
V3 – 15: 10bp
Cast off and cut the 1st leg, the 2nd do not cast off, and continue knitting to join the two legs and continue with the body.
To join the legs and continue :
V1 : join the 2nd leg with the 1st leg with a sc in point # 10 of V15, continue with 9 sc, join with the 2nd with 1 sc in the next free st, and 9 sc (20)
V2 – 7:20 sc
Fill.
V8 : * 2 sc, 1dism * (15)
V9 – 10:15 sc
V11 : * 1sc, 1dism * (10)
V12 : 10 sc
Bind off and cut, leaving a long strand to sew to the head.
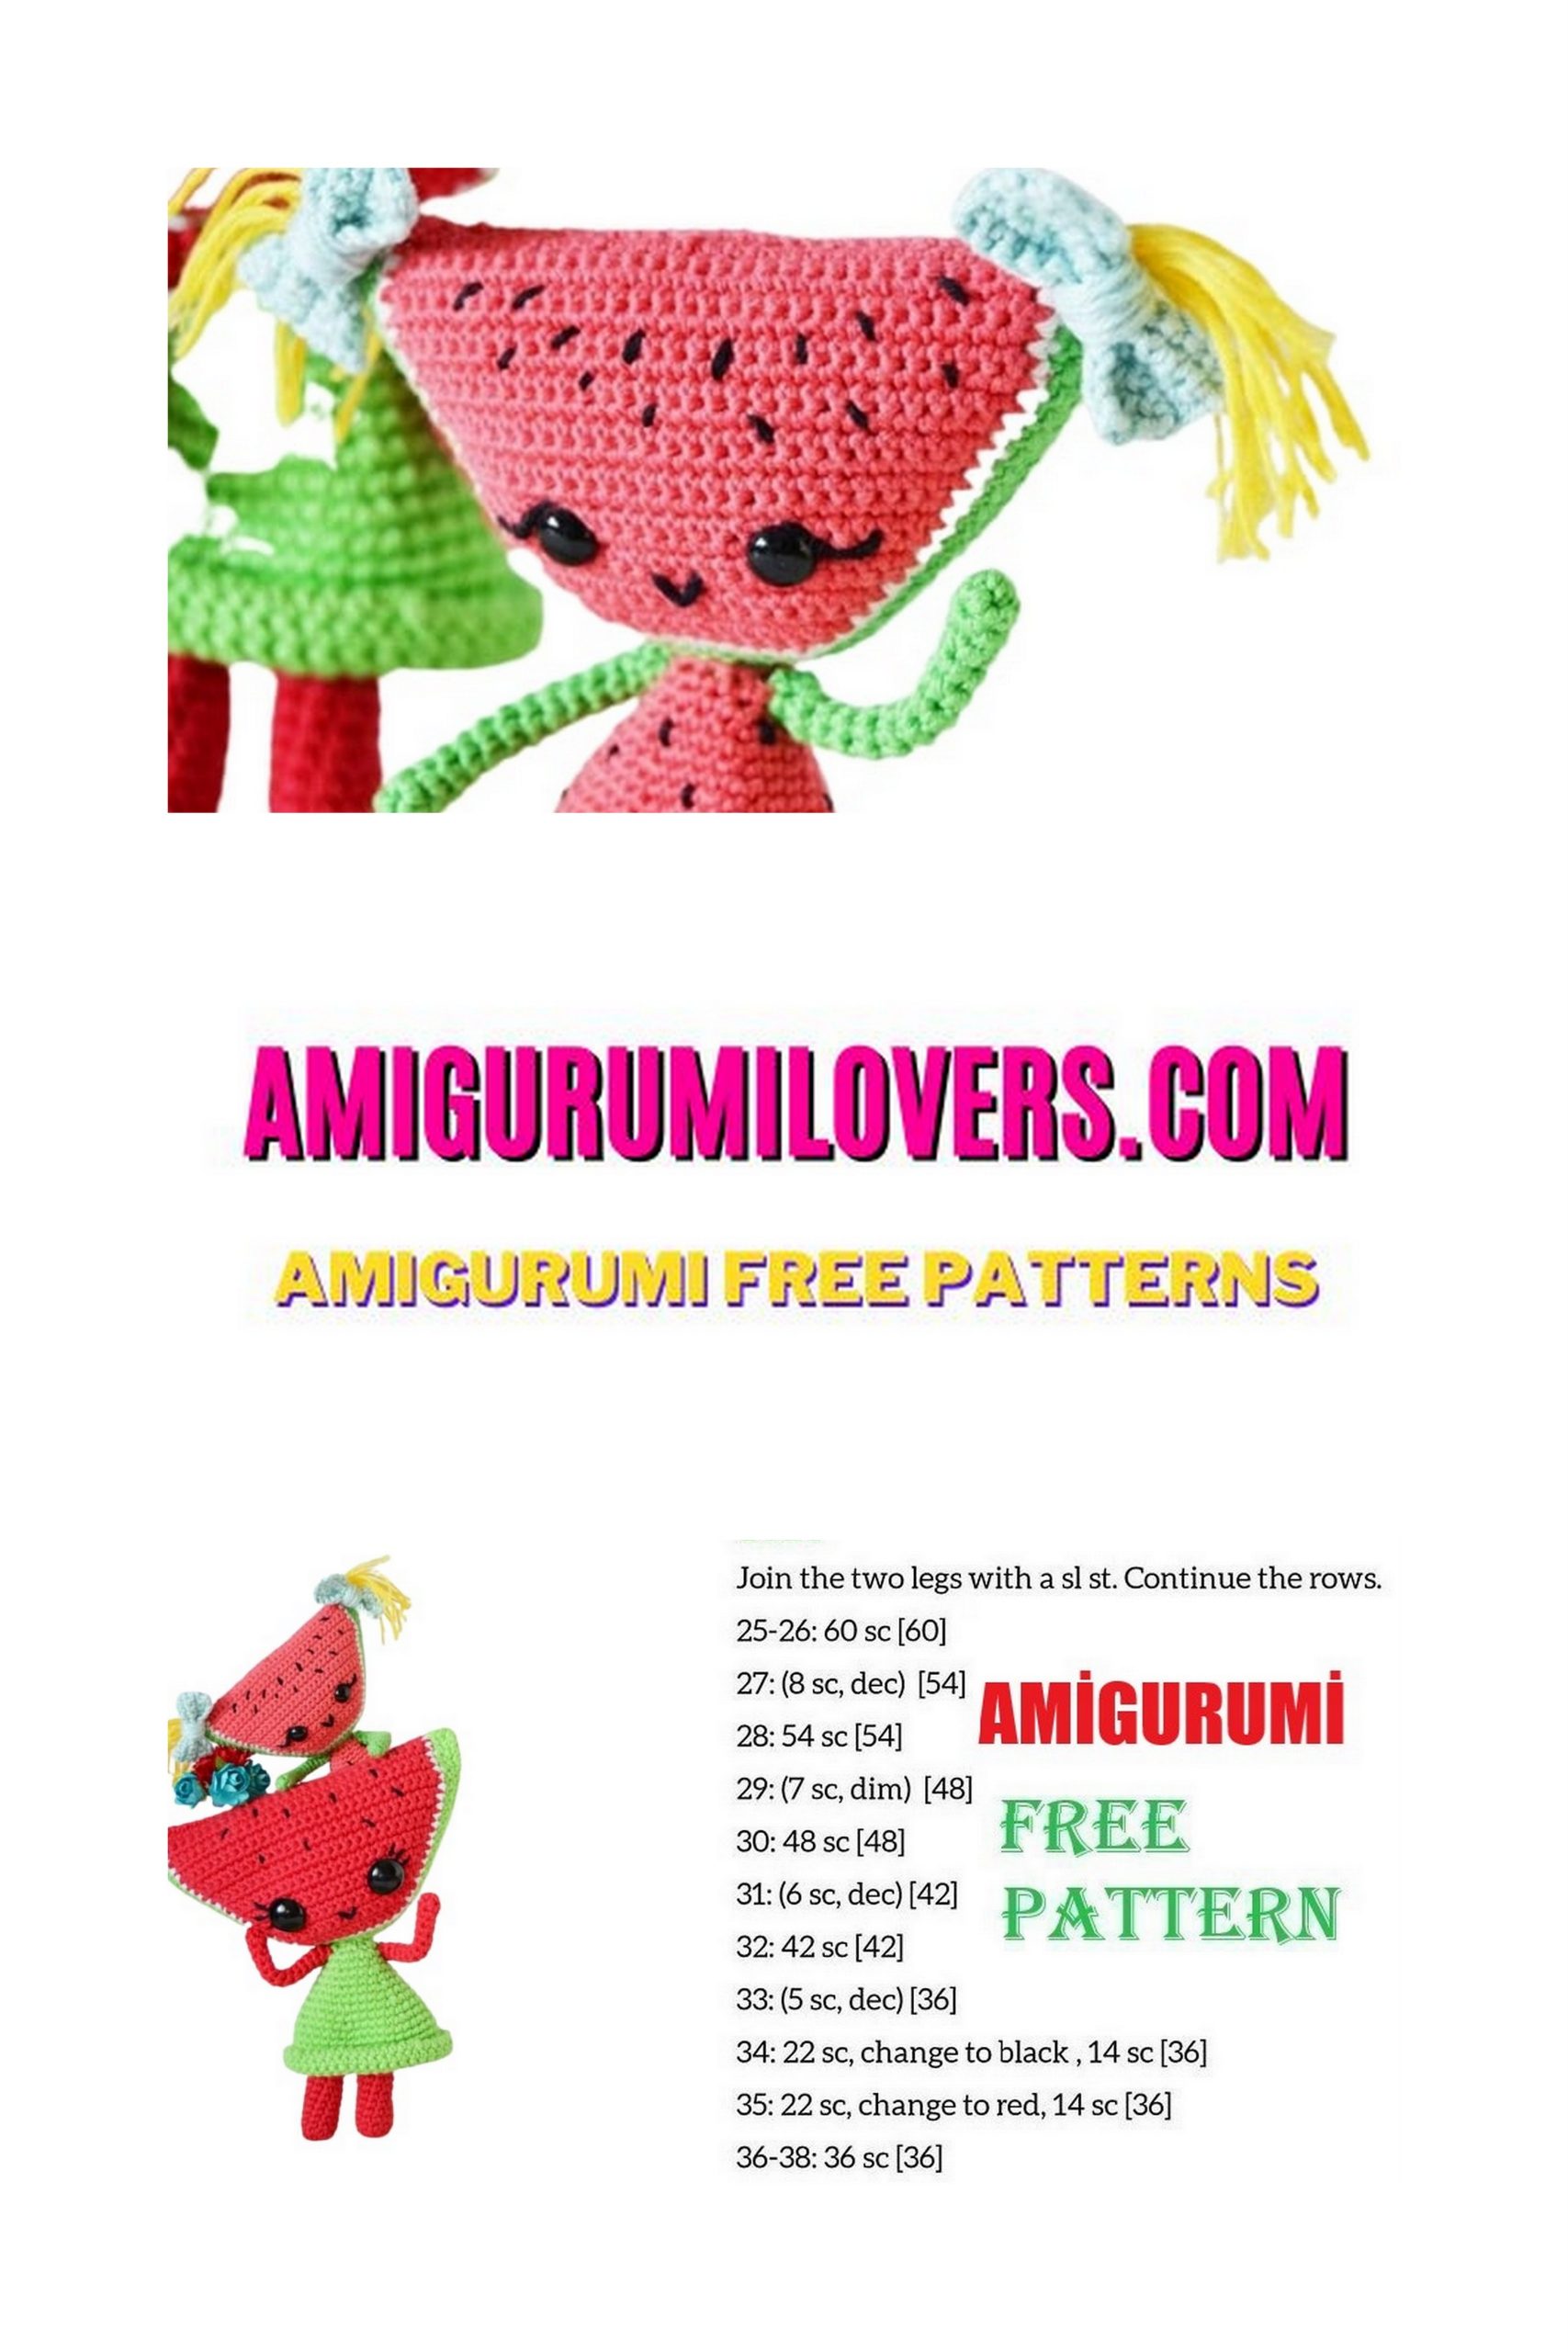
Dress:
In red:
V1 : 12c., Join with 1 sc with 1ºc to form a ring, continue to knit in chain stitches, 12 sc (last st on 1st sc) (12)
V2 : * 1sc, 1aum * (18)
V3 : 18 sc
V4 : * 2sc, 1aum * (24)
V5 : 24bp
V6 : * 3sc, 1aum * (30)
V7 : 30 sc
V8 : * 4sc, 1aum * (36)
V9 : 36 sc
V10 : * 5sc, 1aum * (42)
V11 – 16 : 42bp
Change to white color.
V17 : 42 sc
V18 : * 6 sc, 1aum * (48)
V19 : 1c, 48 crab points. Finish off and cut. Leave a somewhat long strand to finish closing the loop. With the wool needle, sew a stitch with the 1st stitch on the round, and thus close it. Embroider the seeds in black throughout the dress. Sew the dress over the last turn of the body.
Arms (x2):
In green:
V1 : 5 sc in am
V2 – 14 : 5 sc
You can use a bit of wire to articulate the arms. Cut a piece of wire the length of the two arms together plus 1 or 2 cm. Insert the wire over the 2nd turn of the dress. Fold the ends and line with masking tape. Now insert your arms and sew them around the wire. * Note: remember that this system of articulating amigurumis IS NOT SAFE , and is not recommended for minors.
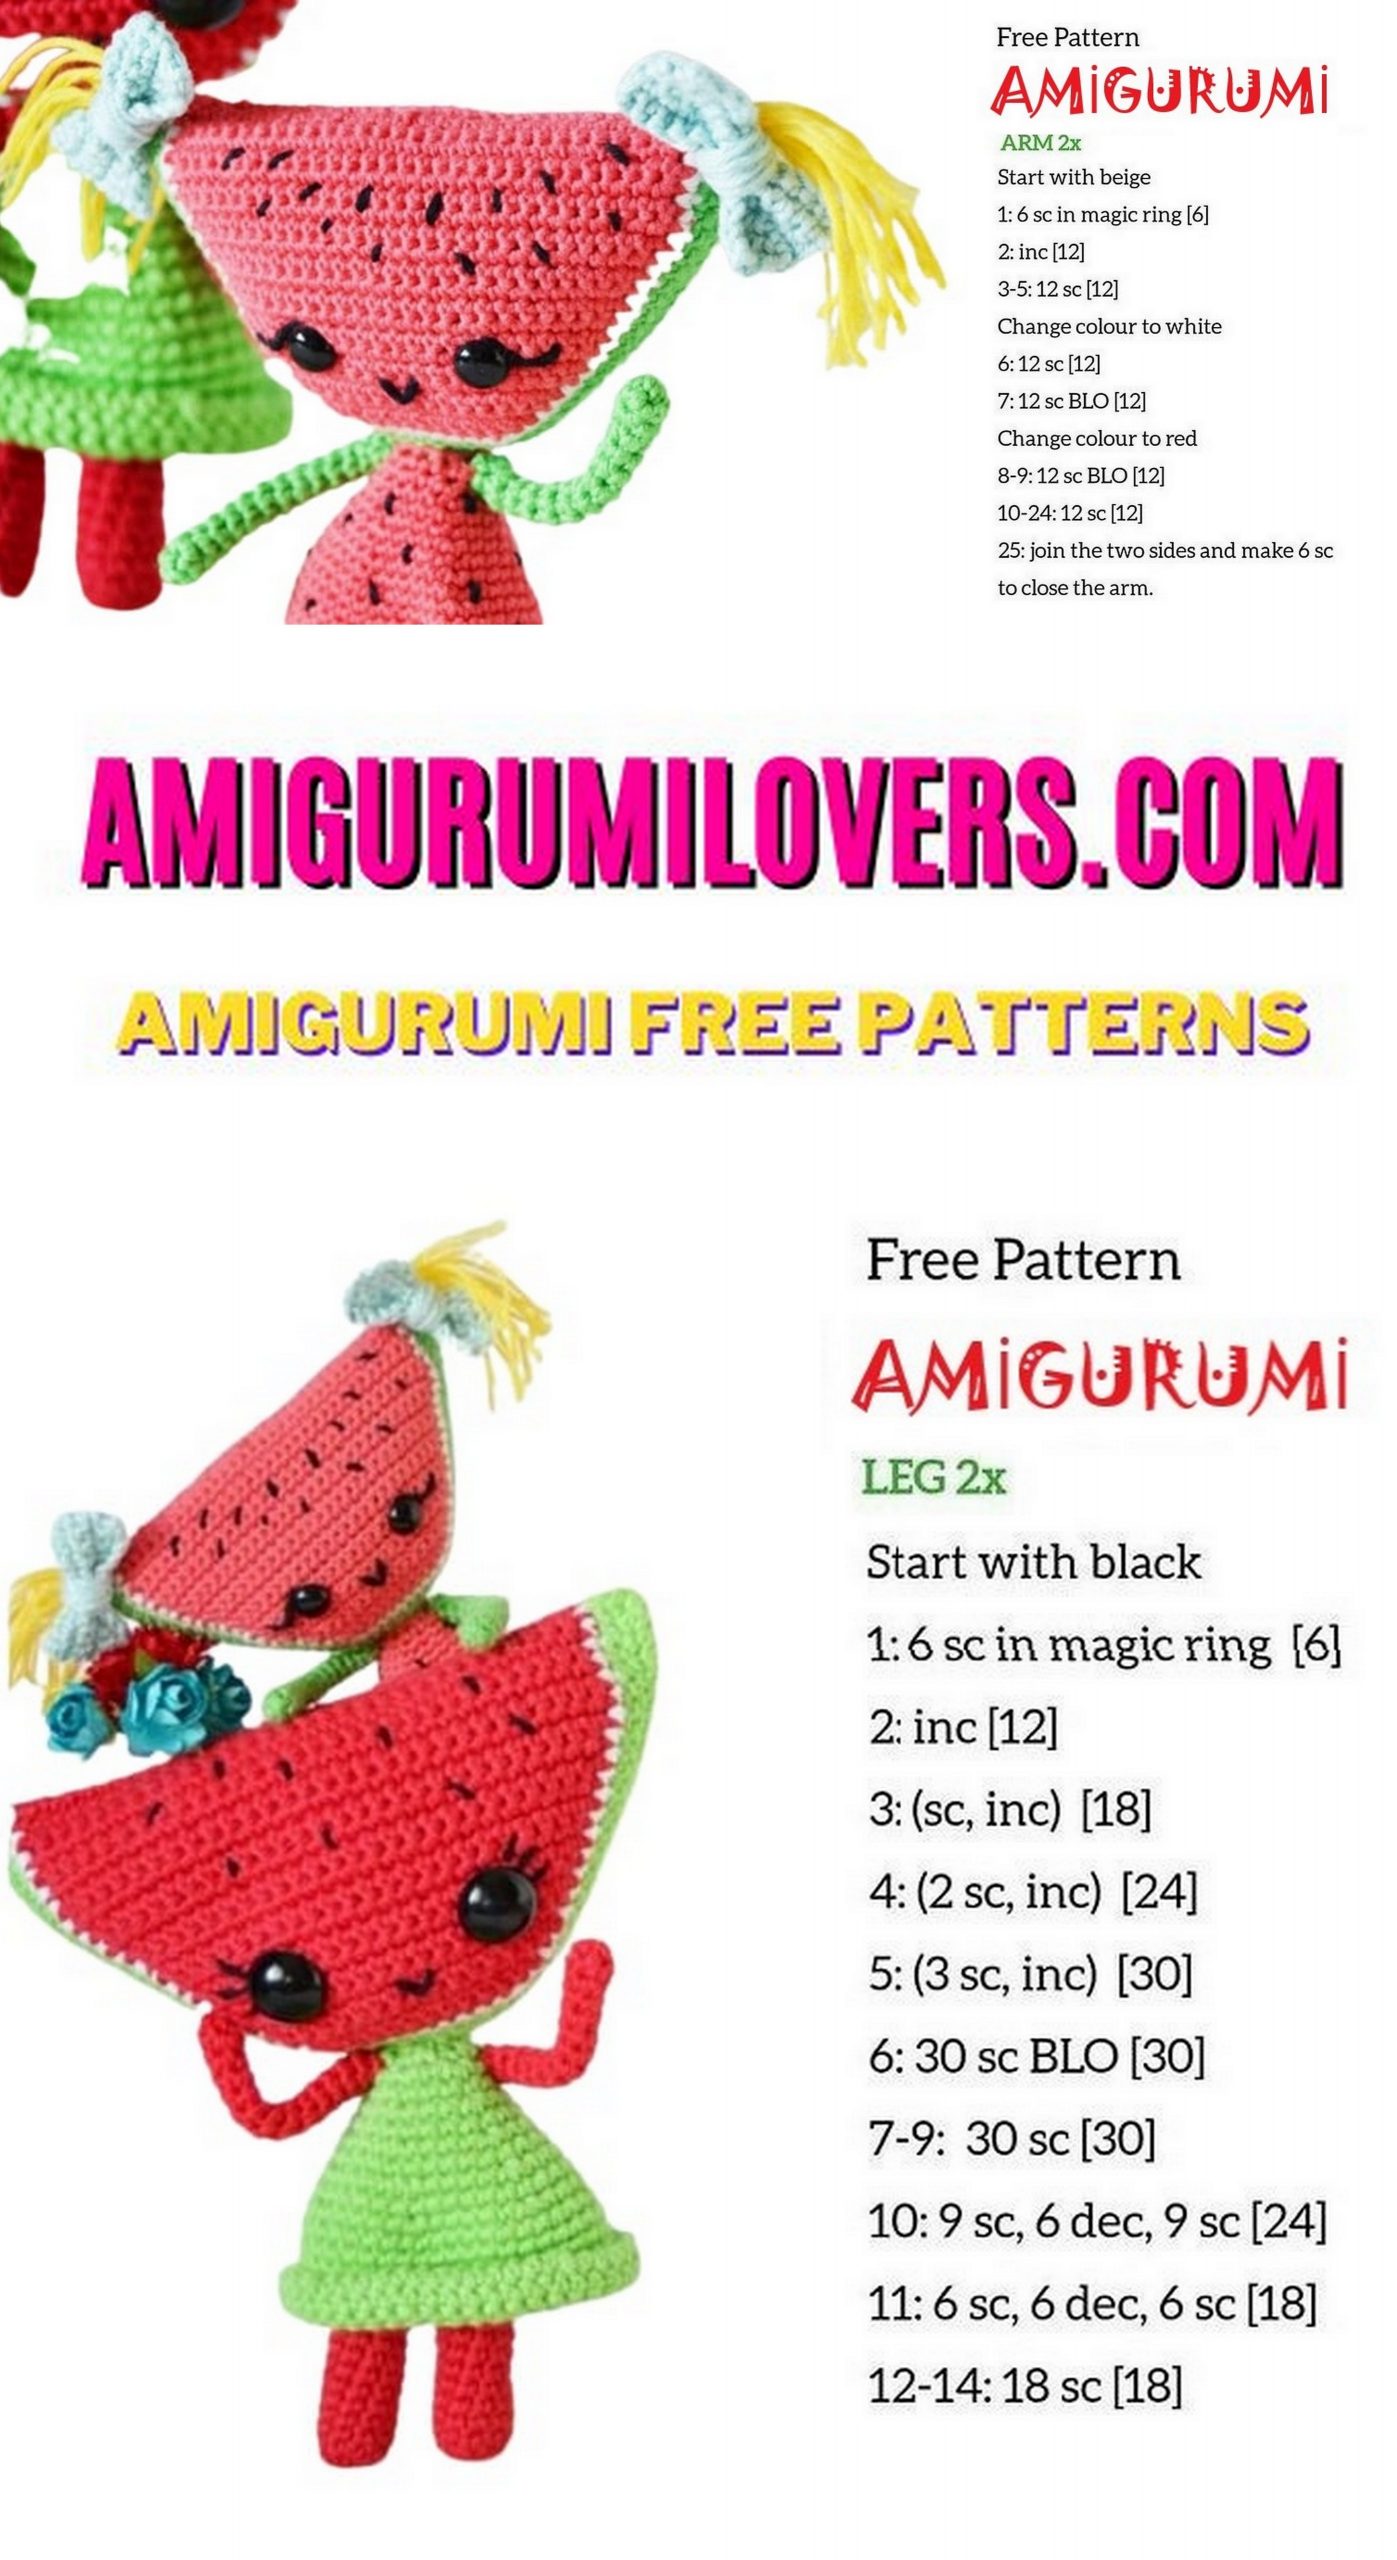
Bow (x2):
In blue:
F1: 11c., 1 sc in 2nd from crochet, 9 sc, 1c and g (10)
F2 – 6: 10 sc 1c and g.
Finish off and cut. Hide the excess strands. Fold the piece in the center and surround it with blue thread, until it is well attached. Sew a few stitches with the strand to hold it tight.
For the hair, cut a few strands (I used 14) of yellow color of about 5 or 6 cm, or the length that you like the most. In each corner, place the hairs with the hair-by-hair technique and, finally, sew the bow in front of the pigtails.
Before you leave, make sure to check out more free amigurumi crochet patterns and discover new ideas for your next project.
You can also browse our full amigurumi pattern archive for hundreds of beginner-friendly designs.