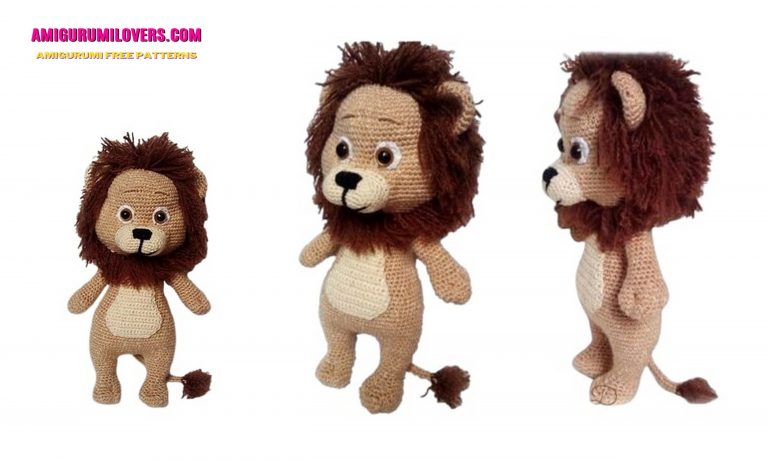
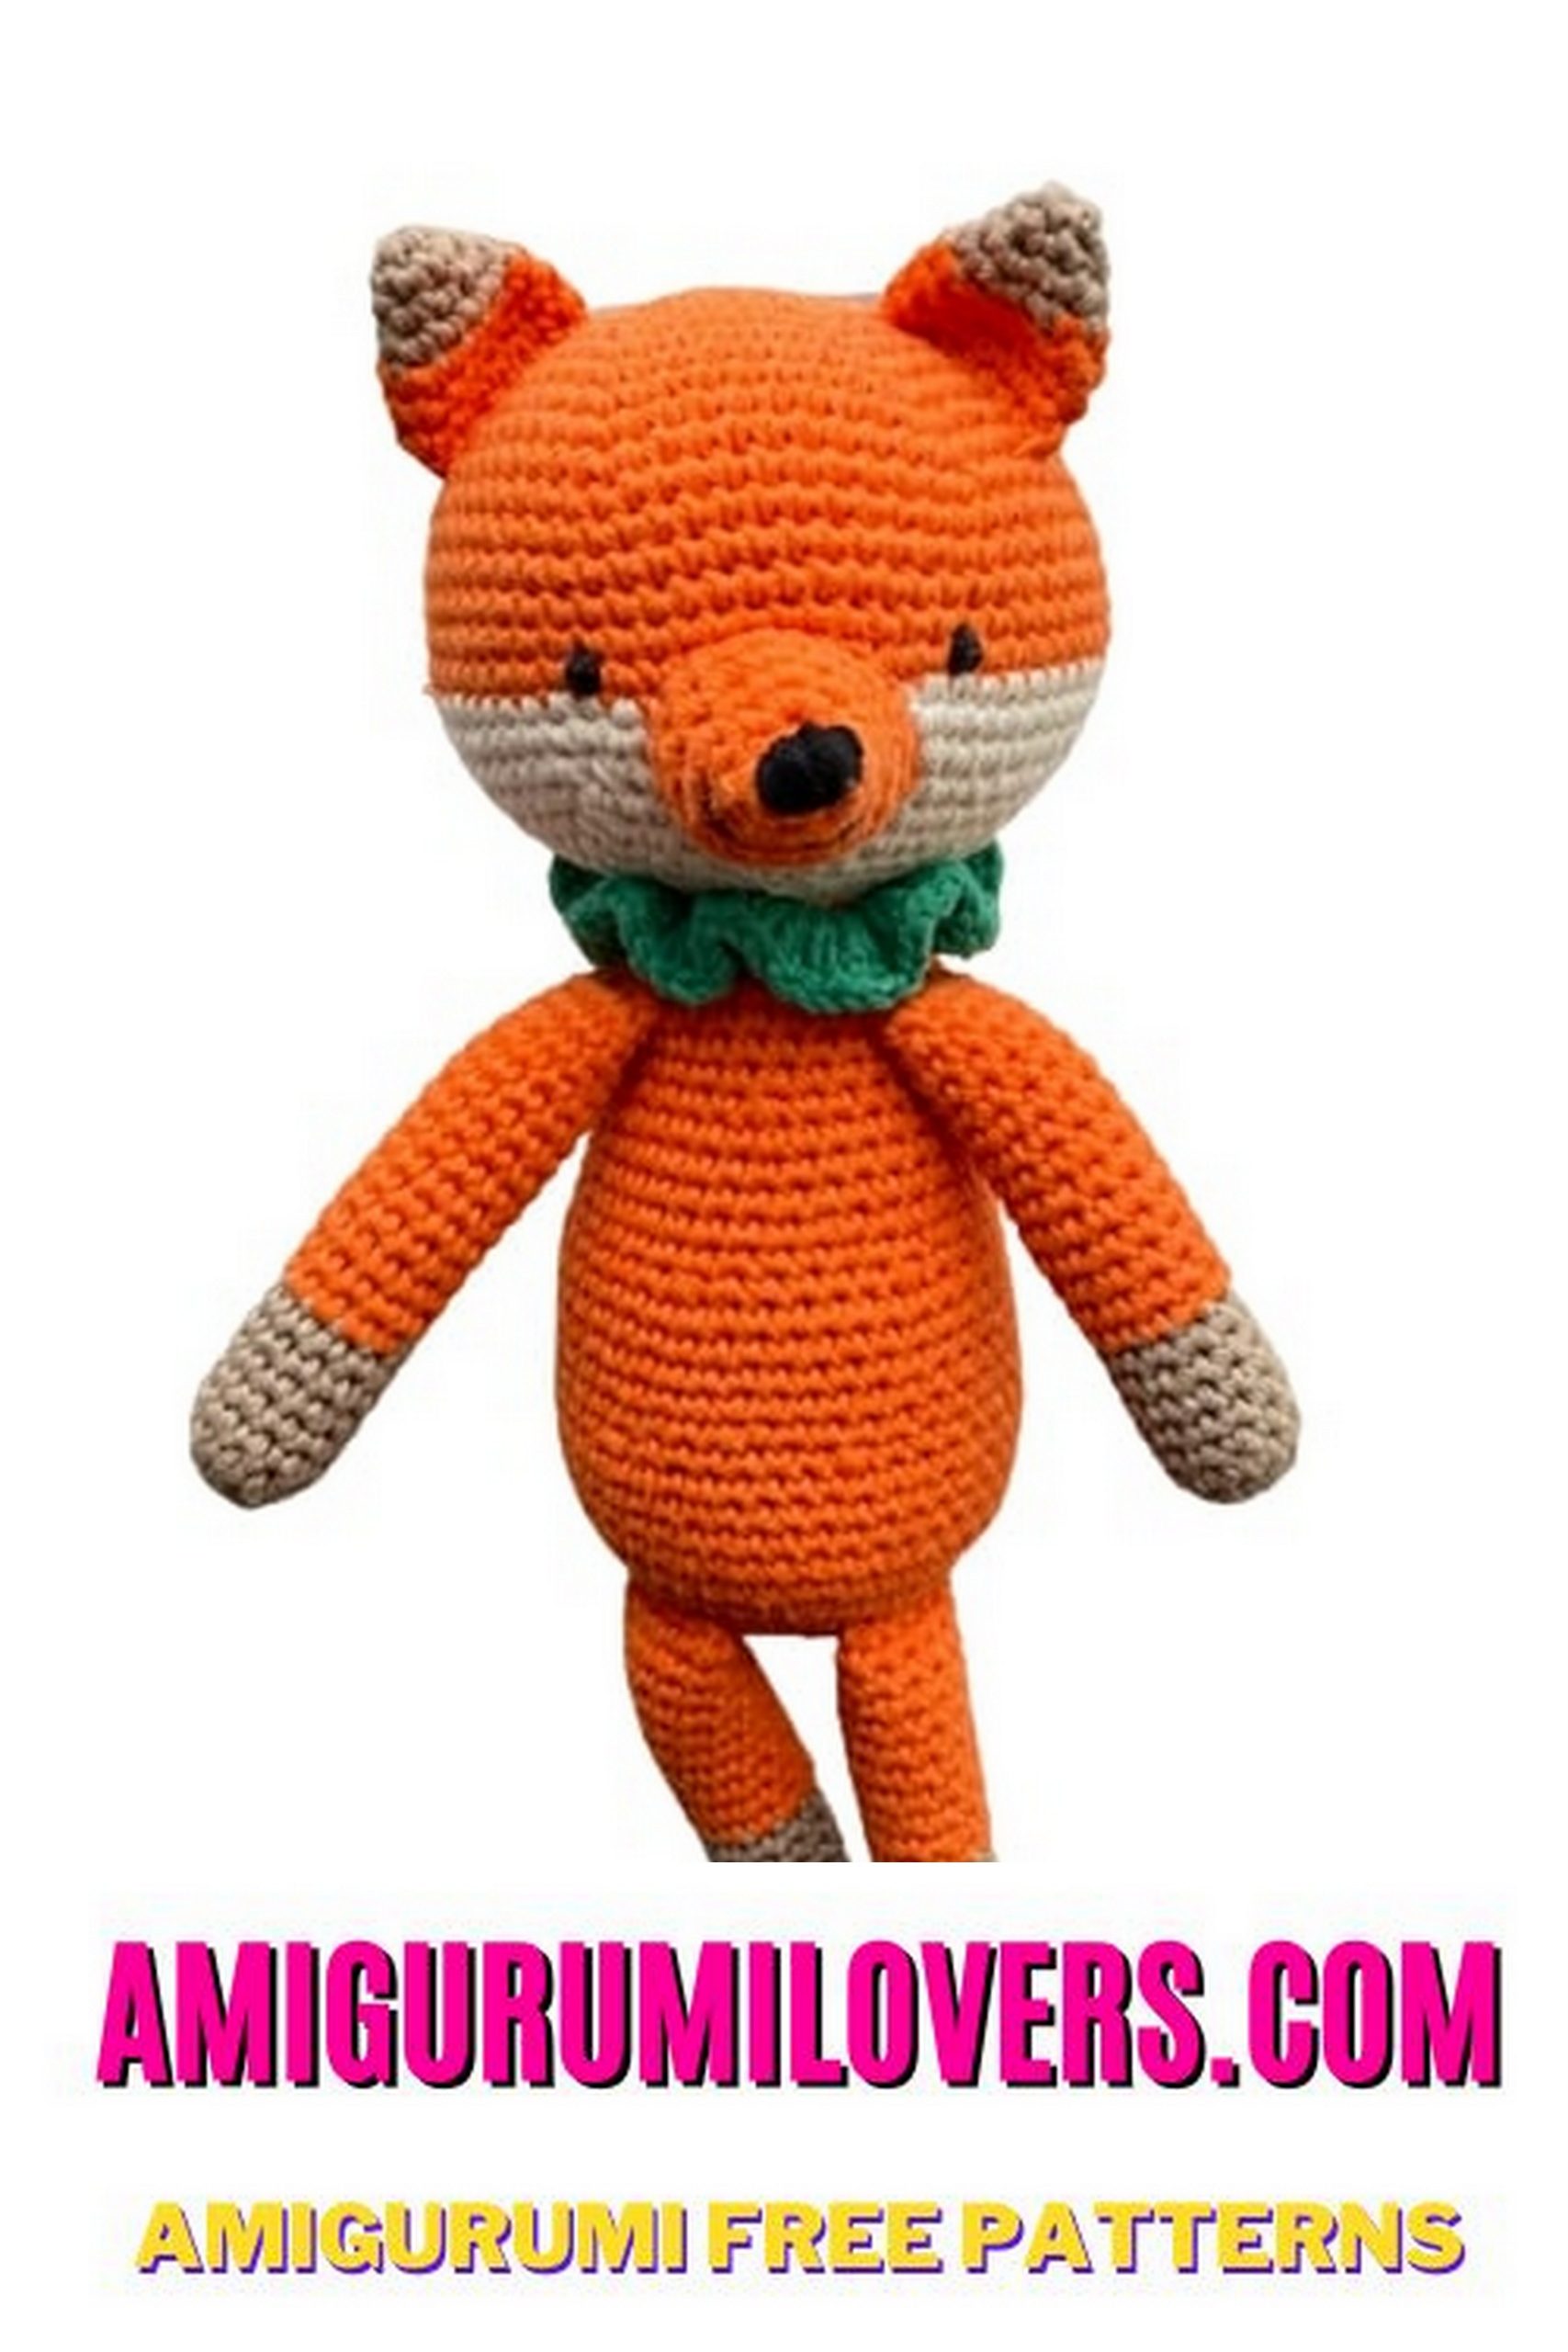
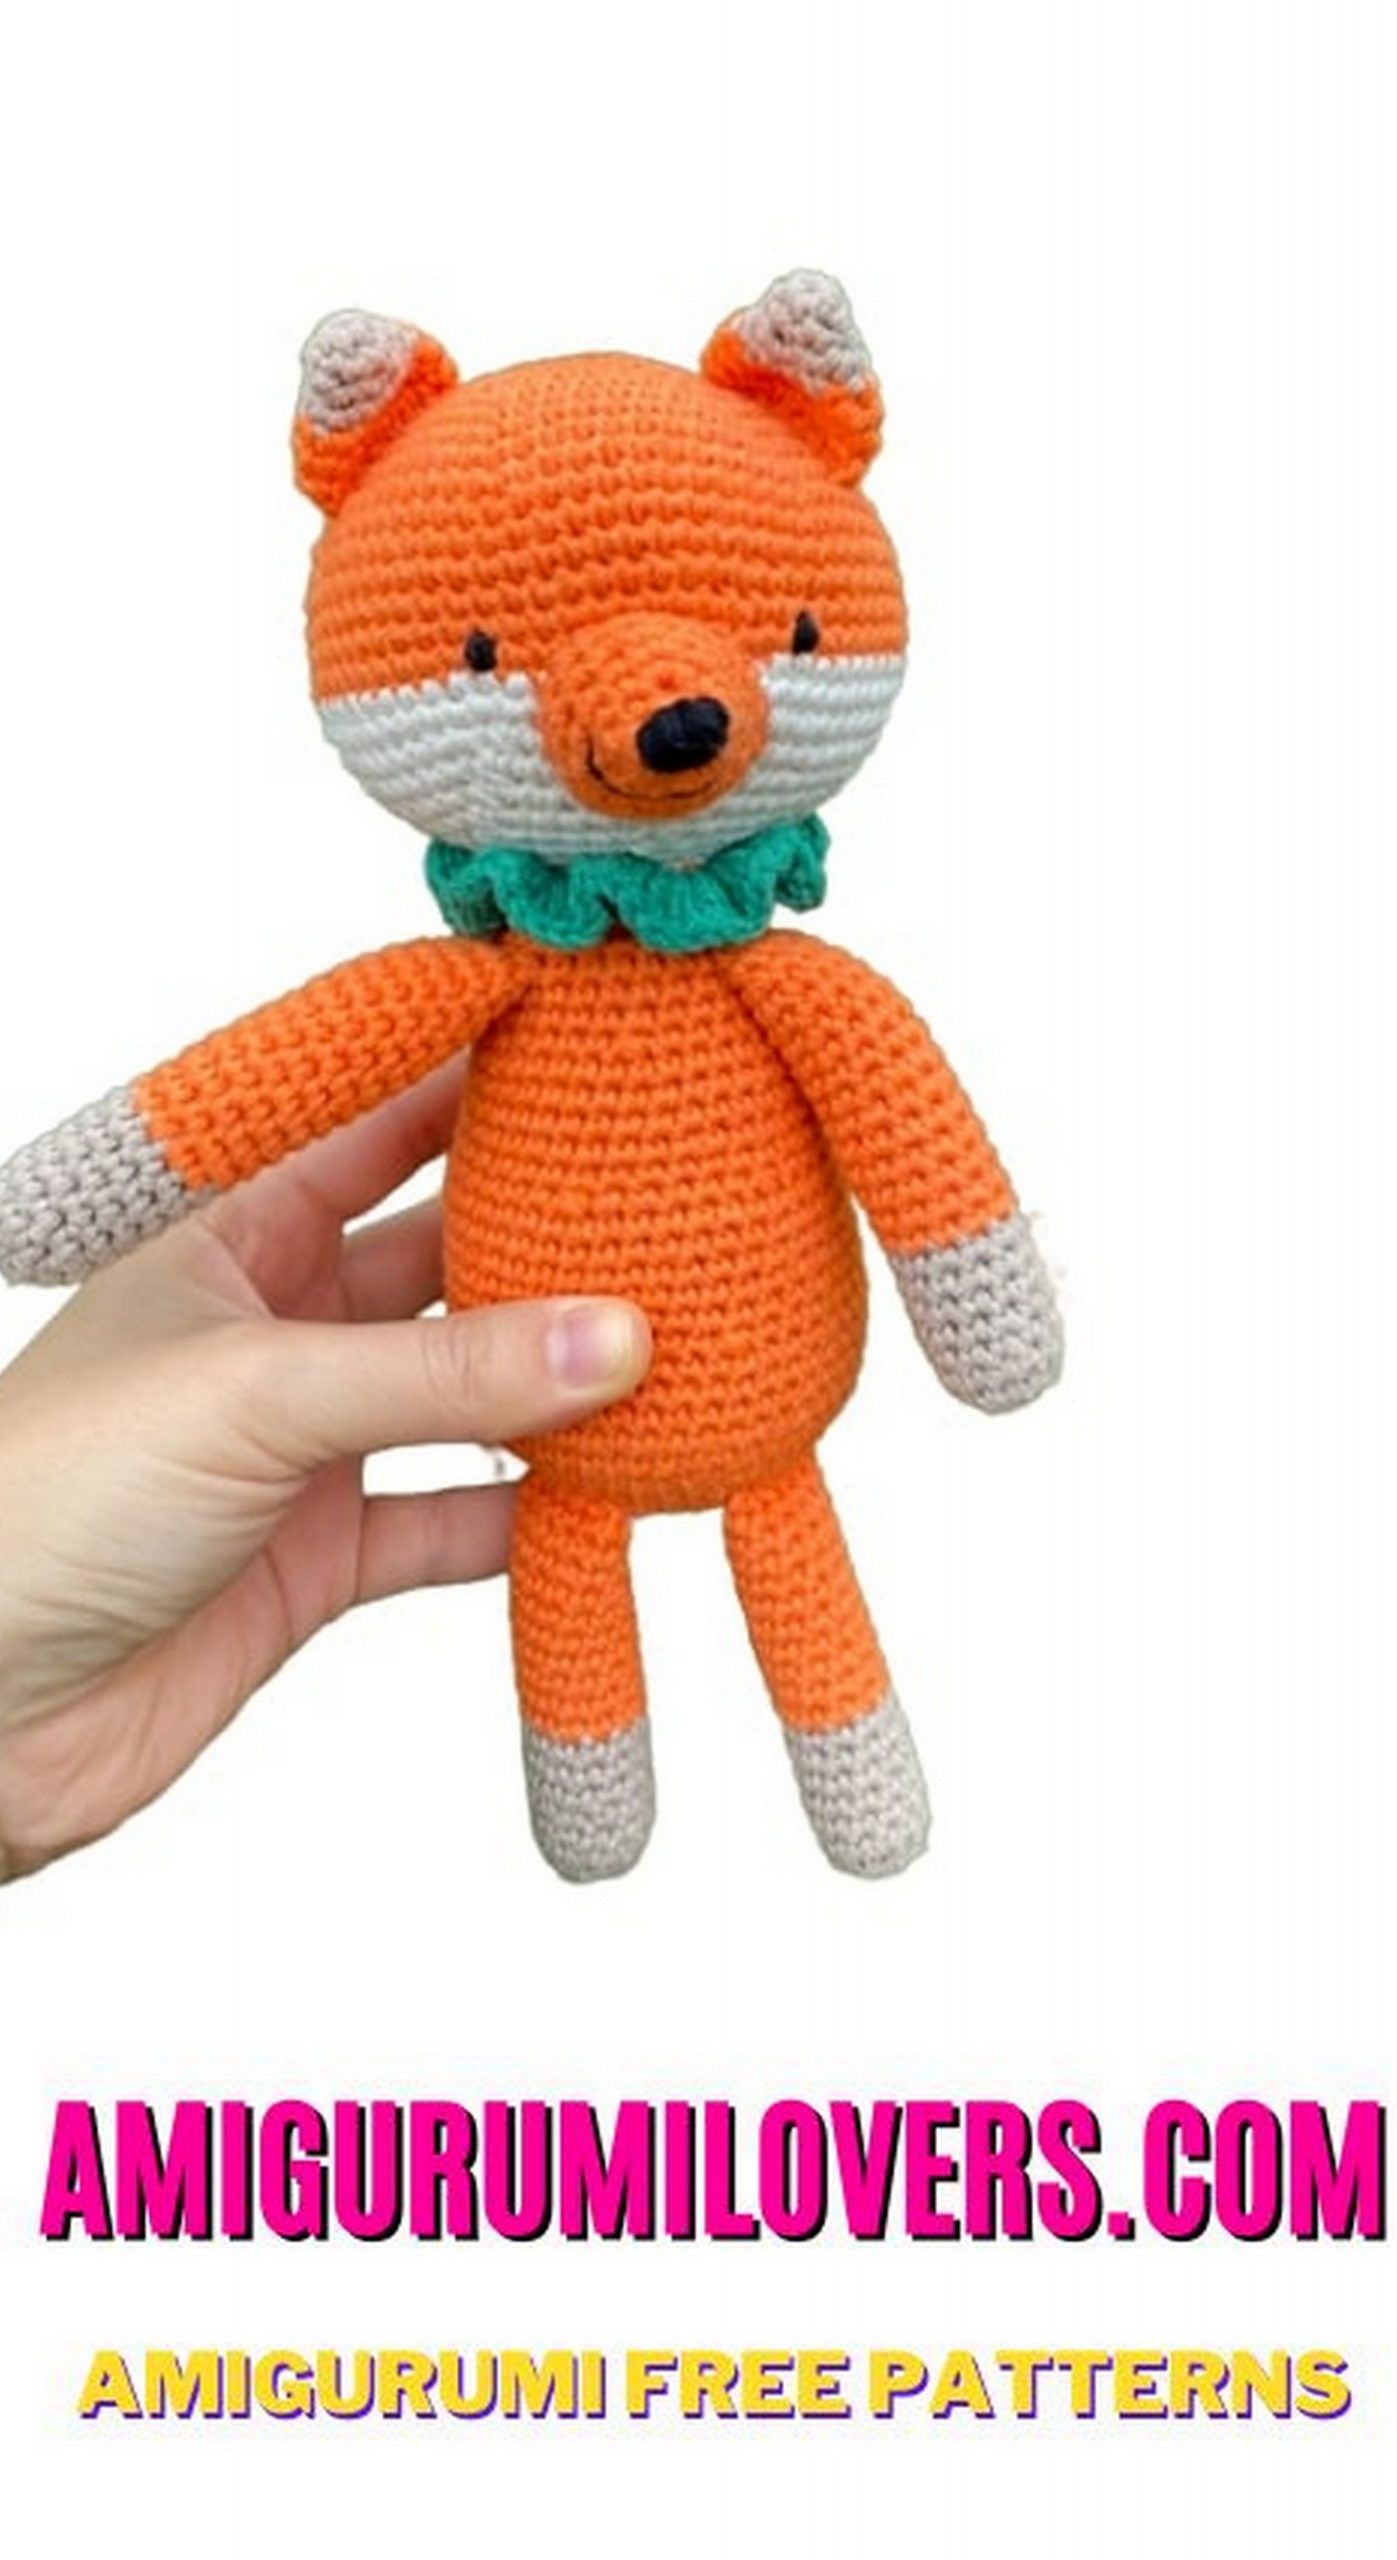
Amigurumi Fox Lucky Free Crochet Pattern
You may also enjoy exploring our free amigurumi patterns and other popular amigurumi animal patterns available on our website.
Welcome to our cozy corner of the crochet world, where creativity knows no bounds! Today, we’re thrilled to share a delightful project perfect for both beginners and experienced crocheters alike. If you’ve ever wanted to add a sprinkle of charm to your home or create an adorable gift for a loved one, our “Amigurumi Fox Lucky Free Crochet Pattern” is just what you need. Amigurumi, the Japanese art of crocheting small stuffed animals or creatures, brings joy to crafters and recipients alike with its whimsical designs. What better way to immerse yourself in this fun technique than by crocheting a cute fox that symbolizes good fortune? This pattern is designed to be beginner-friendly, guiding you step-by-step through the process of creating your very own lucky fox. Don’t worry if you’re new to amigurumi; we’ve included clear instructions and helpful tips to ensure your crafting experience is enjoyable and rewarding. With basic crochet stitches and minimal supplies, you’ll soon find yourself enchanted by the soft textures and vibrant colors that bring your precious fox to life. Whether you’re looking for a fun project to enhance your skills, a unique item for your home décor, or a heartfelt gift that is sure to be treasured, this free crochet pattern has you covered. So grab your crochet hook, select your favorite yarn, and let’s embark on this crafty adventure together. By the end of this post, you’ll not only have a charming amigurumi fox to admire, but you’ll also gain confidence in your crocheting abilities. Join us as we dive into the magical world of amigurumi, and let lucky the fox guide you to a world of creativity and joy! Happy crocheting!
We continue to share Amigurumi free patterns with a beautiful model. For this beautiful amigurumi fox pattern pattern;

Pattern Fox Lucky
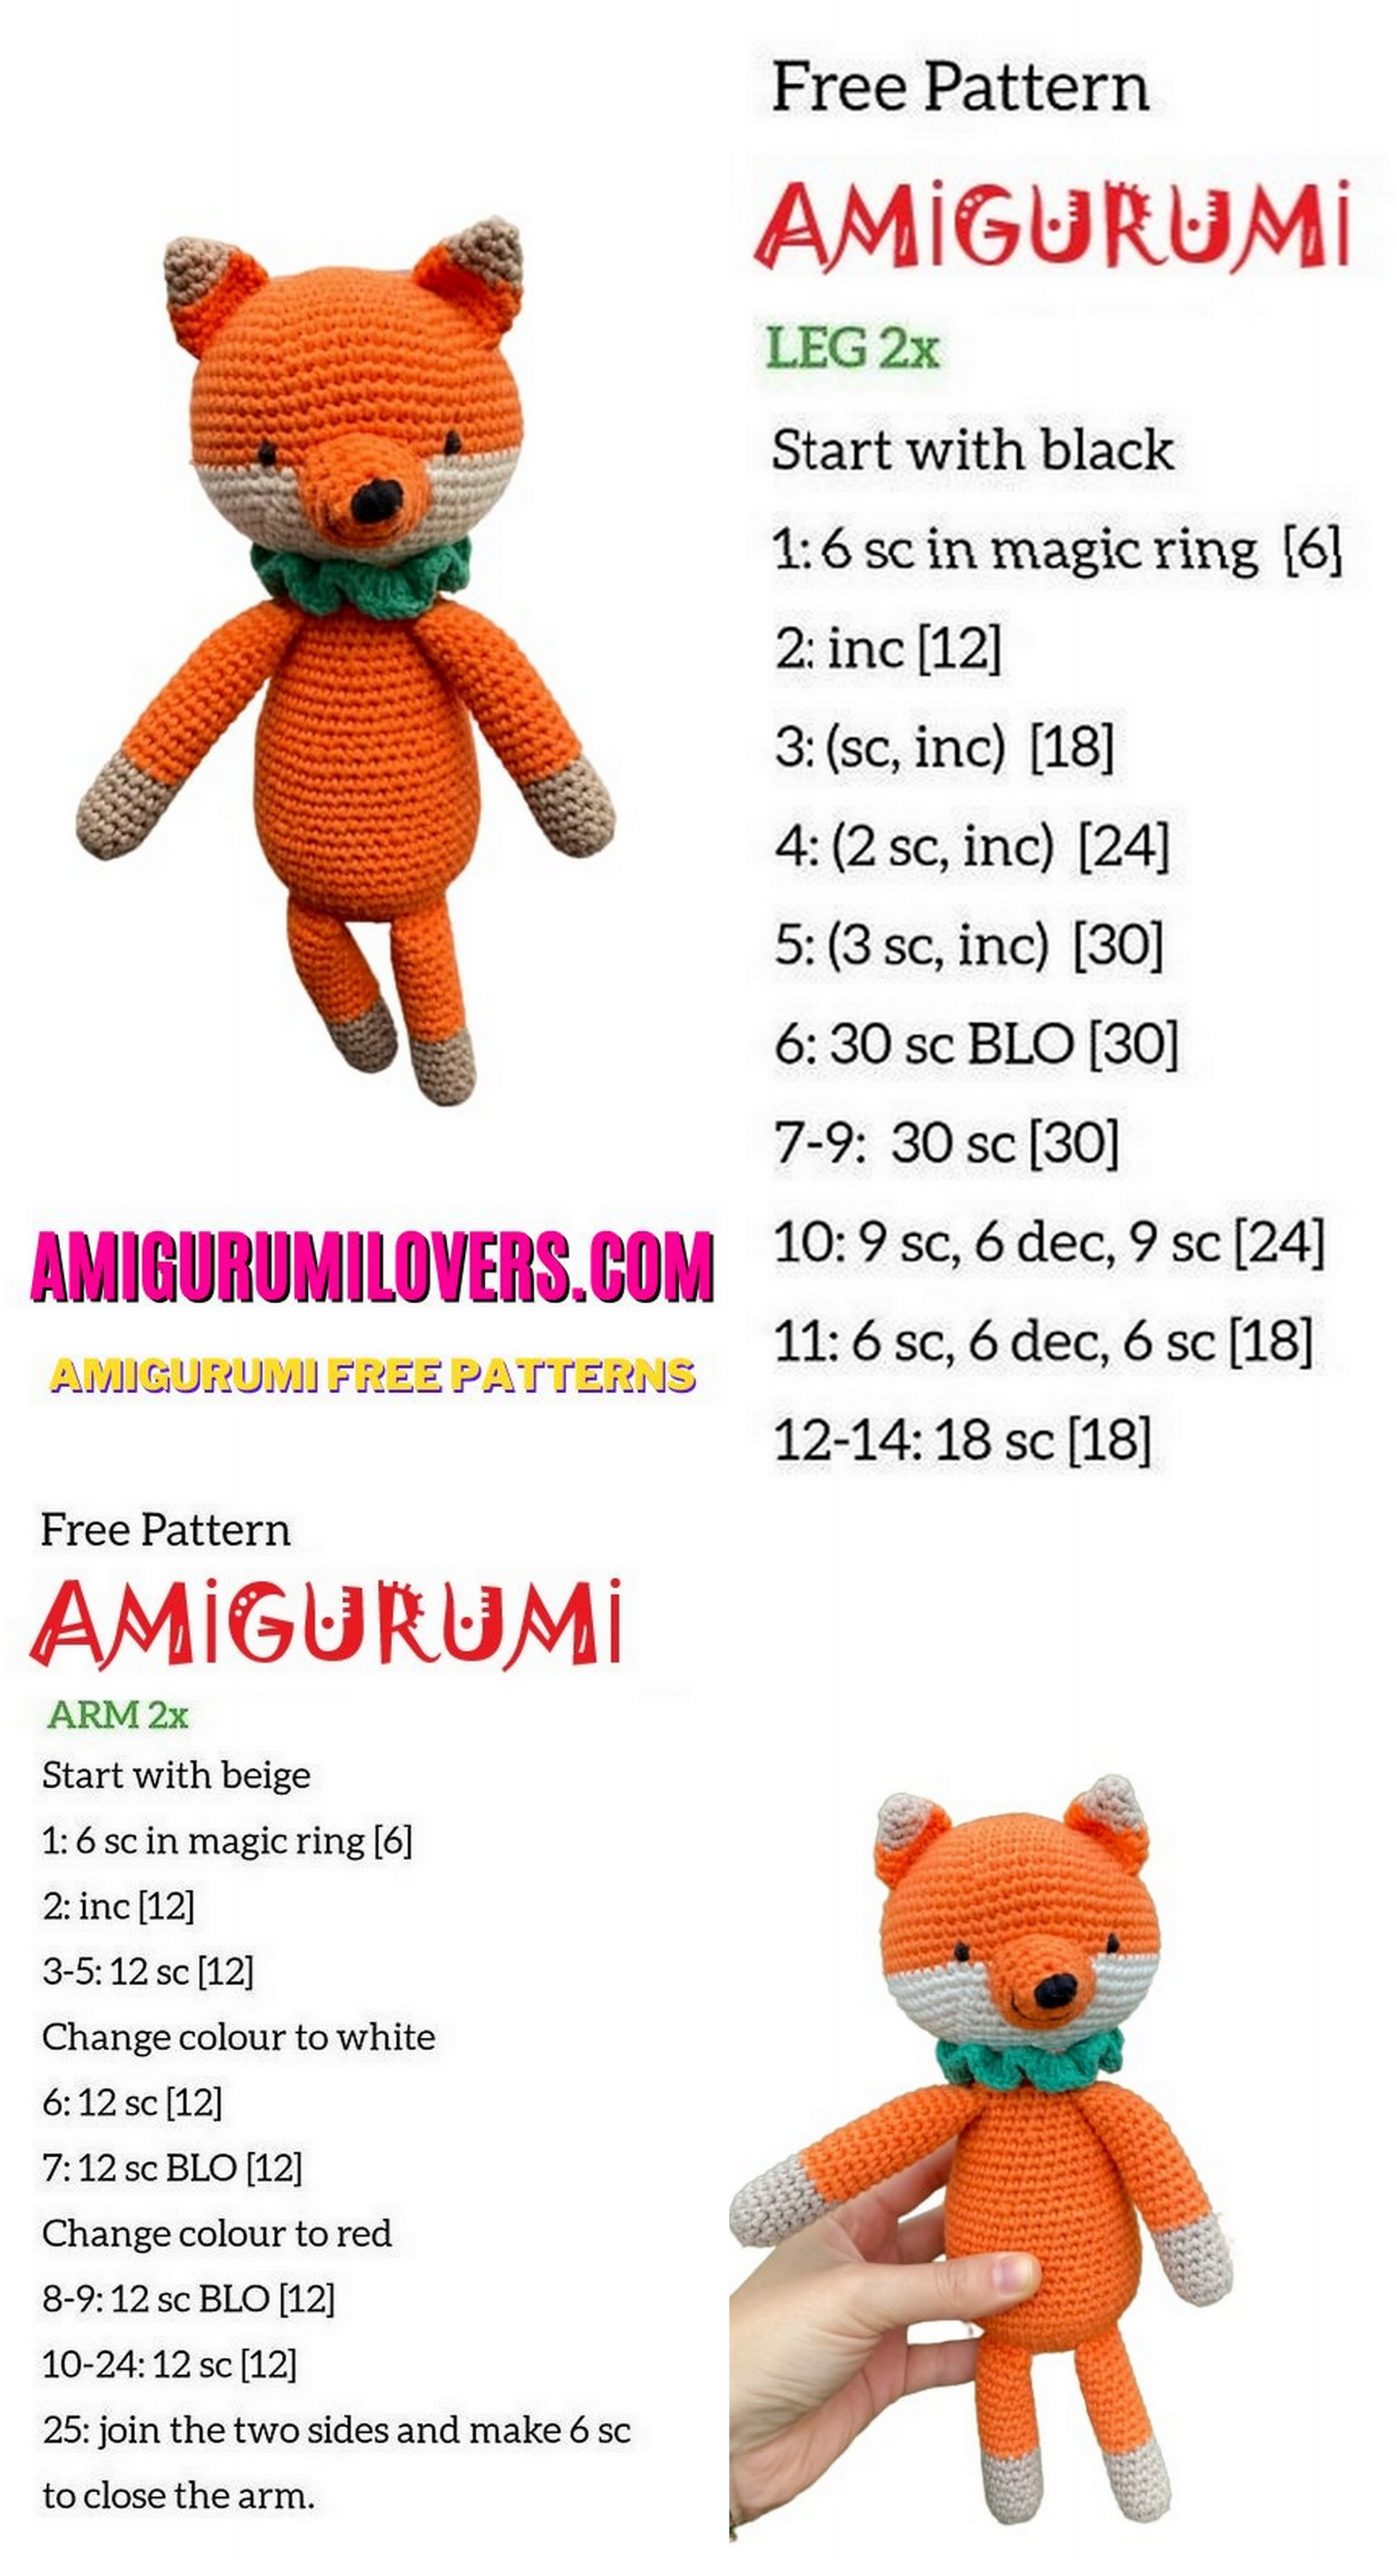
FOOT
1.Magic ring into 6sc: 6 sc,
2.6inc : 12 sc,
3.(2 sc, inc) * 4 : 16 sc,
4-7. 16 sc,
8. 4 sc, 4dec, 4 sc 12sc,
9. 4 sc, 2dec, 4 sc : 10 sc,
10-16. 10 sc, ( 7 rows )
17. 12 sc, now this will be your new start point, Change color to orange,
18-27. 10 sc, (10 rows)
Finish it with slip stitch and leave long yarn tail for sewing.
ARMS
1.Magic ring into 8sc: 8 sc,
2-13. 8 sc, Change color to orange,
14-20. 8 sc,
Finish it with slip stitch and leave long yarn tail for sewing.
EARS
1.Magic ring into 5sc : 5sc,
2.5 inc : 10 sc, Change color to orange,
3.10 sc,
4.( 4 sc, 1 inc)*2 : 12 sc,
5.( 5 sc, 1 inc)*2 : 14 sc,
6.( 6 sc, 1 inc)*2 : 16 sc,
7.( 3 sc, 1inc)* 4 : 20 sc,
8.( 4 sc, 1inc)* 4 : 24 sc,
9.( 5 sc, 1inc)* 4 : 28 sc,
10.28 sc,
Finish it with slip stitch and leave long yarn tail for sewing.
BOW TIE
Make a magic ring. Chain 2, make 6 DC, chain 2, slip stitch on magic ring. Chain 2, make 6 DC, chain 2, slip stitch on magic ring and close your magic ring. Leave a long yarn tail. Wrap your yarn on middle of your bow tie. Tie it on your fox’s neck.
BODY
1.Magic ring into 6sc: 6 sc,
2.6inc : 12 sc,
3.(1 sc, inc) * 6 : 18 sc,
4.(2 sc, inc) * 6 : 24 sc,
5.(3 sc, inc) *
6 : 30 sc, 6.(4 sc, inc) * 6 : 36 sc,
7.(5 sc, inc) * 6 : 42 sc,
8-12. 42 SC,
13. (12 sc, 1dec) * 3 : 39 sc,
14-18. 39 sc,
15. (11 sc, 1dec) * 3 : 36 sc,
16-17. 36 sc,
18. (10 sc, 1dec) * 3 : 33 sc,
19. 33 sc.
20. (9 sc, 1dec) * 3 : 30 sc,
21. 30 sc,
22. (8 sc, 1dec) * 3 : 27 sc,
23. 27 sc,
24. (7 sc, 1dec) * 3 : 24 sc,
25-27. 24 sc,
28. (6 sc, 1dec) * 3 : 21 sc,
29-31. 21 sc,
We will change the yarn color to white and continue to head from here.
HEAD
1.( 2 sc, 1inc)* 7 : 28 sc,
2.( 3 sc, 1inc)* 7 : 35 sc,
3.( 4 sc, 1inc)* 7 : 42 sc,
4.( 5 sc, 1inc)* 7 : 49 sc,
5.( 6 sc, 1inc)* 7 : 56 sc,
6-10. 56 sc,
Change color to orange,
11.56 Sc,
12.24 sc (BLO), 8 sc, 24 sc (BLO) : 56 sc,
13-14. 56 sc,
15. ( 12sc, 1 dec) * 4 : 52 sc,
16. 52 sc,
17. ( 11 sc, 1 dec) * 4 : 48 sc,
18. 48 sc,
19. ( 10sc, 1 dec) * 4 : 44 sc,
20. 44 sc,
21. ( 9sc, 1 dec) * 4 : 40 sc,
22. 40 sc,
23. ( 8sc, 1 dec) * 4 : 36 sc,
24. (4 sc, 1 dec) * 6 : 30 sc,
25. (3 sc, 1 dec) * 6 : 24 sc,
26. (2 sc, 1 dec) * 6 : 18 sc,
27.(1 sc, 1 dec) * 6 : 12 sc,
28. 6 dec: 6 sc,
Finish it with slip stitch, pick the stitches with needle and hide the yarntail. Insert your orange yarn to head from BLO line and sc around. Leave a long yarn tail and sew your cheek part like the pictures. Add your eyes on 13-14. Rows leave 12 between them.

SWEATER
1.Chain 36,
2.Leave 8 for button hole, 28 sc,
3.28 SC,
4.28 sc,
5.3 sc, 1 inc * 7 : 35 sc,
6.4 sc, 1 inc * 7 : 42 sc,
7.7 sc, Chain 5 and Leave 9 sc for arm, 10 sc, Chain 5 and Leave 9 sc for other arm, 7 sc : 34 sc,
8.Chain 8 and turn, this way we Have 2 button hole,
9.6 sc, 1 inc, 20 sc, 1 inc, 6 sc : 36 sc,
10.8 sc, 1 inc * 4 : 40 sc,
11.40 sc,
12.9 sc, 1 inc * 4 : 44 sc,
13.Make reverse sc during the row and finish it. Hide your yarn. Add your buttons and finish.
Before you leave, make sure to check out more free amigurumi crochet patterns and discover new ideas for your next project.
You can also browse our full amigurumi pattern archive for hundreds of beginner-friendly designs.