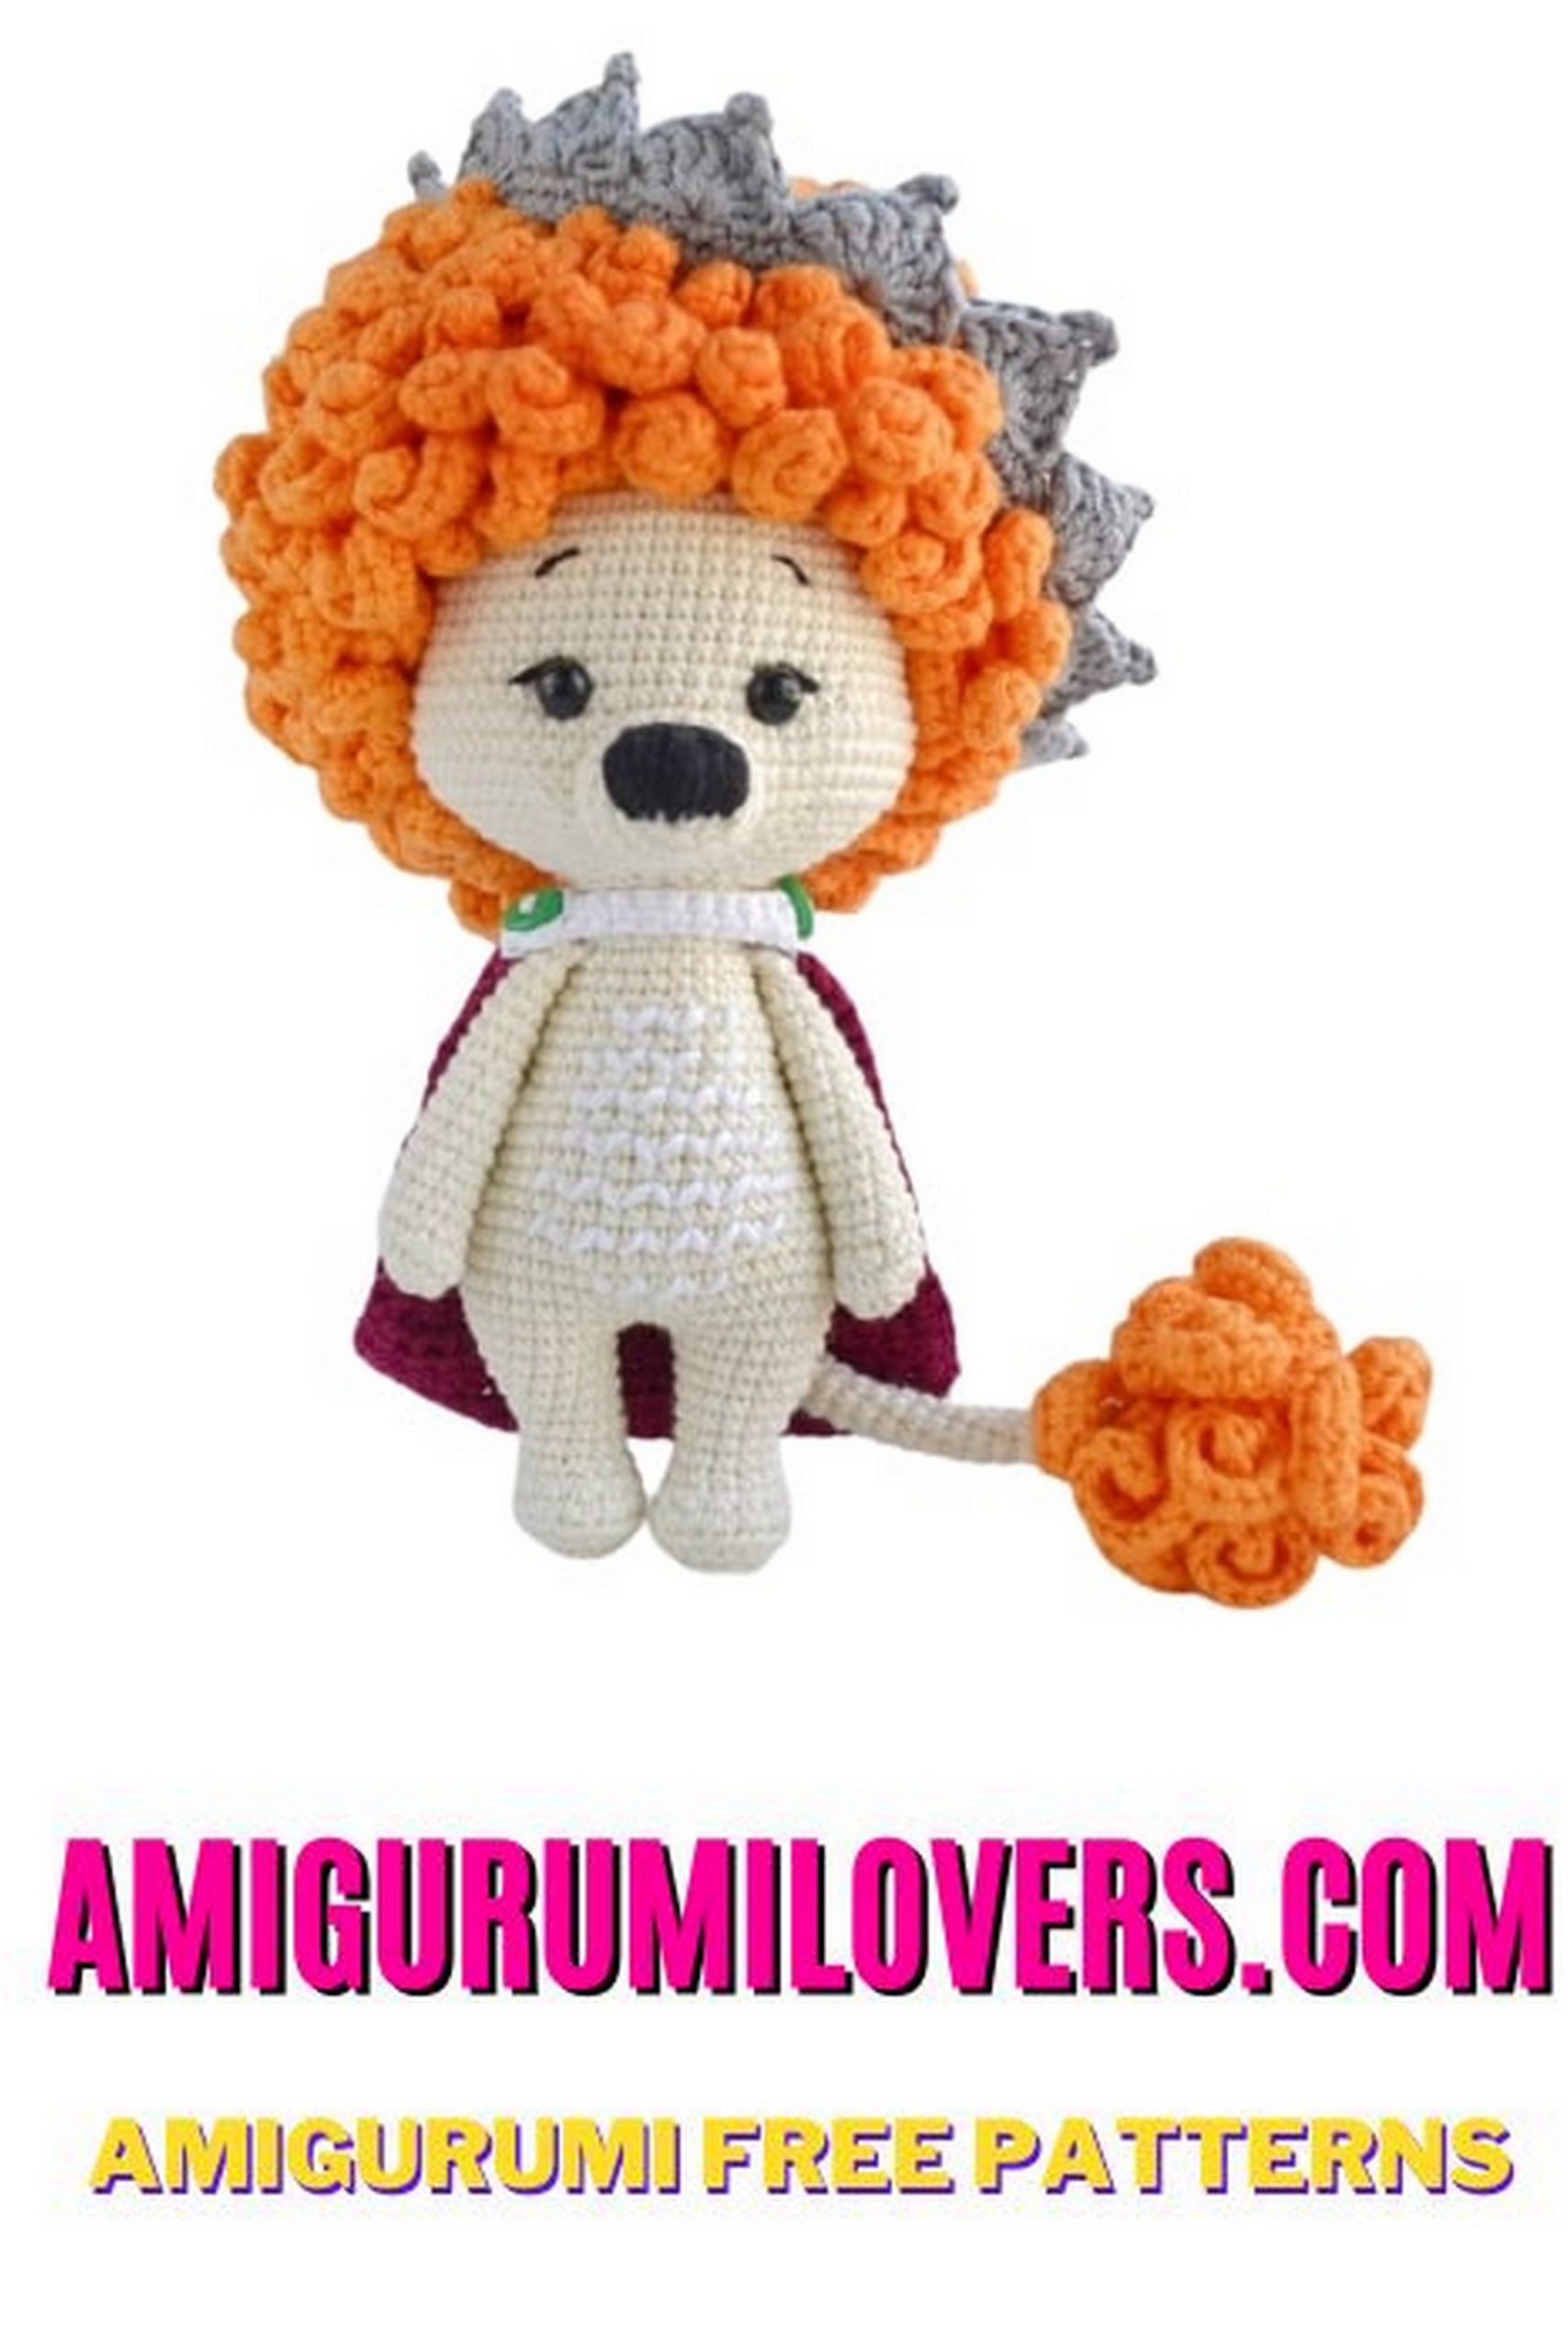
Craft the Majesty of the Jungle with the Amigurumi Lion King Free Crochet Pattern
You may also enjoy exploring our free amigurumi patterns and other popular amigurumi animal patterns available on our website.
Welcome to our crochet corner, where creativity meets the joy of crafting! If you’ve ever dreamed of bringing a piece of the wild into your home, you’re in the right place. In this blog post, we’ll take you on a journey through the vibrant world of amigurumi with a special focus on a free crochet pattern that celebrates one of the jungle’s most majestic creatures: the lion.
Amigurumi, the Japanese art of crocheting or knitting small stuffed toys, has captured the hearts of crafters around the world. It’s not just about creating adorable companions; it’s about the joy of making something beautiful with your own hands. Our featured project, the Amigurumi Lion King, is designed to inspire both seasoned crocheters and beginners alike. This delightful pattern is not only easy to follow but also provides a fantastic opportunity to practice your crochet skills while creating a charming lion plushie that can serve as a decorative piece or a treasured gift.
Whether you are just starting your crochet journey or looking to expand your repertoire, this lion amigurumi pattern offers a perfect blend of simplicity and fun. The detailed instructions and accompanying tips will guide you through every step, ensuring a smooth crafting experience. By the end of this project, you will not only have a beautiful lion to showcase but also a newfound confidence in your amigurumi abilities.
With a few basic crochet stitches and some colorful yarn, you will soon be surrounded by the charm of the jungle right in your living room. Picture a proud lion, sitting regally on your shelf or being embraced by a child as a beloved plush toy. The visual and tactile appeal of your handcrafted creation will surely bring smiles and spark imaginations.
As you embark on this crafting adventure, remember that the heart of crochet lies in the process itself. Embrace each stitch, enjoy the rhythm of your hook, and celebrate the magic that unfolds as your lion takes shape. Join us as we explore the magic of amigurumi, dive into our free crochet pattern, and let your creativity roar to life. So grab your yarn and hook, and let’s begin this delightful journey crafting the Majesty of the Jungle with the Amigurumi Lion King!
Step into the heart of the jungle and embark on a crochet adventure like no other with our Amigurumi Lion King Free Crochet Pattern. This captivating project is designed to appeal to crafters of all skill levels, from crochet enthusiasts looking for their next masterpiece to beginners eager to explore the world of amigurumi. Join us as we unravel the steps to craft your very own majestic lion!
The Amigurumi Lion King Free Crochet Pattern is your key to crafting the regal charm of the animal kingdom. This pattern provides comprehensive, easy-to-follow instructions and expert tips to help you bring the king of the jungle to life. Whether you’re looking to add a touch of wildlife-inspired decor to your home, create a special gift for a loved one, or simply lose yourself in the soothing art of crochet, this project offers it all. From the mane that exudes majesty to the playful twinkle in the lion’s crocheted eyes, your finished amigurumi lion will capture the essence of the savanna’s ruler. Start crocheting today and let the spirit of the Lion King reign in your craft room!
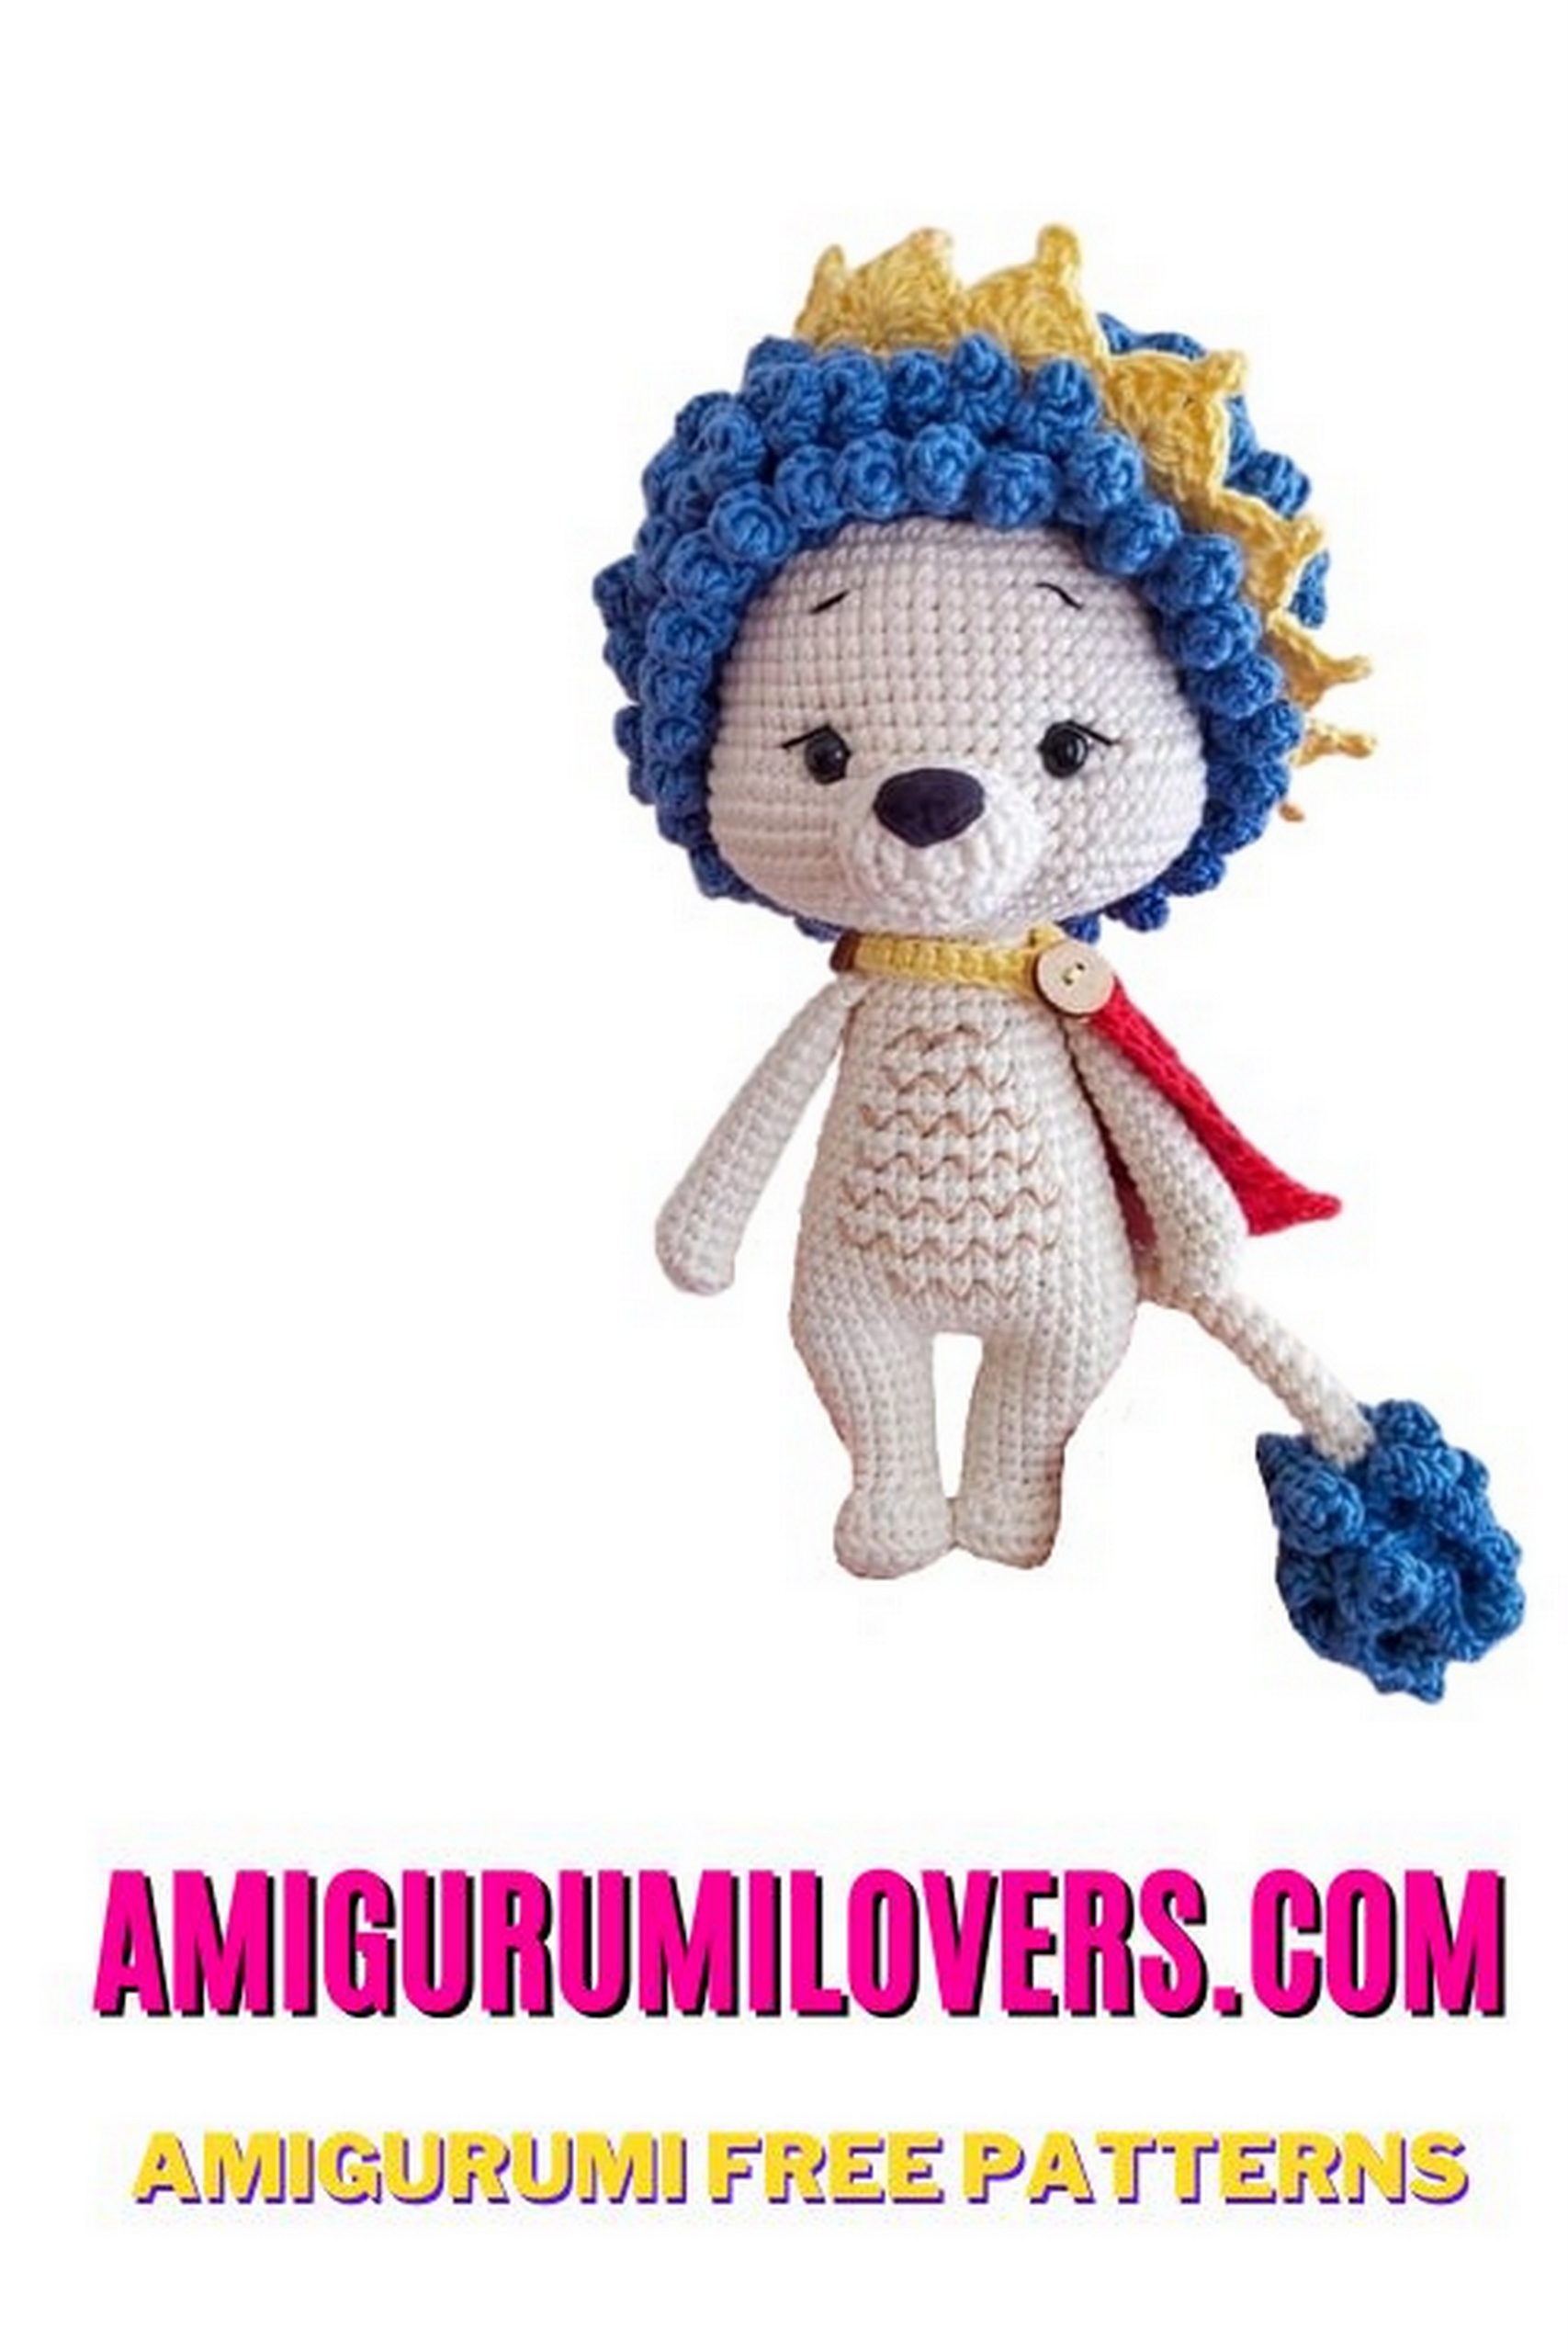
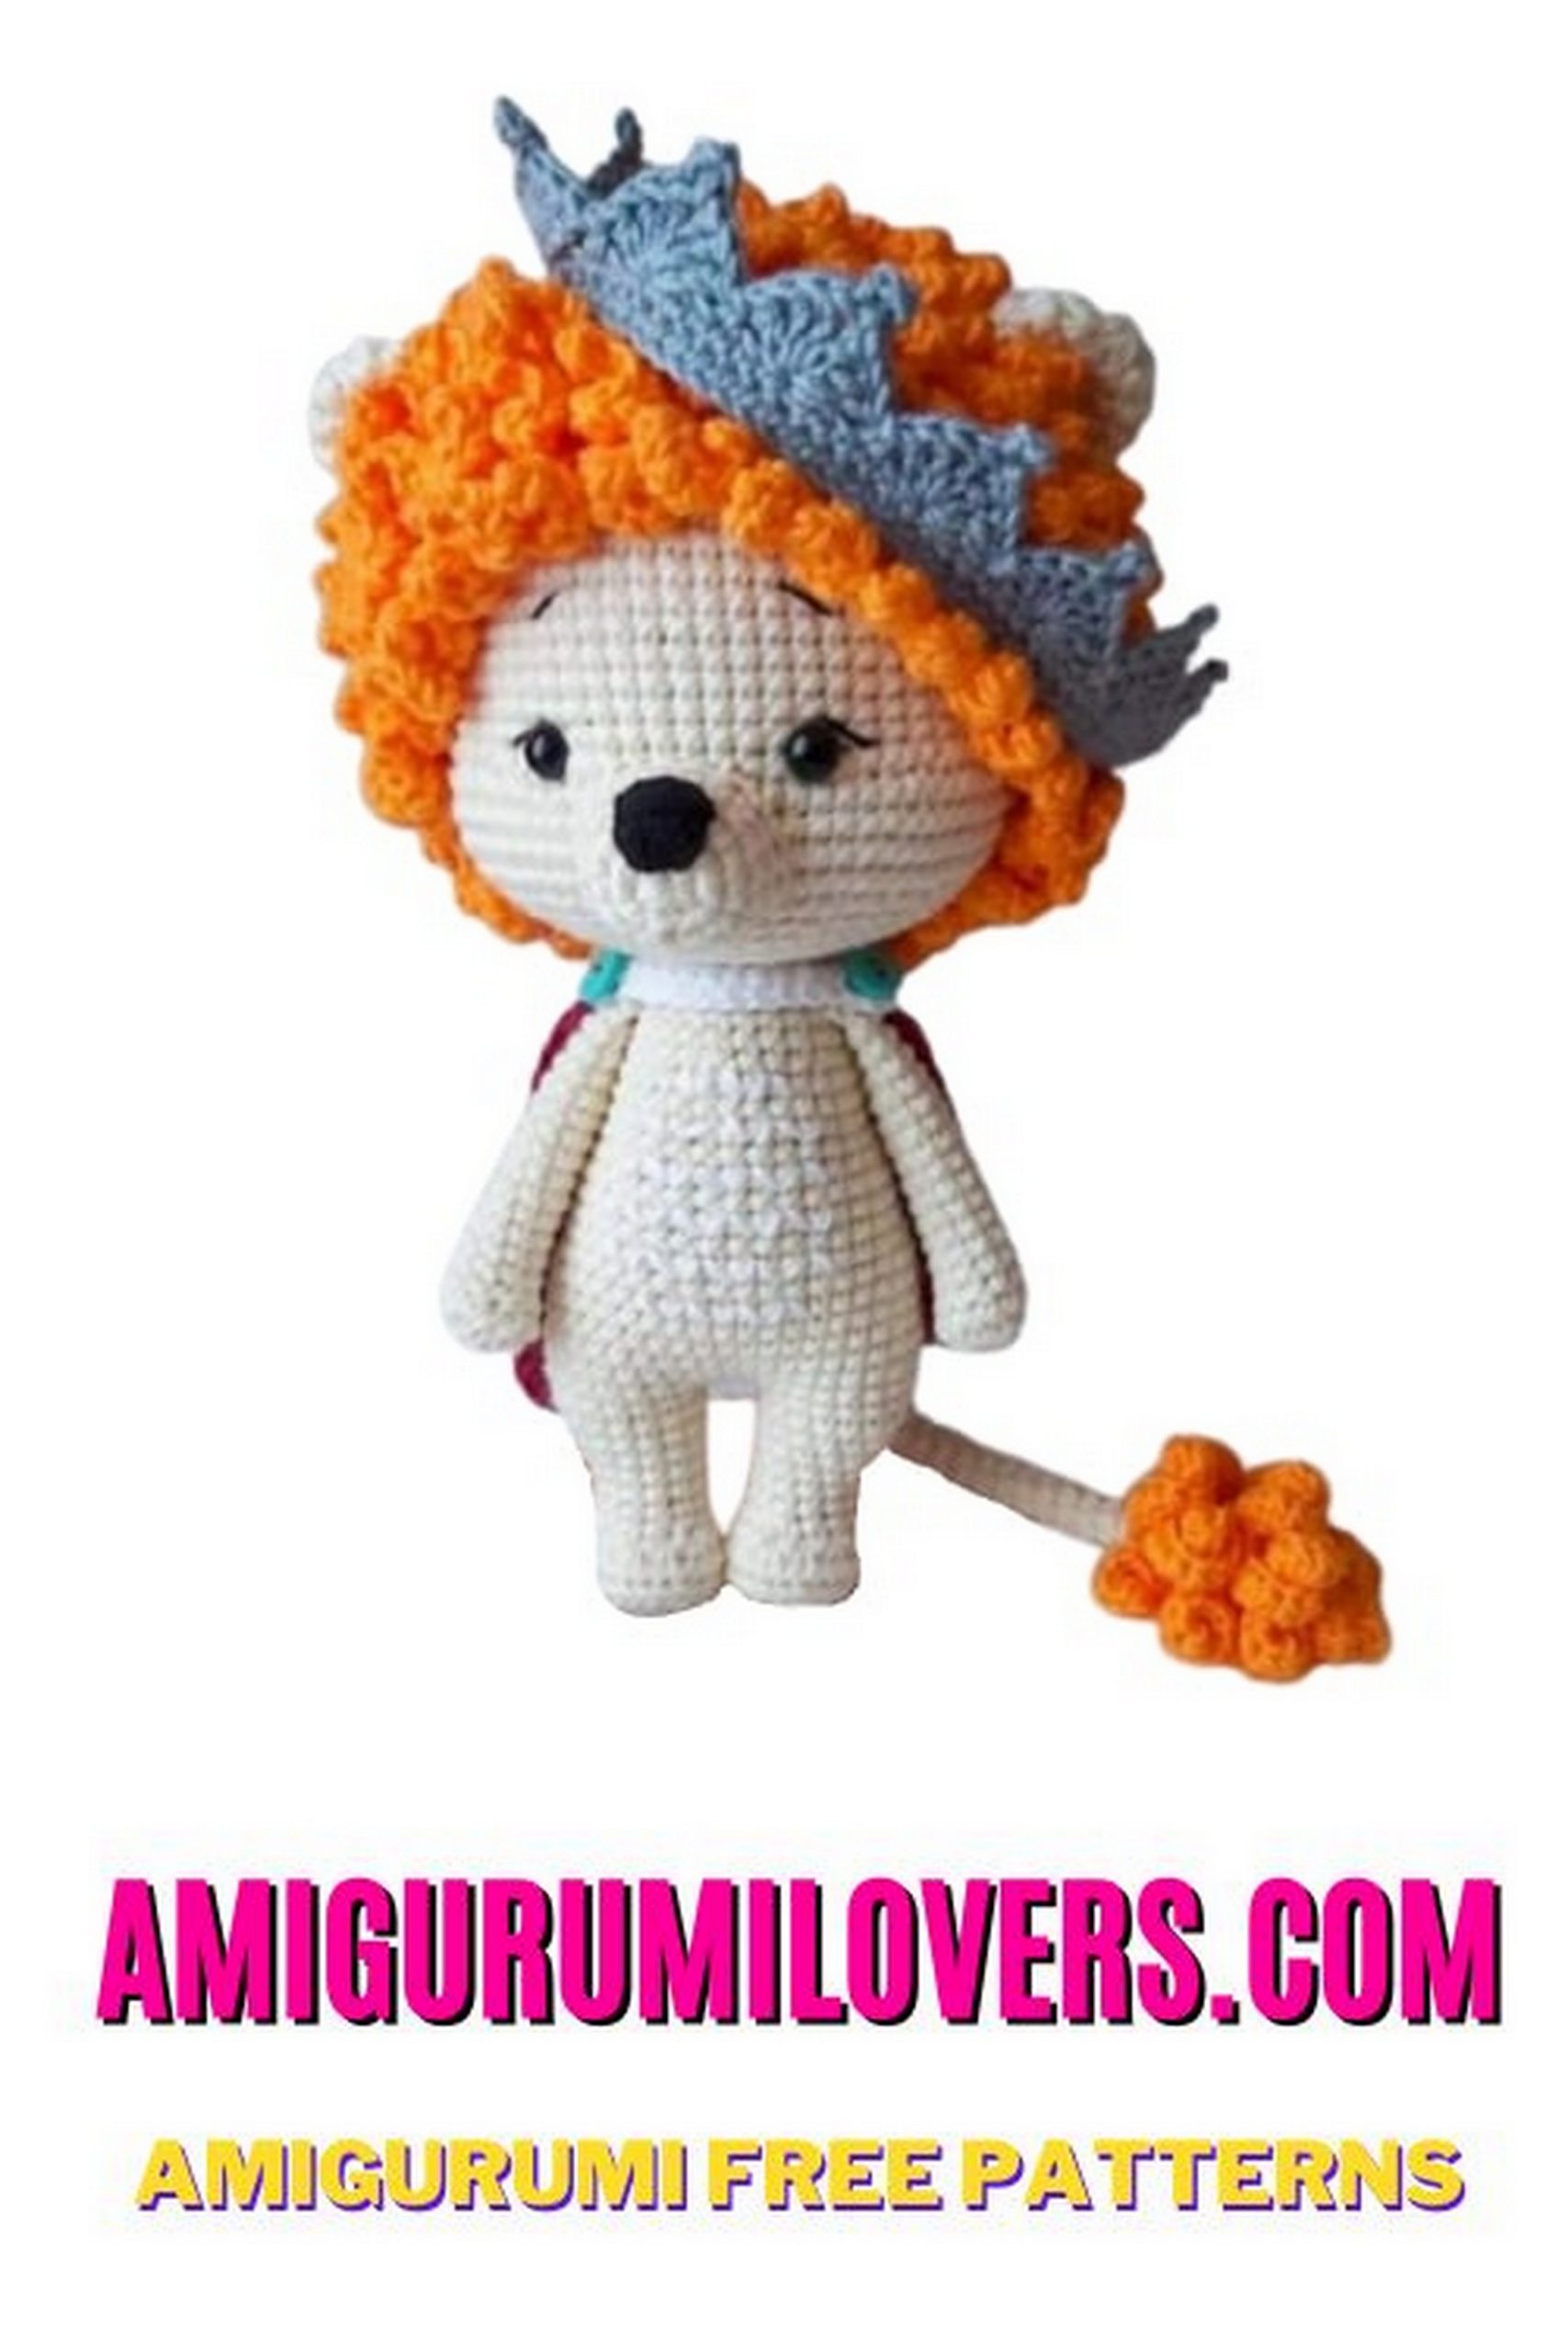
The size of the toy is 20 cm in height
MATERIALS
Yarn Gazzal Baby Cotton, colors:
– beige – No. 3437,
– orange – No. 3416,
– gray – No. 3430,
– claret – No. 3442,
– white – No. 3432
– 2mm hook
– Safety eyes 7 mm
PATTERN
CROWN
Gray yarn, knit in a spiral.
1: 90 ch connect to the ring, 90 sc
2: 90 sc, 1 ch, turn
3: (2 loops to skip, * 3 dc, 5 ch, 3 dc in one loop *, 2 loops to skip, 1 sl-st) – repeat to the end of the row.
To fasten.
Maroon yarn, knit in swivel rows.
1:17 ch, in the 2nd loop from the hook 16 hdc, 1 ch, turn
2: 16 hdc, 1 ch, turn = (16)
3: 1 inc hdc, 14 hdc, 1 inc hdc, 1 ch, turn = (18)
4-5: 18 hdc, 1 ch, turn = (18)
6: 1 inc hdc, 16 hdc, 1 inc hdc, 1 ch, turn = (20)
7-9: 20 hdc, 1 ch, turn = (20)
10: 1 inc hdc, 18 hdc, 1 inc hdc, 1 ch, turn = (22)
11-13: 22 hdc, 1 ch, turn = (22)
Tie part around sc, close. Attach the white yarn and knit over the top 16 sc, then 16 ch, into the 7th loop from hook 10 sc, and again 16 sc
NOSE
Beige yarn, knit in a spiral.
1: 6 sc into magic ring = (6)
2: 6 inc = (12)
3: (1 sc, 1 inc) x6 = (18)
4-5: 18 sc = (18) – 2 rows
Fasten, leave a long thread for sewing.
EARS x2
Beige yarn, knit in a spiral.
1: 8 sc into magic ring = (8)
2: 8 inc = (16)
3-7: 16 sc = (16) – 5 rows
8: (2 sc, 1 dec) x4 = (12)
Fasten, leave a long thread for sewing.
HANDLES x2
Beige yarn, knit in a spiral, we stuff up to half.
1: 6 sc into magic ring = (6)
2: 6 inc = (12)
3: 12 sc = (12)
4: 2 dec, 8 sc = (10)
5-14: 10 sc = (10) – 10 rows
15: 1 sc, 1 dec, 7 sc = (9)
16: 9 sc = (9)
17: 1 dec, 7 sc = (8)
Fold the edges and knit together 4 sc.
HEAD
Beige yarn, knit in a spiral.
1: 8 sc into magic ring = (8)
2: 8 inc = (16)
3: (1 sc, 1 inc) x8 = (24)
4: (3 sc, 1 inc) x6 = (30)
5: (4 sc, 1 inc) x6 = (36)
6: (5 sc, 1 inc) x6 = (42)
7: (6 sc, 1 inc) x6 = (48)
8: (7 sc, 1 inc) x6 = (54)
9: (8 sc, 1 inc) x6 = (60)
10-18: 60 sc = (60) – 9 rows
19: 15 sc, (1 sc, 1 inc) x5, 9 sc, (1 sc, 1 inc) x5, 16 sc = (70)
20-23: 70 sc = (70) – 4 rows
24: 15 sc, (1 sc, 1 dec) x5, 9 sc, (1 sc, 1 dec) x5, 16 sc = (60)
Insert eyes between rows 18 and 19, with a distance of 9 sc (marked red)
25: (8 sc, 1 dec) x6 = (54)
26: (7 sc, 1 dec) x6 = (48)
27: (6 sc, 1 dec) x6 = (42)
28: (5 sc, 1 dec) x6 = (36)
29: (4 sc, 1 dec) x6 = (30) – fill
30: (3 sc, 1 dec) x6 = (24)
31: (2 sc, 1 dec) x6 = (18)
Fasten, leave a long thread for sewing.
Cut a long thread of beige yarn. Take the needle out of the neck to the eyes, as in the photo, and back to the neck. Pull tight. So that the eyes pressed into the head.
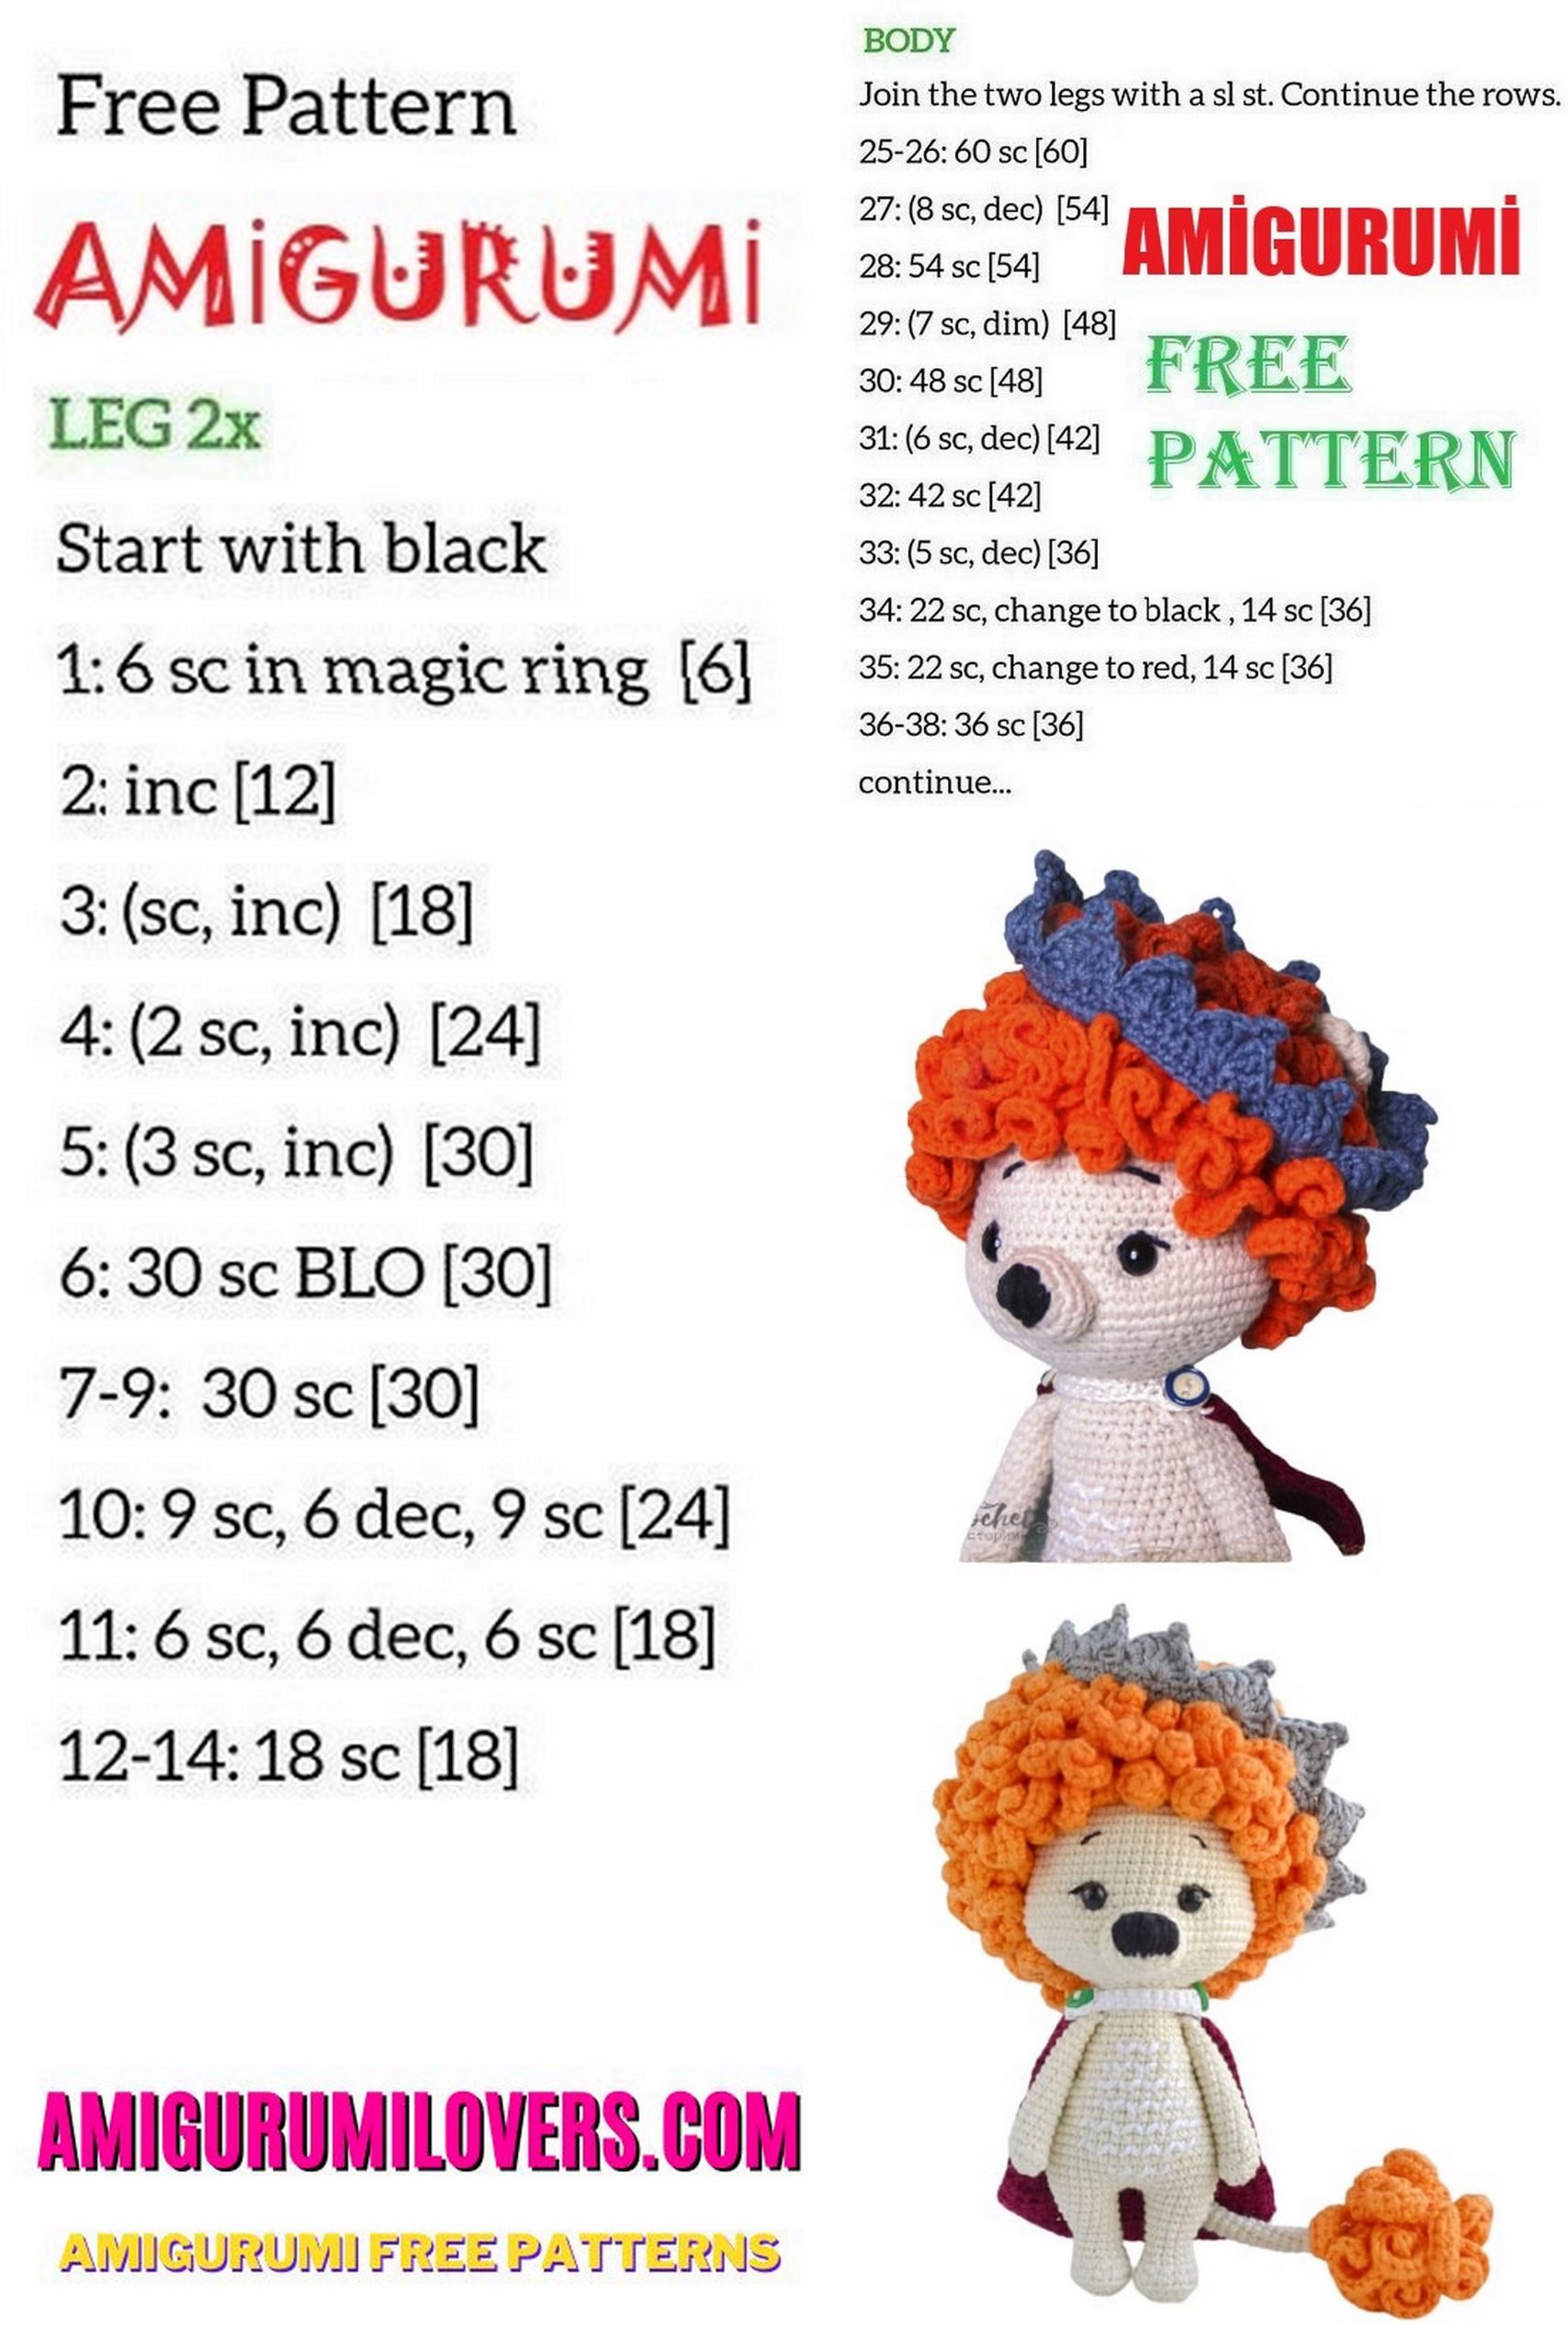
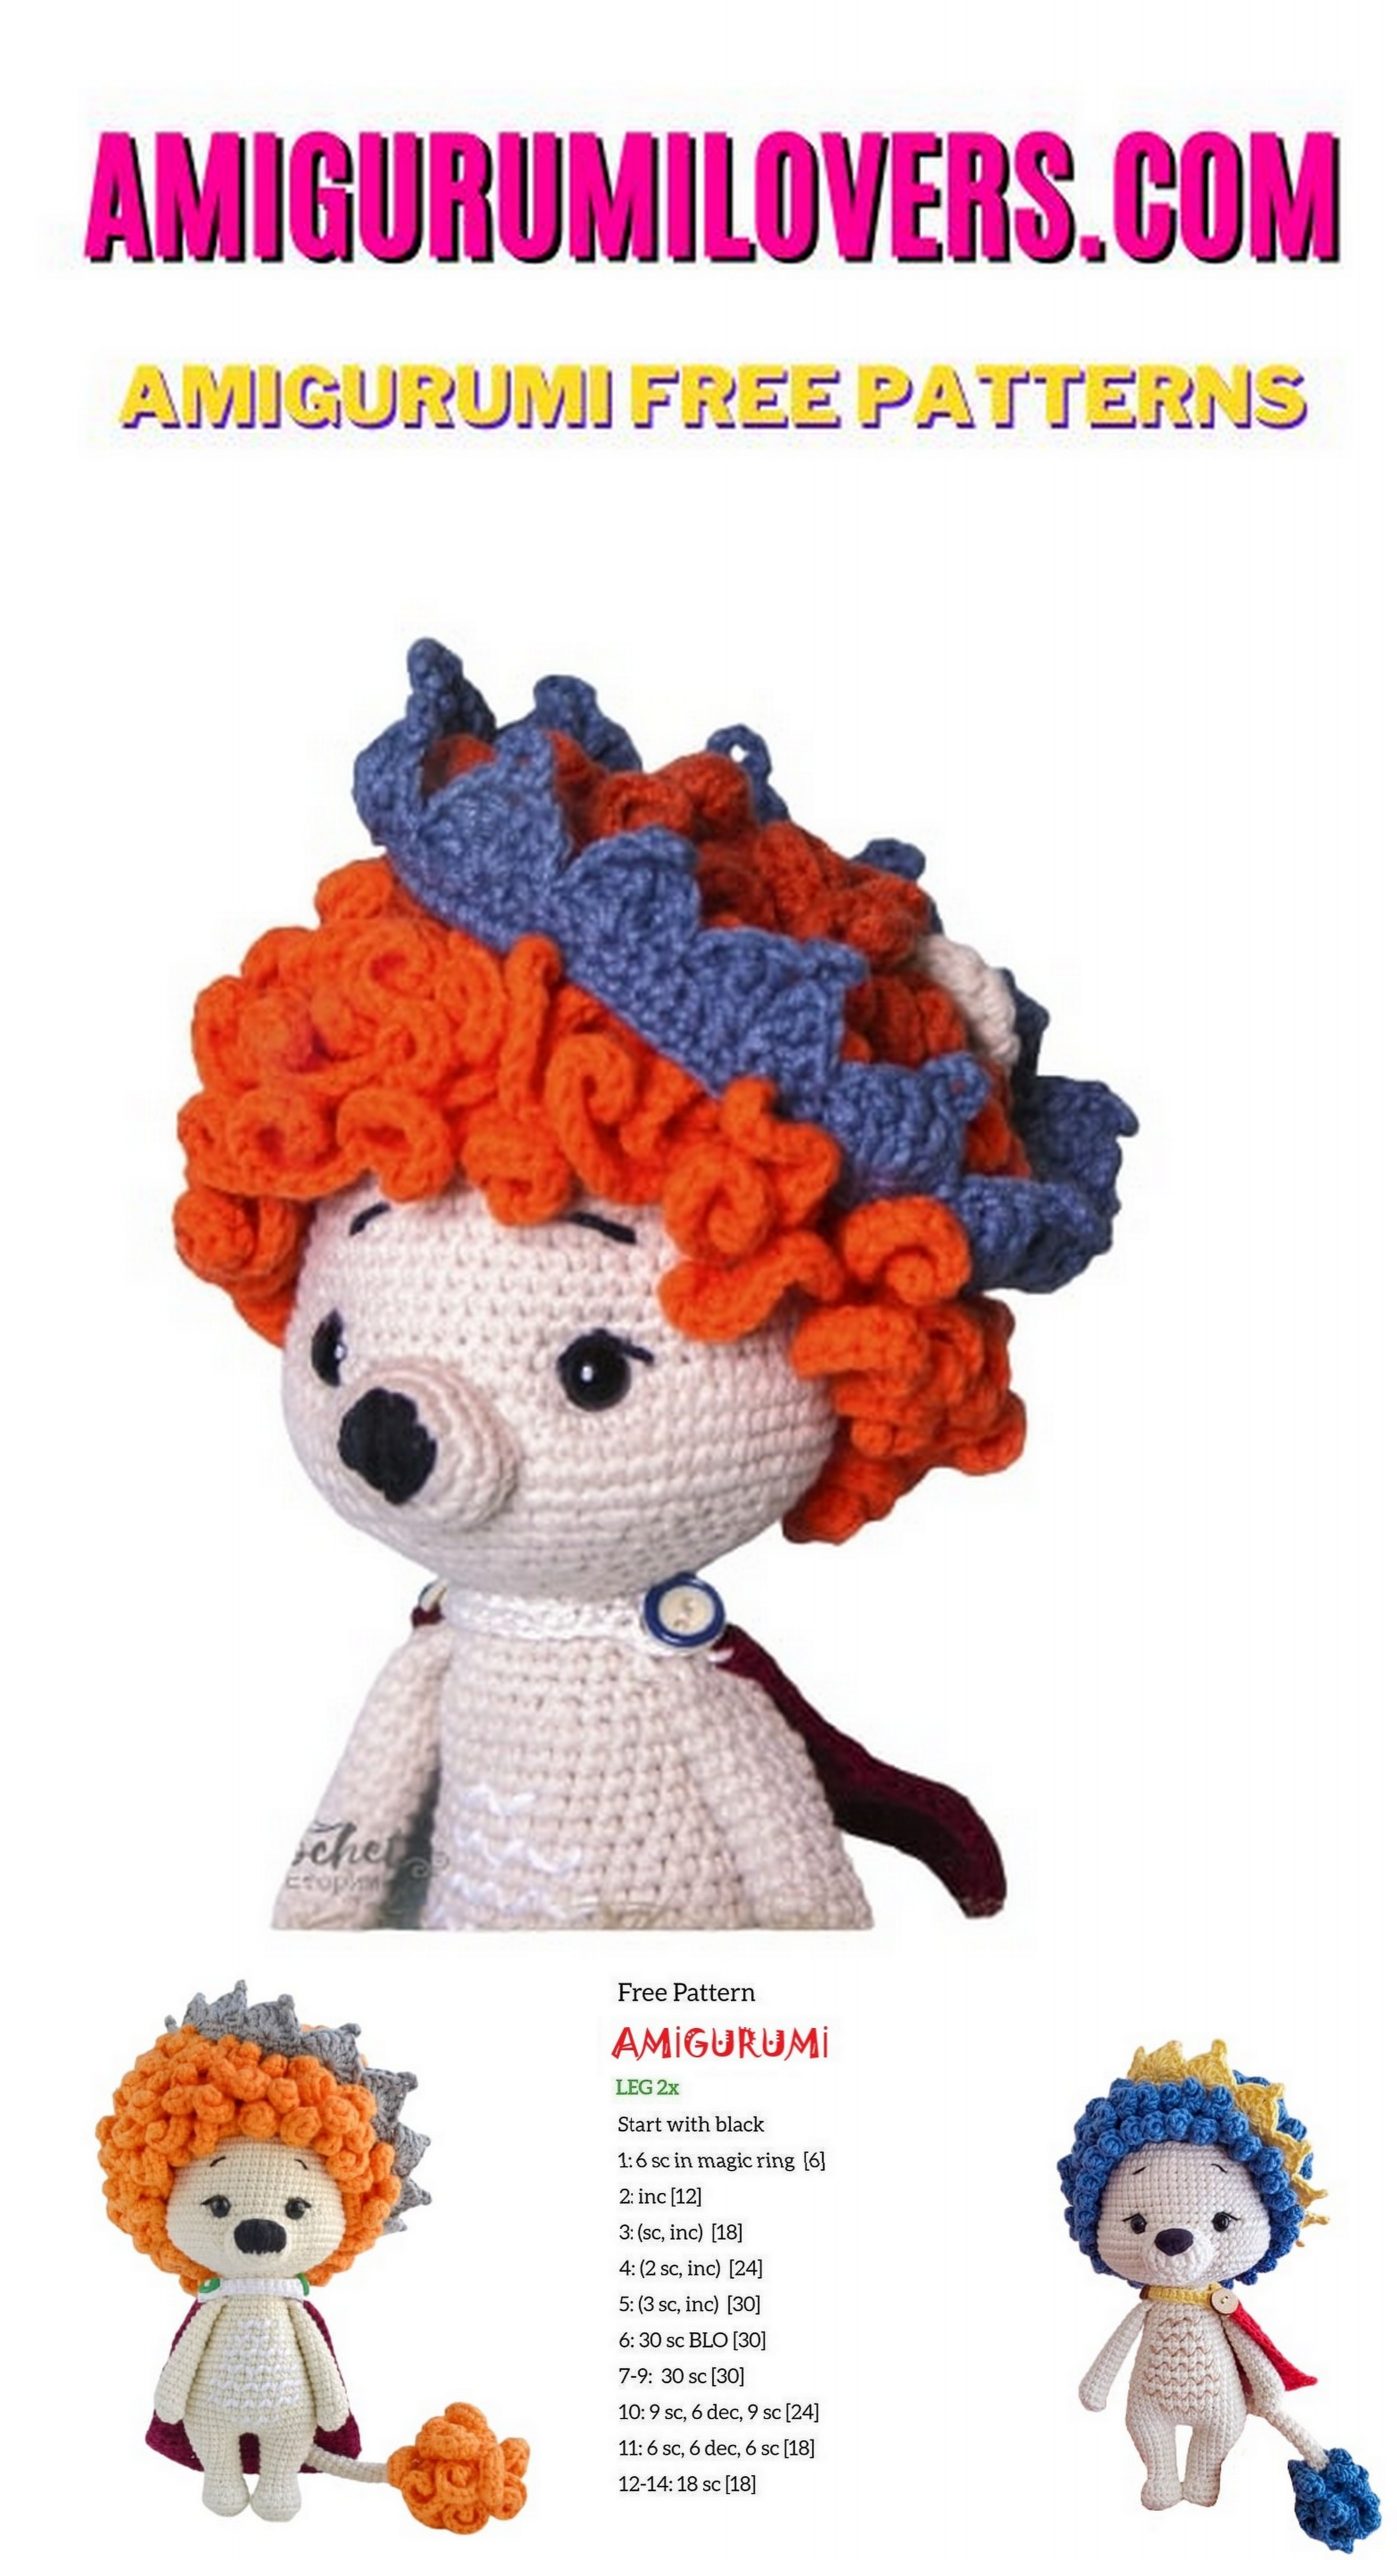
LEGS AND BODY
Beige yarn, we stuff along the knitting.
We start with the left foot.
1: 7 sc into magic ring = (7)
2: 7 inc = (14)
3: (1 sc, 1 inc) x7 = (21)
4: behind the rear wall of the loop 21 sc = (21)
5: 3 sc, 7 dec, 4 sc = (14)
6: 5 sc, 1 dec, 7 sc = (13)
7-8: 13 sc = (13) – 2 rows
9: 2 inc, 11 sc = (15)
10: 15 sc = (15)
11: (1 sc, 1 inc) x2, 11 sc = (17)
12: 17 sc = (17) – fix.
Right leg
1: 7 sc into magic ring = (7)
2: 7 inc = (14)
3: (1 sc, 1 inc) x7 = (21)
4: behind the rear wall of the loop 21 sc = (21)
5: 3 sc, 7 dec, 4 sc = (14)
6: 5 sc, 1 dec, 7 sc = (13)
7-8: 13 sc = (13) – 2 rows
9: 8 sc, 2 inc, 3 sc = (15)
10: 15 sc = (15)
11: 8 sc, (1 sc, 1 inc) x2, 3 sc = (17)
12: 17 sc = (17) + 4 sc
Connect Legs
13: 3 ch join the left leg, 8 sc, 1 inc, 8 sc, 3 sc by ch, 8 sc, 1
inc, 8 sc, 3 sc by ch = (42)
14-16: 42 sc = (42) – 3 rows
17: 9 sc, 1 dec, 18 sc, 1 dec, 11 sc = (40)
18: 40 sc = (40)
19: 8 sc, 1 dec, 18 sc, 1 dec, 10 sc = (38)
20: 38 sc = (38)
21: 7 sc, 3 sc knit together, 16 sc,
3 sc knit together, 9 sc = (34)
22-24: 34 sc = (34) – 3 rows
25: 6 sc, 3 sc knit together, 14 sc, 3 sc knit together, 8 sc = (30)
26-29: 30 sc = (30) – 4 rows
30: (3 sc, 1 dec) x6 = (24) – fill
31: 24 sc = (24)
Join hands
32: 4 sc, 4 sc on the arm and body, 8 sc,
4 sc on the arm and body, 4 sc = (24)
33: 24 sc = (24)
34: (2 sc, 1 dec) x6 = (18) – fix.
HAIR
Orange yarn
1: 6 sc into magic ring = (6)
2: behind the rear wall of the loop 6 inc = (12)
3: (1 sc, 1 inc) x6 = (18)
4: behind the back wall of the loop (2 sc, 1 inc) x6 = (24)
5: (3 sc, 1 inc) x6 = (30)
6: behind the back wall of the loop (4 sc, 1 inc) x6 = (36)
7: (5 sc, 1 inc) x6 = (42)
8: behind the back wall of the loop (6 sc, 1 inc) x6 = (48)
9: (7 sc, 1 inc) x6 = (54)
10: behind the back wall of the loop 54 sc = (54)
11: (8 sc, 1 inc) x6 = (60)
12: behind the rear wall of the loop 60 sc = (60)
13: 60 sc = (60)
14: behind the rear wall of the loop 60 sc = (60)
15: 60 sc = (60)
16: behind the rear wall of the loop 60 sc = (60)
17: 60 sc = (60)
18: behind the rear wall of the loop 60 sc = (60)
19: 60 sc = (60)
20: behind the rear wall of the loop 60 sc = (60)
21: 60 sc = (60)
22: behind the rear wall of the loop 60 sc = (60)
Fasten, leave a long thread for sewing.
We attach the orange thread to the last row and knit the front loop wall (see photo) 11 ch, in the 2nd loop from the hook (1 hdc, 1 inc hdc) x5, skip 1 loop, 1 sl-st – repeat to the end of the row. Tie all subsequent rows in this way.
TAIL
Orange yarn
1: 6 sc into magic ring = (6)
2: behind the rear wall of the loop 6 inc = (12)
3: 12 sc = (12)
4: behind the rear wall of the loop 12 sc = (12)
5: (2 sc, 1 dec) x3 = (9)
6: behind the back wall of the loop 9 sc = (9) – fill
7: (1 sc, 1 dec) x3 = (6)
Change to beige yarn
8: behind the back wall of the loop 6 sc = (6)
9-31: 6 sc = (6) – 23 rows
Fasten, leave a long thread for sewing.
Tie the end of the tail in the same way as hair.
ASSEMBLY
Before you leave, make sure to check out more free amigurumi crochet patterns and discover new ideas for your next project.
You can also browse our full amigurumi pattern archive for hundreds of beginner-friendly designs.