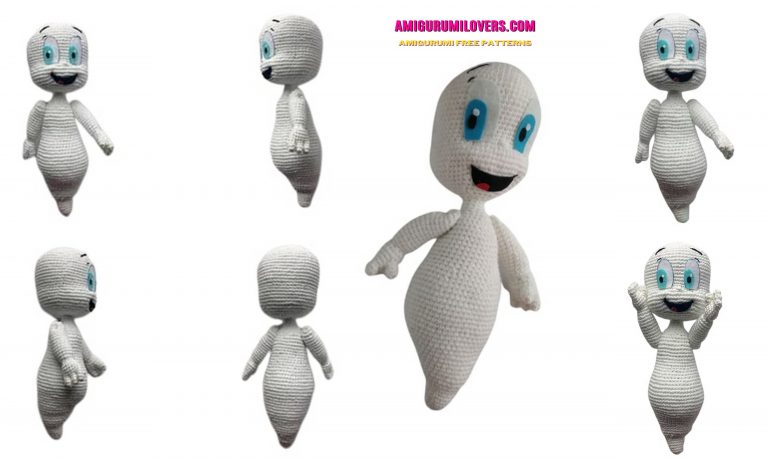
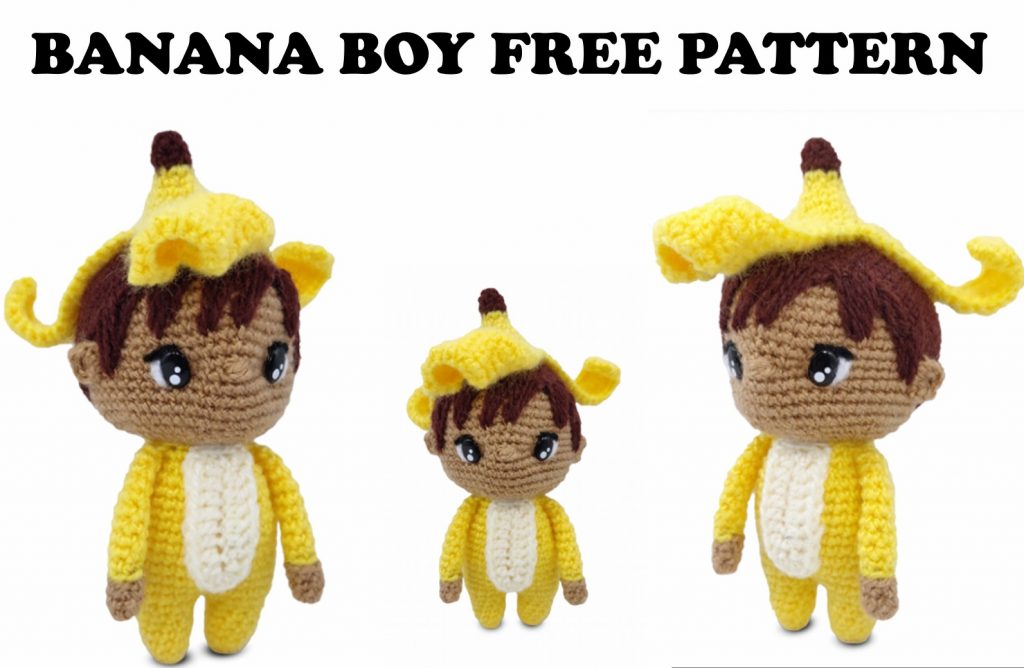
Free Banana Boy Amigurumi Pattern | Craft Your Adorable Crochet Banana Friend
You may also enjoy exploring our free amigurumi patterns and other popular amigurumi animal patterns available on our website.
Welcome to our crochet corner, where creativity and yarn come together to create the most delightful projects! Today, we are thrilled to share a special treat for crochet enthusiasts of all levels: a free amigurumi pattern to make your very own Banana Boy! This charming little character is not only fun to create but also a fantastic addition to your soft toy collection or a unique gift for that special someone in your life.
If you’re new to the world of amigurumi, you might be wondering what this whimsical term means. Amigurumi is the art of crocheting small, stuffed animals or objects, and it’s a delightful way to express your creativity while improving your crochet skills. With just a few simple stitches and a bit of yarn, you can bring our Banana Boy to life, complete with a cheeky smile and adorable features that are sure to brighten anyone’s day.
Our free Banana Boy amigurumi pattern is designed with beginners in mind, guiding you through each step with clear instructions and helpful tips. Whether you’re an experienced crocheter or taking your first steps with a hook and some yarn, this pattern provides an excellent opportunity to practice basic stitches while allowing you to experiment with your color choices. The finished product is not only cute but also versatile enough to be used as a decorative item, a playful gift, or a unique companion for children.
In this blog post, you will find everything you need to get started on your journey to creating this adorable crochet banana friend. We’ll cover essential materials, tools, and techniques needed to make your amigurumi experience enjoyable and fulfilling. From selecting the perfect yarn to the final stitches that bring your Banana Boy to life, our detailed guide will help you every step of the way.
So grab your crochet hook, choose your favorite yarn colors, and get ready to embark on a whimsical adventure! The joy of crafting comes from the process itself and seeing your ideas take shape. It’s amazing how a simple ball of yarn can transform into a delightful character that can spark joy and creativity in both you and those who receive your handmade treasure. Join us as we dive into the delightful world of amigurumi, and let’s create something wonderful together. Happy crocheting!
Welcome to the delightful world of amigurumi! How about crocheting a charming little friend like Banana Boy? The good news is that this guide offers the Banana Boy Amigurumi pattern for free! Designed with beginners in mind, this pattern provides easy-to-follow step-by-step instructions.
Pattern Highlights:
- Materials List: Discover the materials you’ll need to bring Banana Boy to life.
- Basic Techniques: The pattern includes explanations of fundamental amigurumi crochet techniques, making it perfect for newcomers.
- Detailed Instructions: Each step is carefully explained, ensuring a smooth crafting experience.
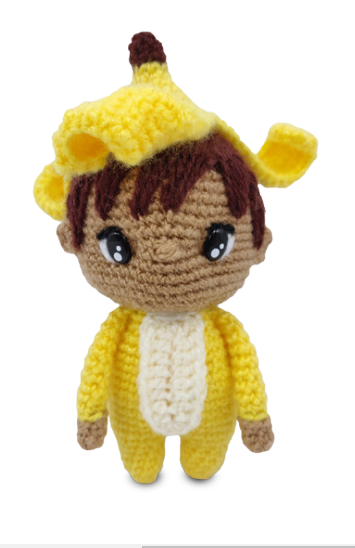
- Adorable Outcome: You’ll be delighted with the cute and huggable Banana Boy you create.
To learn more about the Banana Boy Amigurumi pattern and start your crochet journey, follow the instructions below. Craft your very own Banana Boy, and let the world of amigurumi fill your life with joy and creativity!
Materials
. Sock weight yarn in yellow, light brown, dark brown,
ivory, small lengths of yarn in black and white for eye
details
. 2.5mm hook
. a pair of 10mm oval eyes
. Stitch markers
. Polyester fiberfill for stuffing
. Yarn needle
. Pearl headed pins
. A pair of scissors
Terminology
magic ring
ch (chain / chains)
st (stitch / stitches)
sc (single crochet)
hdc (half double crochet)
dc (double crochet)
inc (increase)
dec (decrease)
BLO (back loops only)
sl st (slip stitch)
Size: 16cm [approximately] when made with the indicated yarn
Difficulty Level: Easy
Instructions
LEG (make 2)
Start with yellow yarn.
Rnd 1: 5 sc in a magic ring. [5]
Rnd 2: inc X 5. [10]
Rnd 3-6: sc around. [10]
Rnd 7: (sc, inc) X 5. [15]
Mark the next st.
Fasten off. Weave in the yarn end.
Make the second leg but do not fasten off. We will join the legs in the next round.
BODY
Rnd 1: With the active stitch of the second leg on your hook, sc on the marked st of the first leg; sc on the remaining 14 stitches of this leg and then continue making sc on all 15 st of the second leg. [30]
Rnd 2: sc 14, inc X 2, sc 14. [32]
Rnd 3-11: sc around. [32]
Rnd 12: (sc 6, dec) X 4. [28]
Rnd 13: (sc 5, dec) X 4. [24]
Rnd 12: (sc 4, dec) X 4. [20]
Fasten off, leaving a long tail for sewing.
Stuff the legs and the body.
CHEST PATCH
Start with ivory yarn.
Ch 11. Starting from the 4th ch from the hook, dc in the next 7 ch, 5 dc in the last ch. Continue working on the other side of the foundation ch and dc 7. [19]
Fasten off, leaving a long tail for sewing.
ARM (make 2)
Start with light brown yarn.
Rnd 1: 6 sc in a magic ring. [6]
Rnd 2-3: sc around. [6]
Join yellow yarn.
Rnd 4: BLO sl st around. [6]
Rnd 5: BLO sc around. [6]
Rnd 6-13: sc around. [6]
Fasten off, leaving a long tail for sewing.
HEAD
Start with light brown yarn.
Rnd 1: 8 sc in a magic ring. [8]
Rnd 2: inc X 8. [16]
Rnd 3: (sc, inc) X 8. [24]
Rnd 4: (sc 2, inc) X 8. [32]
Rnd 5: (sc 3, inc) X 8. [40]
Rnd 6: (sc 4, inc) X 8. [48]
Rnd 7-19: sc around. [48]
Rnd 20: (sc 4, dec) X 8. [40]
Rnd 21: (sc 3, dec) X 8. [32]
Rnd 22: (sc 2, dec) X 8. [24]
Insert 10mm black oval safety eyes between Rnd 14 & 15, 9 st apart.
Rnd 23: (sc, dec) X 8. [16]
Rnd 24: (sc 2, dec) X 4. [12]
Fasten off. Weave in the yarn end.
Stuff the head.
EYES
Indent eye sockets Following this step will give the doll’s face some definition.
Thread a yarn needle with light brown yarn or any other color you have used for making the head. Insert the needle from the base of the head, bring it out from Point A next to the eye [Pic 1]. Push the needle back in from Point B and out from Point C close to the next eye [Pic 2]. Push it in from Point D, bringing it out from Point A again [Pic 3]. Gently squish the eyes together with your fingers and carefully pull the yarn to bring the eyes closer. While holding this shape, push the needle back in from Point B and out from Point C [Pic 4]. Push it in from Point D, and bring it out from the opening at the base of the head [Pic 5]. Gently pull both the yarn ends and tie them together to hold the shape. Clip off excess yarn and push the yarn ends inside the head.
Eye details: Thread a yarn needle with white yarn and embroider a crescent shape around the outer eye [Pic 6]. With black yarn, sew a horizontal line above the eye, starting from the inner corner of the eye and extending just beyond the white crescent [see Pic 6 for reference].

NOSE
To make the nose, sew 4 to 5 short horizontal lines between the eyes with light peach yarn [between Rnd 14 & 15 of the head]. See Pic 7 for reference.
HAIR
Start with dark brown yarn.
Rnd 1: 8 sc in a magic ring. [8]
Rnd 2: inc X 8. [16]
Rnd 3: (sc, inc) X 8. [24]
Rnd 4: (sc 2, inc) X 8. [32]
Rnd 5: (sc 3, inc) X 8. [40]
Rnd 6: (sc 4, inc) X 8. [48]
Rnd 7-14: sc around. [48]
Fasten off, leaving a long tail for sewing fringe on the forehead.
Slip the hair cap on the head. Make sure the yarn tail is aligned with the doll’s left eye. Using pearl headed pins, mark the area on the forehead where the fringe will be embroidered [see Pic 8 for reference]. First, weave the remaining yarn tail around these pins to create a zigzag outline for the fringe that will cover the entire right side of the forehead. Secure it with a single stitch on the hair piece. Do not take out the pins yet; we will need them to hold the outline. Push needle all the way back to the starting point [Pic 9].
Now we will start embroidering hair, one cluster at a time. With your yarn needle, make a stitch at the lowest point of the first inverted triangle on the outline [Pic 10]. Make sure the needle goes beneath the yarn that serves as your outline and through one stitch on the head. Make the next stitch on the hair cap, right next to the point where the first diagonal hair strand begins [Pic 11]. The idea is to keep sewing these lines within the outline you created until you cover the entire right side of the forehead [Pic 12].
Similarly, create an outline with pearl headed pins on the left side of the forehead and make the fringe.

EAR (make 2)
In a magic ring, [sc, hdc, 2 dc, hdc, sc] to create a semicircle. Fasten off, leaving a long tail for sewing. Sew ears on the head.
BANANA PEEL HAT
Start with dark brown yarn.
Rnd 1: 6 sc in a magic ring. [6]
Rnd 2-3: sc around. [6]
Join yellow yarn.
Rnd 4: (sc 2, inc) X 2. [8]
Rnd 5: sc around. [8]
Rnd 6: inc X 8. [16]
Rnd 7: sc around. [16]
Rnd 8: (sc, inc) X 8. [24]
Rnd 9: sc around. [24]
From here on, we will work in rows.
*Row 1: sc in the next 8 st, mark the next st, ch 1,
turn. [8]
Row 2-3: sc 8, ch 1, turn. [8]
Row 4: sc, dec, sc 2, dec, sc, ch 1, turn. [6]
Row 5-7: sc 6, ch 1, turn. [6]
Row 8: sc, dec X 2, sc, ch 1, turn. [4]
Row 9-18: sc 4, ch 1, turn. [4]
Row 19: sc, dec, sc, ch 1, turn. [3]
Row 20-21: sc 3, ch 1, turn. [3]
Fasten off, weave in the yarn end.
Join yellow yarn on the marked st.**
Repeat from * to ** two more times.
Join yellow yarn at any point between the two strips of banana peel and sc along the row ends, making 1 st per row. At the tip of the peel (Row 21), dec 1, sc in the next st. Continue making sc along the next row end. Do this for all three strips of the banana peel.
Fasten off, weave in the yarn ends.

ASSEMBLY
. Pin the head on the body and sew them together.
. Sew arms on the last round of the body.
. Sew chest patch on the body.
. Pin the banana peel hat on the head and sew in place.
Congratulations!
You’ve made your very own Banana Boy.
Credit: talesoftwistedfibers
Before you leave, make sure to check out more free amigurumi crochet patterns and discover new ideas for your next project.
You can also browse our full amigurumi pattern archive for hundreds of beginner-friendly designs.