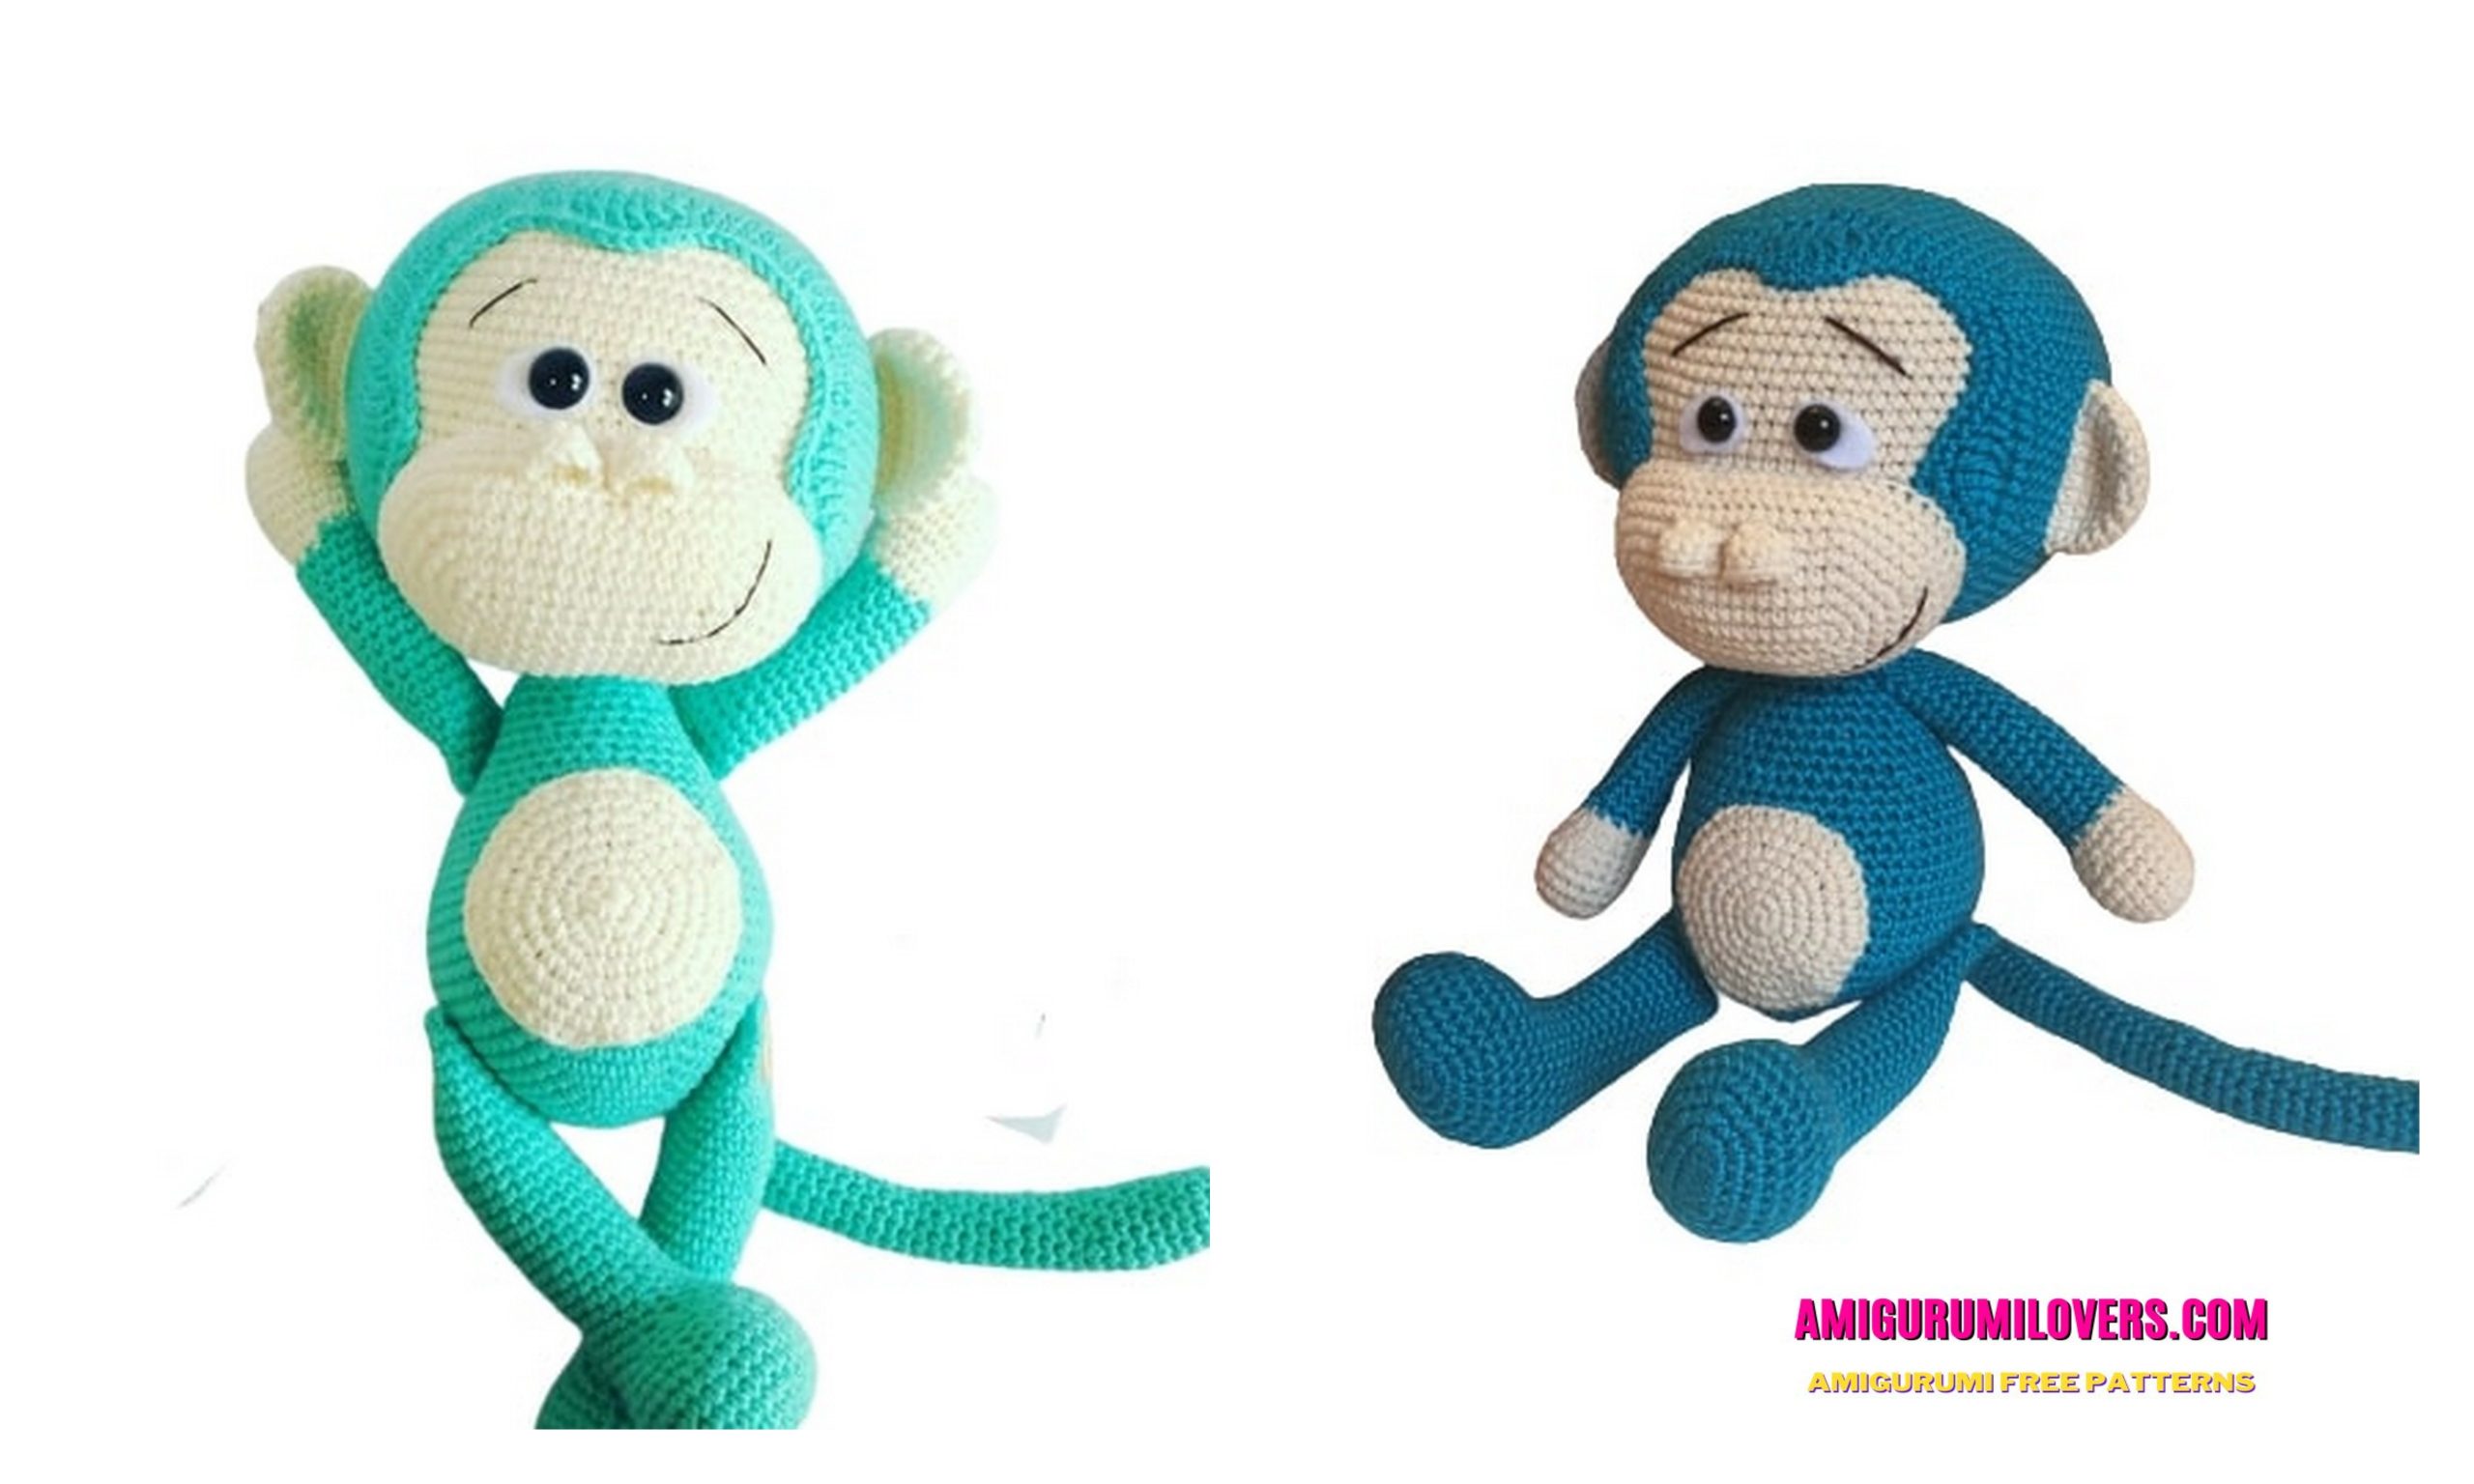
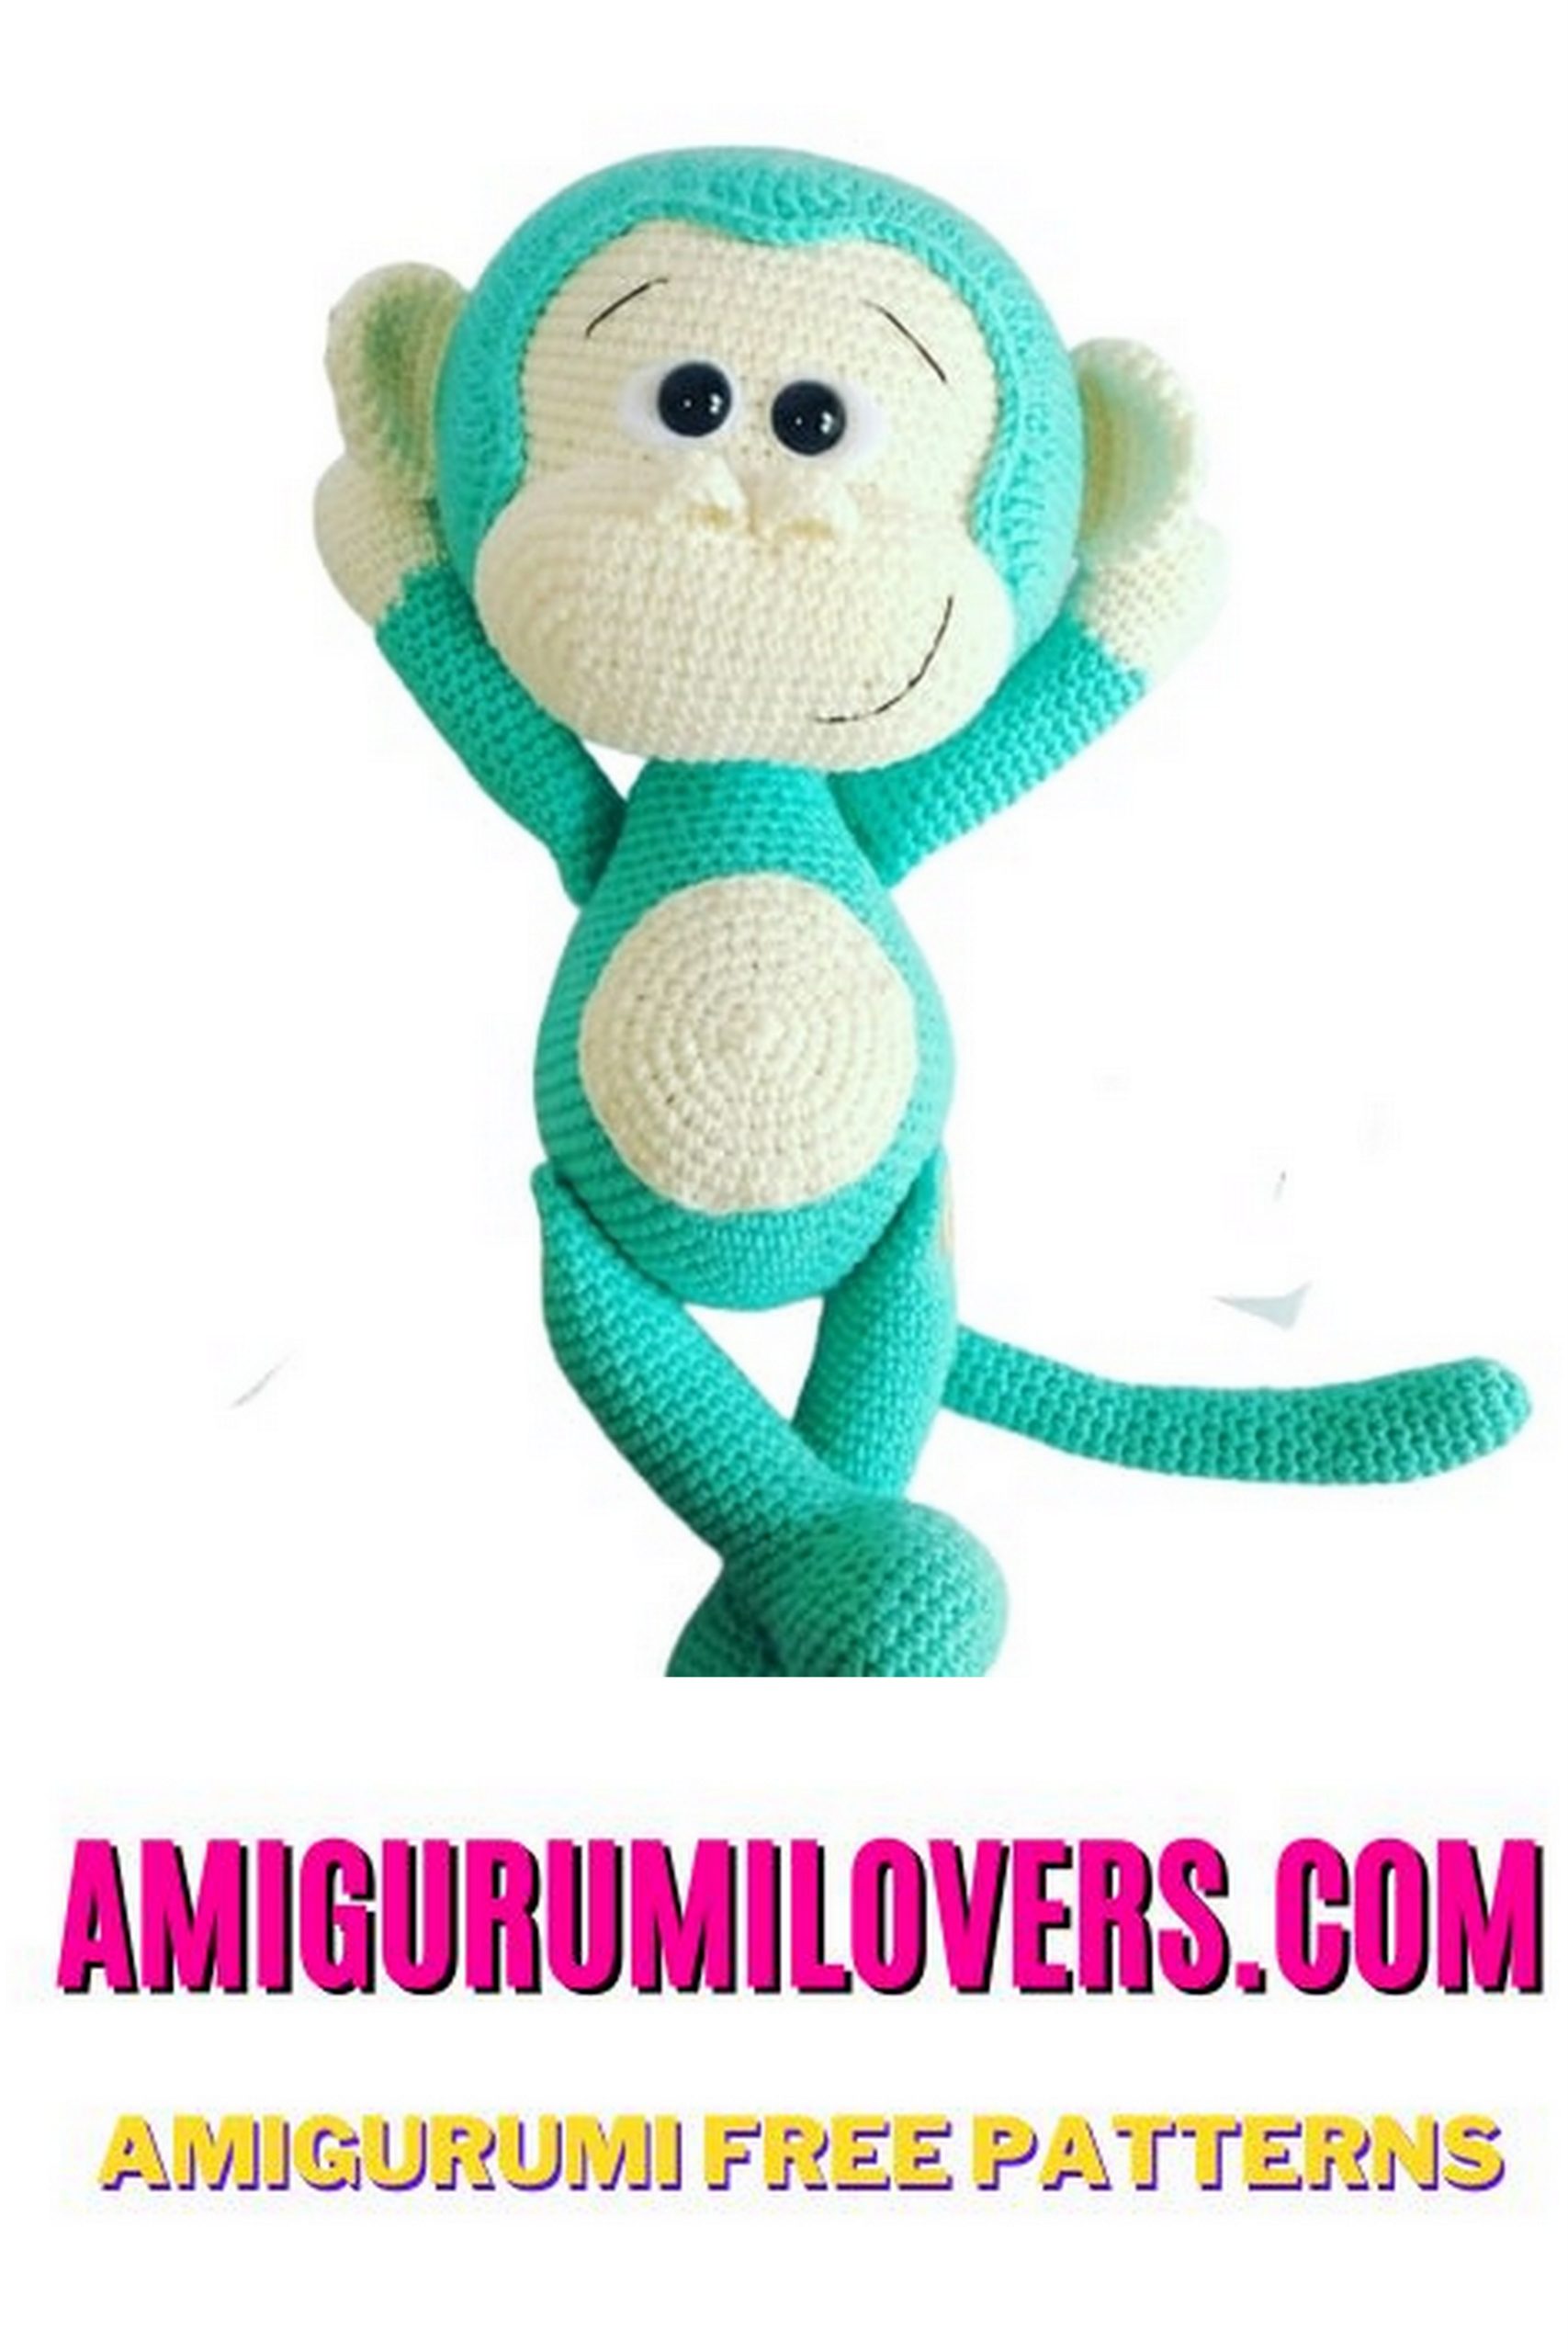
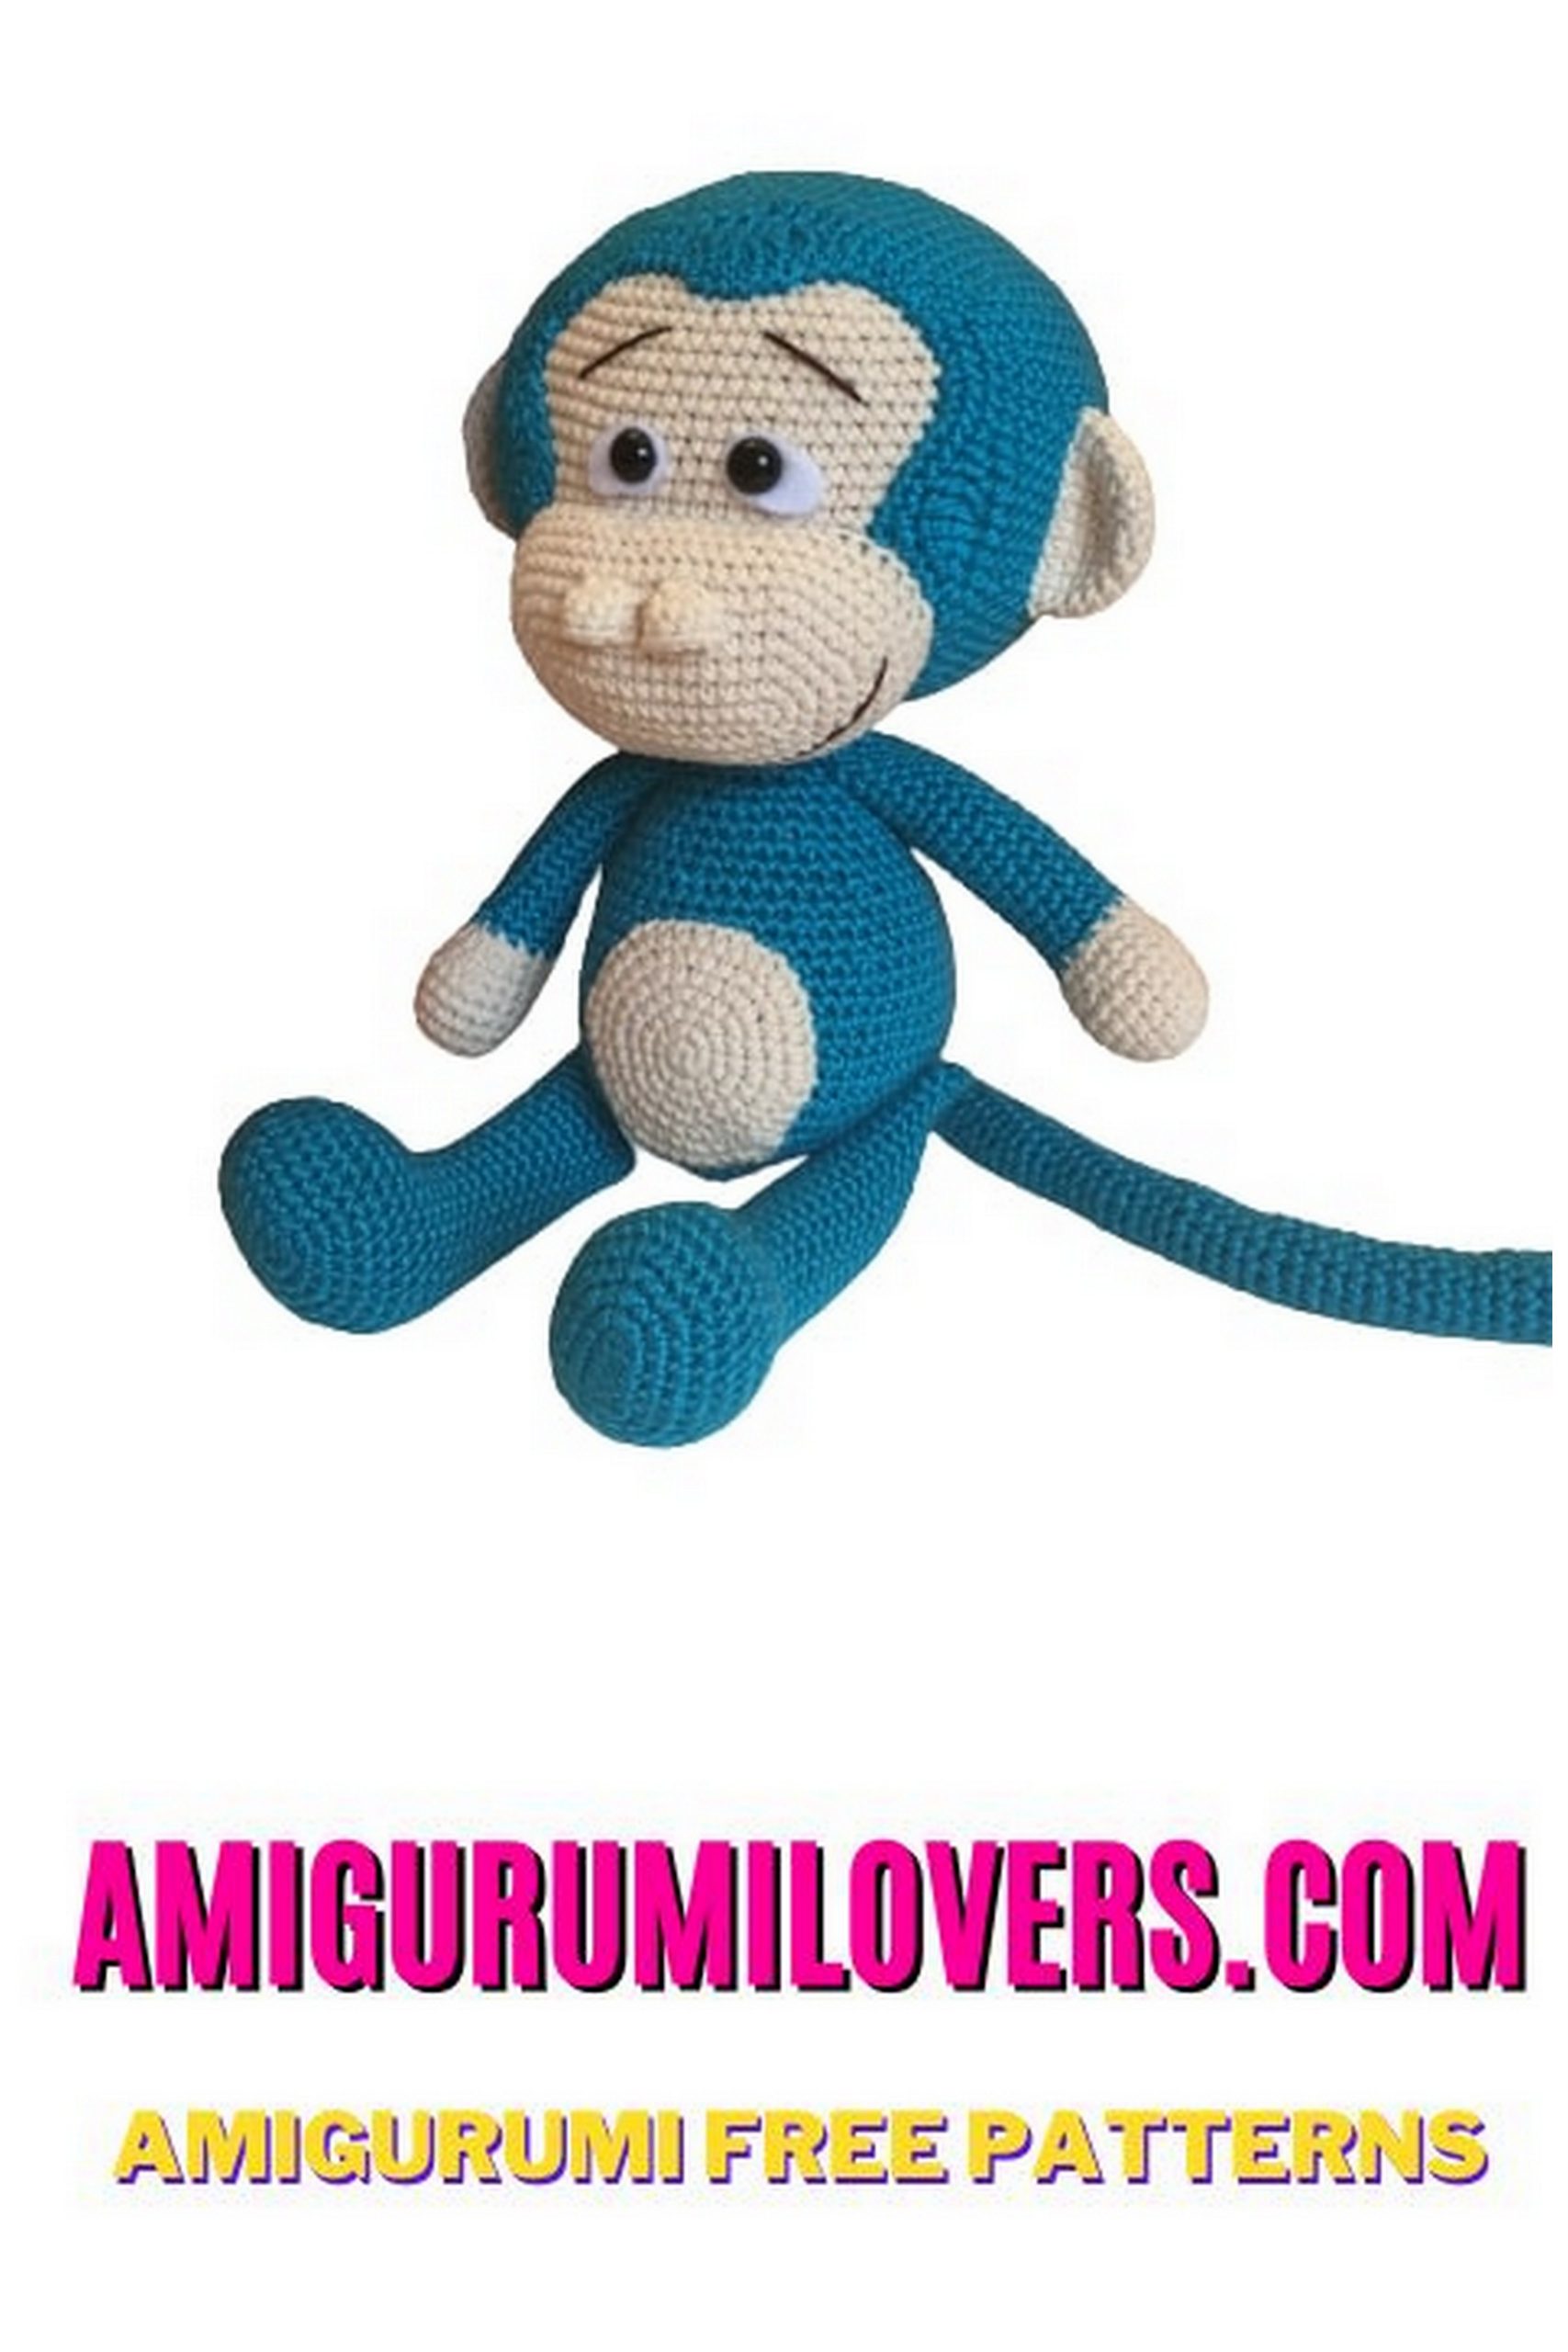
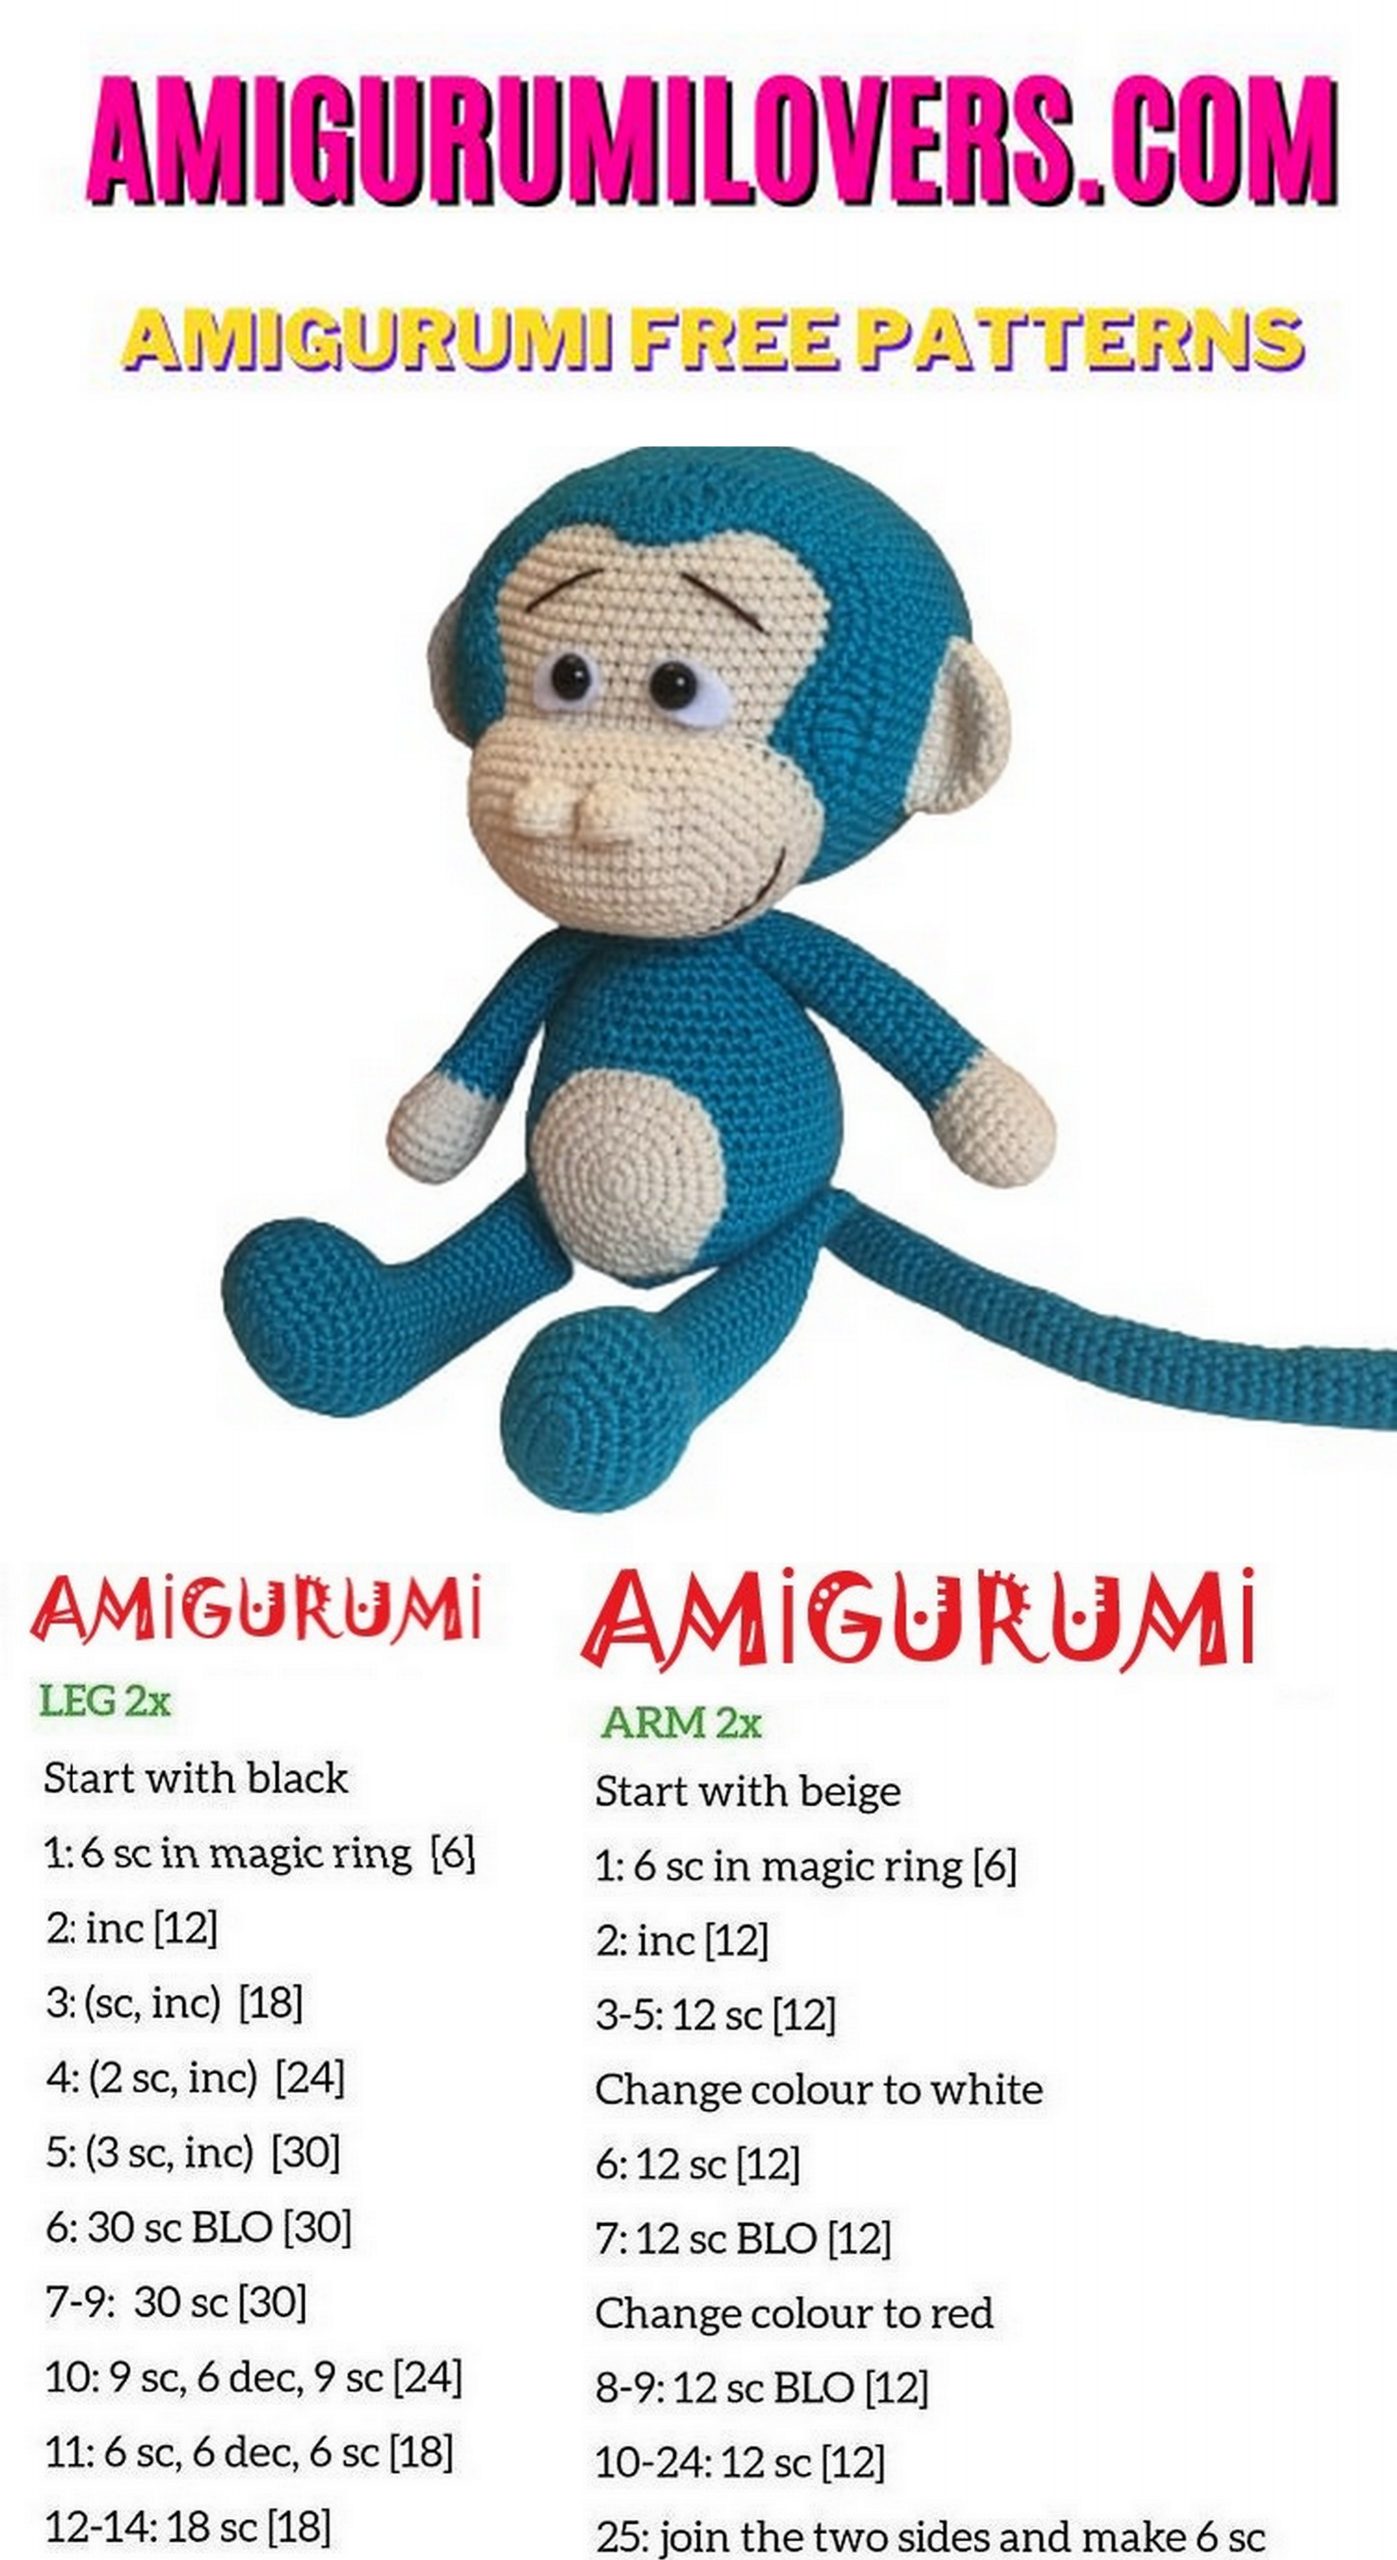
Cute Blue Monkey Amigurumi Free Crochet Pattern
You may also enjoy exploring our free amigurumi patterns and other popular amigurumi animal patterns available on our website.
Are you ready to unleash your creativity and dive into the delightful world of amigurumi? If you’ve been searching for the perfect project that combines cuteness with crochet, you’re in for a treat! In this post, we’re excited to share a free crochet pattern for a charming blue monkey amigurumi that is sure to capture your heart. This adorable little creature is not only a fun and engaging project for crochet enthusiasts of all skill levels, but it also makes for a wonderful gift or a delightful addition to your home decor.
Whether you’re a seasoned crocheter or just picking up your crochet hook for the first time, this blue monkey amigurumi pattern is designed with clarity and simplicity in mind. The straightforward instructions ensure that you’ll have an enjoyable crafting experience, allowing you to create a beautiful piece step by step. Amigurumi is an excellent way to enhance your crochet skills while having fun, and this playful monkey is an ideal project to practice your techniques such as crocheting in the round, increasing, and decreasing stitches.
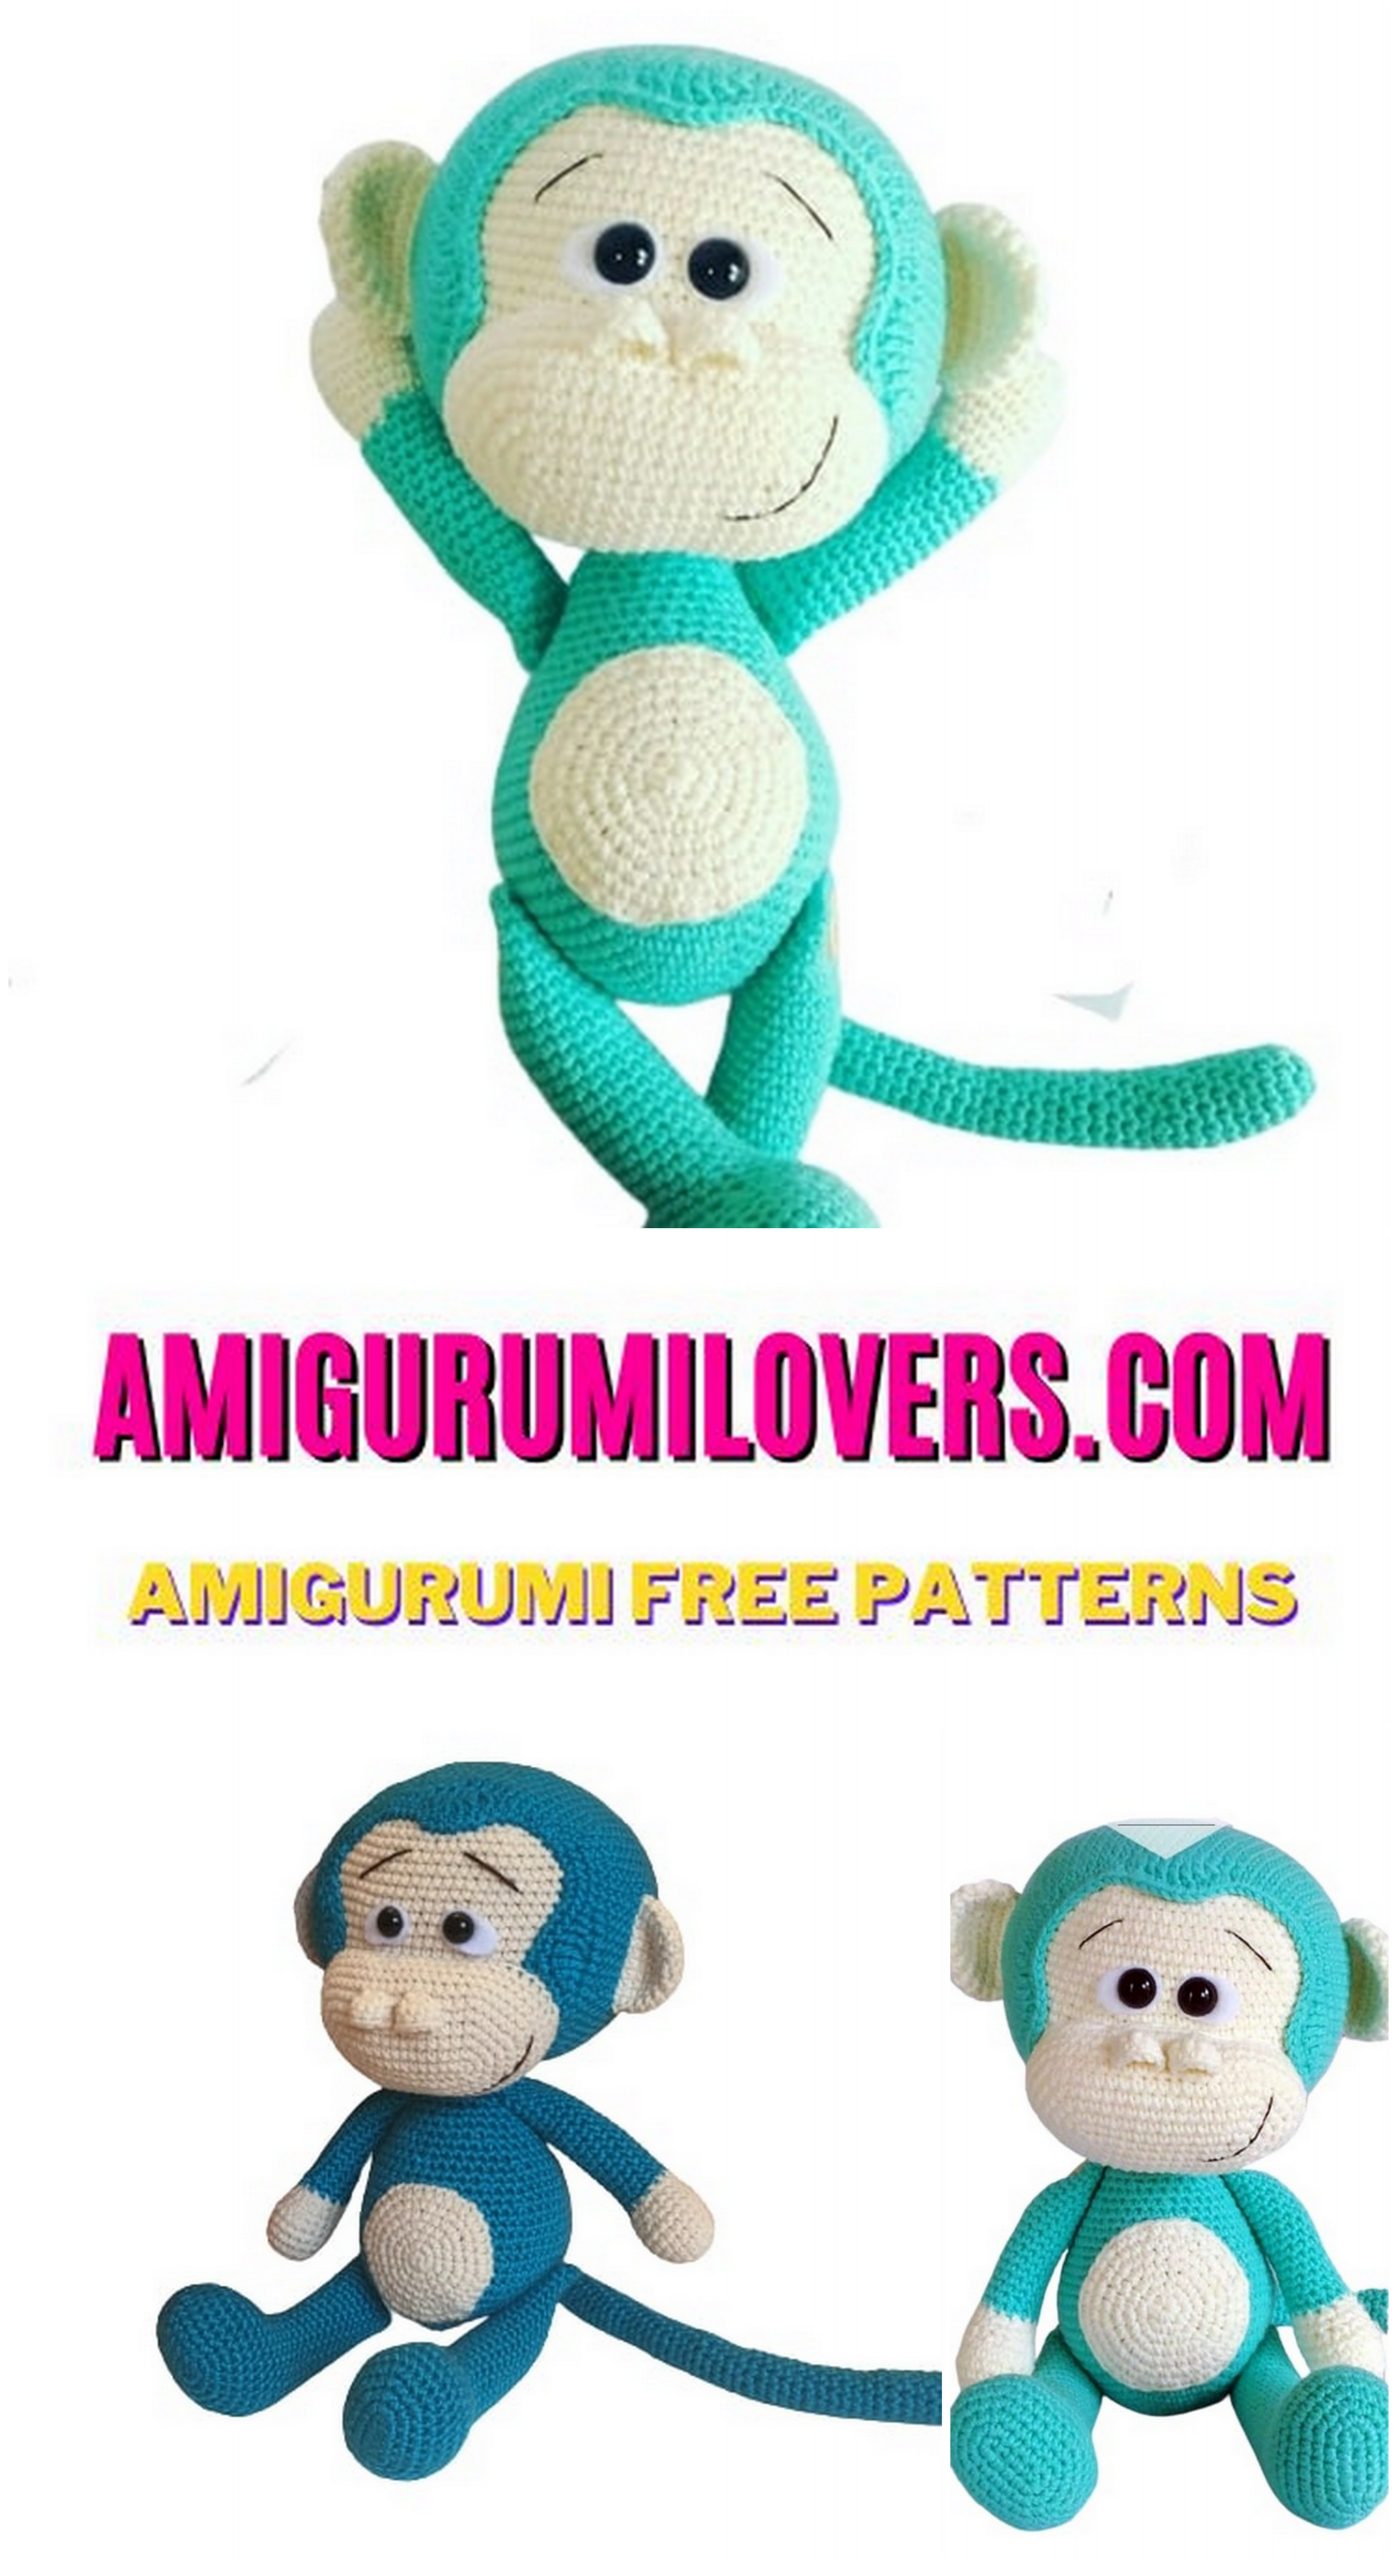
When it comes to amigurumi, the possibilities are endless, and each creation has its own unique charm. The blue monkey pattern stands out with its vibrant color and cheerful personality, making it a perfect toy for children or a quirky addition to any collection. Plus, you can personalize it further by experimenting with different color combinations, adding accessories, or even giving it a little outfit. This flexibility allows you to customize your monkey and make it truly your own!
Before you begin your crocheting adventure, make sure to gather your materials. You’ll need some yarn, crochet hooks, and filling material to bring your cute blue monkey to life. Most importantly, you’ll need a willingness to have fun and explore your creative side. As you work through the pattern, don’t hesitate to express yourself; after all, part of the joy of crocheting is making something that reflects your personality.
Join us as we embark on this delightful journey to create a cute blue monkey amigurumi that you can cherish for years to come. By following our friendly and easy-to-read pattern, you’ll not only produce a delightful little monkey but also gain confidence in your crocheting skills. So, grab your yarn and hooks, and let’s get started on this exciting project that promises to bring smiles and a sense of accomplishment as you watch your cute blue monkey come together, stitch by stitch!
Cute amigurumi animal patterns from each other for free on this site. In this article, cute amigurumi monkey pattern is with you.
Monkey 🙊🙉🙈
Materials:
1. YarnArt Jeans yarn color 03 (milk)
2. YarnArt Jeans yarn of your choice as the main one for the monkey
3. Some black cotton thread for eyebrows and mouth
4. Some white felt for the eyes
5. Half beads for eyes 8 mm
6. Filler (holofiber, synthetic fluff)
7. Hook number 2
8. Long needle
9. Scissors
10. Glue moment crystal
🌴 You can use any other yarn of your preference, but in this case, you need to choose the right crochet size. The size of the toy itself will also change.
🍌 When using the materials specified by me, the size of the toy is 25 cm
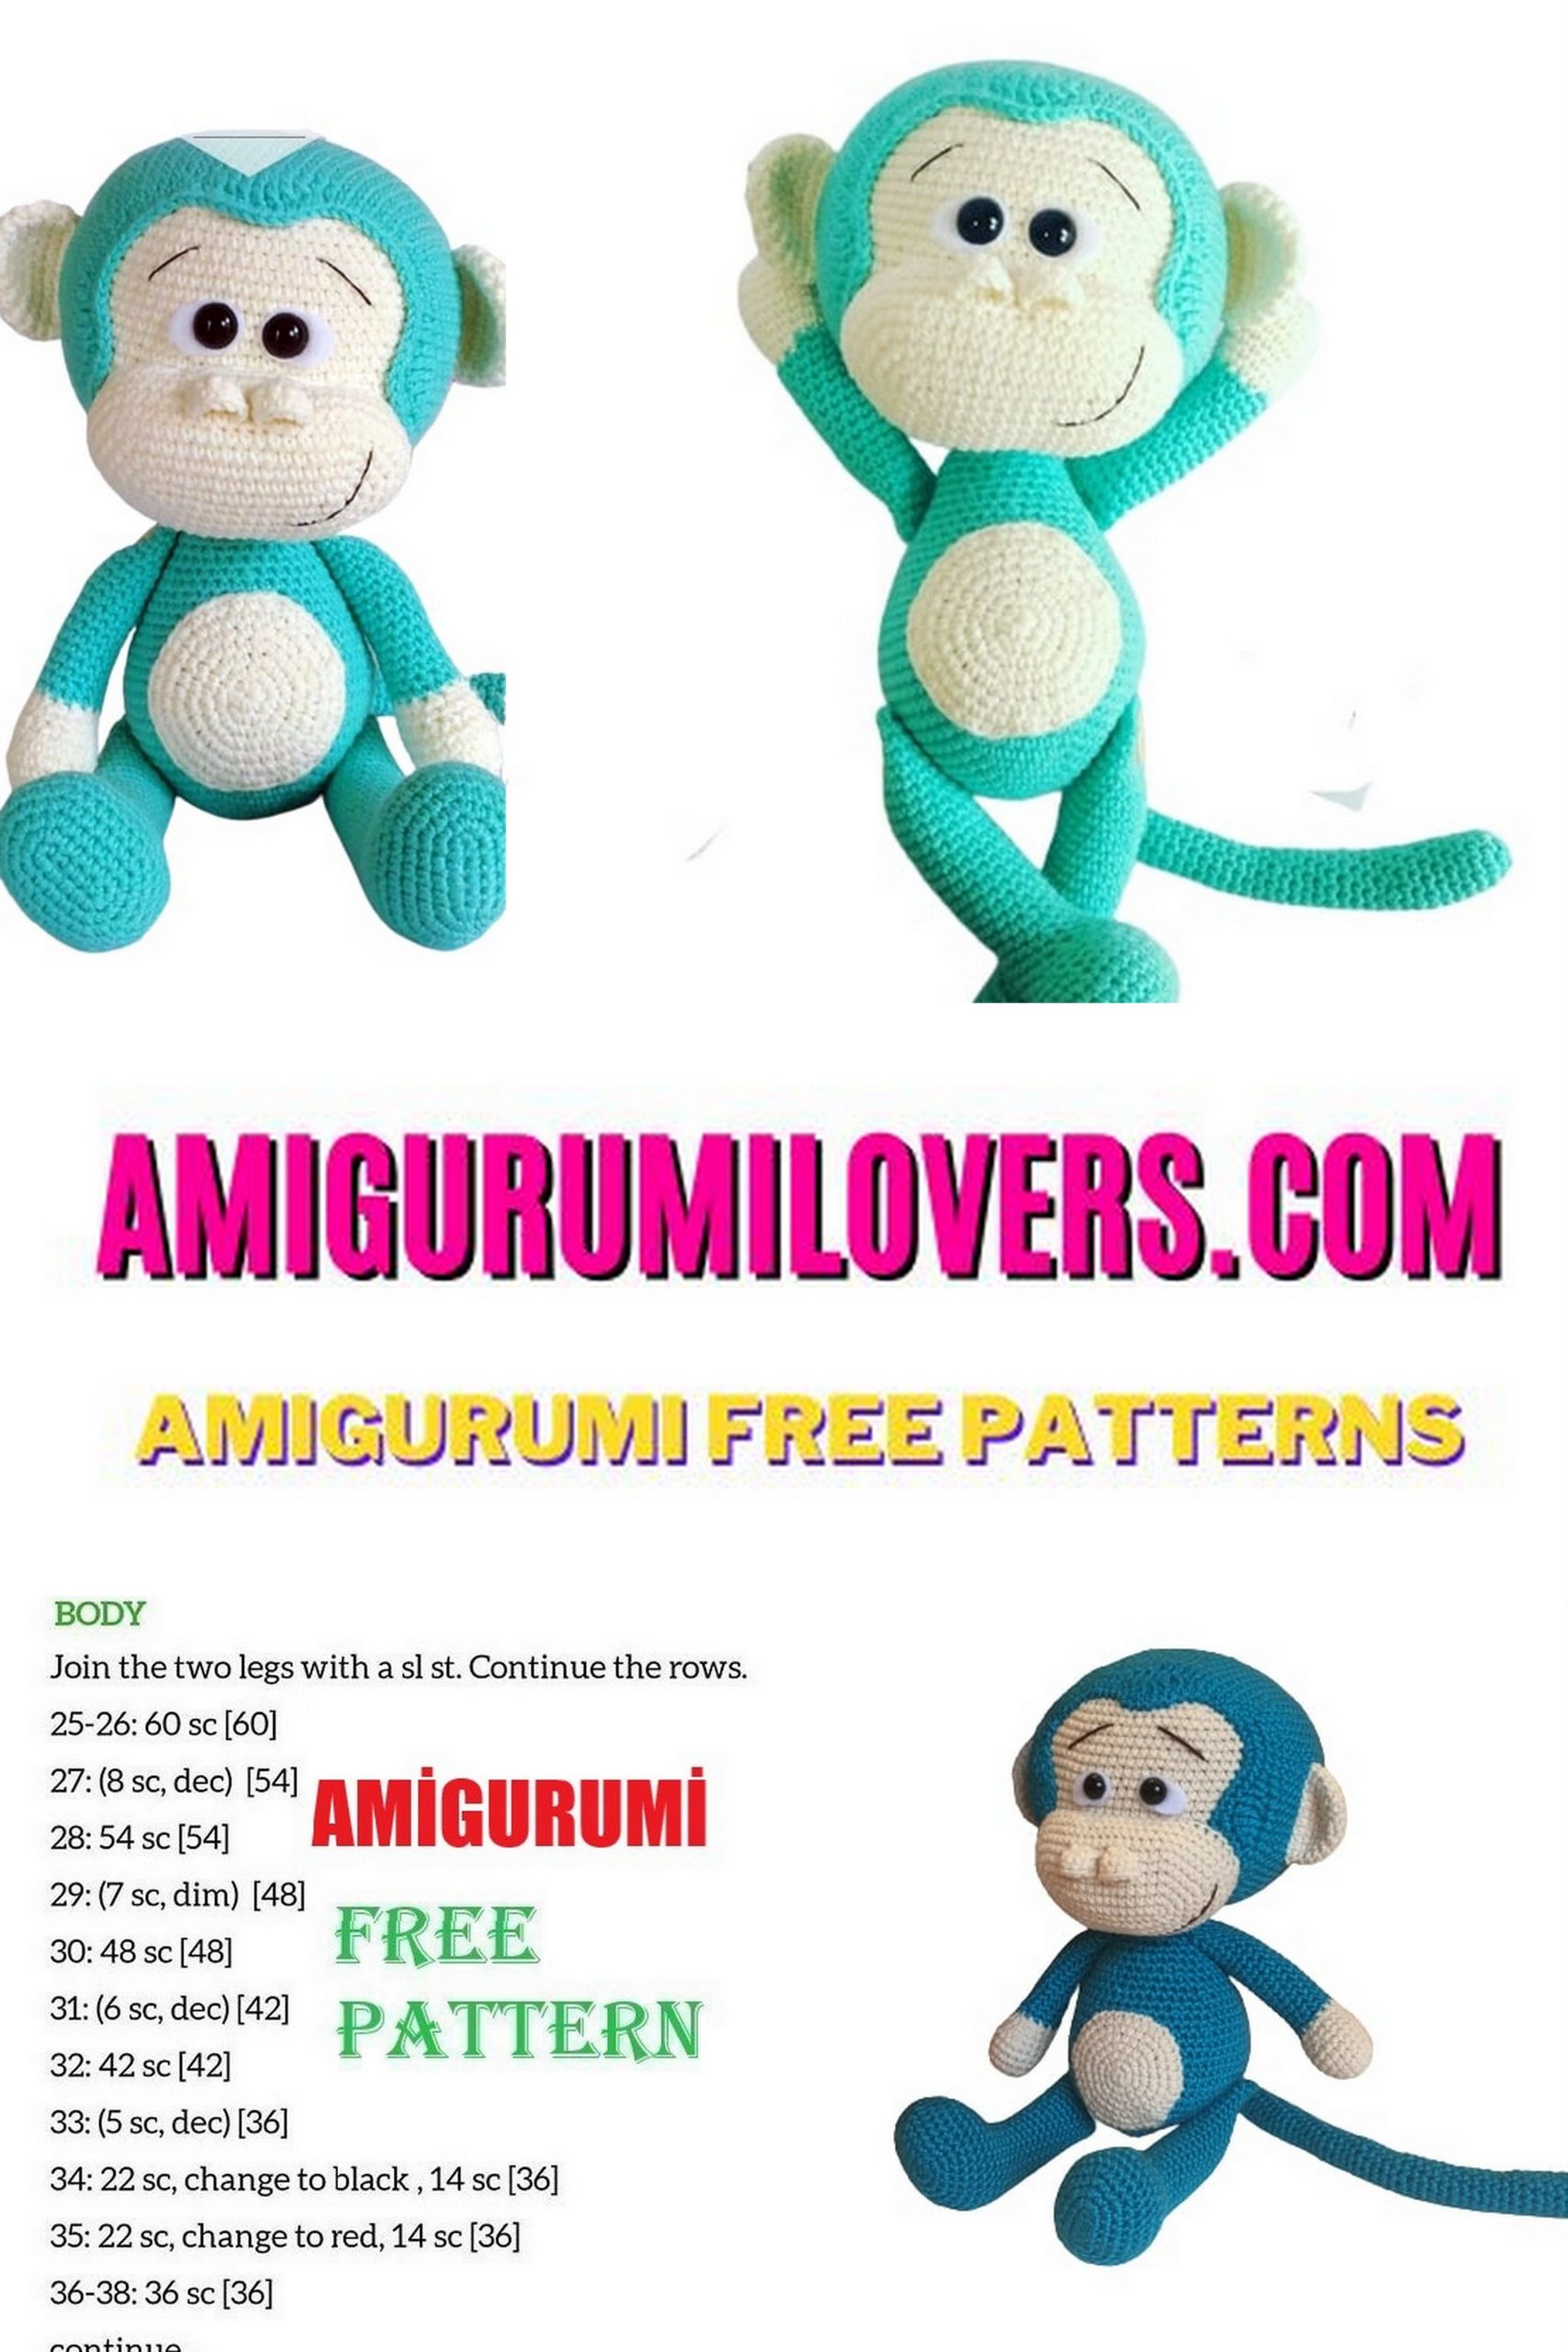
HEAD:
We start knitting with yarn of the main color.
1 row: 6 sc in amigurumi ring (6)
2nd row: 6 inc (12)
3rd row: (1 sc, inc) * 6 times (18)
4th row: (2 sc, inc) * 6 times (24)
5 row: (3 sc, inc) * 6 times (30)
6 row: (4 sc, inc) * 6 times (36)
7 row: (5 sc, inc) * 6 times (42)
8 row: (6 sc, inc) * 6 times (48)
9th row: (7 sc, inc) * 6 times (54)
10 row: (8 sc, inc) * 6 times (60)
11 row: (9 sc, inc) * 6 times (66)
12 row: (10 sc, inc) * 6 times (72)
Row 13-20: Knit unchanged 72 sc (8 rows)
21 row: knit for! Front! hinge wall 72 sc. We do NOT cut the thread.
Row 22: attach a milky thread and knit 72 sc for the back! the wall of the loop of the 20th row.
Row 23-24: continue to knit with a milky thread, knit unchanged 72 sc (2 rows)
25 row: (10 sc, dec) * 6 times (66)
26 row: (9 sc, dec) * 6 times (60)
27 row: (8 sc, dec) * 6 times (54)
28 row: (7 sc, dec) * 6 times (48)
29 row: (6 sc, dec) * 6 times (42)
30 row: (5 sc, dec) * 6 times (36)
31 row: (4 sc, dec) * 6 times (30)
Start filling your head with filler
32 row: (3 sc, dec) * 6 times (24)
33 row: (2 sc, dec) * 6 times (18)
34 row: (1 sc, dec) * 6 times (12)
Fill your head completely
35 row: dec * 6 times
Pull the hole with a needle, cut the thread and hide
RIM
Go back to where we knit 72 sc for the front stitches with the base color and left the thread.
1st row: 72 sc
2nd row: 5 sc, dec, 15 sc, dec, 20 sc, dec, 15 sc, dec, 7 sc, dec (67)
3rd row: 4 sc, dec, 7 sc, 4 hdc, 4 sc, dec, 7 sc, 4 hdc, 7 sc, dec, 4 sc, 4 hdc, 7 sc, dec, 7 sc (63)
4th row: 5 sc, dec, 2 sc
!Attention!
Rapport: (2 hdc, 1dc, 1 hdc, 2 dc, 1 hdc, 1 dc, 2 hdc)
2 sc, dec, 2 sc, repeat the rapport,
2 sc, dec, 2 sc, repeat the rapport,
5 sc, dec, 5 sc (59)
Next 1 sc, 1 sl-st, close. Leave a long thread for sewing.
Muzzle
We knit with milky yarn.
1 row: 14 + 1 ch
Row 2: in second loop from hook 13 sc, 3 sc in one loop, 12 sc, inc. (thirty)
3rd row: inc, 12 sc, 3inc, 12 sc, 2inc (36)
4th row: 1 sc, inc, 13 sc, inc, (1 sc, inc) * 2 times, 13 sc, inc, 1 sc, inc (42)
5 row: 2 sc, inc, 14 sc, inc, (2 sc, inc) * 2 times, 14 sc, inc, 2 sc, inc (48)
6 row: 3 sc, inc, 15 sc, inc, (3 sc, inc) * 2 times, 15 sc, inc, 3 sc, inc (54)
Row 7-10: Knit unchanged 54 sc (4 rows)
1 sl-st, close, leave long thread to sew on.
Girls! I changed the content of the stages a little, because the photos did not quite fit))
I will describe in detail how to collect all the details of the head together.
EARS (2 parts)
We knit with milky yarn
1 row: 6 sc in amigurumi ring (6)
2nd row: 6 inc (12)
3rd row: (1 sc, inc) * 6 times (18)
4th row: (2 sc, inc) * 6 times (24)
5-6 row: knit unchanged 24 sc (2 rows)
There is no need to fill the eyelet. Fold the ear into the hole. Knit 11 sc for the loops on both sides. We leave a long thread for sewing.
NOZDRI (2 parts)
We knit with milky yarn
Row 1: 4 sc in amigurumi ring. Do not connect the first and fourth sc!
2 row: 1 ch, pivot, 2sc, 2 sc in last st (5)
Row 3: 1ch, pivot, 3 sc, 2 sc in last st (6)
Leave the thread for sewing.
The nostril should look like a flat triangle.
TUMMY
We knit with milky yarn
1 row: 6 sc in amigurumi ring (6)
2nd row: 6 inc (12)
3rd row: (1 sc, inc) * 6 times (18)
4th row: (2 sc, inc) * 6 times (24)
5 row: 1 hdc, 5 dc, 1hdc, sl-st
Leave the thread for sewing.
ASSEMBLING THE HEAD
🍌 Sew on the bezel.
I sewed the needle back to the last row of the headband. Captured only 1sc. I didn’t tighten it too much so that there were no waves along the edge. The places where I knitted dc were slightly pulled to the center. This makes it more expressive😊
🍌 Put the filler in the face. We arrange it as follows. The upper part of the muzzle should cover the place where we closed the head loops. The rest – right, left and bottom – should be in contact with the rim. Sew on.
🍌 Cut out two semicircles from white felt and glue them over the muzzle. Glue the half-beads on top. I have them 8 mm. I use the glue “Moment crystal”.
🍌 Now we sew on the nostrils. These small triangles need to be centered on top of the face. They should almost touch one of the sides and form small tunnels.
🍌 Sew the ears on the sides of the muzzle, placing them in a semicircle.
🍌 We take a black thread and embroider the eyebrows and mouth.
TRUNK
We knit with yarn of the main color
1 row: 6 sc in amigurumi ring (6)
2nd row: 6 inc (12)
3rd row: (1 sc, inc) * 6 times (18)
4th row: (2 sc, inc) * 6 times (24)
5 row: (3 sc, inc) * 6 times (30)
6 row: (4 sc, inc) * 6 times (36)
7 row: (5 sc, inc) * 6 times (42)
8 row: (6 sc, inc) * 6 times (48)
9-14 row: knit unchanged 48 sc (6 rows)
15 row: (6 sc, dec) * 6 times (42)
16 row: knit unchanged 42 sc
17 row: (5 sc, dec) * 6 times (36)
Row 18: knit unchanged 36 sc
19 row: (4 sc, dec) * 6 times (30)
Row 20: knit unchanged 30 sc
Start filling the torso with filler
21 row: (3 sc, dec) * 6 times (24)
22 row: knit unchanged 24 sc
23 row: (2 sc, dec) * 6 times (18)
24-25 row: knit unchanged 18 sc
1 sl-st, keep the long thread. We fill in the rest of the body.
Sew the torso to the head.
The seam should not go over the muzzle. Sew on half of the neck, add filler, sew on the rest.
Girls, the head is a little heavier than the body, so your monkey may already start flirting by tilting his head a little.
Sew on the belly.
TAIL
We knit with the main color of the yarn.
We fill the tail as we knit. We put a little filler so that the tail is soft and bent)
1 row: 6 sc in amigurumi ring (6)
2nd row: 6 inc (12)
Row 3-10: Knit unchanged 12 sc (8 rows)
11 row: dec, 10 sc (11)
12 row: knit unchanged 11 sc
13 row: dec, 9 sc (10)
Rows 14 – 33: Knit unchanged 10 sc (20 rows)
1 sl-st, keep long thread to sew on.
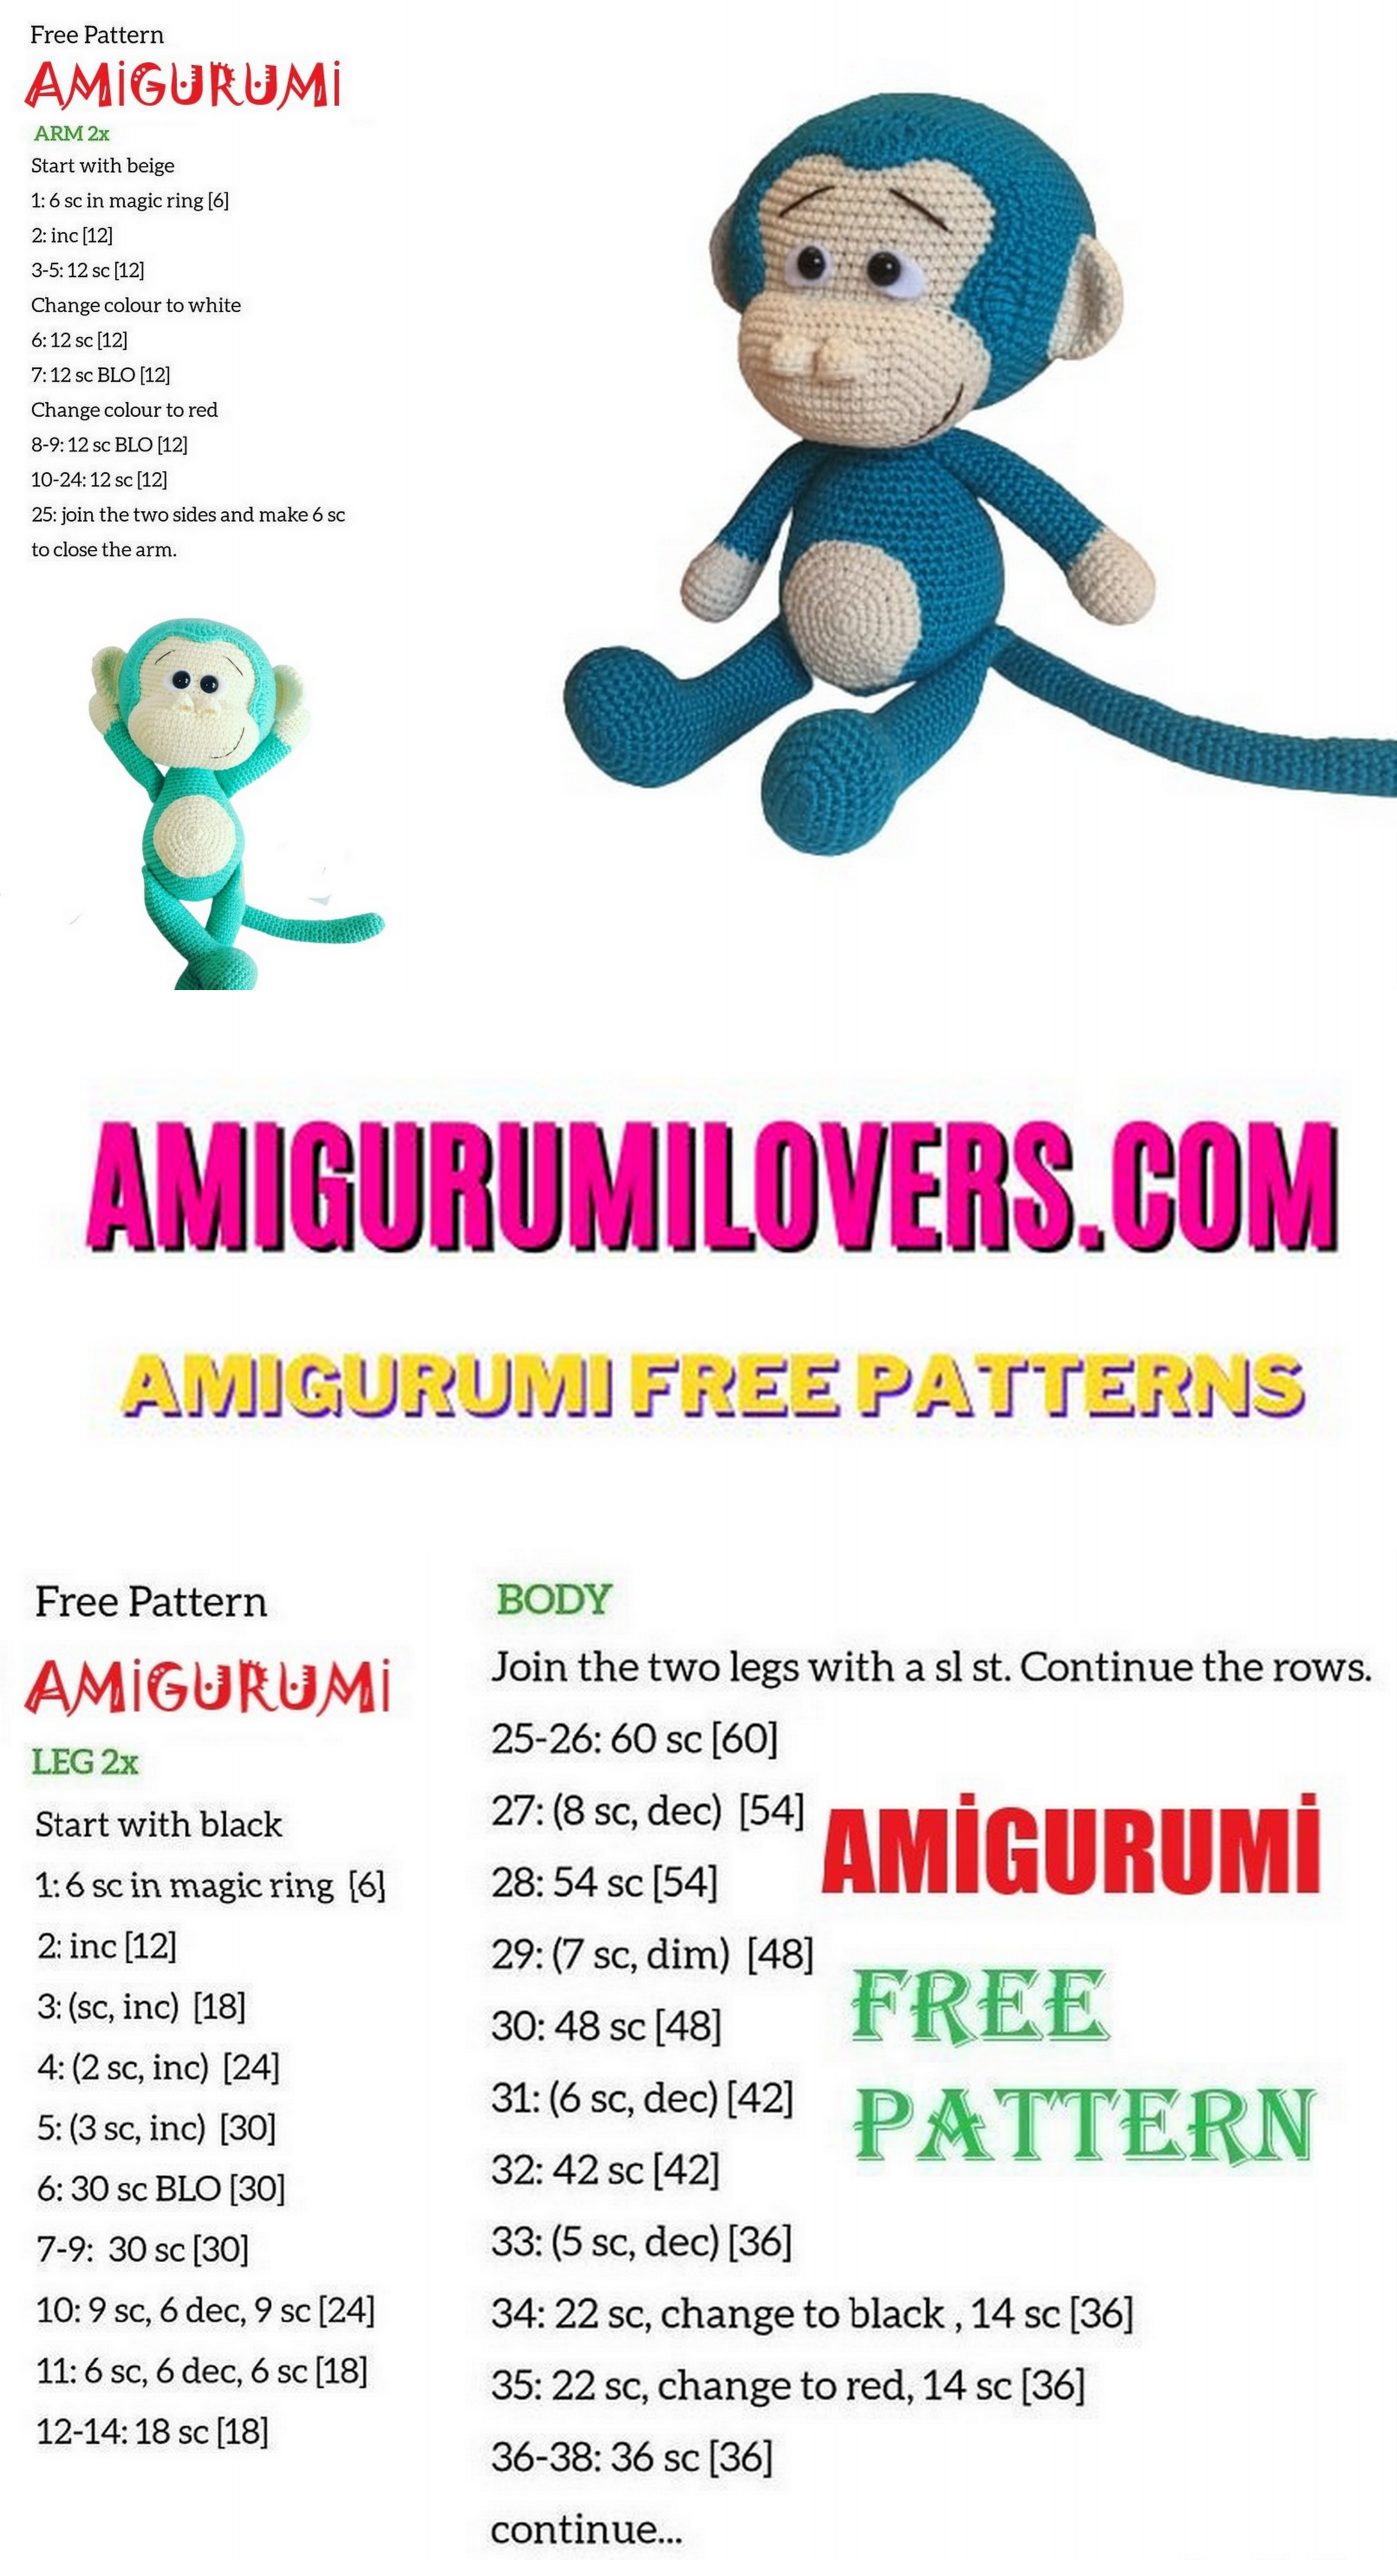
HANDLES (2 parts)
We knit with milky yarn.
We fill the handles as we knit. We put a little filler so that they are soft and bend)
1 row: 6 sc in amigurumi ring (6)
2nd row: inc * 6 times (12)
3rd row: (2 sc, inc) * 4 times (16)
4-5 row: knit unchanged 16 sc (2 rows)
6 row: 6 sc, dec, 1 sc, dec, 5 sc (14)
7 row: 14 sc (14)
8 row: 5 sc, dec, 1 sc, dec, 4 sc (12)
Change the color to the main color of the monkey’s yarn
Rows 9-11: Knit unchanged 12 sc (3 rows)
12 row: 4 sc, dec, 1 sc, dec, 3 sc (10)
Row 13-24: Knit unchanged 10 sc (12 rows)
Fold the hole in the middle, knit 4 sc. Leaving the thread
LEGS (2 parts)
We knit with the main color of the yarn 4 + 1 ch
1st row: 3 sc, 3 sc in one loop, 2 sc, inc (10)
2nd row: inc, 2 sc, 3inc, 2 sc, 2inc (16)
3rd row: 1 sc, inc, 3 sc, inc, (1 sc, inc) * 2 times, 3 sc, inc, 1 sc, inc (22)
4th row: 2 sc, inc, 4 sc, inc, (2 sc, inc) * 2 times, 4 sc, inc, 2 sc, inc (28)
5-7 row: knit unchanged 28 sc (3 rows)
8 row: 9 sc, (dec, 2 sc) * 2 times, dec, 9 sc (25)
9th row: 9 sc, (dec, 1 sc) * 2 times, dec, 8 sc (22)
10 row: 6 sc, (dec, 1 sc) * 3 times, dec, 5 sc (18)
11 row: 18 sc
We begin to fill the leg
12 row: 8 sc, dec, 8 sc (17)
13 row: 17 sc
Row 14: 8 sc, dec, 7 sc (16)
15-24 row: knit unchanged 16 sc (10 rows)
We fill the legs, leaving some free space.
Fold the hole in the middle, knit 7 sc. We leave the thread for sewing.
ASSEMBLY
Sew on the legs at the center of the belly.
We retreat 2 rows from the head and sew on the handles.
The tail will sit in the center between the legs. 6
Before you leave, make sure to check out more free amigurumi crochet patterns and discover new ideas for your next project.
You can also browse our full amigurumi pattern archive for hundreds of beginner-friendly designs.