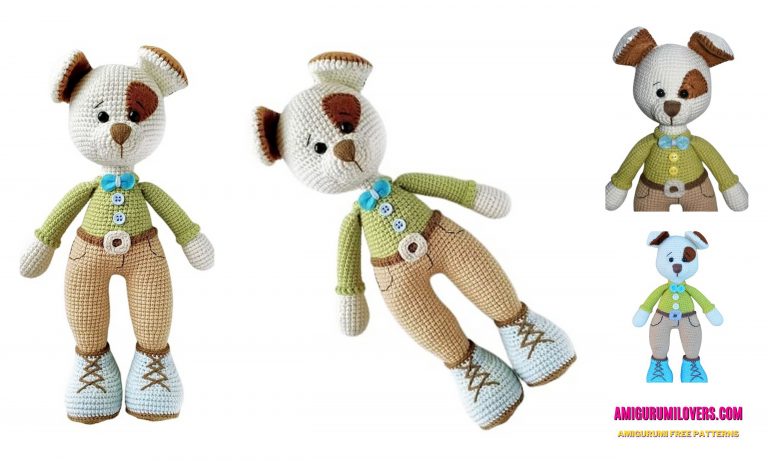
Jack Russell Dog Amigurumi Free Crochet Pattern
You may also enjoy exploring our free amigurumi patterns and other popular amigurumi animal patterns available on our website.
Welcome to our crochet oasis! If you’re a dog lover and an avid crocheter, you’re in for a treat. Today, we’re diving into the cute and cozy world of amigurumi with a free crochet pattern for a Jack Russell dog. This delightful project is perfect for beginners and seasoned crocheters alike, allowing you to create a charming companion that will undoubtedly warm your heart and brighten your home. Amigurumi, the Japanese art of crocheting or knitting small, stuffed animals, has taken the crafting community by storm. It’s no wonder why—these whimsical creations bring a smile to anyone’s face and serve as wonderful gifts or fun decorative pieces. You’ll find that making your own Jack Russell using this easy-to-follow pattern is not only satisfying but also a great way to hone your crochet skills.
Whether you’re making this adorable pup for yourself, a friend, or a beloved family member, this pattern will guide you through every crochet stitch needed to bring your Jack Russell to life. Detailed instructions will help you create this lovable little dog with minimal fuss, making it accessible for those who are new to amigurumi. Plus, who wouldn’t want a cuddly Jack Russell to decorate their space? Dogs have an undeniable charm that can light up any room, and now, with your crochet hook in hand, you can craft your very own version of this energetic breed.
In this post, you’ll not only discover the pattern but also some handy tips to make your amigurumi-making experience as smooth as possible. We’re here to support you throughout your crochet journey, ensuring that you feel confident as you stitch together your adorable Jack Russell. We understand that starting a new crochet project can sometimes feel daunting, especially when you’re trying to perfect those small details that make all the difference. That’s why we’ve crafted this simple, beginner-friendly pattern to help make the process both enjoyable and rewarding.
So grab your yarn, hook, and a comfy seat, and let’s get started on this exciting crochet adventure! We can’t wait to see how your Jack Russell turns out. By the end of this project, not only will you gain a delightful new creation, but you’ll also feel a sense of accomplishment that comes from completing a handmade item. Let’s stitch together some joy with this free Jack Russell dog amigurumi crochet pattern, and create something truly special that you can treasure for years to come!
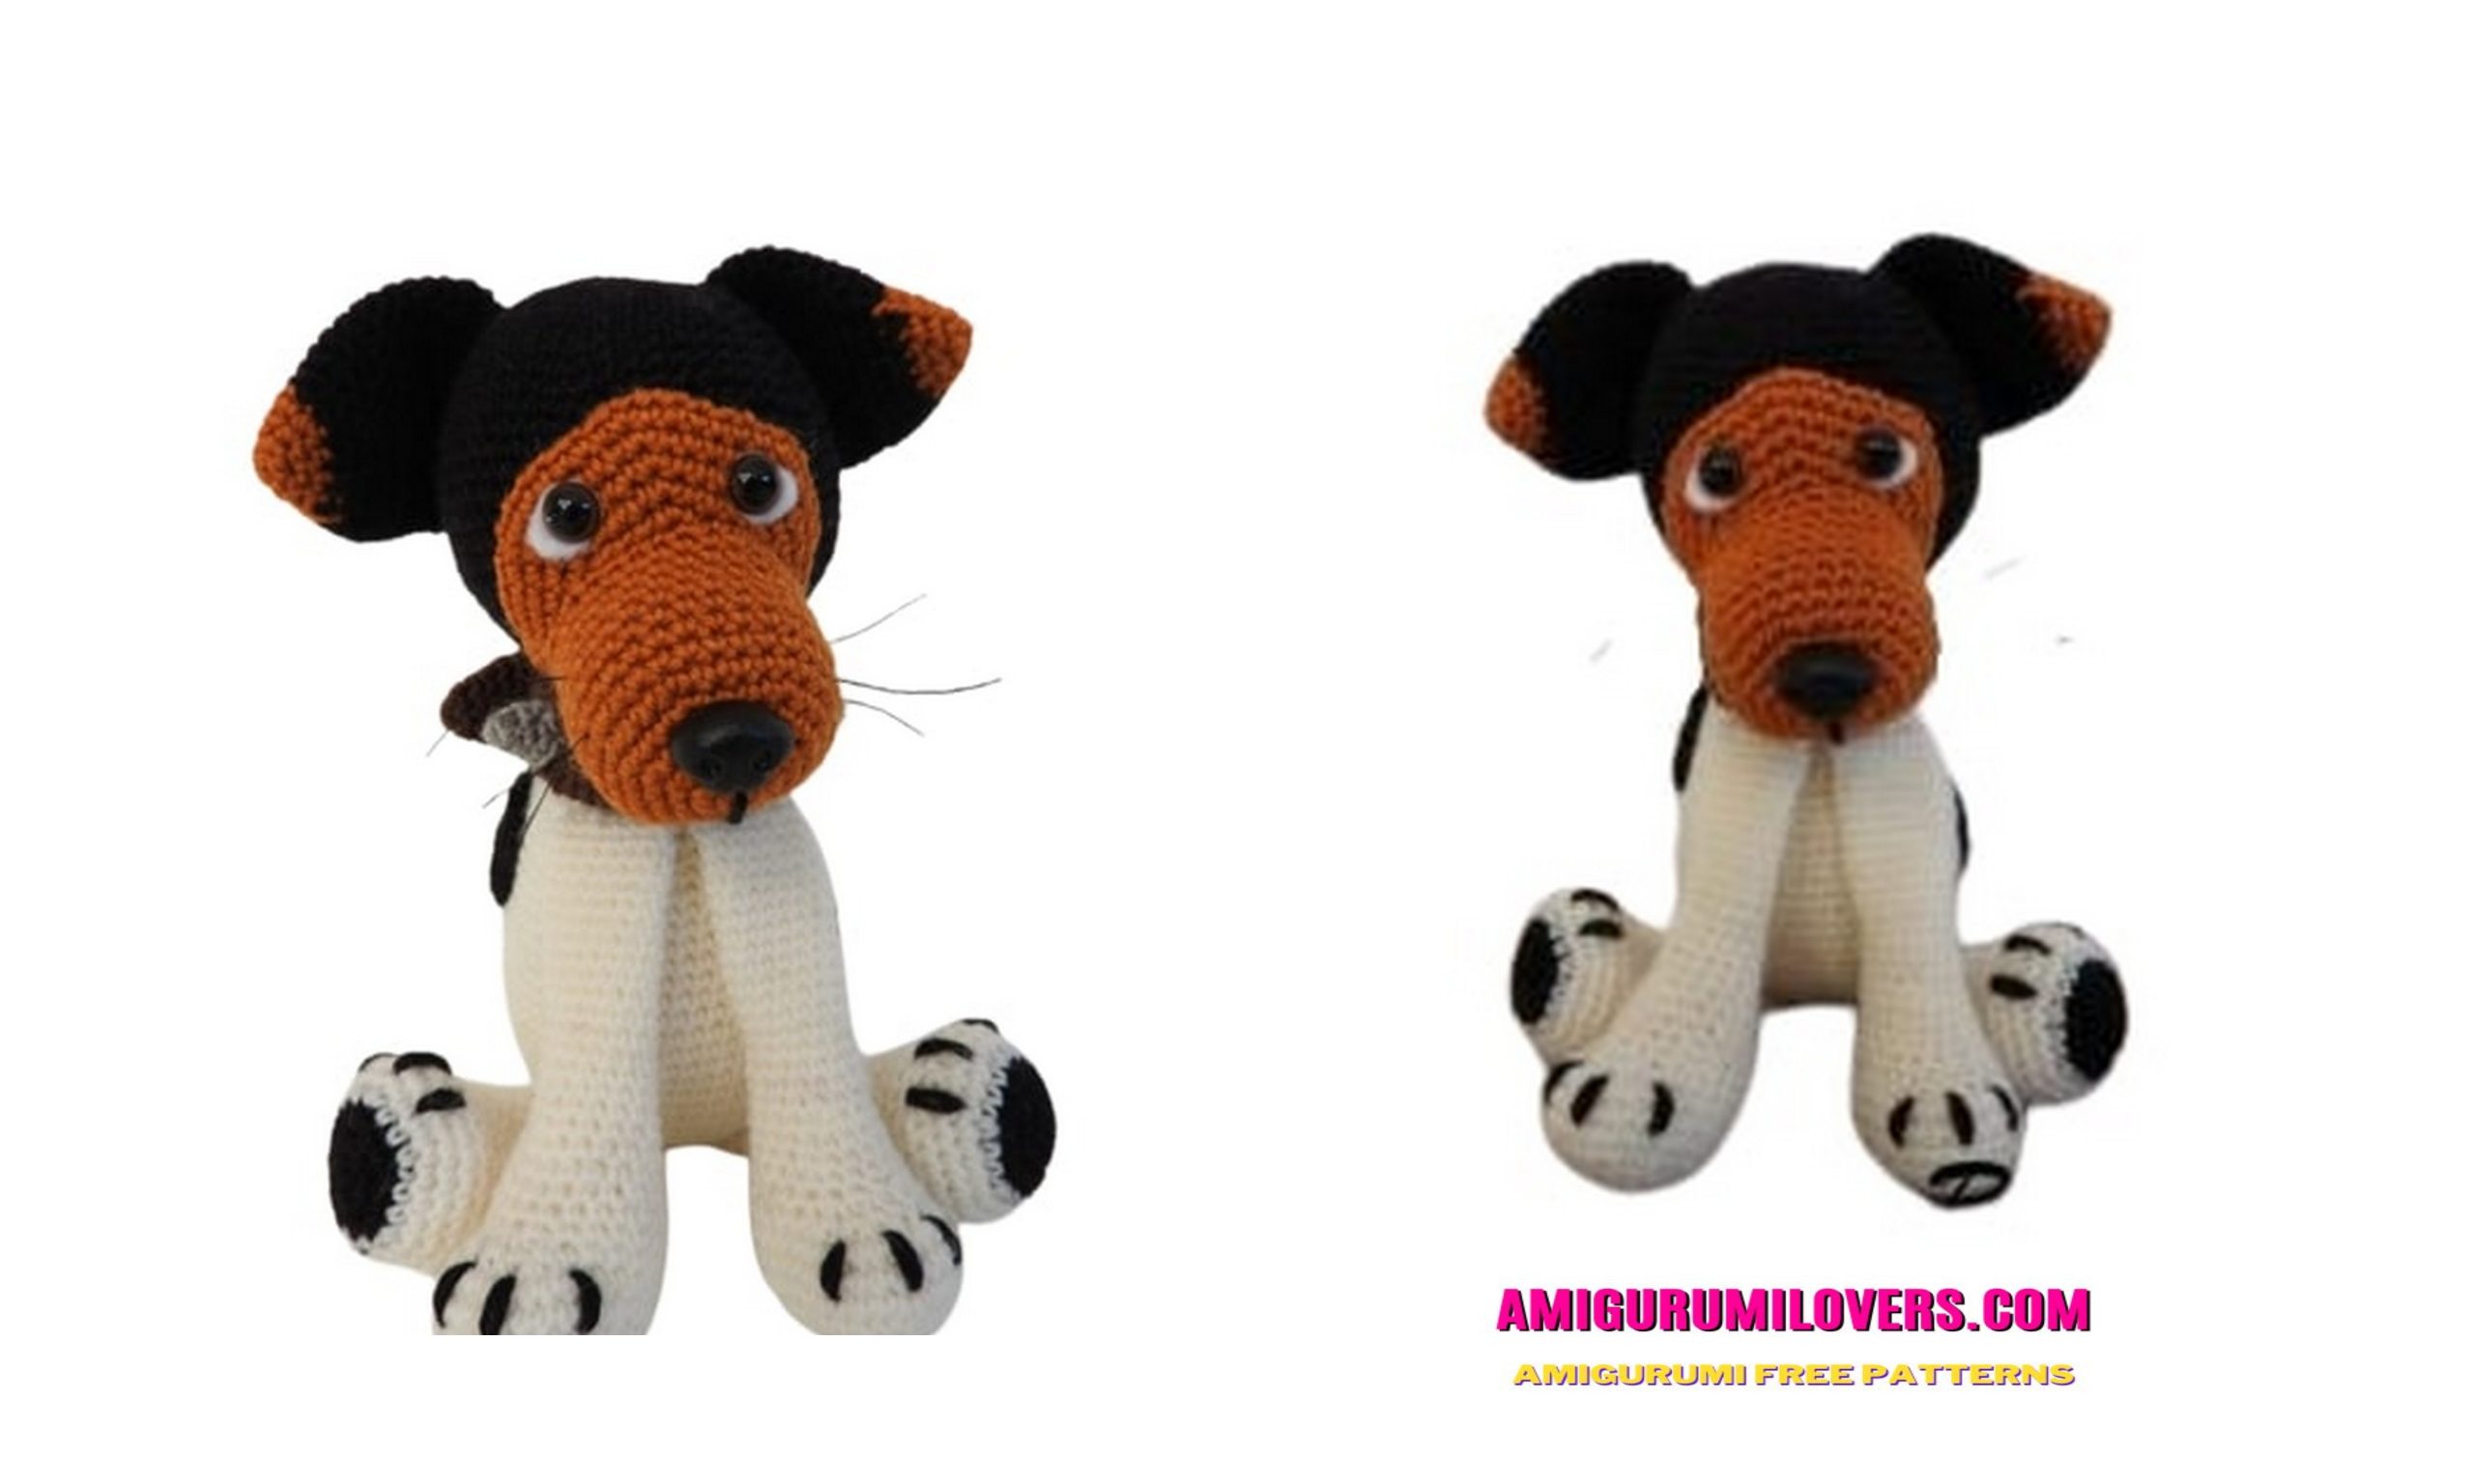
I will share a great amigurumi recipe with you again. In this article, jack russel dog amigurumi free pattern is waiting for you. Good luck with.
I made Hankey with sock wool, crochet hook 2.5. Hankey then gets seated approximately
16 cm. Crocheting Hankey with cotton will make it slightly larger. Watch your safety eyes hereon (size bigger).
Materials
1 ball Regia uni 4 ply natural white (600)
½ ball Regia uni 4 ply black (2066)
¼ ball Regia uni 4 ply orange / brown (2746)
Leftover gray, Regia uni 4 ply gray (1991)
Leftover brown, Regia uni 4 ply d.brown (2903)
Brown / black safety eyes 7mm
White felt
Black sewing thread (whiskers)
Filling
Crochet hook 2.5
Black dog nose 15mm
Abbreviations
inc = increase
dec = decrease
sc = single crochet
Sl-st = slip stitch
Mr = magic ring
Pattern
Head
Round 1: Magic ring into 6sc
Row 2: 6inc (12sc)
Round 3: (1sc, 1inc) * 6 (18sc)
Row 4: (2sc, 1inc) * 6 (24sc)
Round 5: (3sc, 1inc) * 6 (30sc)
Row 6: (4sc, 1inc) * 6 (36sc)
Round 7: (5sc, 1inc) * 6 (42sc)
Row 8: 42sc
Round 9: (6sc, 1inc) * 6 (48sc)
Round 10: (7sc, 1inc) * 6 (54sc)
Row 11: (8sc, 1inc) * 6 (60sc)
Round 12: 60sc
Round 13: (9sc, 1inc) * 6 (66sc)
Round 14 to 21: 66sc (8 rounds)
Round 22: (9sc, 1dec) * 6 (60sc)
Row 23: (8sc, 1dec) * 6 (54sc)
Round 24: (7sc, 1dec) * 6 (48sc)
Round 25: (6sc, 1dec) * 6 (42sc)
Row 26: (5sc, 1dec) * 6 (36sc)
Round 27: (4sc, 1dec) * 6 (30sc)
Round 28: (3sc, 1dec) * 6 (24sc)
Tie off and get rid of wire.
Main spot
Orange / brown
Round 1: Magic ring into 6sc
Row 2: 6inc (12sc)
Round 3: (1sc, 1inc) * 6 (18sc)
Row 4: (2sc, 1inc) * 6 (24sc)
Round 5: (3sc, 1inc) * 6 (30sc)
Row 6: (4sc, 1inc) * 6 (36sc)
Round 7: (5sc, 1inc) * 6 (42sc)
Round 8: (6sc, 1inc) * 6 (48sc)
Tie off, leave enough thread.
We are now going to cut pieces of felt behind the safety eyes. You cut onerectangle and put your eye through it. Then you cut one half of youeye the felt away and on the other side cut it nicely in shape.
You can now place the safety eyes in the main spot, this is done between round 6and 7 (do not add back covers yet!).
Point up.
Put the main spot with the eyes between rows 16 and 17 through the head. Positionof the main spot is between rows 12 and 28 of the head.
Now you can fill the head.
Secure your head spot with pins and sew the head spot to the head.
Nose
Orange brown
Round 1: Magic ring into 6sc
Row 2: 6inc (12sc)
Round 3: (1sc, 1inc) * 6 (18sc)
Row 4: (2sc, 1inc) * 6 (24sc)
Round 5: (3sc, 1inc) * 6 (30sc)
Rounds 6 to 13: 30sc (8 rows)
Securing leaves enough thread.
Place the safety nose just above the magic ring.
Fill the nose and place it under the eyes. From below it must connect to the bottom edge of your main spot.
Embroider a line under the nose with black.

Ears
Orange / brown
Round 1: Magic ring into 6sc
Round 2: (1sc, 1inc) * 3 (9sc)
Row 3: (2sc, 1inc) * 3 (12sc)
Round 4: (3sc, 1inc) * 3 (15sc)
Switch from color to black
Round 5: (4sc, 1inc) * 3 (18sc)
Round 6: (5sc, 1inc) * 3 (21sc)
Round 7: (6sc, 1inc) * 3 (24sc)
Round 8: 24sc
Row 9: (7sc, 1inc) * 3 (27sc)
Round 10 to 16: 27sc (7 rounds)
Fold the ear and close it with 13sc.
Securing leaves enough thread.
Place the ears on the head between rows 5 and 18. Fold the bottom edge ofdouble the ear and sew it on the head, he will get cute flappies
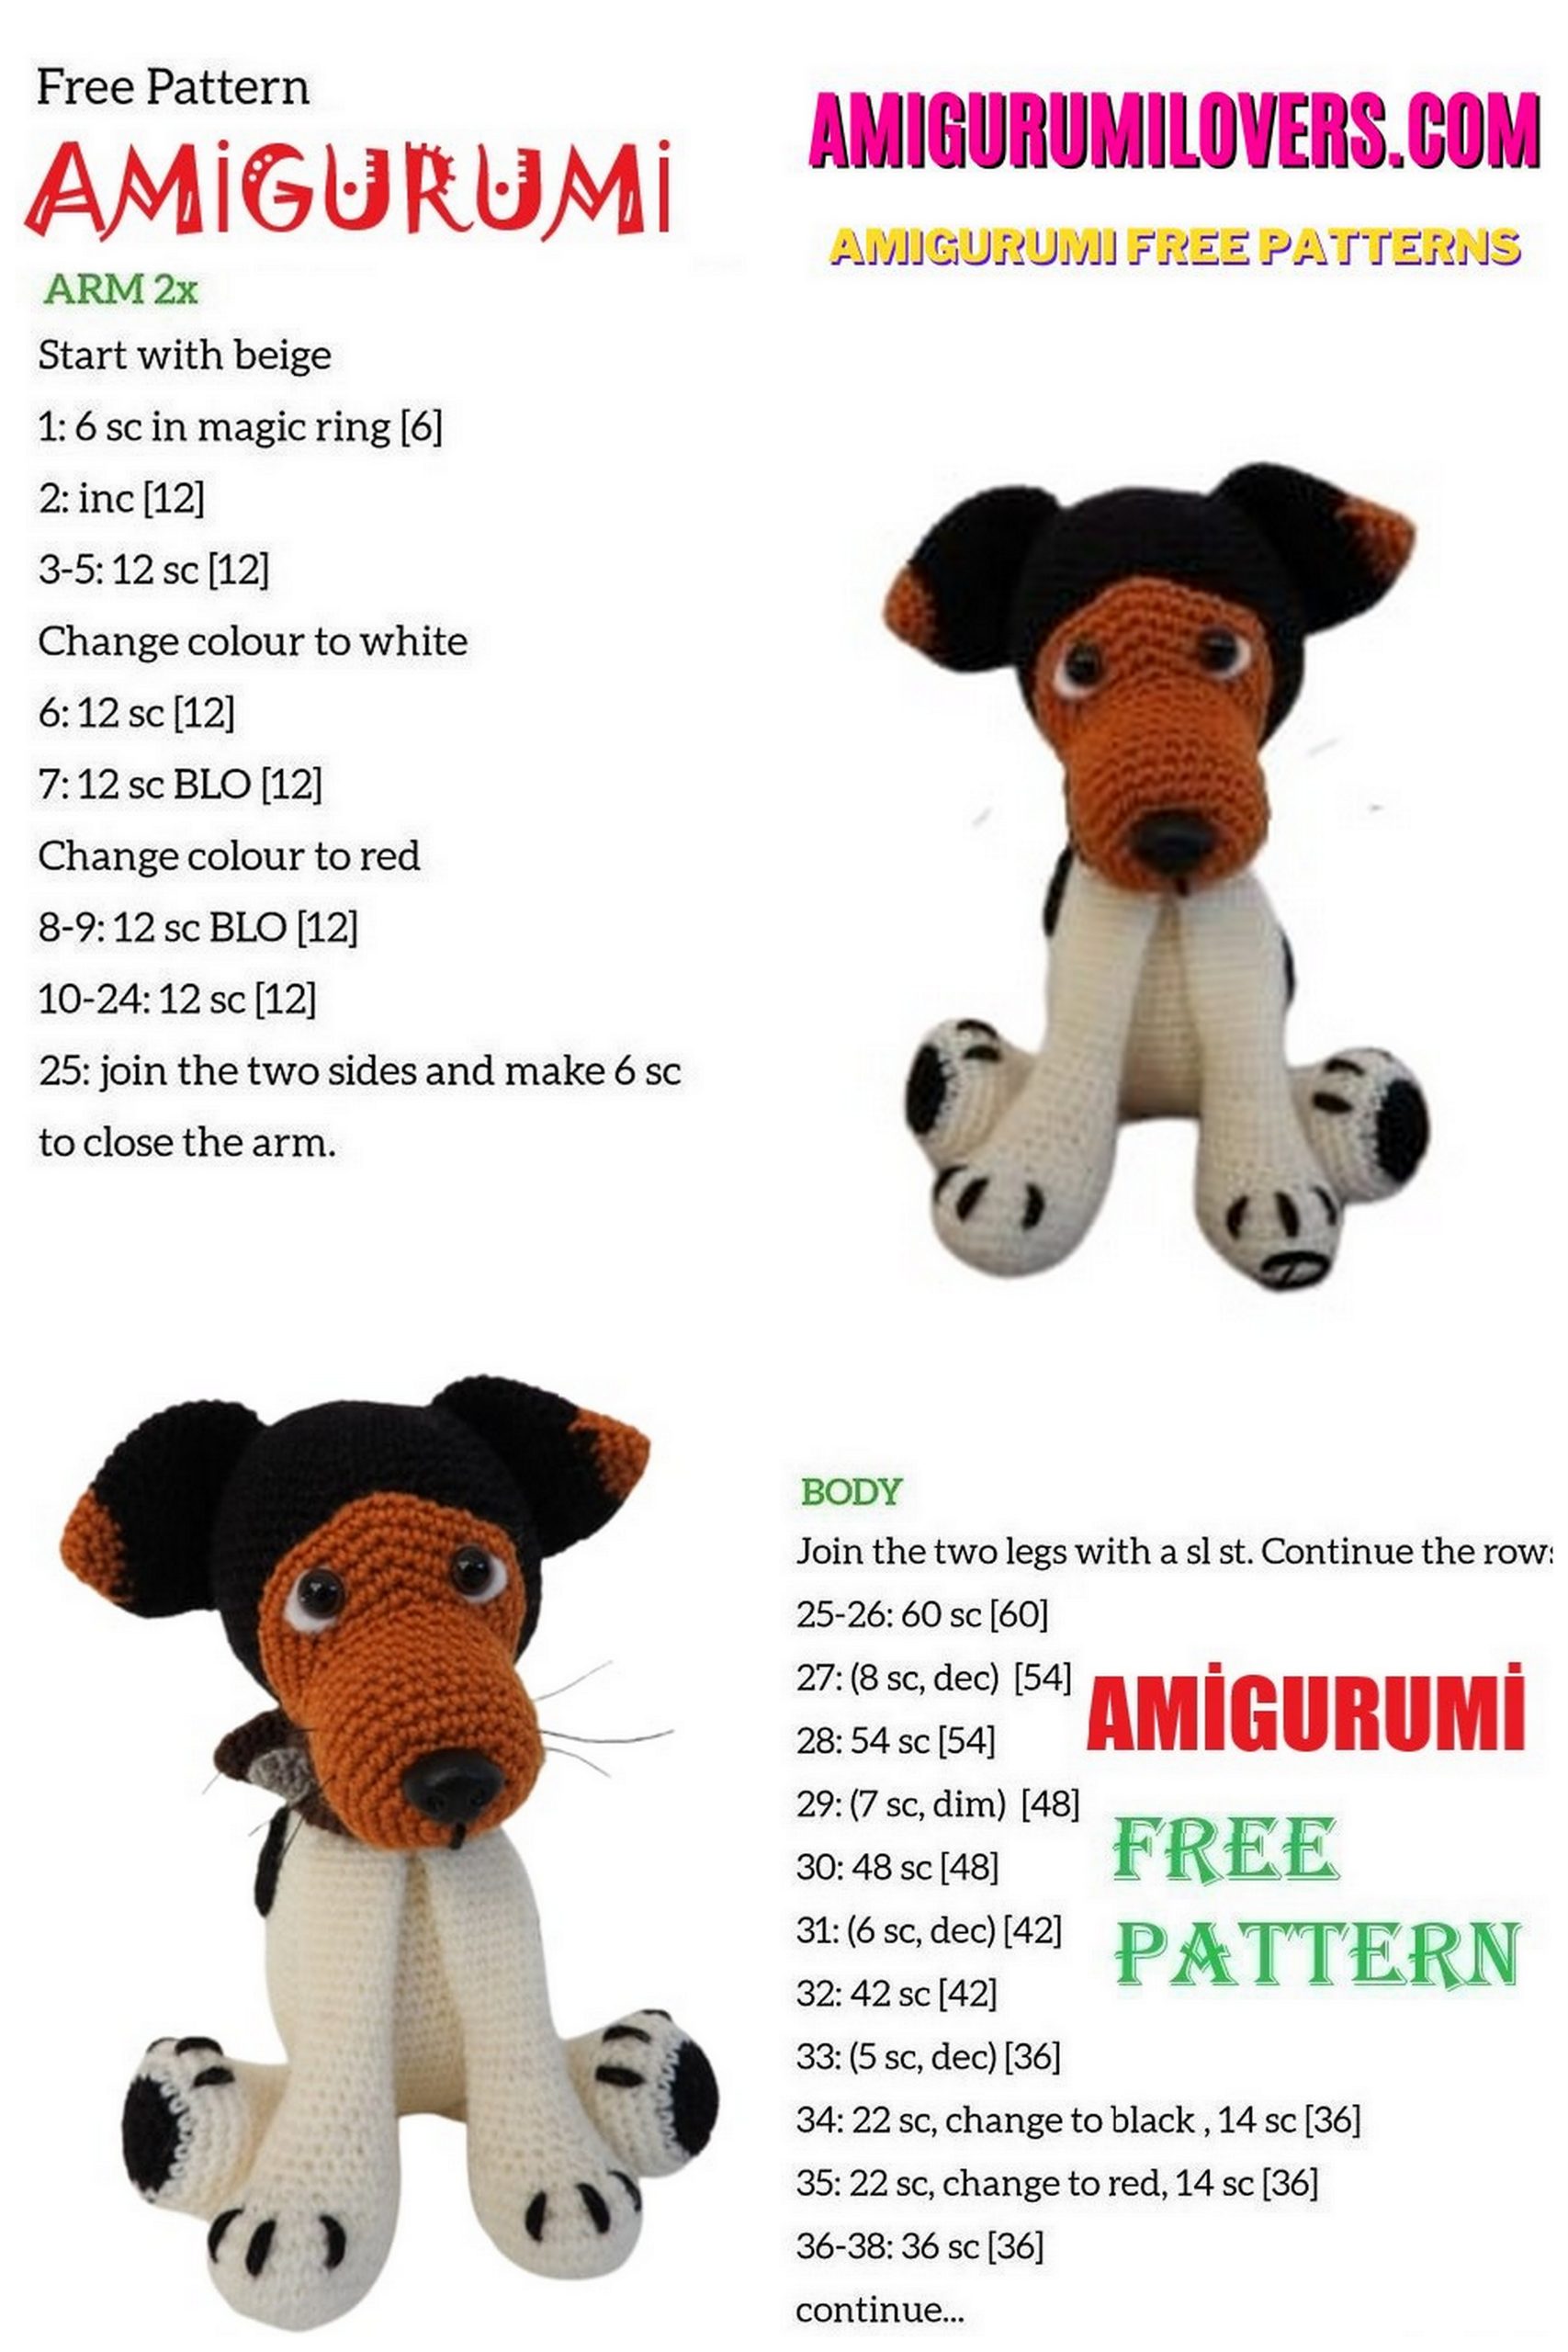
Body
White
Round 1: Magic ring into 6sc
Row 2: 6inc (12sc)
Round 3: (1sc, 1inc) * 6 (18sc)
Row 4: (2sc, 1inc) * 6 (24sc)
Round 5: (3sc, 1inc) * 6 (30sc)
Row 6: (4sc, 1inc) * 6 (36sc)
Round 7: (5sc, 1inc) * 6 (42sc)
Round 8: (6sc, 1inc) * 6 (48sc)
Round 9: (7sc, 1inc) * 6 (54sc)
Round 10: (8sc, 1inc) * 6 (60sc)
Rounds 11 to 20: 60sc (10 revs)
Round 21: (8sc, 1dec) * 6 (54sc)
Round 22 + 23: 54sc
Round 24: (7sc, 1dec) * 6 (48sc)
Round 25 + 26: 48sc
Round 27: (6sc, 1dec) * 6 (42sc)
Round 28 + 29: 42sc
Round 30: (5sc, 1dec) * 6 (36sc)
Round 31 + 32: 36sc
Round 33: (4sc, 1dec) * 6 (30sc)
Tour 34 + 35: 30sc
Round 36: (3sc, 1dec) * 6 (24sc)
Round 37 + 38: 24sc
Securing leaves enough thread.
Fill the body and sew the head to the body.
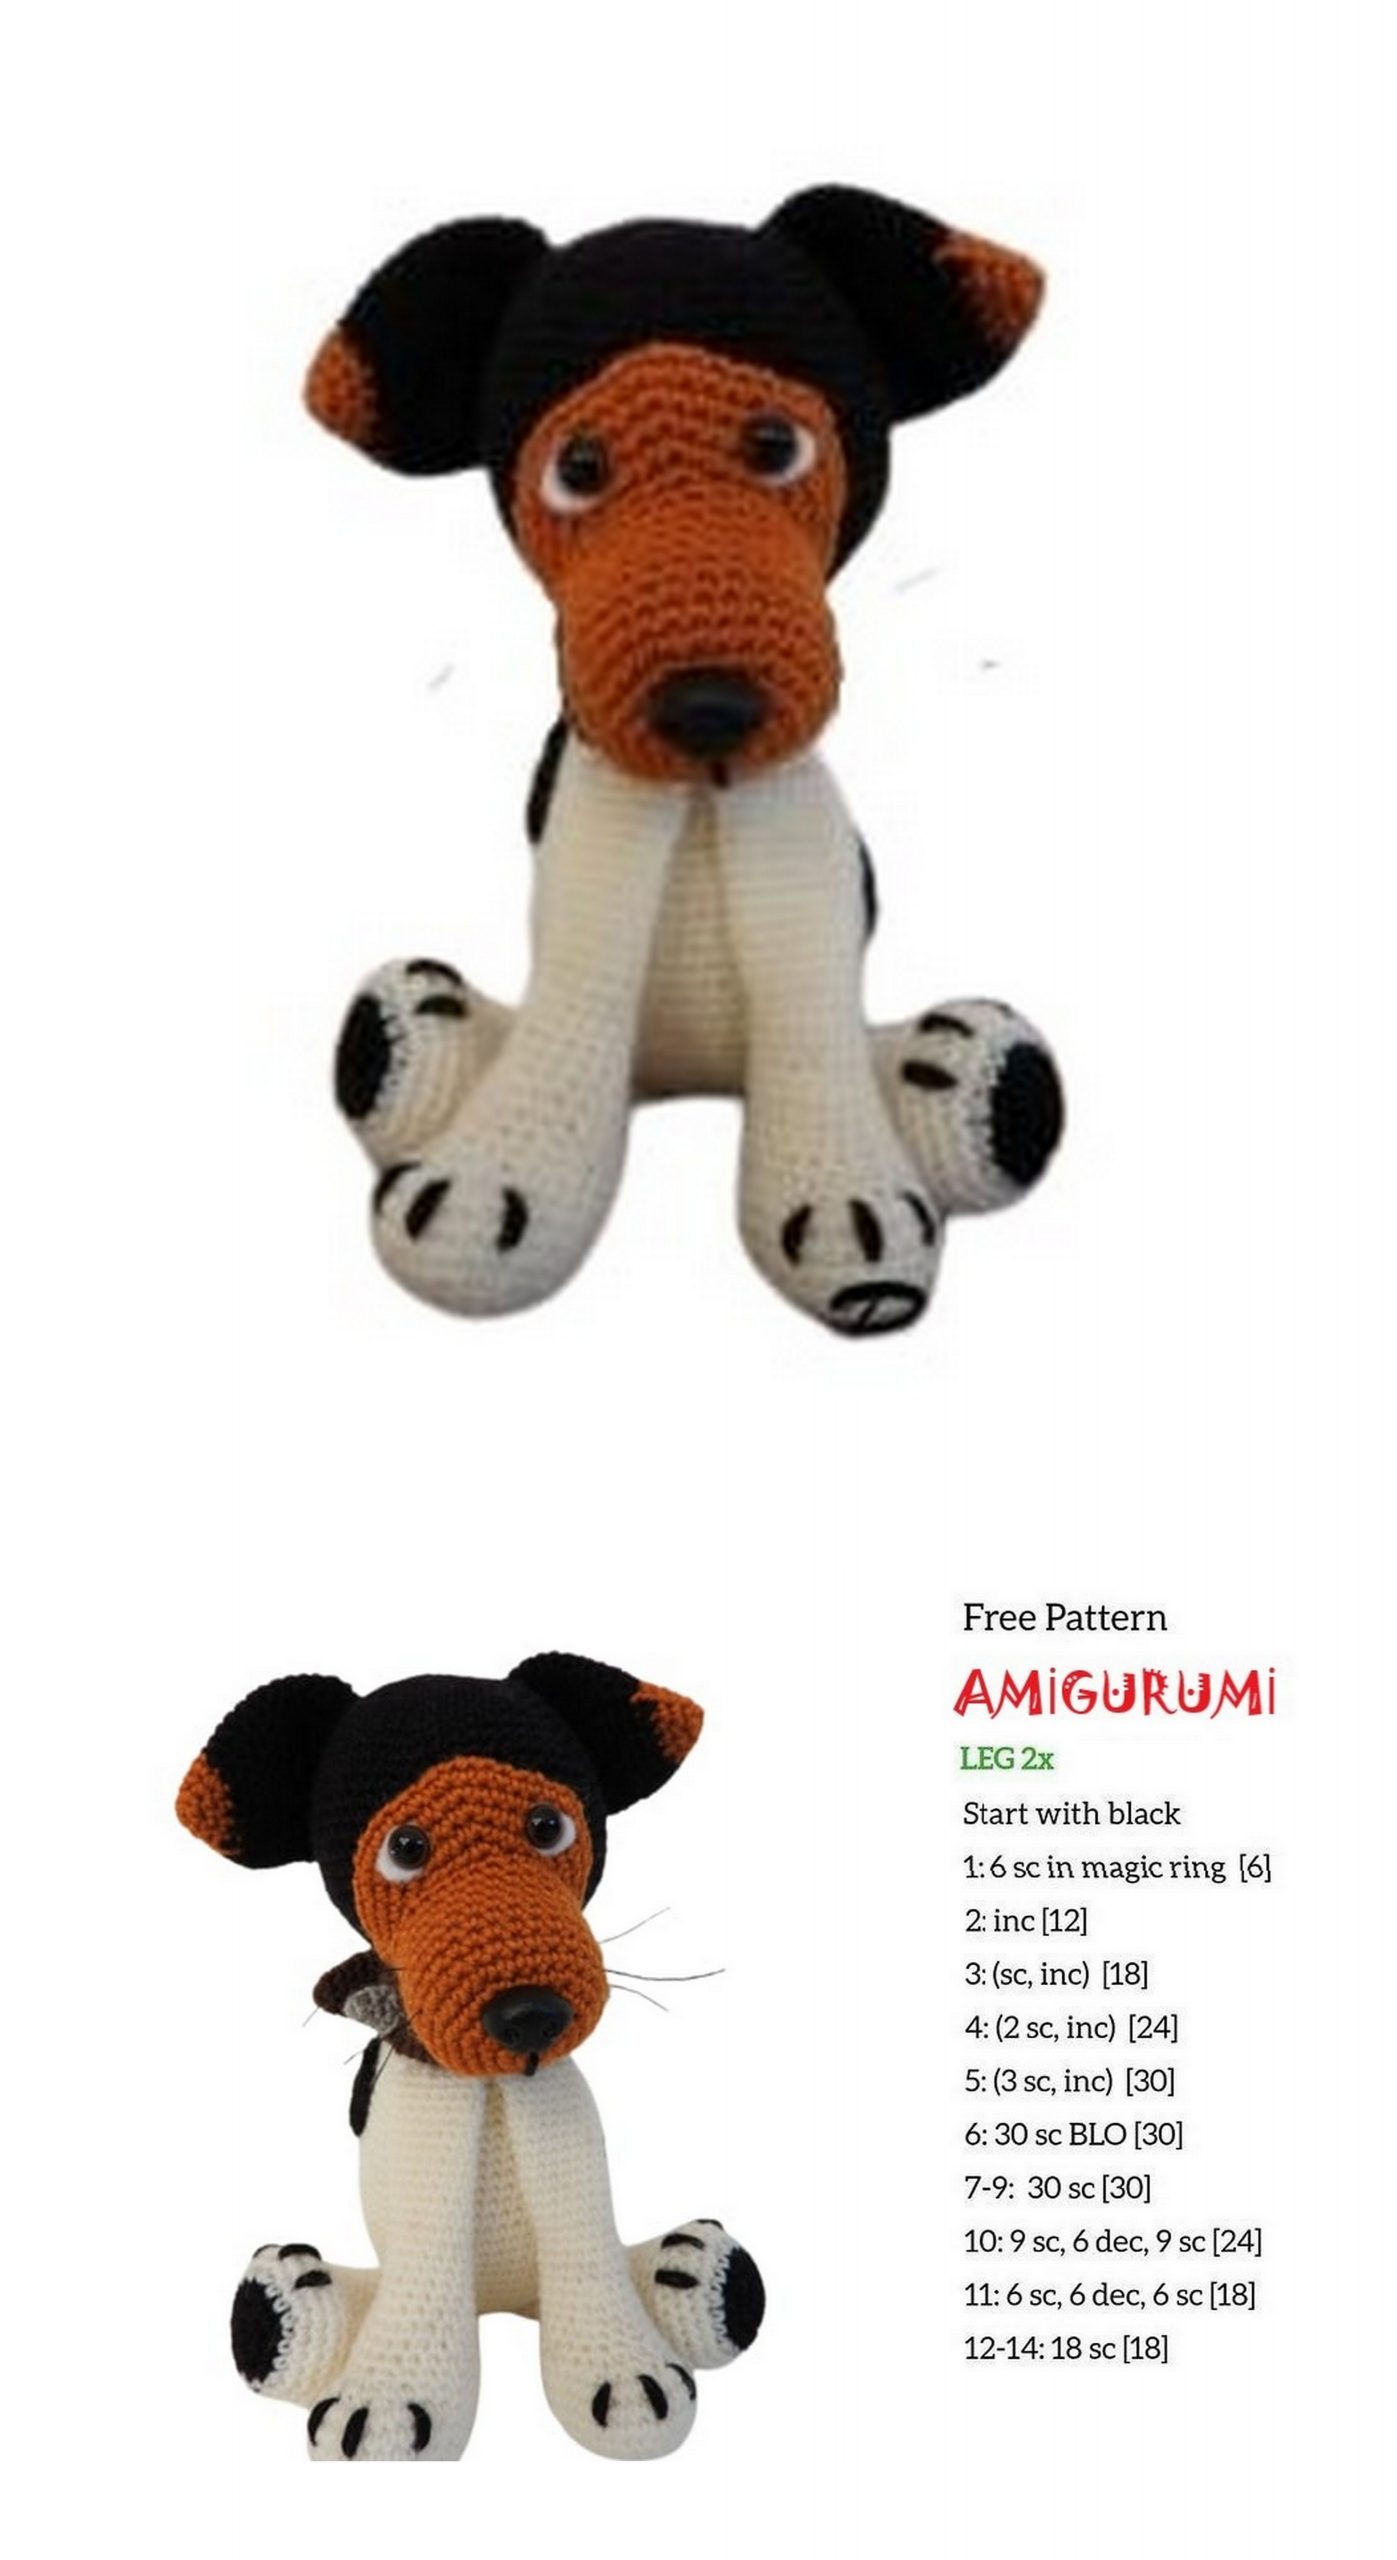
Front legs
White
Round 1: Magic ring into 6sc
Row 2: 6inc (12sc)
Round 3: (1sc, 1inc) * 6 (18sc)
Row 4: (2sc, 1inc) * 6 (24sc)
Round 5: (3sc, 1inc) * 6 (30sc)
Round 6 to 8: 30sc
Round 9: 9sc, 6dec, 9sc (24sc)
Round 10: 9sc, 3dec, 9sc (21sc)
Round 11: 21sc
Round 12: (5sc, 1dec) * 3 (18sc)
Tour 13 + 14: 18sc
Fill the foot.
Row 15: (4sc, 1dec) * 3 (15sc)
Round 16 to 30: 15sc (15 rounds)
Row 31: 2sc, skip the rest.
Fill the leg lightly. Fold the bone closed and crochet it with 7sc.
Securing leaves enough thread.
Position of the front legs: between row 27 and 28 of the body with 1sc spacing.
Hind legs
Black
Round 1: Magic ring into 6sc
Row 2: 6inc (12sc)
Round 3: (1sc, 1inc) * 6 (18sc)
Switch color to white!
Row 4: (2sc, 1inc) * 6 (24sc)
Round 5: (3sc, 1inc) * 6 (30sc)
Row 6: (4sc, 1inc) * 6 (36sc)
Round 7: 12sc, 6dec, 12sc (30sc)
Round 8: 30sc
Round 9: (3sc, 1dec) * 6 (24sc)
Round 10 + 11: 24sc
Round 12: (6sc, 1dec) * 3 (21sc)
Round 13: 21sc
Fill your feet!
Round 14: 21sc
Round 15: (5sc, 1dec) * 3 (18sc)
Round 16 to 19: 18sc (4 rounds)
Round 20: (4sc, 1dec) * 3 (15sc)
Round 21 to 25: 15sc
Row 26: 1sc, skip the rest!
Fill the leg lightly. Fold the bone closed and crochet it with 7sc.
Securing leaves enough thread.
Position: on row 4 of the body.

Collar
Dark brown
Round 1: Magic ring into 6sc
Round 2: (1sc, 1inc) * 3 (9sc)
Row 3: 9sc
Round 4: (2sc, 1inc) * 3 (12sc)
Tour 5 to 50: 12sc (46 rpm)
Close the collar with 6sc.
Securing leaves enough thread.
Spikes (5 pieces)
Gray
Row 1: Magic ring into 4sc
Round 2: (1sc, 1inc) * 2 (6sc)
Row 3: (1sc, 1inc) * 3 (9sc)
End with a sl-st.
Securing leaves enough thread.
You place the first spike on row 13/14 of the collar. The rest you place withalways 8sc spacing.
Now you can put the collar on at Hankey. Sew it in about 6sc from row 1 of the tape. Embroider 2 more black stripes to finish it strap.
Back spots
Black
1
Round 1: Magic ring into 6sc
Row 2: 6inc (12sc)
Round 3: (1sc, 1inc) * 6 (18sc)
Row 4: (2sc, 1inc) * 6 (24sc)
Round 5: (3sc, 1inc) * 6 (30sc)
2 (2x)
Round 1: Magic ring into 6sc
Row 2: 6inc (12sc)
Round 3: (1sc, 1inc) * 6 (18sc)
Row 4: (2sc, 1inc) * 6 (24sc)
3
Round 1: Magic ring into 6sc
Row 2: 6inc (12sc)
You can tie off all stains, leave enough thread.
Place 1 spot on his buttocks, in the middle of that spot comes the tail.
Tail
Fill in a little while crocheting the tail.
White
Round 1: Magic ring into 6sc
Round 2: (1sc, 1inc) * 3 (9sc)
Row 3: 9sc
Round 4: (2sc, 1inc) * 3 (12sc)
Round 5 + 6: 12sc
Round 7: (3sc, 1inc) * 3 (15sc)
Round 8 to 22: 15sc
Switch from color to black
Round 23 to 25: 15sc
End the round with a sl-st.
Securing leaves enough thread.
Place the tail in the center of the black buttock spot.
Finish
With sewing thread, give Hankey a few more whiskers.
Embroider toes (2 stitches each) on his legs.
Jack Russell, Hankey
This pattern may not be shared or made public! The pattern is for your own use only!
Before you leave, make sure to check out more free amigurumi crochet patterns and discover new ideas for your next project.
You can also browse our full amigurumi pattern archive for hundreds of beginner-friendly designs.