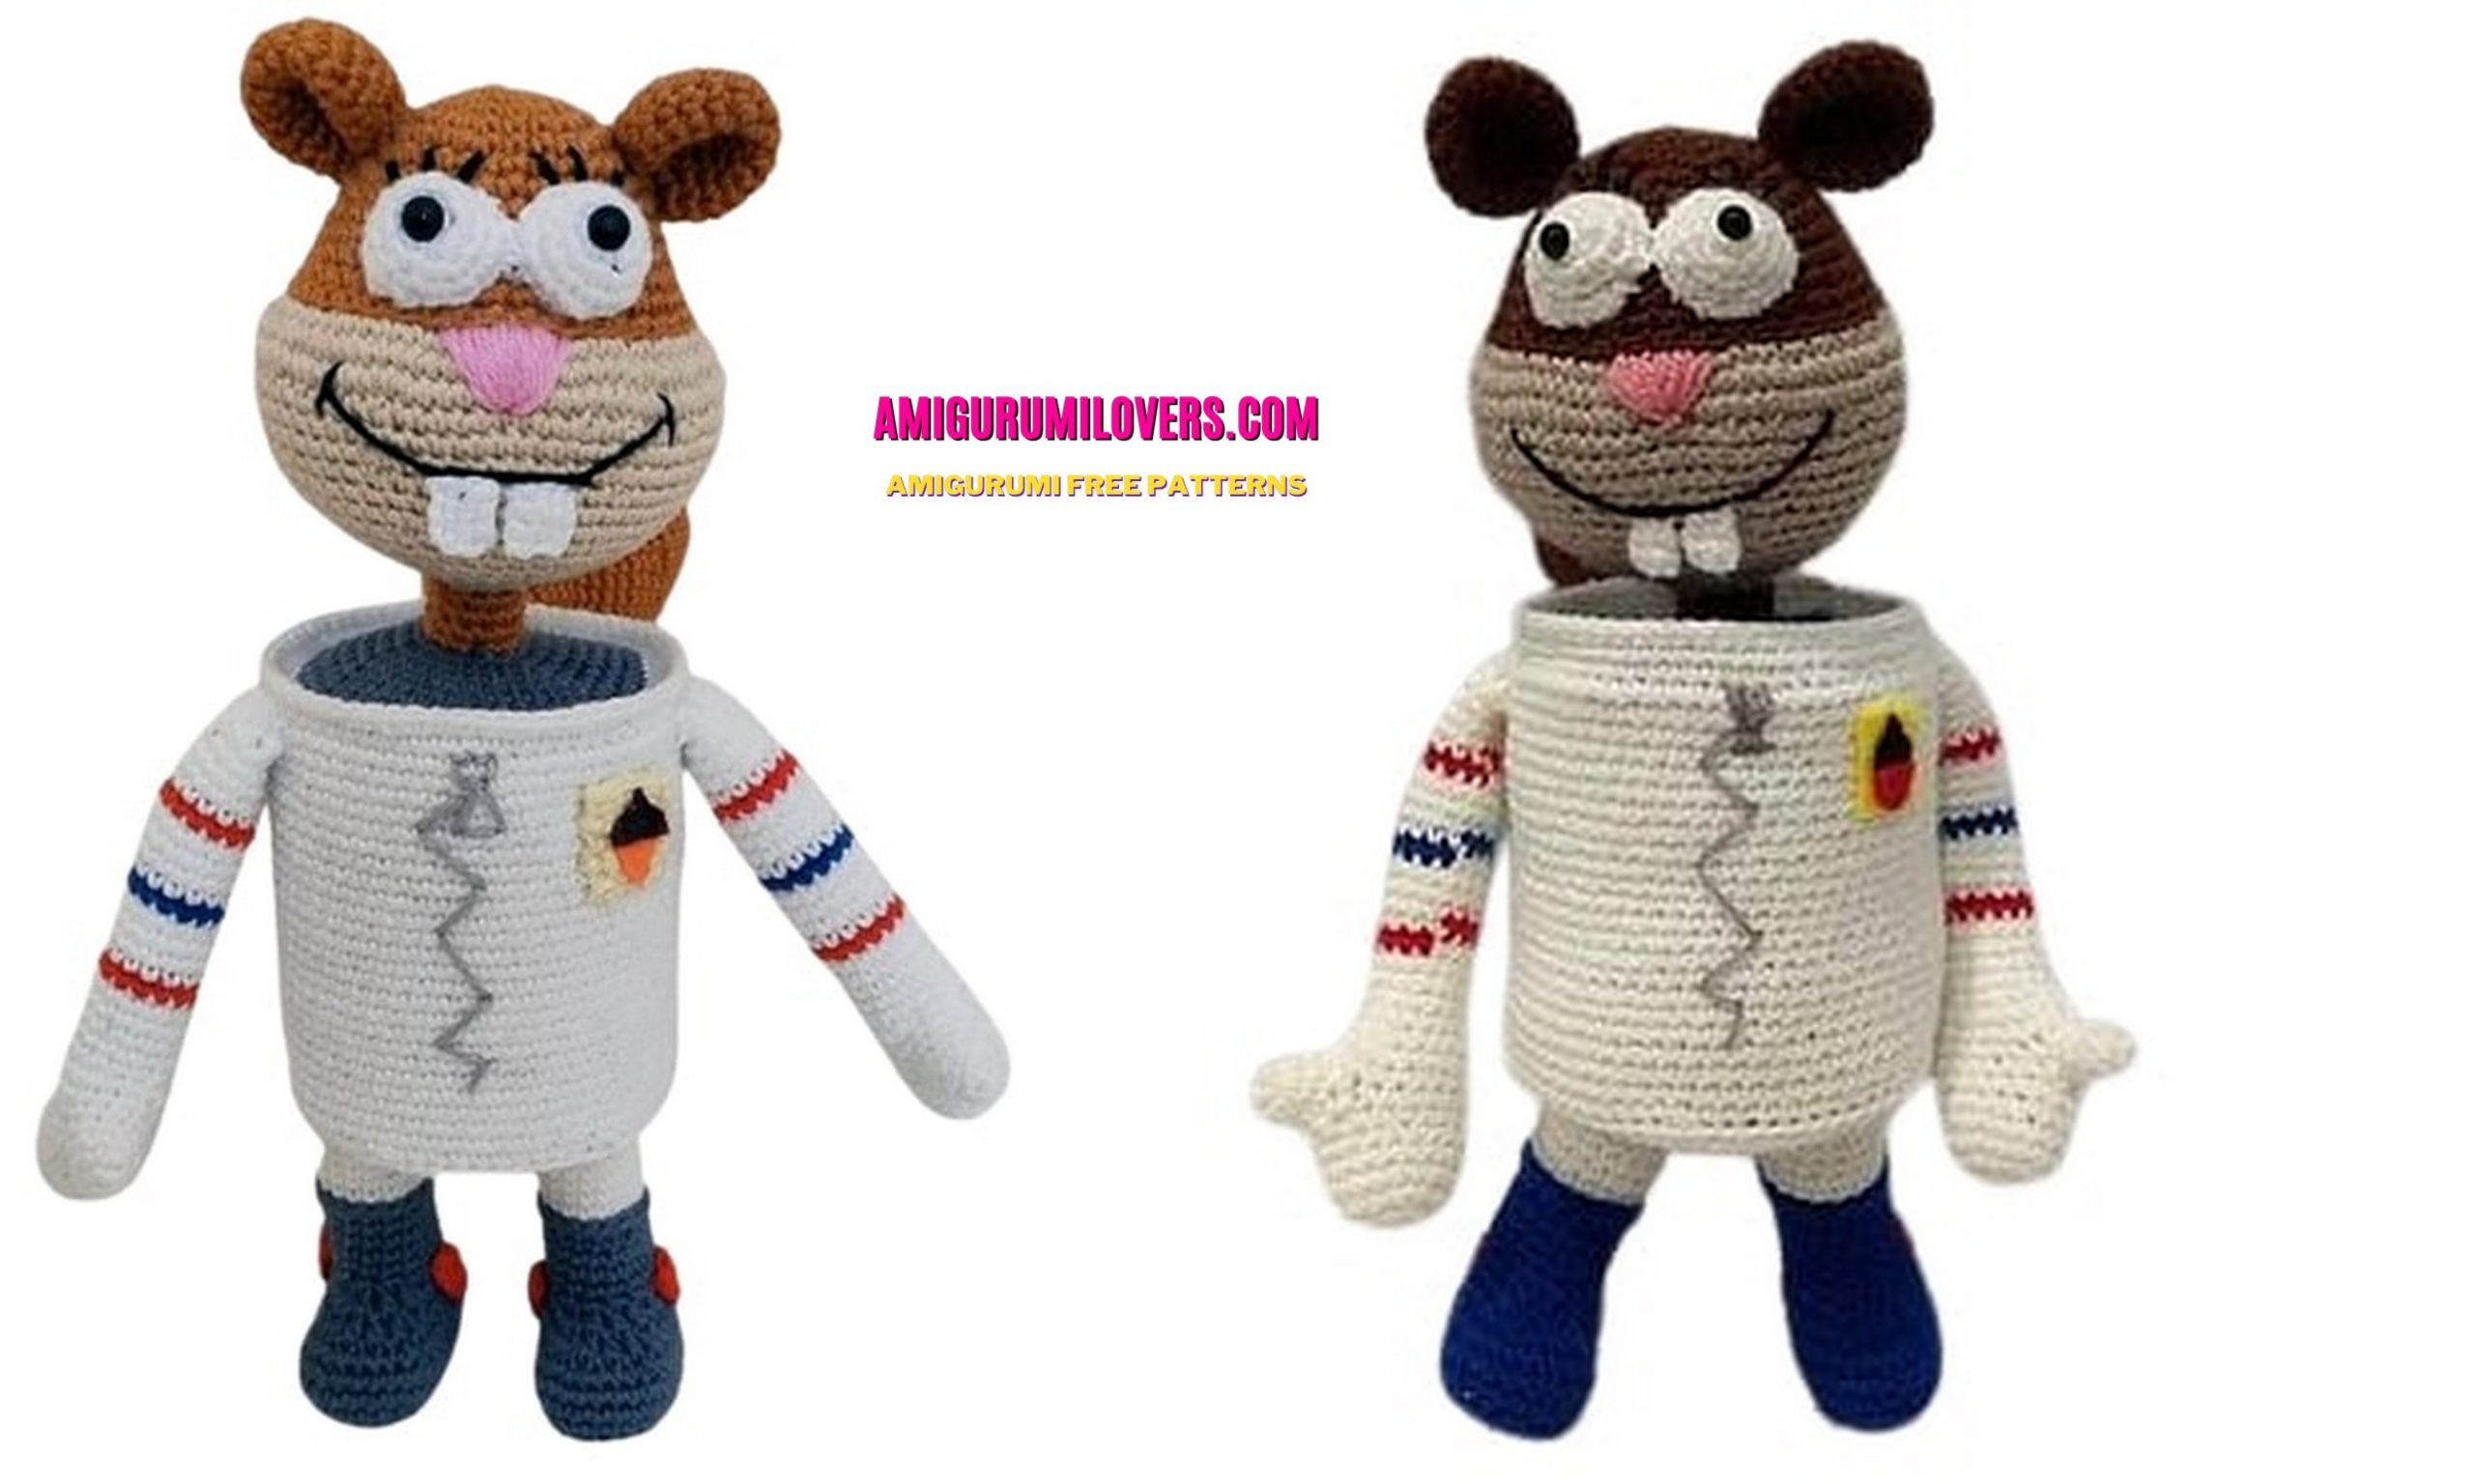
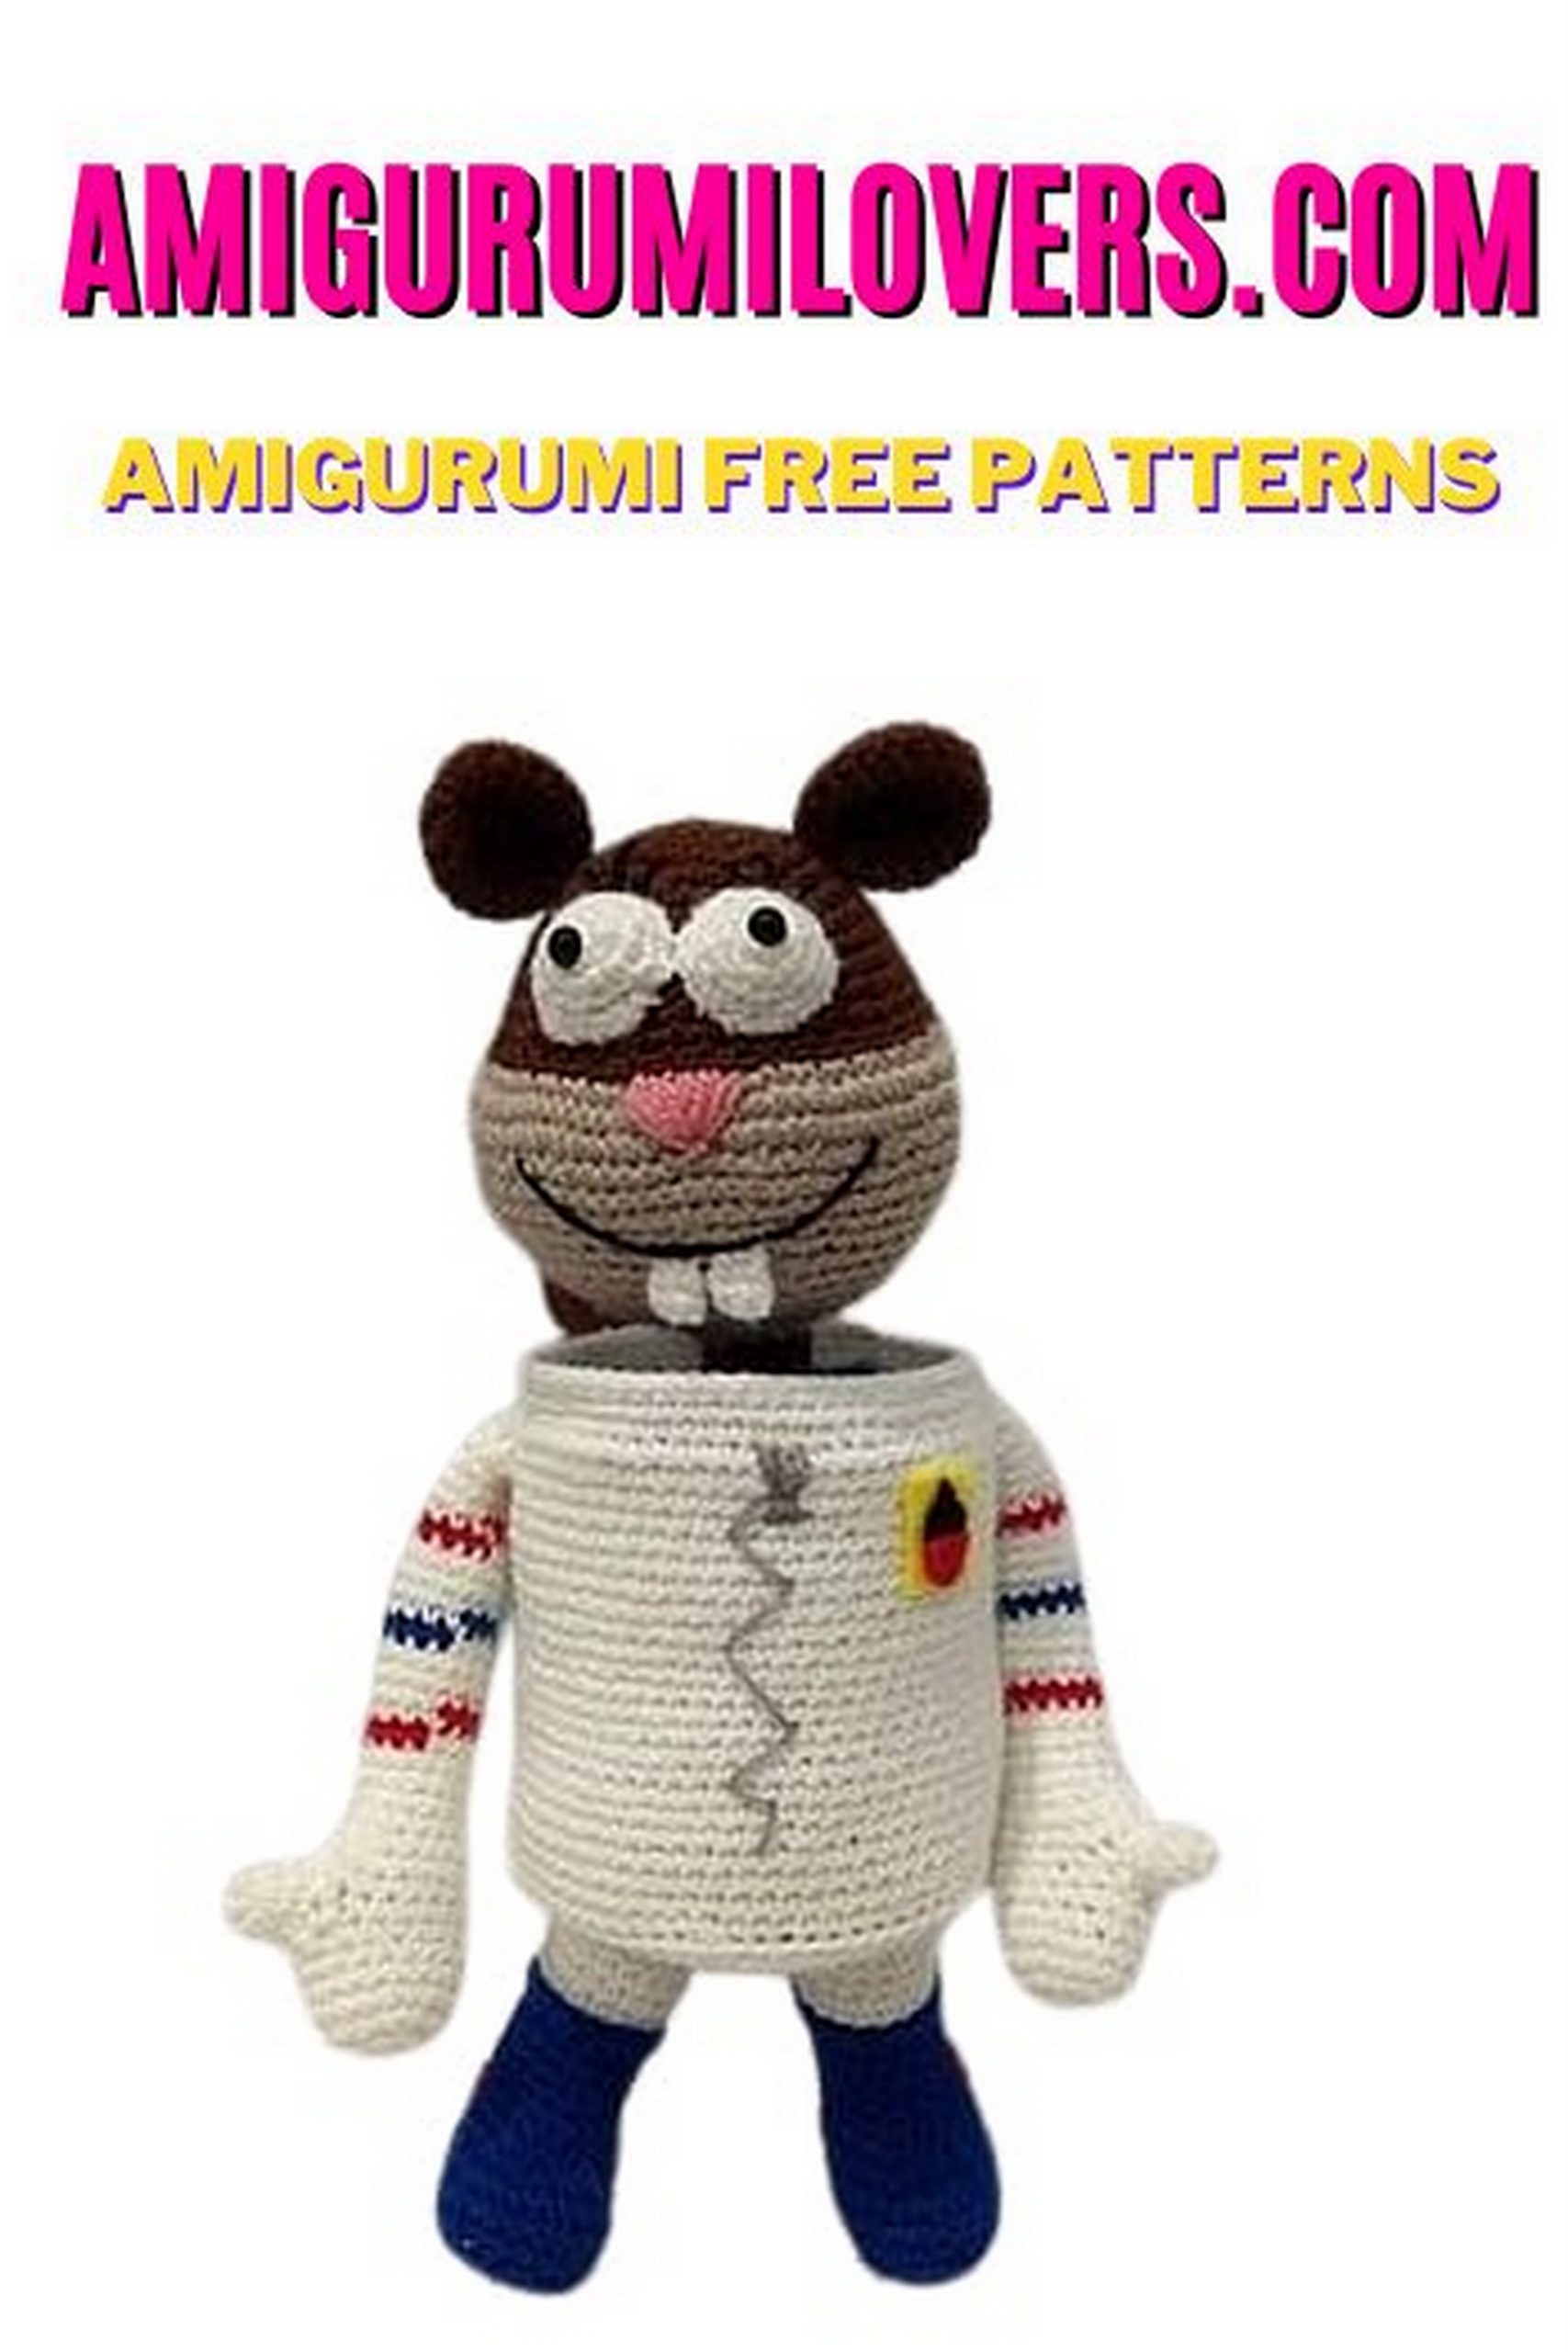
Robot Beaver Amigurumi Free Crochet Pattern
You may also enjoy exploring our free amigurumi patterns and other popular amigurumi animal patterns available on our website.
Welcome to our crochet corner, where creativity and fun come together in vibrant yarn projects! If you’ve ever wanted to dive into the whimsical world of amigurumi, you’re in for a treat. Today, we’re excited to share a delightful free crochet pattern for an adorable Robot Beaver amigurumi. This charming little creature combines the playful spirit of a beaver with a futuristic robotic twist, making it perfect for beginners and seasoned crocheters alike.
Crocheting amigurumi is not just about creating cute toys; it’s a fantastic way to hone your skills, express your creativity, and even make personalized gifts for friends and family. The Robot Beaver pattern is designed with beginners in mind, guiding you through each step with easy-to-follow instructions. You don’t need to be an expert; just grab your crochet hook, some colorful yarn, and let your imagination flow!
In this post, we will discuss the materials you’ll need and provide clear guidance on how to create this quirky character from head to tail. As you work on your Robot Beaver, you’ll develop essential techniques such as single crochet, increasing, and decreasing, all while enjoying the meditative rhythm that crochet brings. This pattern offers a fun challenge while also allowing you the freedom to add your own creative touches, whether through color choices or embellishments.
There’s something incredibly satisfying about watching your creation come to life stitch by stitch. Whether you’re making this Robot Beaver for yourself, to brighten up a child’s room, or as a unique gift, it’s sure to be a conversation starter. Plus, once you’ve mastered this pattern, you can apply your newfound skills to create other amigurumi designs, opening up a whole new world of possibilities.
Make sure you have your crochet toolkit ready. You’ll need a crochet hook, yarn in your favorite colors, and a bit of stuffing to give your beaver its cuddly form. Don’t worry if you’re not familiar with all the stitches involved; we’ll walk you through each one in simple terms. We believe that crochet should be an enjoyable experience, and we’re here to ensure you feel supported every step of the way.
This Robot Beaver amigurumi is more than just a pattern; it’s an opportunity to explore your creativity, learn a new craft, and perhaps even make new friends within the crochet community. So, grab your yarn and hook, and let’s set out on this creative adventure together. Follow along as we unravel the secrets to crafting this adorable little robot, and soon you’ll have a charming companion to cherish or share. Let’s get started on creating a masterpiece that blends nature with a dash of robotics!
Amigurumi patterns are available on this site for free with quality images. I shared with you the amigurumi beaver pattern in this article.
Materials:
• Schachenmayr Catania Originals Mercerized 100% Cotton Yarn (50g/125m)
• crochet hook No 2
• 6mm safety eyes
• Fiberfill stuffing
• Needle, scissors . plastic inserts, wire
Abbreviations:
(This pattern was writing using U.S.A. terms.)
MR= magic ring
ch= chain stitch
sist =slip stitch
st= stitch
SC =single crochet
hdc= half double crochet
dc= double crochet
tr= treble crochet
dec= decrease (sc 2 stitches together
inc= increase (sc in indicated stitch 2 times)
dc2tog= double crochet 2 stitches together
FLO = front loop only
BLO = back loop only
F.o. = fasten off
(12) = number of stitches you should have at the end of the round/row
()*6 = repeat whatever is between the brackets the number of times stated
Work is countinuos rounds. Do not join or turn if not instructed in the pattern.
Fill the stuffing into the body parts while crocheting them.
If you use the same materials as me, the finished size is 23 cm.
Head:
Starting from the top of the head with brown color yarn.
1) 6 sc in Mr
2) 6inc (12)
3) (1sc,inc)*6 (18)
4) (2sc,inc)*6 (24)
5) (3sc,inc)*6 (30)
6) 30 SC (30)
7) (4sc,inc)*6 (36)
8)36 SC (36)
9) (5sc,inc)*6 (42)
10-13) 42 sc (42) Change color with sand color.
14) BLO 9sc, 25inc, 8sc (67)
15) 9sc,(sc,inc)*8, 18sc, (inc,sc)*8, 8sc (83)
16) 83 sc (83)
17) 9sc, (sc,dec)*10, 9sc, (dec,sc)*9, 8sc (64)
18-19) 64 SC(64)
20) (45c, dec)*10, 4sc (54)
21-22) 54 SC (54)
23) (7sc, dec)*6 (48)
24) 48 SC (48)
25) (6sc, dec)*6 (42)
26) (5sc, dec)*6 (36)
27) (4sc, dec)*6 (30)
28) (3sc, dec)*6 (24)
29) (2sc, dec)*6 (18)
30) (1sc, dec)*6 (12) Continue into the neck from here. Change color with brown.
31-35) 12sc (12)
I crochet +3 sc to get the color change in the middle at the back. Change color with gray. The neck is stiffened with wire and stuffed.
36) 12 inc (24)
37) (3sc,inc)*6 (30)
38) (4sc,inc)*6 (36)
39) (5sc,inc)*6 (42)
40) (6sc, inc)*6 (48)
41) (7 sc, inc)*6 (54)
42) (8sc, inc)*6 (60) Change to white yarn 43) (9sc, inc)*6 (66)
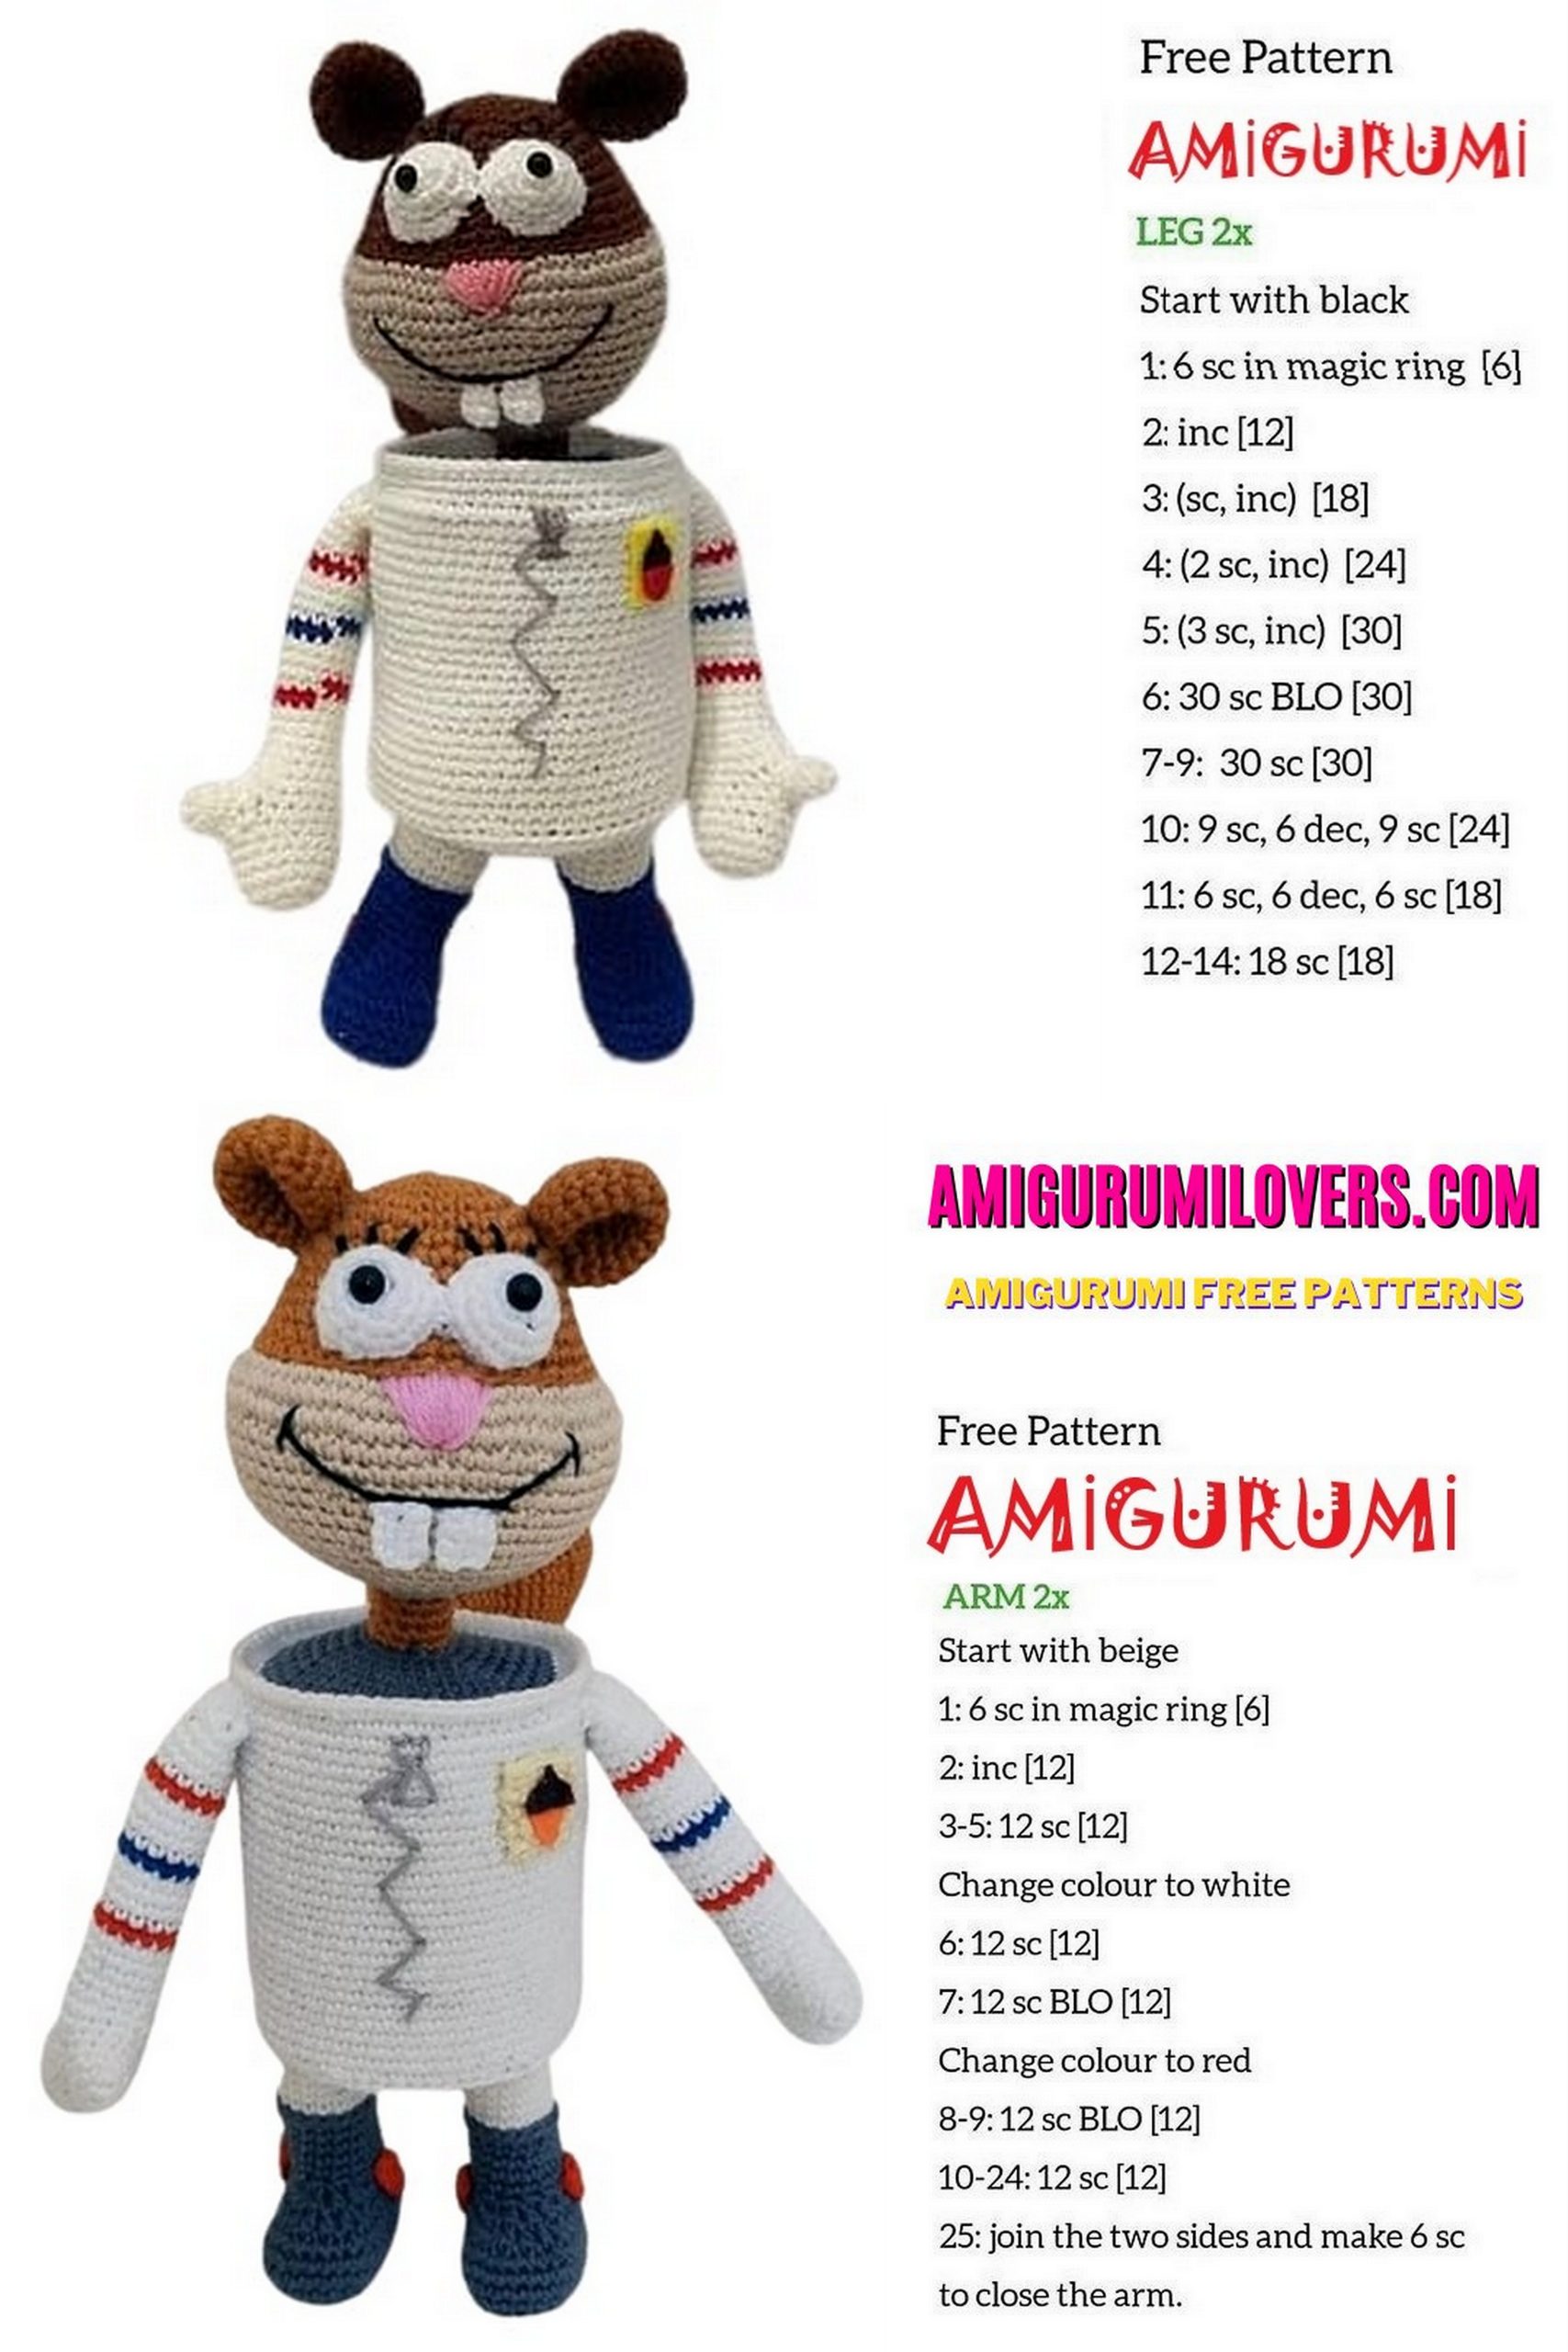
Legs (make 2):
We start crocheting the boots in gray yarn. Cut cardboard or plastic inserts in the size of the sole. Add stuffing.
1) 10 ch
2) In the second ch from the hook: linc, 7sc, linc, continue into the unused loops on the opposite side of the chain: linc, 7sc, linc (22)
3) 1sc, linc, 7sc, 4inc, 8sc, linc (28)
4) 1sc, linc, 9sc, linc, 4sc, linc, 10sc, linc (32)
5)BLO 32sc (32)
6) 12sc, inc, 5sc, inc, 13sc (34)
7) 34 sc (34)
8) 12sc, dec, 5sc, dec, 13sc (32)
9) 1Osc, 6 dc2tog, 10sc (26)
10) 9sc, 4 dc2tog, 9 SC (22)
11) 7sc, 4dec, 7 sc (18)
12-15) 18 SC (18)
16) Flo 18 SC (18)
17) Change to white yarn, Row 16 in the back loop:18 SC (18)
18-24) 18 SC (18) F.o. and leave a long tail for sewing.
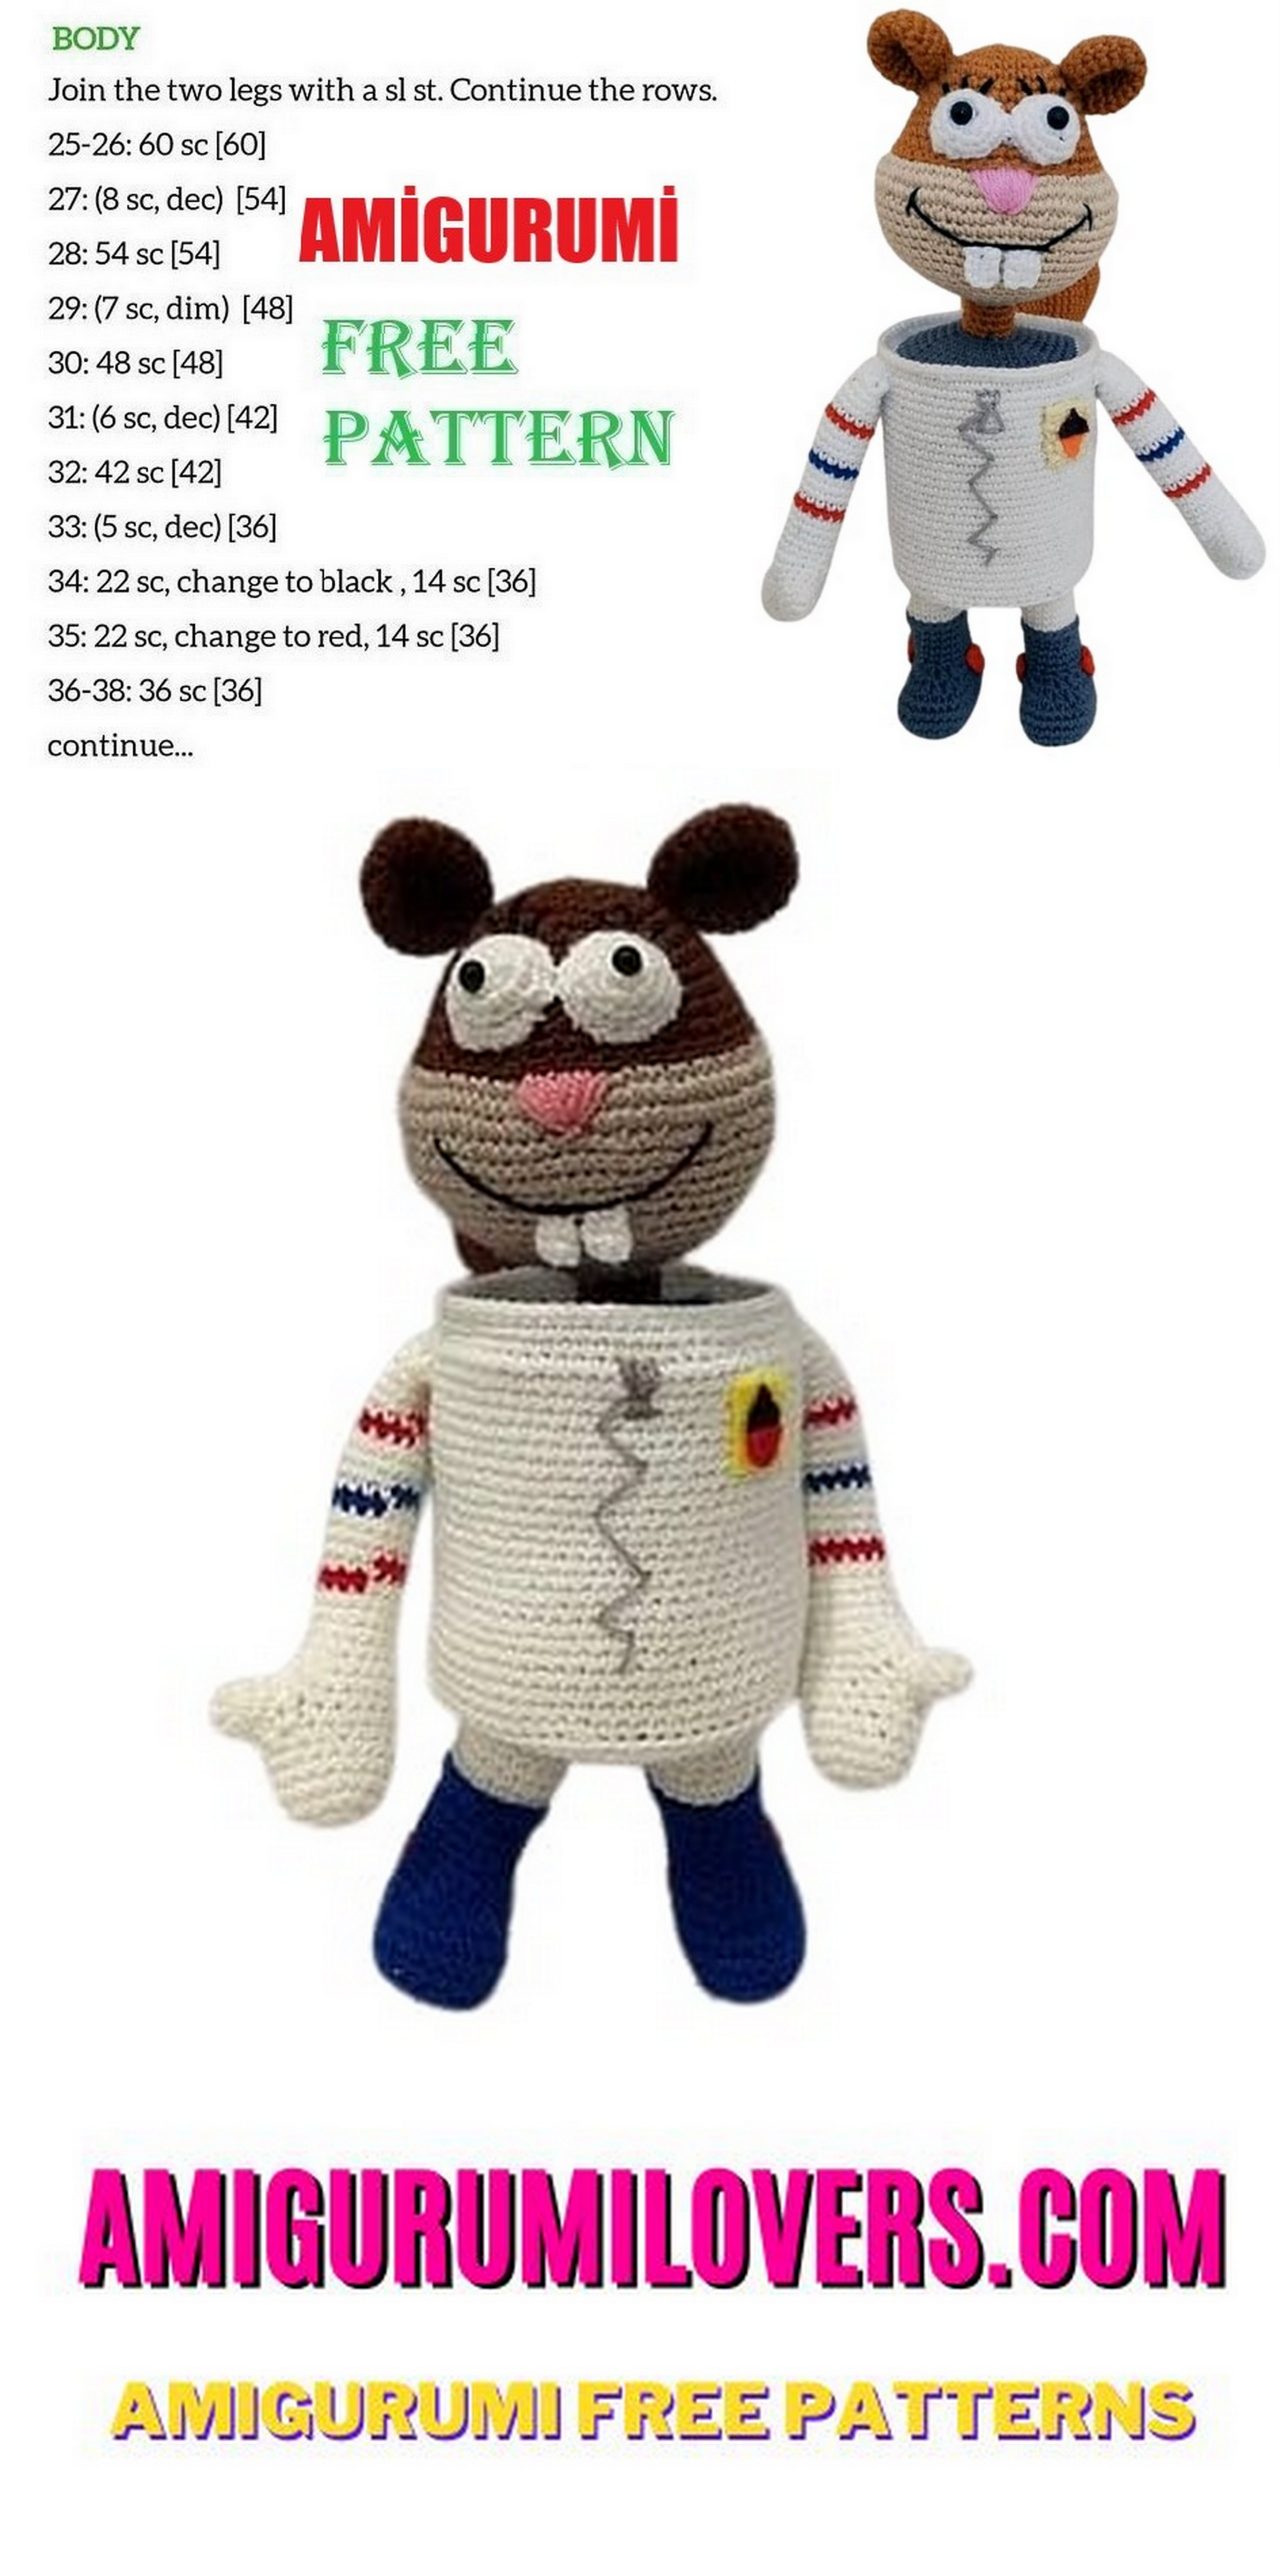
Body:
1) 6 sc in Mr
2) 6inc (12)
3) (1sc,inc)*6 (18)
4) (2sc,inc)*6 (24)
5) (3sc,inc)*6 (30)
6) (4sc,inc)*6 (36)
7) (5sc,inc)*6 (42)
8) (6sc, inc)*6 (48)
9) (7sc, inc)*6 (54)
10) (8sc, inc)*6 (60)
11) (9sc, inc)*6 (66)
12) (10sc, inc)*6 (72)
13) BLO (10sc, dec)*6 (66)
14) -37) (24 round) 665C (66)
Cut plastic inserts in the sizeof the body. Place one at the bottom, add stuffing. We add the same insert to the top.
38) Place the body and the neck’s round with the wrong sides together and crochet them together with sc around like you can see in the picture.
39-40)Then we crochet two more rows. (66) F.O

Ears (make 2):
1)6 sc in Mr
2) 6inc (12)
3) (1sc,inc)*6 (18)
4-7) 18 SC (18)
8) (1sc,dec)*6 (12)
F.o. and leave a long tail for sewing.
Eye White (make 2):
1)6 sc in Mr
2) 6inc (12)
3) 12 sc (12)
4) (1sc,inc)*6 (18)
F.o. and leave a long tail for sewing.
We place the safety eye in the middle, stuff it. Sew the eyes to the head. Eyelashes, nose and mouth are embroidered.
Tooth(make 2):
1) 3 ch, turn
2) ch 1, 3 sc, turn
3) ch 1, 3sc F.o. and leave a long tail for sewing.
Arms (make 2):
Start crocheting the thumbs:
1)6 sc in Mr
2) (1sc,inc) *3 (9)
3-4) 19sc
Hand(2db):
1) 6 sc in Mr
2) 6inc (12)
3) (1sc,inc)*6 (18)
4-7) 18 SC (18)
Do not cut the yarn.
Right hand:
8) Join the two parts together, crochet 4 sc together and then continue the row with 14 rp. (18)
9) crocet 5 sc on the other side of the thumb and 14 sc on the hand (19)
10-11) 19 sc (19)
12) dec, 2sc, dec, 3sc, dec, 2sc, dec, 4sc (15)
13-16) 15 SC (15)
17) change to red yarn, 15 SC (15)
18-21) change to white yarn, 15 SC (15)
22) change to blue yarn, 15 SC (15)
23-26) change to white yarn, 15 sc (15)
27) change to red yarn, 15 sc (15)
28-31) change to white yarn, 15 sc (15)
32) 1 hdc, 2 dc, 2 tr, 2 dc, 1 hdc, 1 sc F.o. and leave a long tail for sewing.
Crochet the second hand in the same way, but at row 17 crochet enough sc in white before the color change so that the color change is on the inside of the hand.
Also on the last row, make sure the highest point is in the middle
Tail:
1) 6 sc in Mr
2)6inc (12)
3) (1sc,inc)*6 (18)
4) (2sc,inc)*6 (24)
5) (3sc,inc)*6 (30)
6) (4sc,inc)*6 (36)
7) (5sc,inc)*6 (42)
8-11) 424 sc (42)
12) (5sc, dec)*6 (36)
13-16) 36 SC (36)
17) (4sc, dec)*6 (30)
18) (3sc, dec)*6 (24)
19-23) 24 sc (24)
24)2sc,6dec,2sc,6inc,2sc (24)
25) 24 sc (24)
26) (3sc,inc)*6 (30)
27) 3sc, 4dec, 19sc (26)
28) 26 sc (26)
29) dec, 24sc (25)
30) dec, 23sc (24)
31) dec, 22sc (23)
32) dec, 21sc (22)
33) dec, 20sc (21)
34) dec, 19sc (20)
35) dec, 185C (19)
36) dec, 17sc (18)
37) (1sc, dec)*6 (12)
38-41) 12 sc (12) F.o. and leave a long tail for sewing.
Acorn patch: We crochet a small square or cut it out of yellow felt.
We also cut acorns from felt.
I sewed the crochet square onto it and then glued the acorn shape with textile glue.
I also embroidered the zipper.
The circles can also be cut out of felt and glued to the boots.
Or crochet 6 or 8 sc in magic ring with red, sew to the boots.
Make 4 pieces.
Before you leave, make sure to check out more free amigurumi crochet patterns and discover new ideas for your next project.
You can also browse our full amigurumi pattern archive for hundreds of beginner-friendly designs.