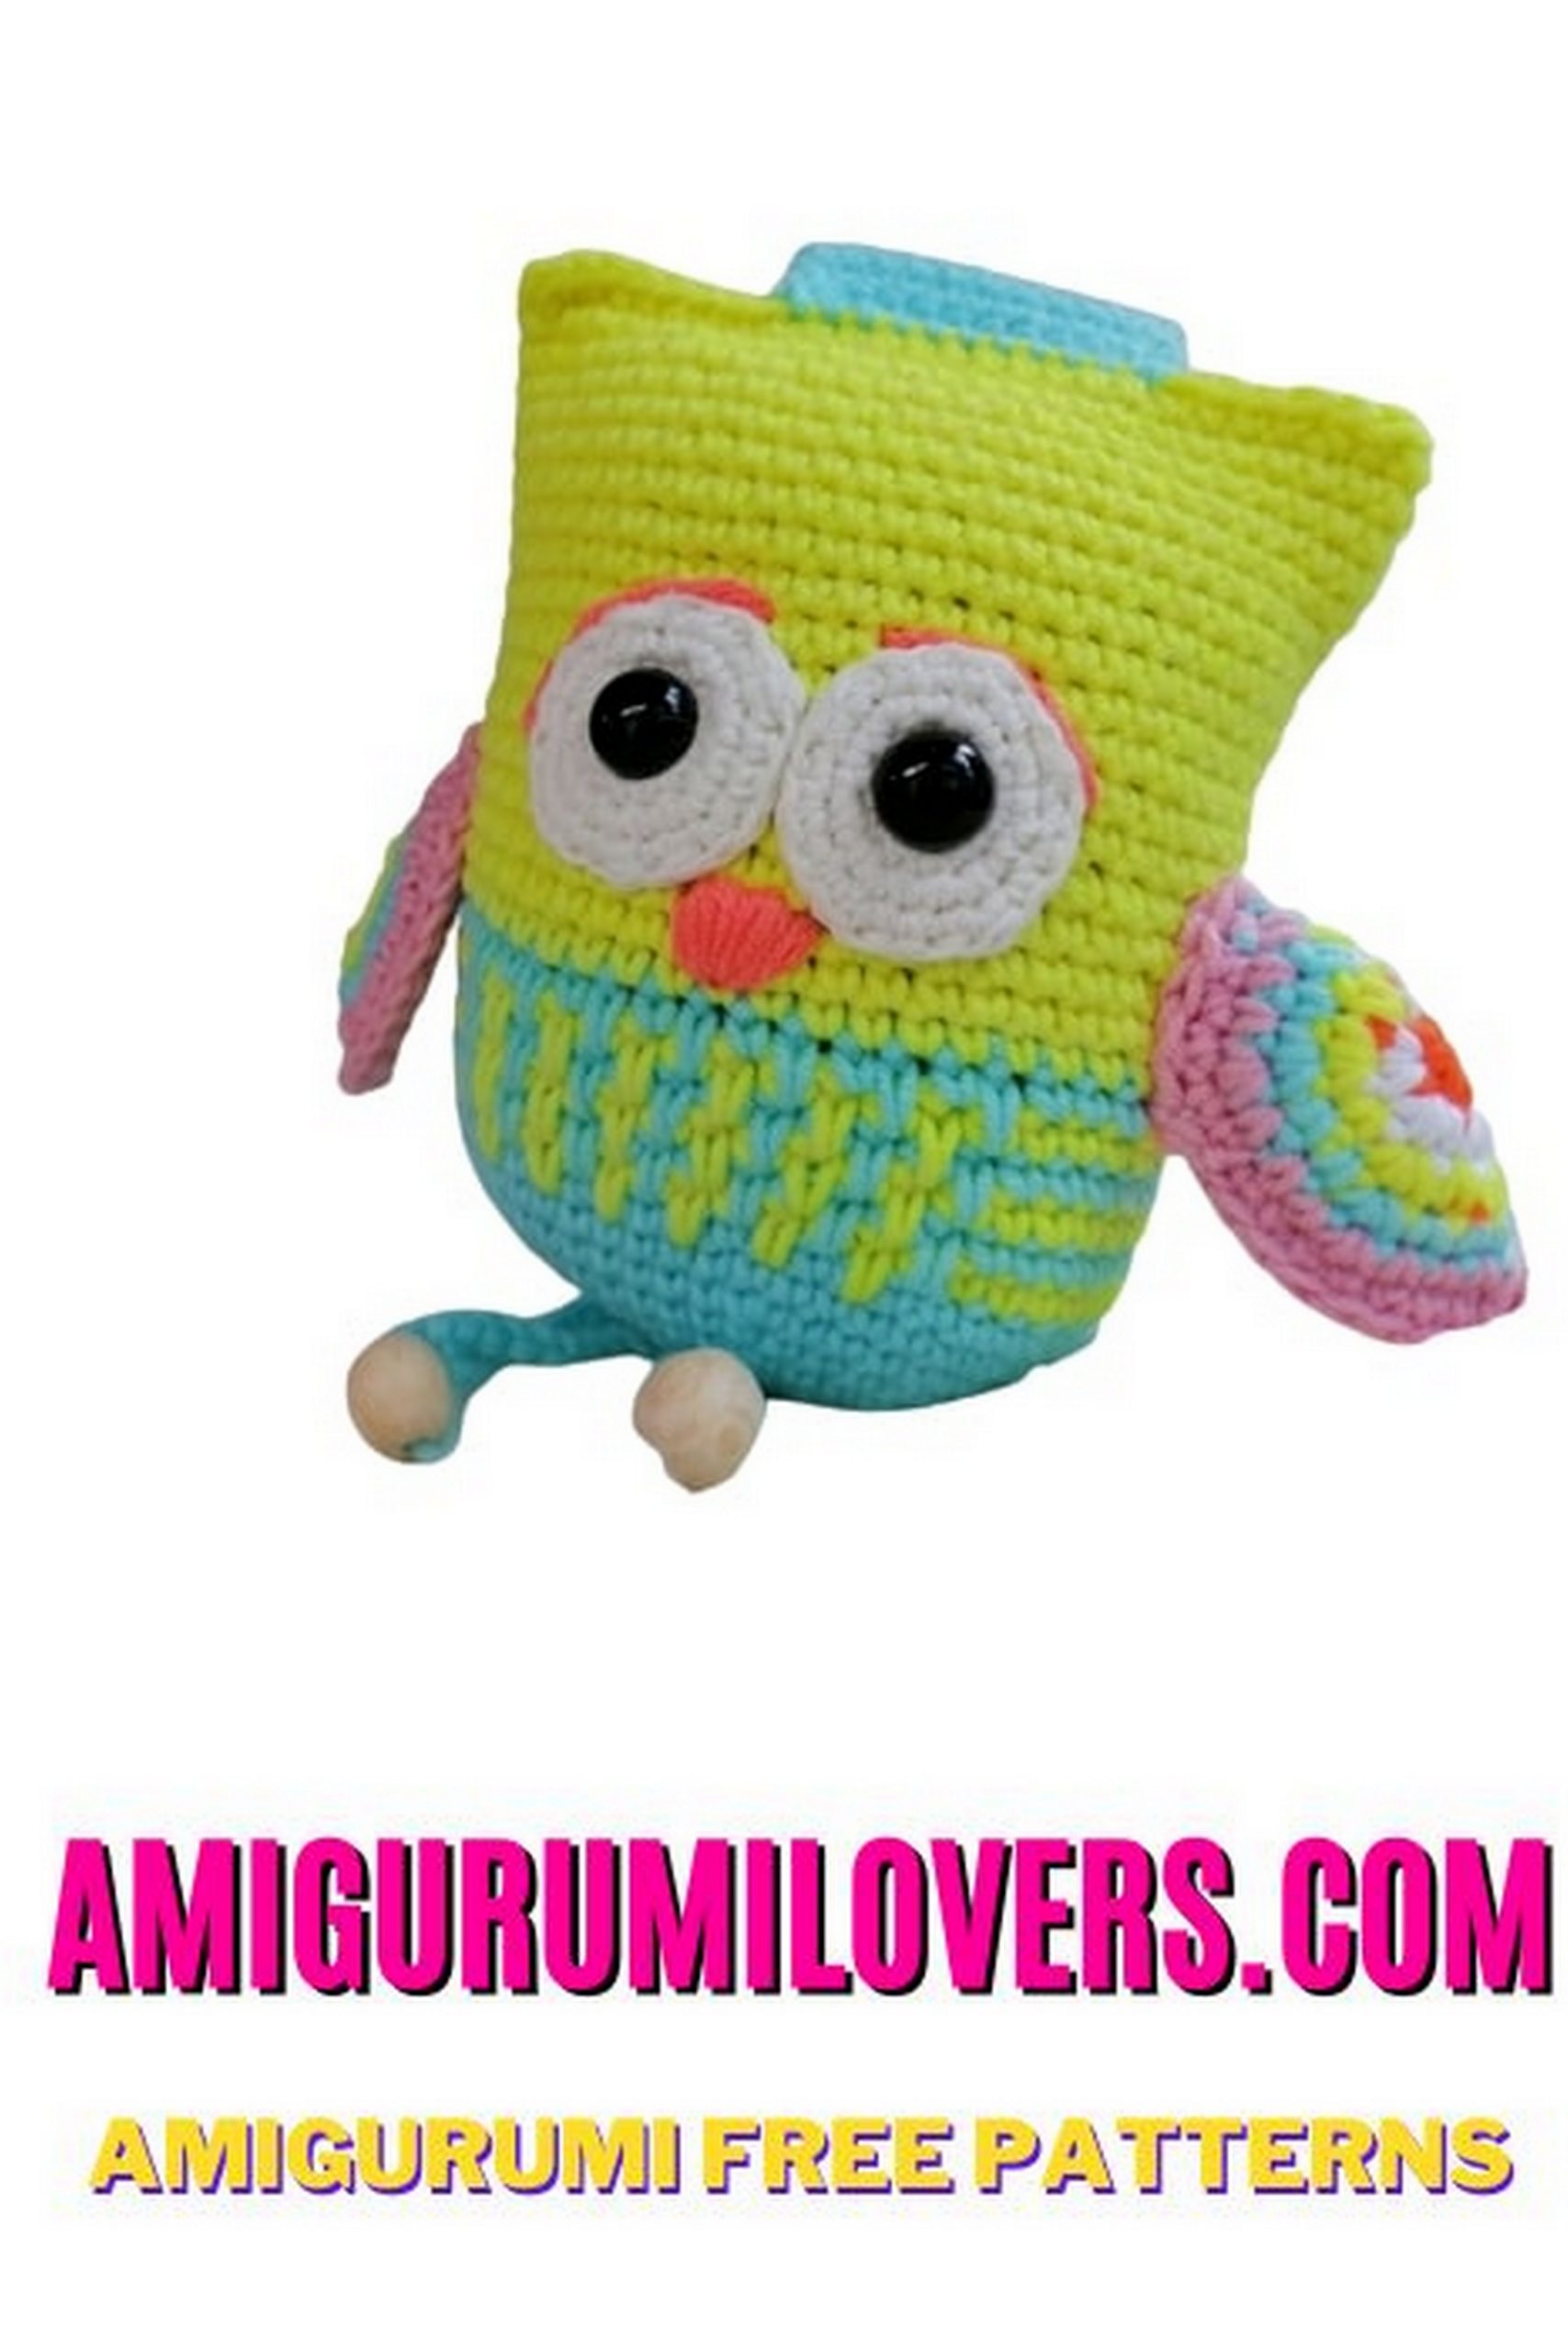
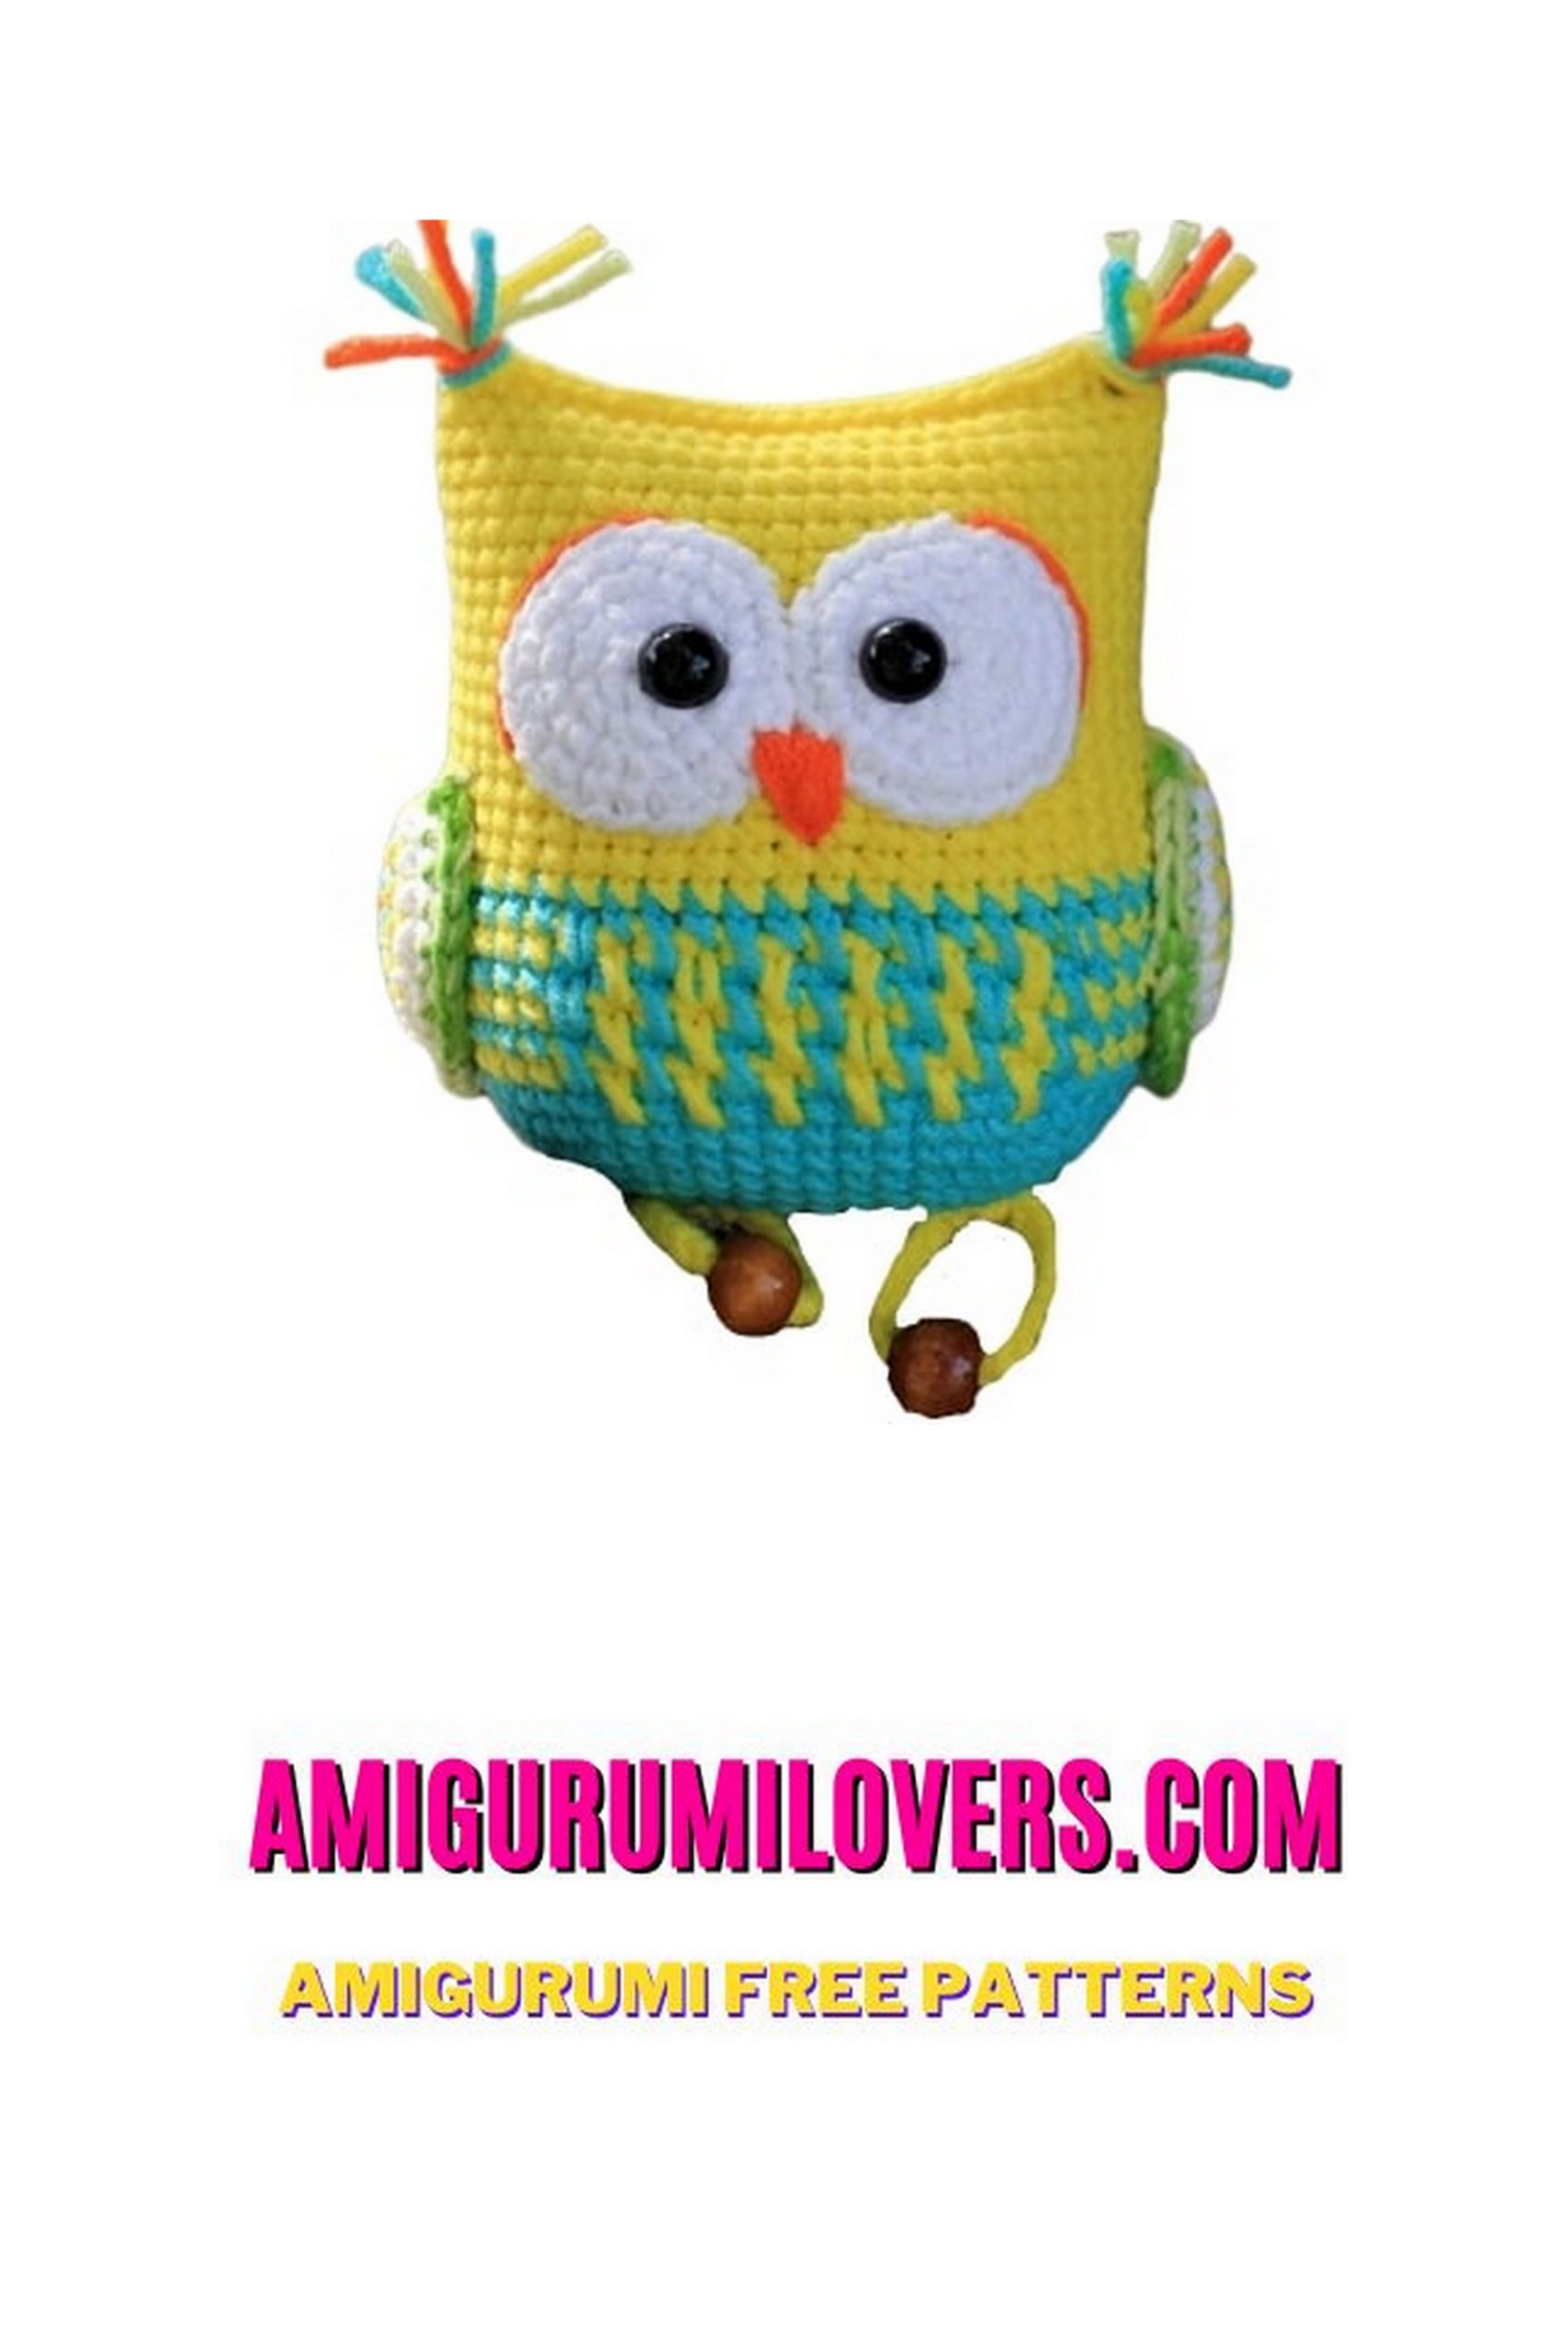
Adorable Amigurumi Owl Free Crochet Pattern
You may also enjoy exploring our free amigurumi patterns and other popular amigurumi animal patterns available on our website.
Welcome to our crochet corner where creativity and fun intertwine! Today, we’re excited to share a delightful project that will bring a touch of whimsy to your crafting journey: an adorable amigurumi owl free crochet pattern. If you’re a beginner looking for a charming and manageable project, this pattern is perfect for you. Amigurumi, the art of creating plush figures using crochet techniques, is not only a fantastic way to practice your stitches but also results in irresistibly cute creations that make perfect gifts or home decor items.
In this blog post, we will guide you through each step of making your own amigurumi owl, from gathering materials to assembling your finished piece. Our easy-to-follow instructions ensure that even novice crocheters can achieve a result they’ll be proud of. Crafting an amigurumi owl is a wonderful introduction to the world of crochet, allowing you to build confidence while creating something truly special. Plus, the satisfaction of completing a handmade item is one of the most rewarding aspects of crochet!
This particular pattern features a simple yet charming design, characterized by big round eyes and a plump body that is both adorable and huggable. You can use any yarn color you like, making this project customizable to perfectly match your style or the taste of the person you are gifting it to. Not to mention, amigurumi projects typically require only small amounts of yarn, making them a budget-friendly option for crafty enthusiasts. You might even have some yarn scraps lying around that are just waiting to become part of this cute creation!
As you work through this pattern, you’ll not only learn foundational crochet skills but also how to join different pieces together to create a cohesive design. The pattern’s stitch instructions are straightforward, ensuring that you can focus on honing your skills without feeling overwhelmed. And even if you stumble along the way, remember that every crochet project is a learning experience, and practice only makes you better.
Gather your materials, find a comfy spot, and prepare to embark on a delightful crochet adventure. Whether you are crafting for yourself or someone special, our amigurumi owl pattern is sure to bring joy and a sense of accomplishment. So, let’s dive right in and start creating this charming little friend that will surely capture hearts. Keep reading to find the full free pattern and all the tips you need to make this project a breeze!
Welcome to our world of crochet, where creativity knows no bounds! If you’re looking for a fun and rewarding project, you’re in the right place. Our Amigurumi Owl crochet pattern is here to brighten up your crafting journey. Whether you’re a seasoned crocheter or just starting out, this free pattern is designed to delight and inspire.
Owls have a special place in our hearts with their wise and whimsical charm. With this pattern, you can bring a cute, cuddly owl to life with your own hands. Plus, it’s absolutely free!
To get started, gather your crochet hooks, yarn, and a pinch of enthusiasm. Our easy-to-follow instructions will walk you through the process, stitch by stitch. Soon, you’ll have a huggable owl to call your own, or perhaps to gift to a loved one.
So, grab your yarn and let’s embark on a crochet adventure together. Join us as we unravel the magic of amigurumi, one stitch at a time. Get ready to create a one-of-a-kind owl that will melt hearts and spark smiles.
Let’s crochet away and make memories with our Amigurumi Cute Owl crochet pattern. Happy crafting!
Abbreviations
Mr = Magic ring
sc = single crochet
inc = Increase
dec = decrease
sl-st = slip-stitch
dc =double crochet
Materials
1. Knit Alize Cotton Gold and Yarn Art Jeans in Blue, Yellow, White, Green and orange flowers.
2. Hook No. 1.75 or No. 2.
3. Filler
4. Black beads with a diameter of 8 mm or black beads.
5. Super glue
6. Container from kinder surPriz
7. Beads
8. Tapestry needle
9. Holofiber filler

PATTERN
Head-body
Take the Knot of blue.
Dial a chain of 8 ch
1 row: starting from the 2nd item, make inc, 5 sc, 4 sc in the last item of the chain, 5 sc, inc (18)
2 row: 2 inc, 5 sc, 4 inc, 5 sc, 2 inc (26)
3 row: (1 sc, inc) x 2, 5 sc, (1 sc, inc) x 4, 5 sc, (1 sc, inc) x 2 (34)
4 row: (2 sc, inc) x 2, 5 sc, (2 sc, inc) x 4, 5 sc, (2 sc, inc) x 2 (42)
5 row: sc in each p. (42)
6 row: (3 sc, inc) x 2, 5 sc, (3 sc, inc) x 4, 5 sc, (3 sc, inc) x 2 (50)
7-8 row: sc in each p. (50)
When tying the last item in the 8th row, change the thread to yellow.
9 row: 6 sc, (sc, dec) x 6, 32 sc (50)
Change the thread to blue.
10 row: 5 sc, (sc, dec) x 7, 31 sc (50)
Change the thread to yellow.
11 row: 6 sc, (sc, dec) x 6, 32 sc (50)
Change the thread to blue.
12 row: 5 sc, (sc, dec) x 7, 31 sc (50)
Change the thread to yellow.
13 row: 6 sc, (sc, dec) x 6, 32 sc (50)
Change the thread to blue.
14 row: 5 sc, (sc, dec) x 7, 31 sc (50)
Change the thread to yellow.
15-31 row: 17 rows of sc in each p. (50)
Tie another 2 sc to align the edge.
Put some stuffing inside, then place the container from the kinder with beads, more stuffing. Fold the edges and sew them sc. Do not forget to put before closing still filler.
Eyes (2 pcs.)
White thread
1 row: Magic ring into 6sc(6)
2 row: 6 inc (12)
3 row: (sc, inc) x 6 (18)
4 row: (2 sc, inc) x 6 (24)
Leave the thread for incubation. Hang the eyes to the body, Stick the black half beads (inc sew the beads). With orange strands, embroider the beak and rims around the eyes.

Wings (2 pcs.)
Orange thread
1 row: Magic ring into 6sc(6)
2 row: 6 inc (12)
Change the thread to blue
3 row: (sc, inc) x 6 (18)
Change the thread to yellow
4 row: (2 sc, inc) x 6 (24)
Change the thread to white
5 row: (3 sc, inc) x 6 (30)
Change the thread to green, fold the wing in half and sew sc.
Leave the thread for Sewing and Sew wings to the body.
Tail
Orange thread.
Dial a chain of 6 ch + 3 ch lift
1 row: starting from the 4th p. Do 3 DC, HDC, 2 sc, ch, turn the knitting (6)
2 row: 2 sc, HDC, 3 DC, 3 ch, turn knitting (6)
3 row: 3 DC, HDC, 2 sc (6)
Define the tail.
Feet (2 pcs)
Tie two chains of 21 ch, put on them wooden beads and write to the body of an owl.


Ears
Cut a yarn of different colors into segments of 6-7 cm. Fasten a bundle of colored threads to the corners of the head as the fringe is attached to the scarf – stick the hook in the corner, make a loop of threads, Slide all the ends through the loop and tighten. Trim extra length.
Before you leave, make sure to check out more free amigurumi crochet patterns and discover new ideas for your next project.
You can also browse our full amigurumi pattern archive for hundreds of beginner-friendly designs.