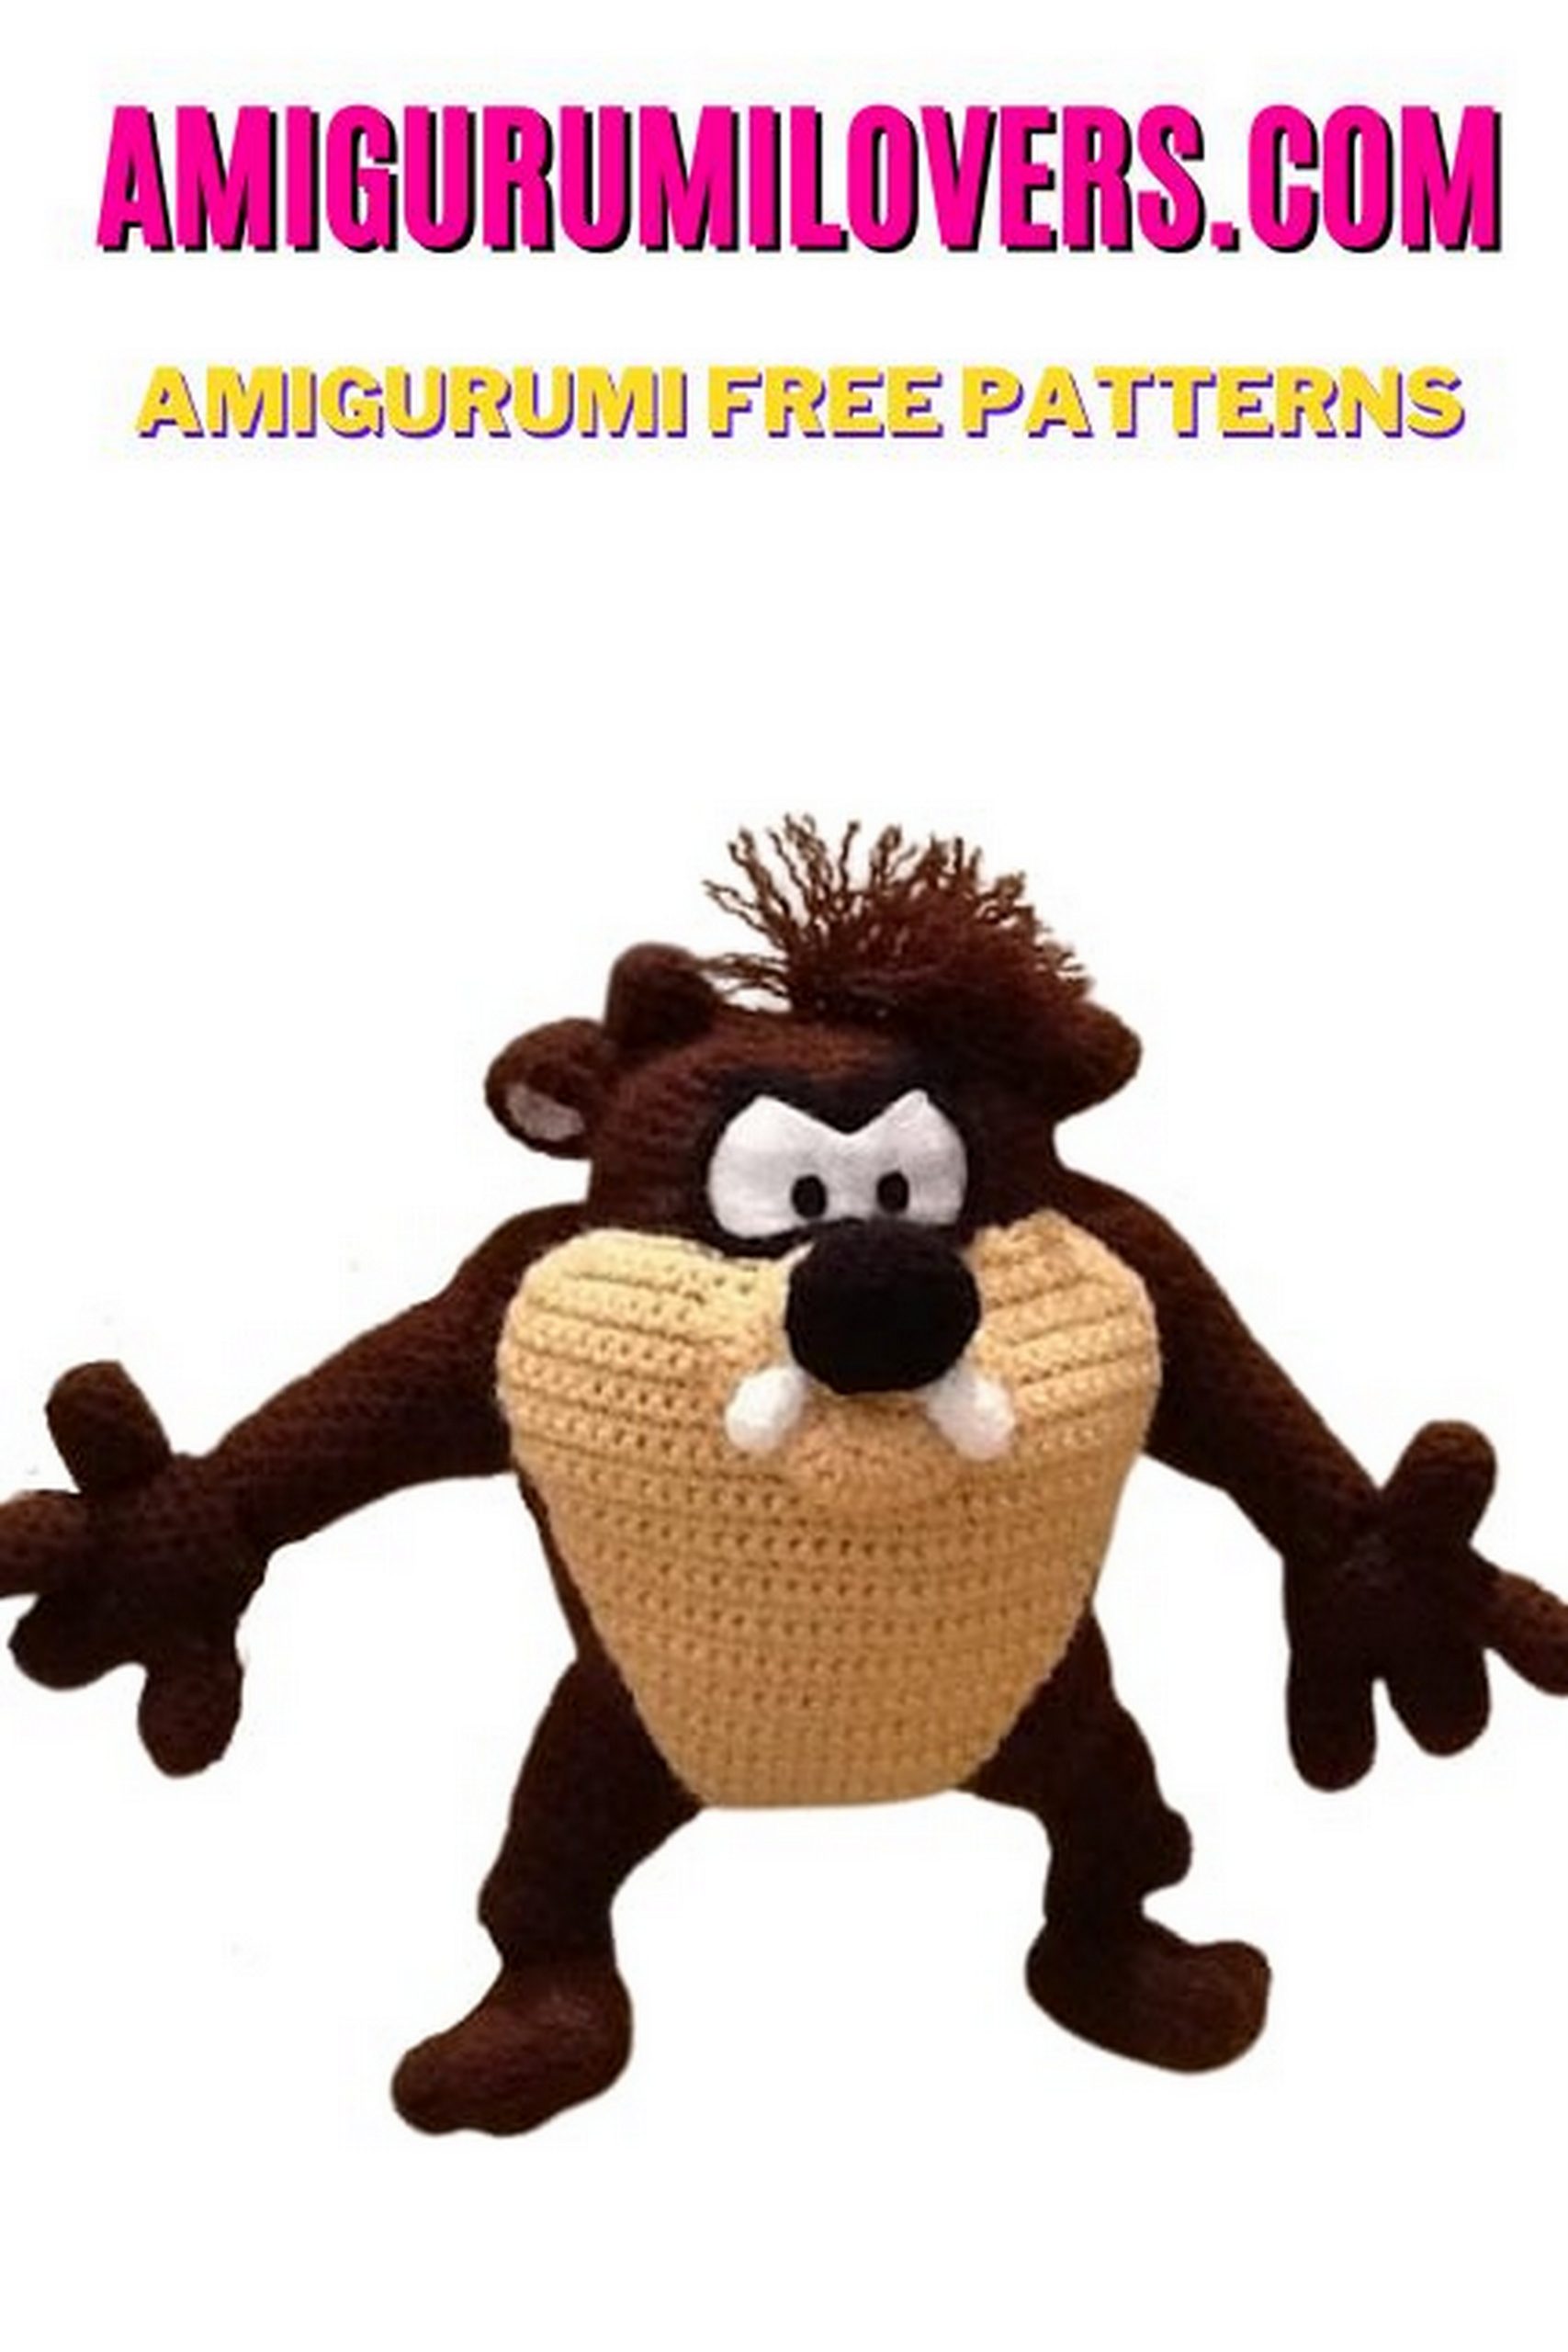
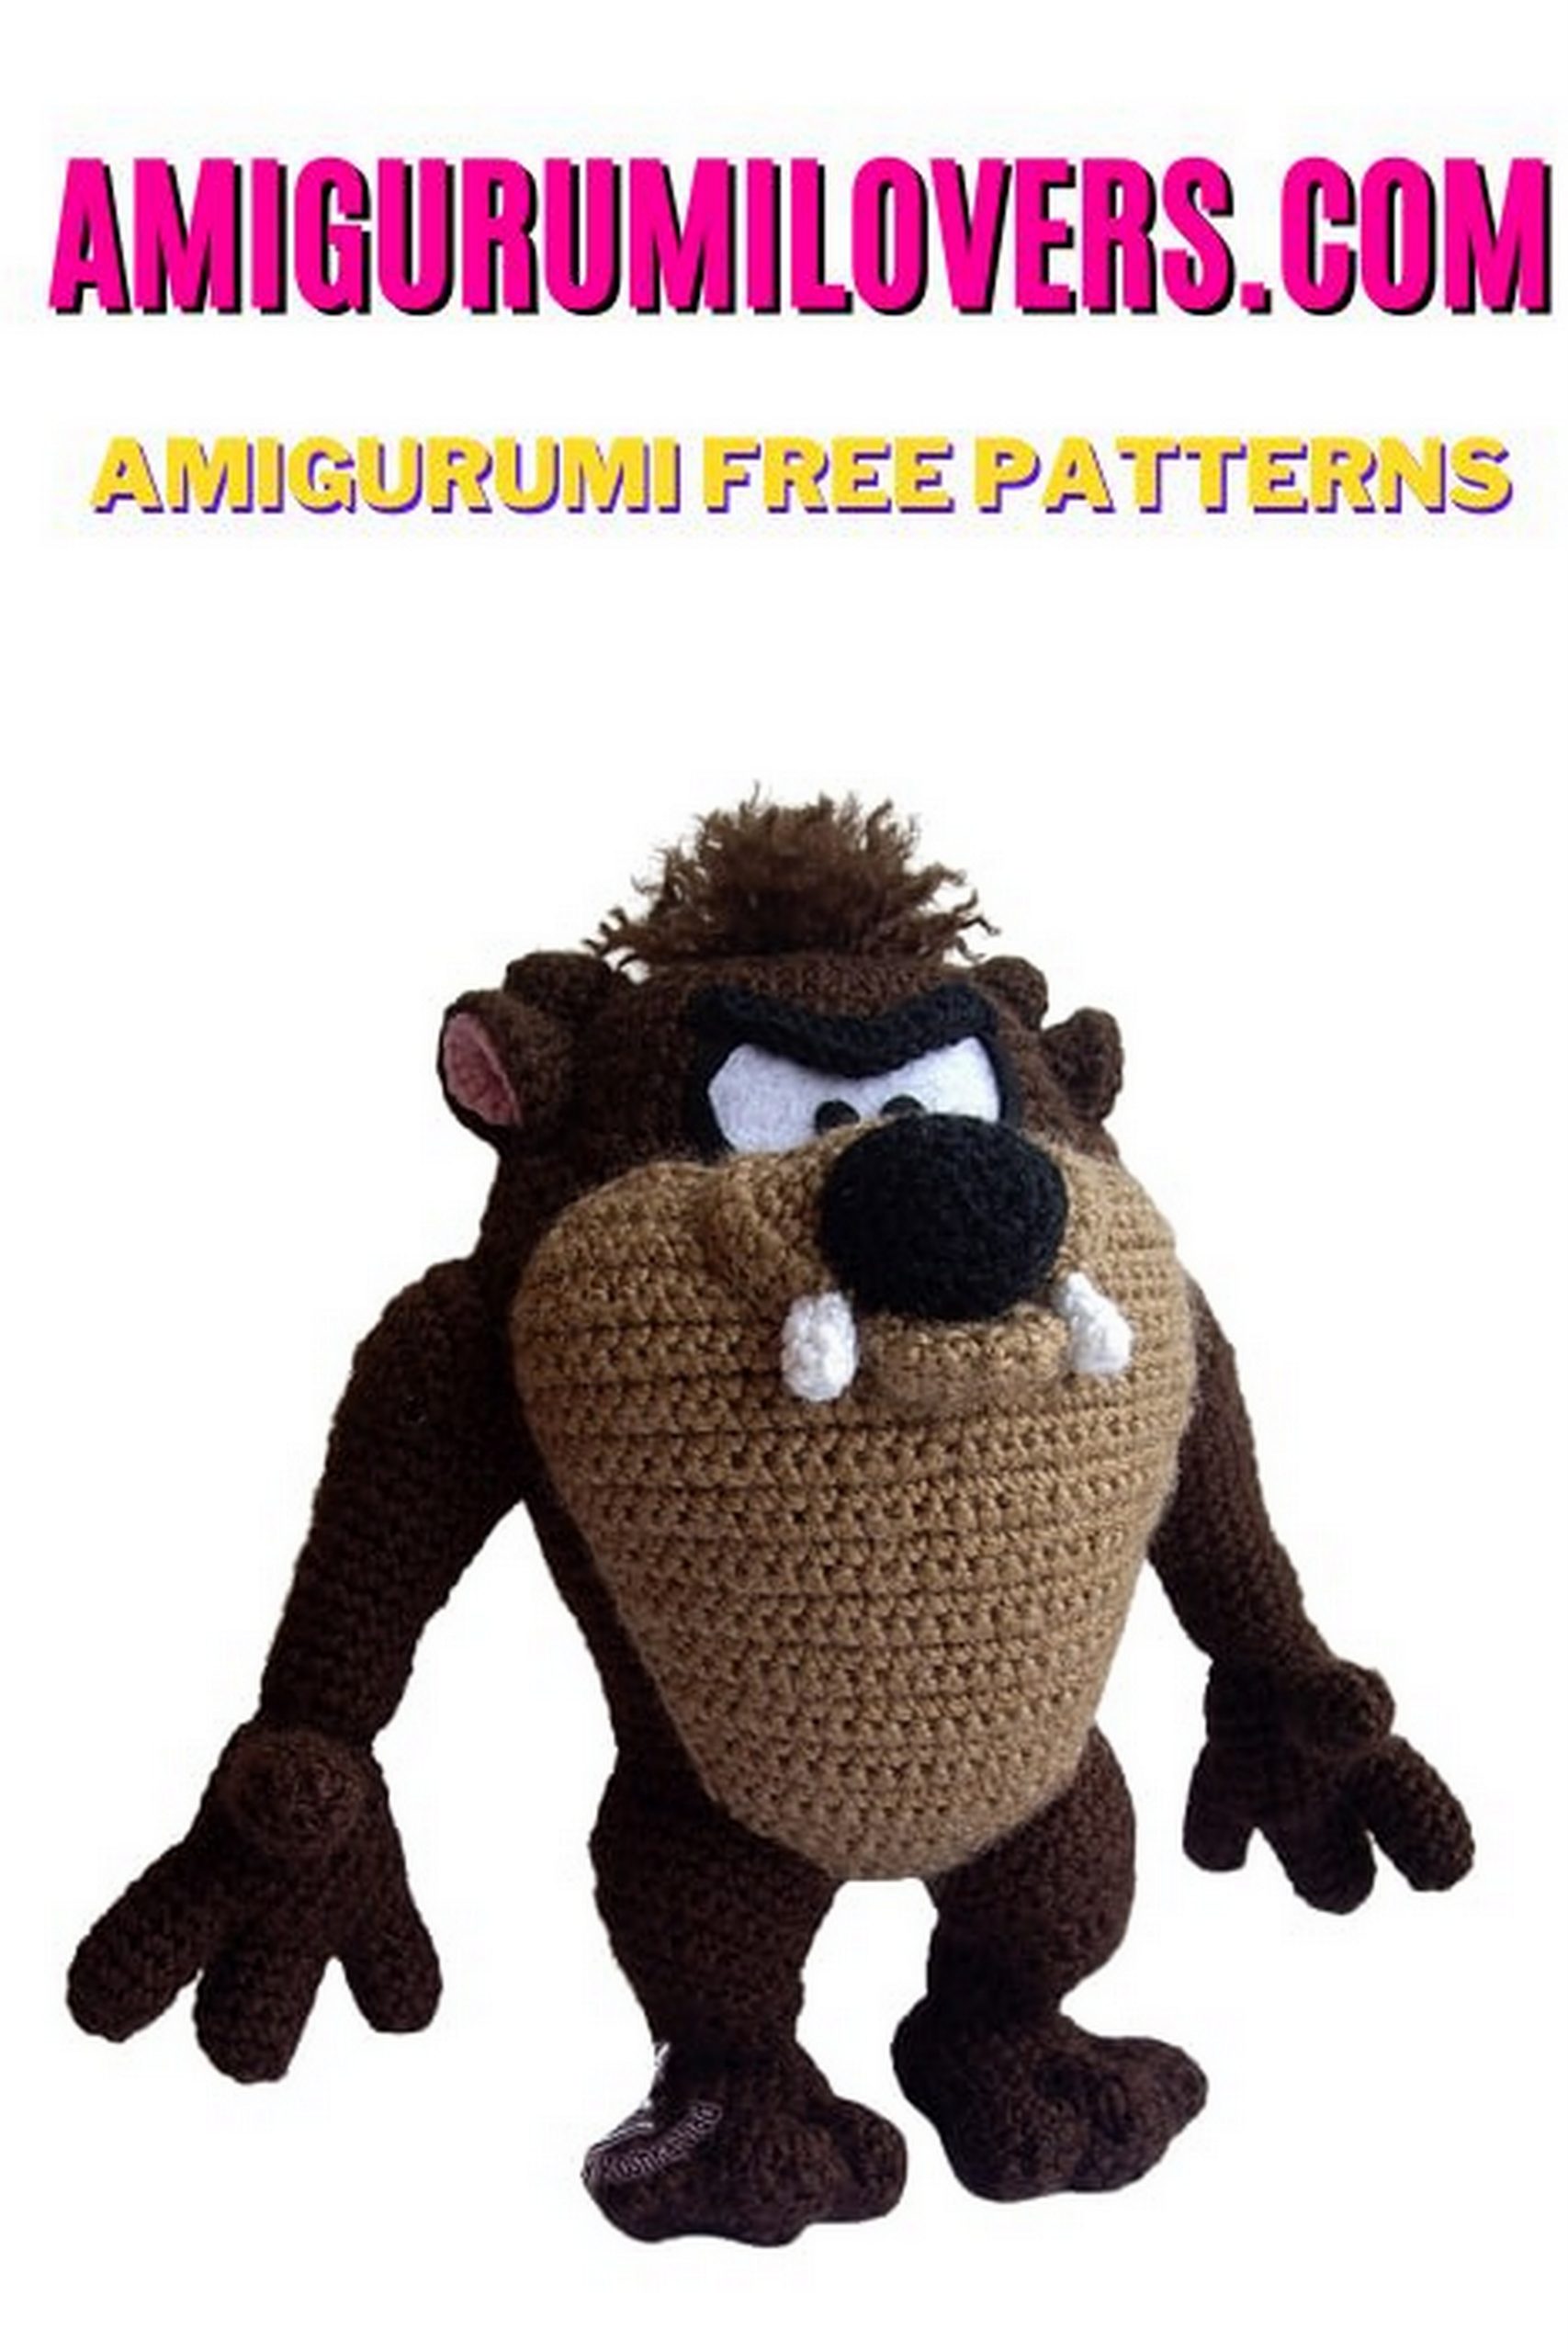
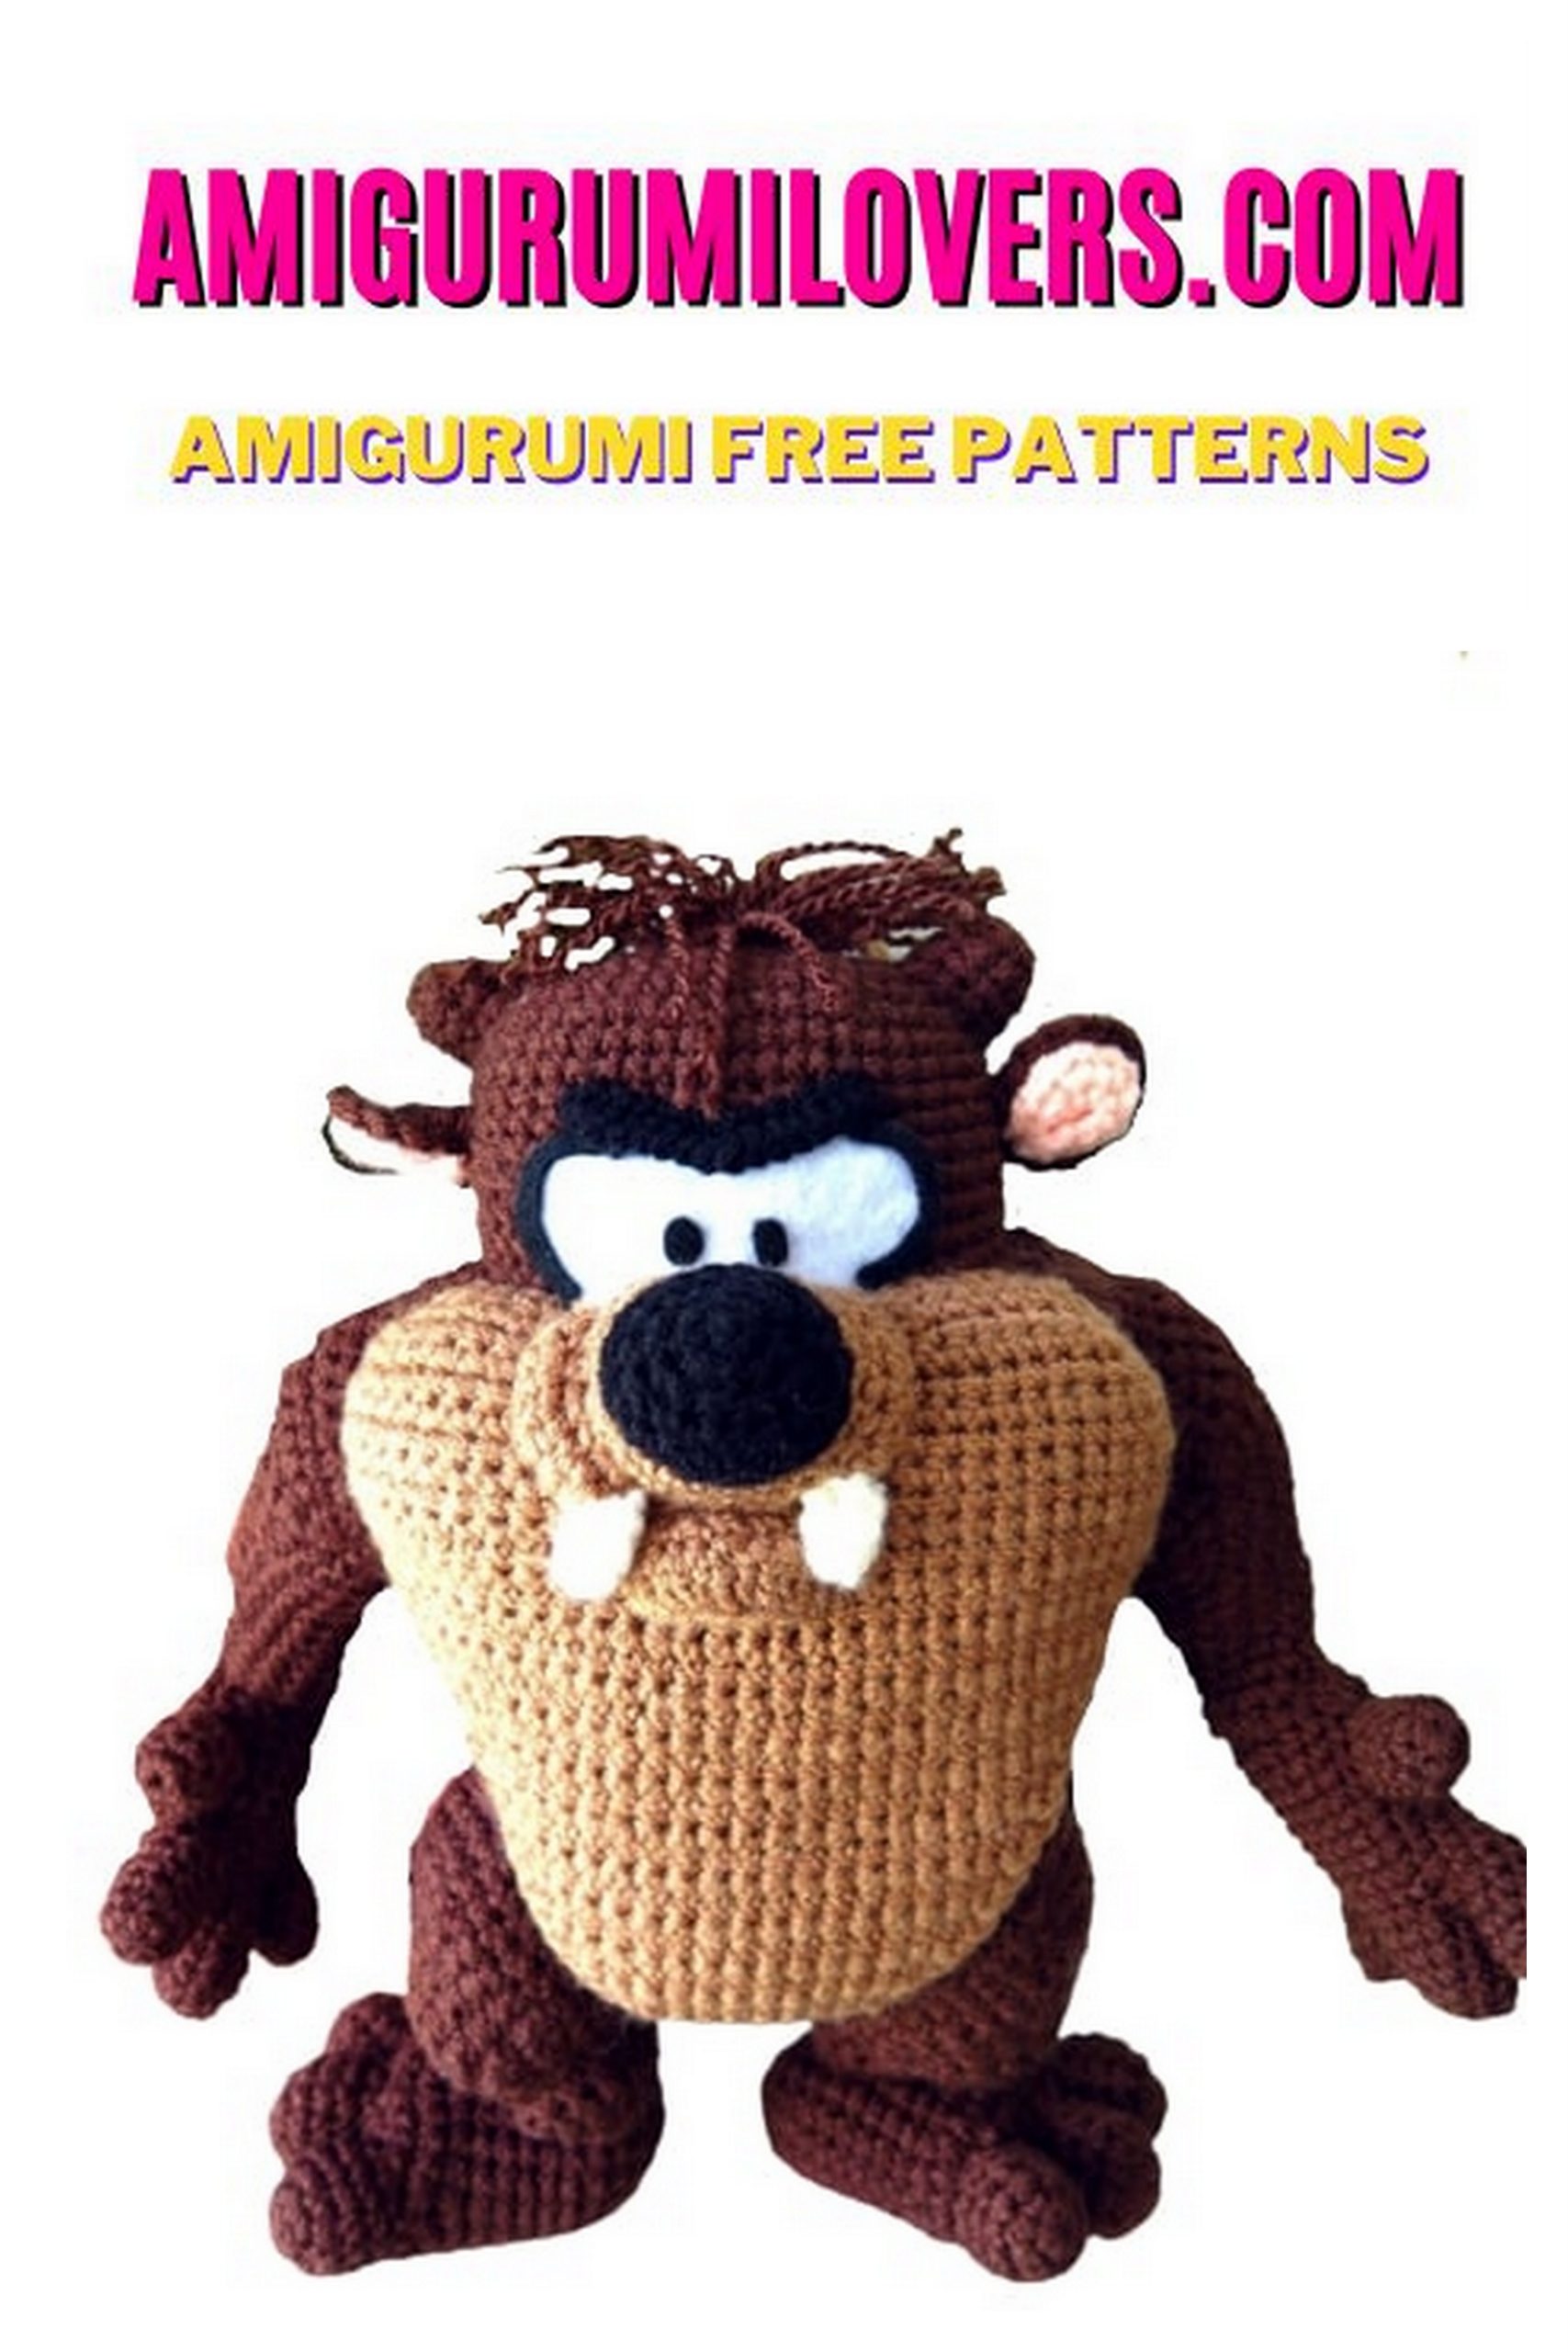
Amigurumi Tasmanian Devil – Free Crochet Pattern
You may also enjoy exploring our free amigurumi patterns and other popular amigurumi animal patterns available on our website.
Welcome to our crochet corner, where creativity and fun come together through the art of amigurumi! If you’re looking for a delightful project to ignite your crochet passion, you’re in the right place. This blog post features a free crochet pattern for an adorable Amigurumi Tasmanian Devil, an endearing figure that brings a bit of whimsy and charm to your crochet collection. Whether you’re a beginner or a seasoned crocheter, this pattern is designed to be simple to follow and fun to create. With clear instructions and helpful tips, you’ll find yourself hooked on crafting this lovable creature.
Amigurumi, the Japanese art of knitting or crocheting small stuffed animals and anthropomorphic creatures, has gained immense popularity in recent years. It’s not just an enjoyable hobby; it’s a fantastic way to express your creativity while producing charming handmade gifts for friends and family. The Amigurumi Tasmanian Devil pattern we’re sharing today is perfect for those new to this craft. By working through basic crochet techniques, you’ll build your skills while crafting a whimsical character that’s sure to bring joy.
This Tasmanian Devil character captures the energy and spirit of its namesake while being friendly enough to be cherished by children and adults alike. With its distinctive features and playful demeanor, it’s an ideal project for anyone looking to create something truly unique. In this blog post, we’ll walk you through each step of the process, ensuring you have all the information you need to bring your Amigurumi Tasmanian Devil to life.
The materials required for this project are easily accessible, making it an ideal pattern for those who might still be building their crochet stash. Grab some yarn in the right colors, a suitable crochet hook, and a pair of safety eyes, and you’ll be ready to start your adventure. We also encourage you to get creative with color variations and embellishments, allowing you to personalize your Tasmanian Devil to reflect your own style and flair.
As you follow along with the pattern, don’t hesitate to reach out if you have questions or need clarifications. The crochet community is a warm and welcoming space where we support each other in our creative endeavors. So, roll up your sleeves, grab your yarn, and let’s embark on this fun journey to create an unforgettable Amigurumi Tasmanian Devil. Soon, you’ll have a charming addition to your collection, proudly crafted by your own hands. Stay with us as we dive into the materials and get started on this fabulous free crochet pattern!
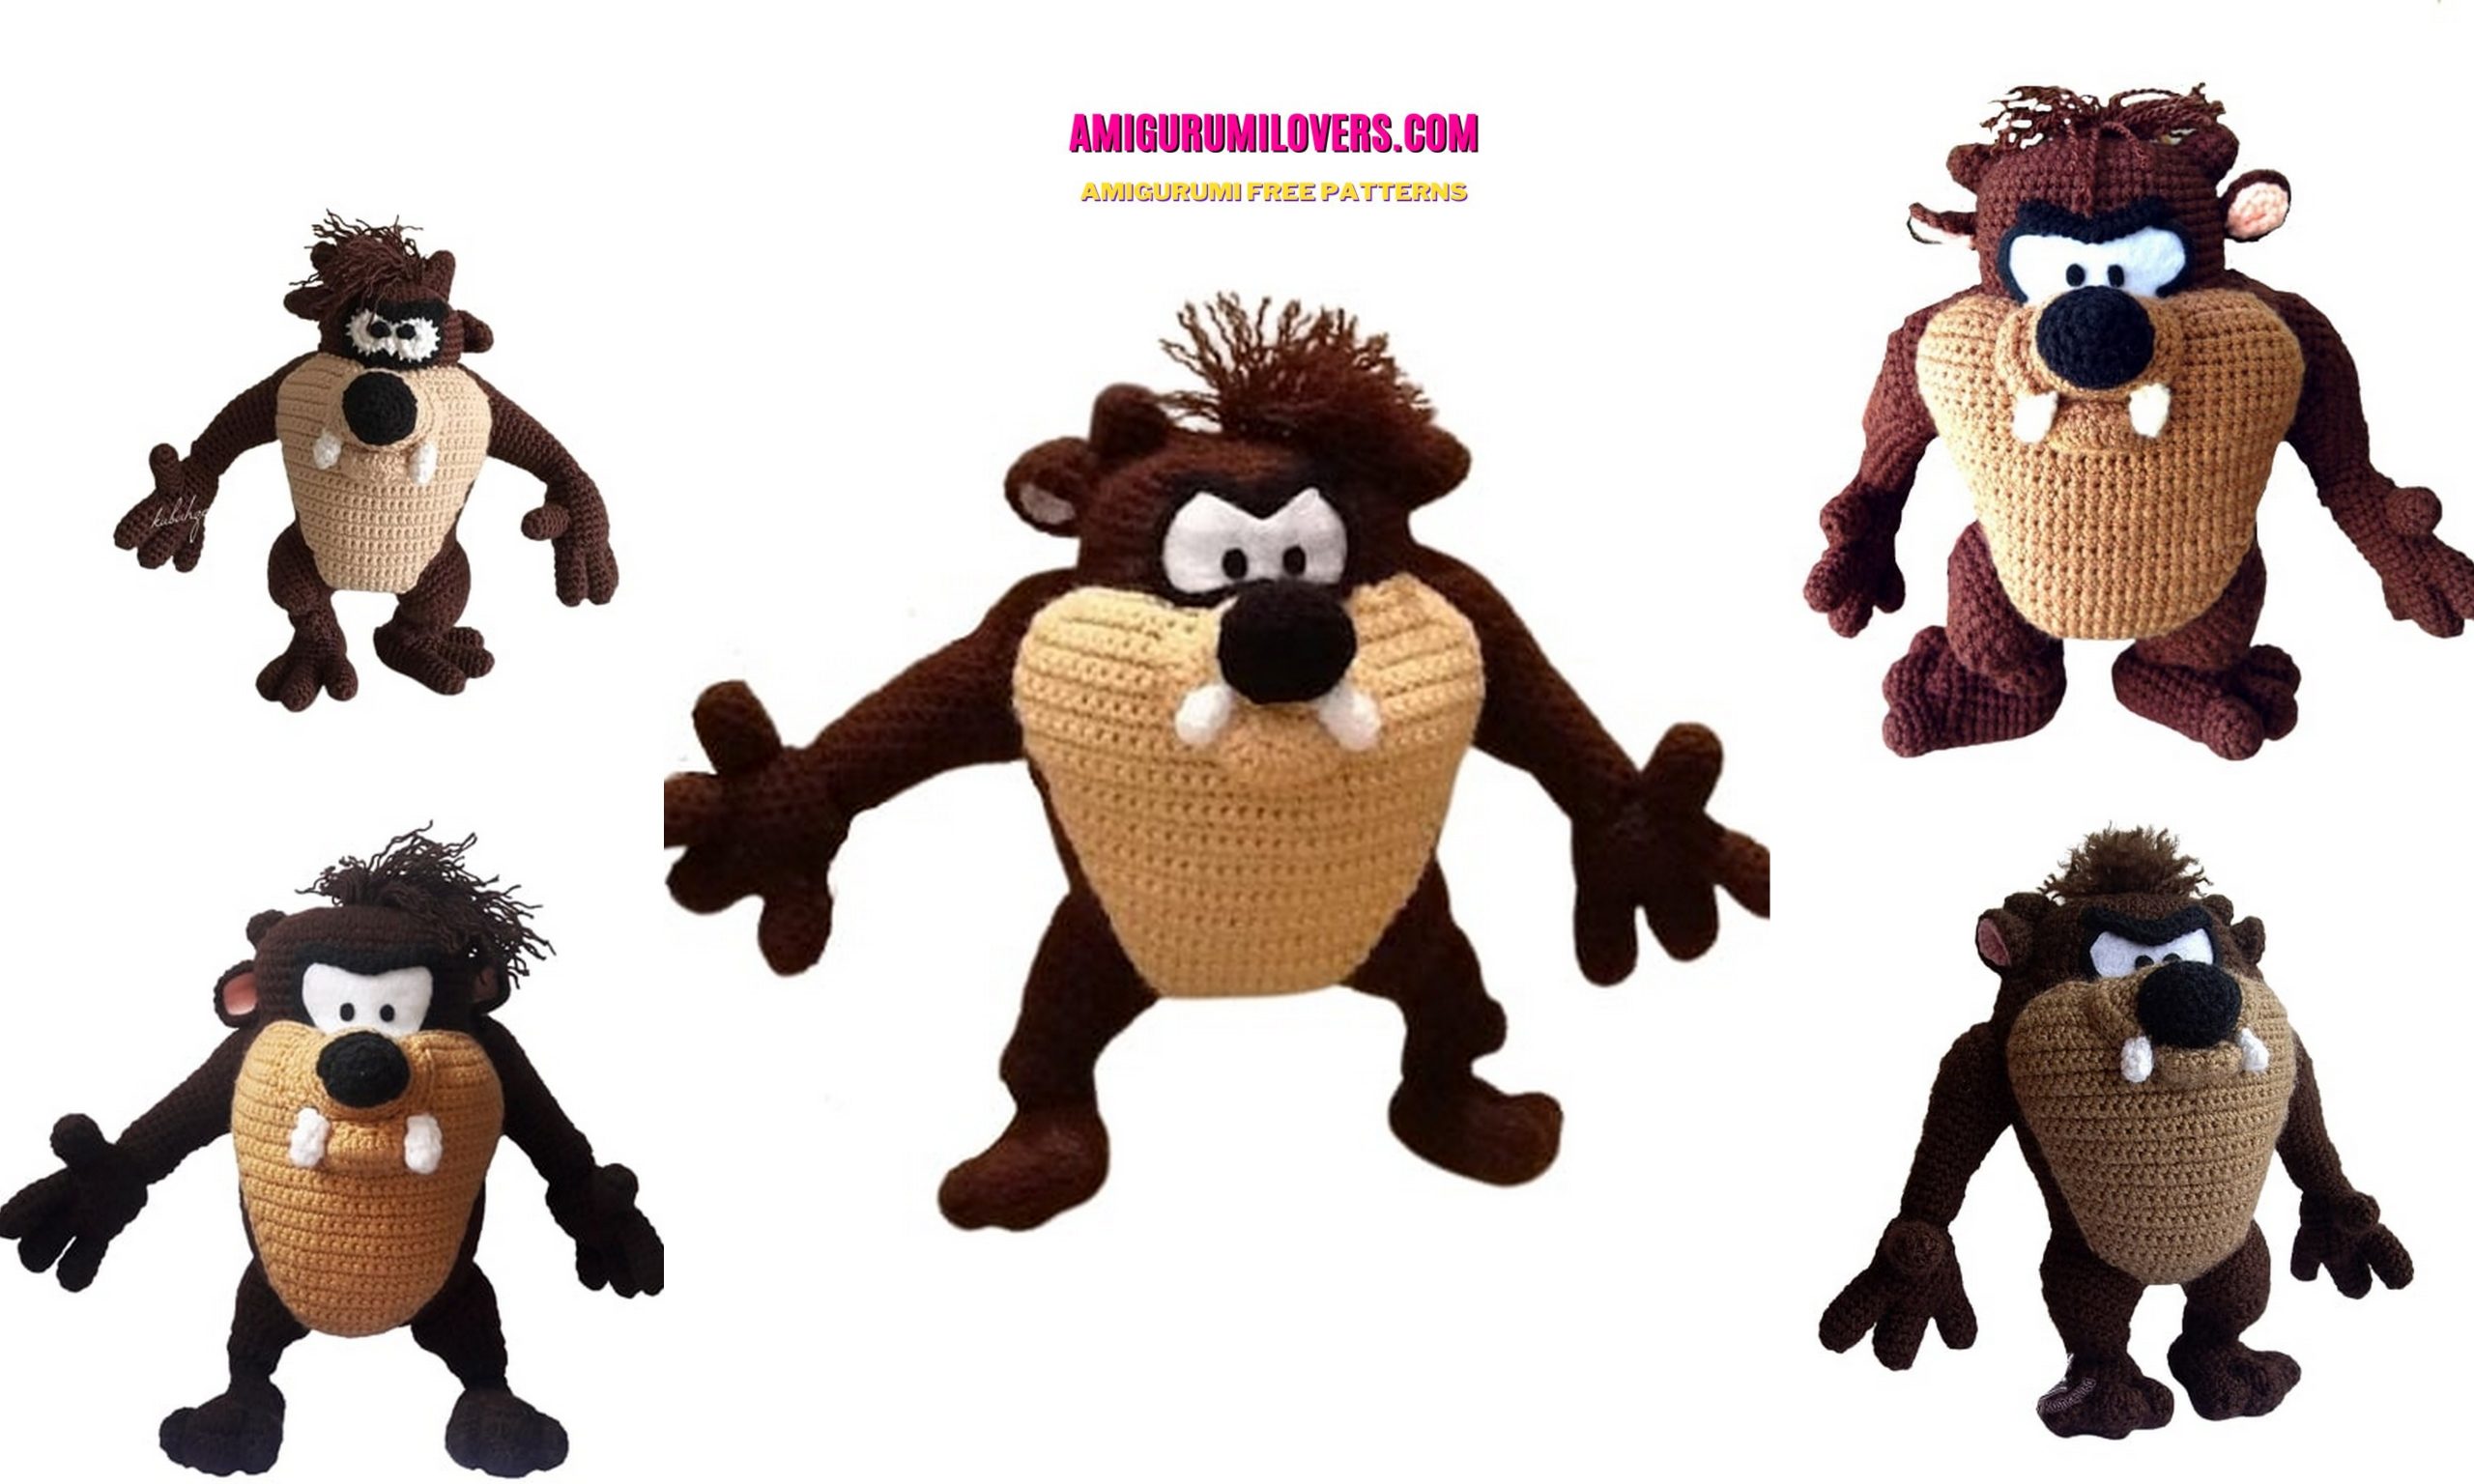
Get ready to bring some whirlwind energy to your crochet projects with this free Amigurumi Tasmanian Devil pattern! Inspired by the iconic character amigurumi toy from Looney Tunes, this mischievous and wild little creature is a fun and exciting project for any crochet enthusiast.
Perfect for both beginners and experienced crocheters, this pattern includes a full list of materials, standard amigurumi abbreviations, and detailed, step-by-step instructions. From his wild eyes to his toothy grin and signature fur details, every part of the Tasmanian Devil is thoughtfully explained and easy to follow.
Whether you’re making it as a gift, a collectible, or just for fun, this handmade plush is sure to delight fans of all ages. Plus, you can personalize your Tasmanian Devil with different facial expressions or accessories to make it truly one-of-a-kind.
Don’t forget to browse the helpful photos throughout the pattern to guide you along the way. So grab your hook and yarn — it’s time to crochet your very own Taz!
1000+ free amigurumi patterns, you can download our application from this link!
Abbreviations
mr: Magic ring,
sc: single crochet,
INC: increase,
DEC: decrease,
*: repeat,
BLO: back loop only.
PATTERN – Amigurumi Tasmanian Devil
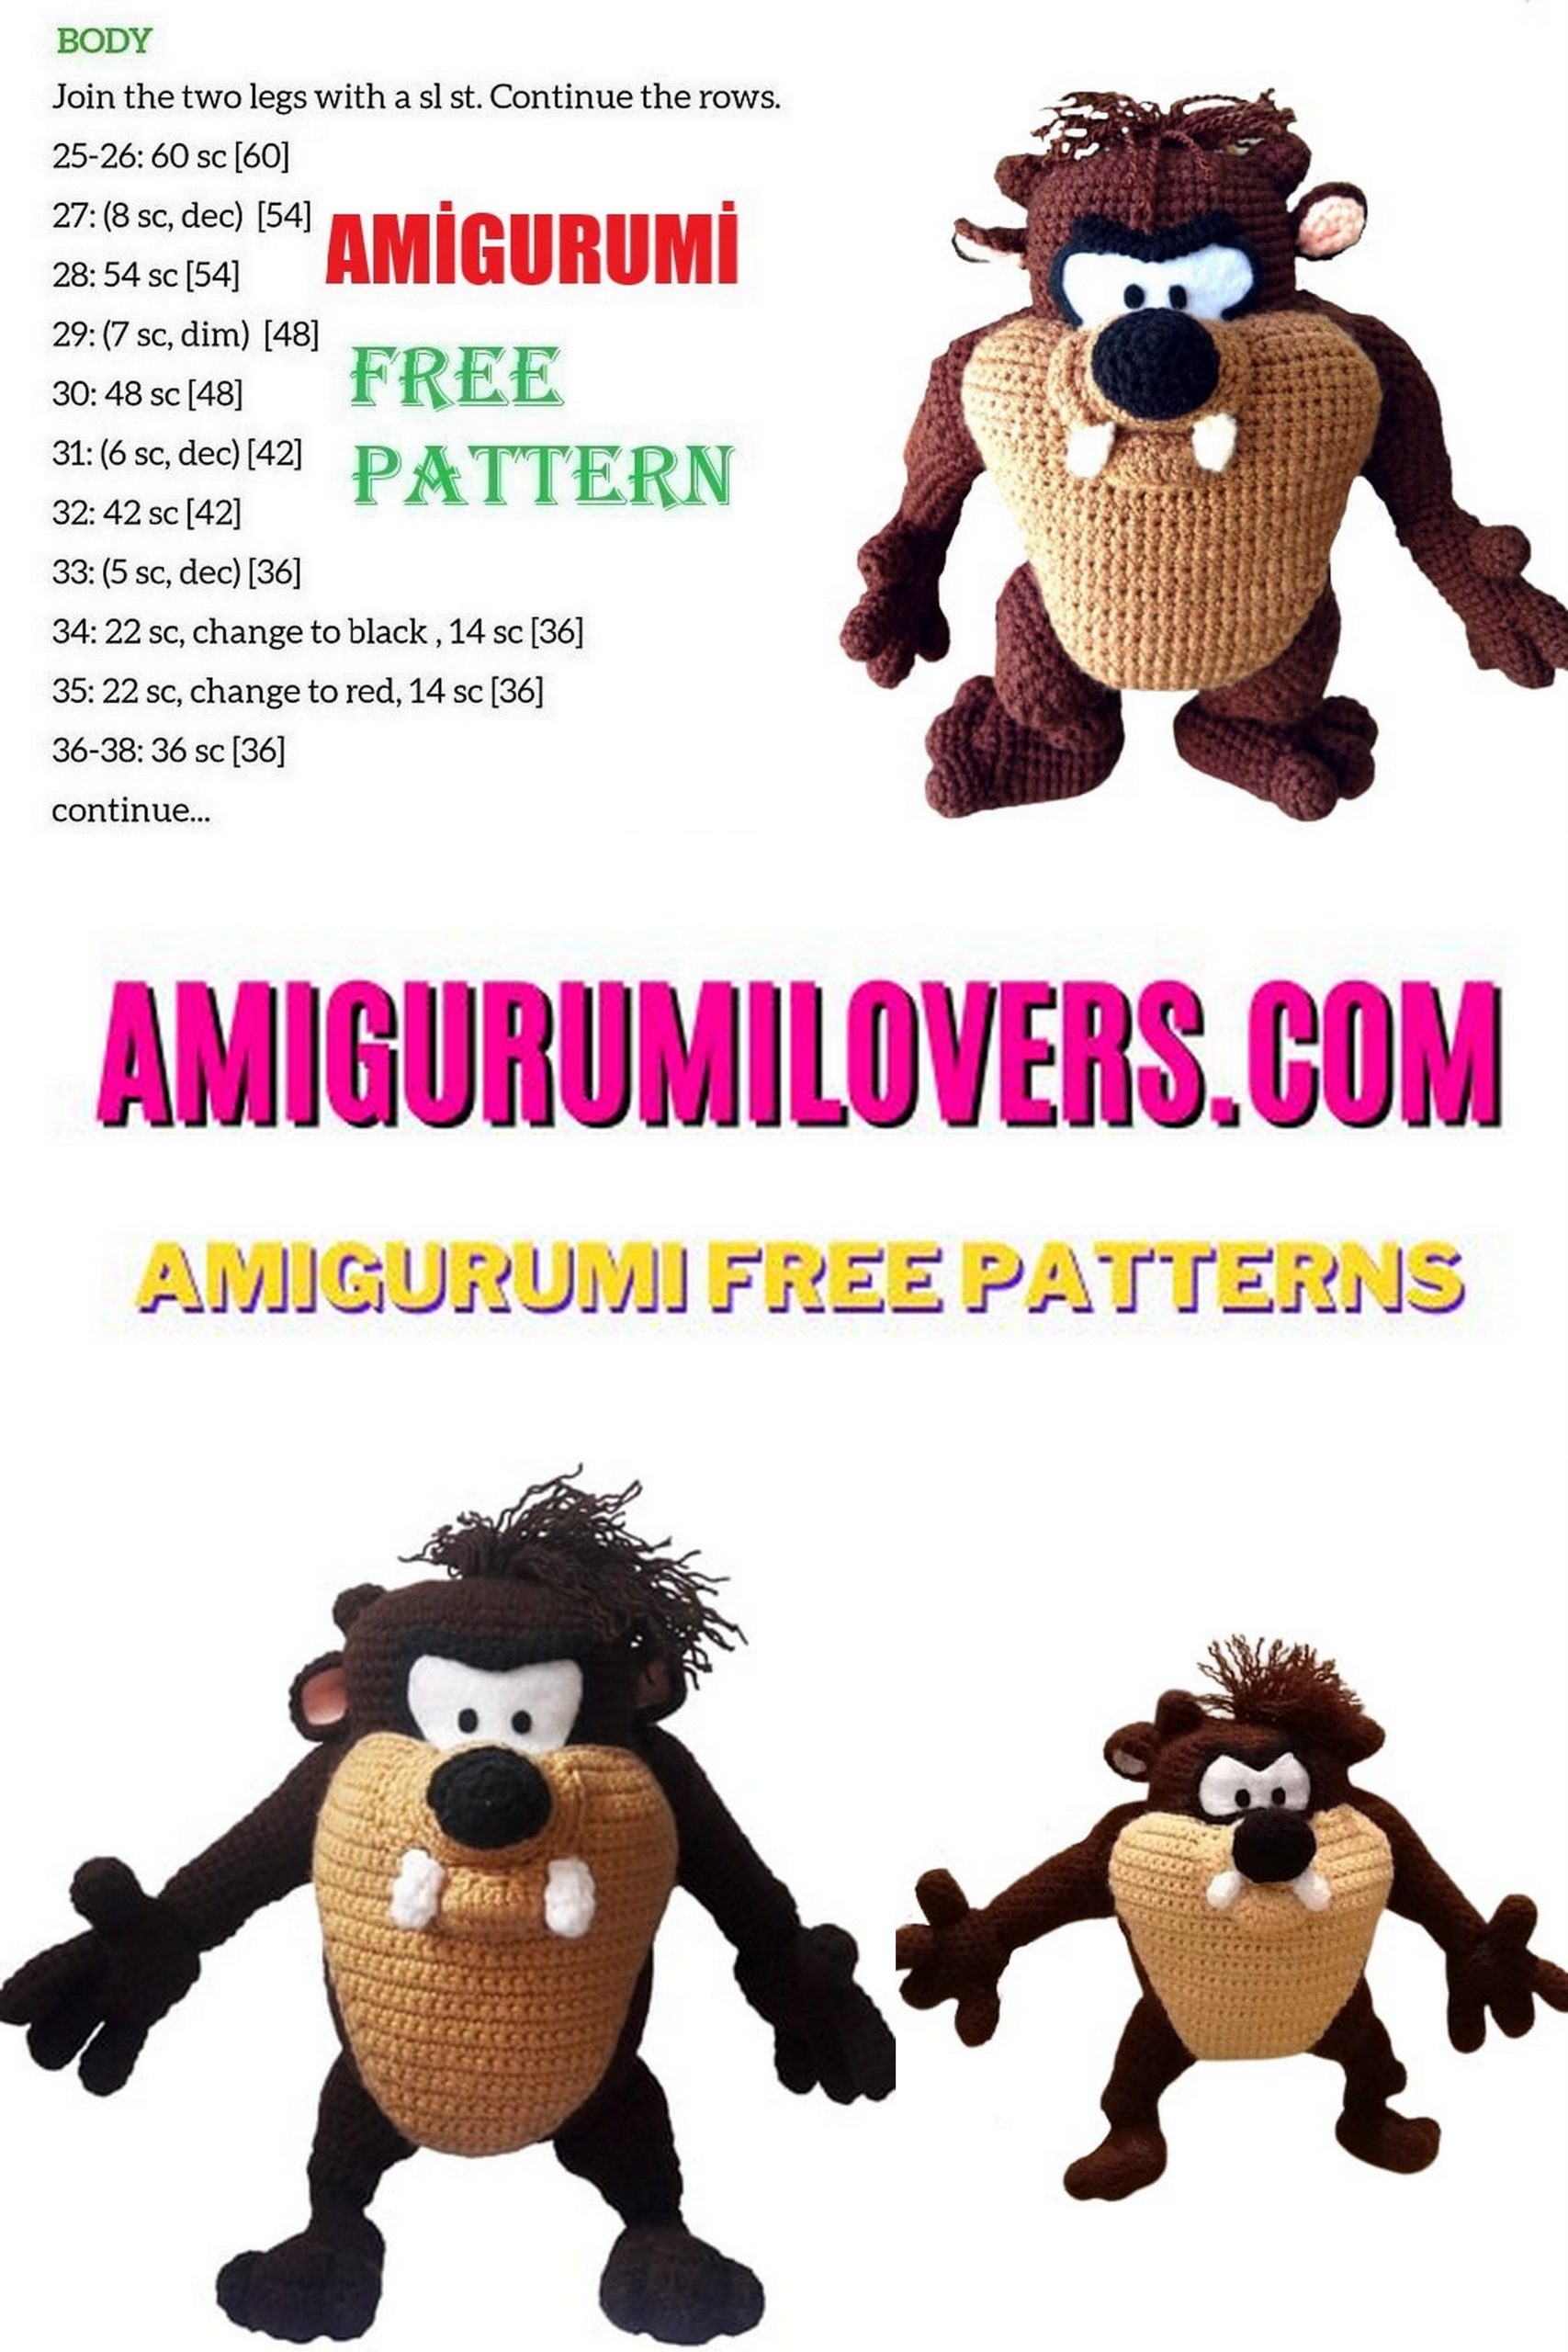
Body – Amigurumi Tasmanian Devil:
With brown yarn, make 13 chains.
1: 9 sc, 5 sc (turn) at the last chain, 10 sc, 5 sc at the last chain, 1 sl-st to finish the sequence. (30)
2: 1 chain, 10 sc, 5 inc, 10 sc, 5 inc (40)
3: * 1 inc, 19 sc * 2 times again (42)
4: 11 sc, 1 inc, 20 sc, 1 inc, 9 sc (44)
5: * 21 sc, 1 inc * 2 times again (46)
6: 7 sc, 1 inc, 22 sc, 1 inc, 15 sc (48)
7: * 1 inc, 23 sc * 2 times again (50)
8: 12 sc, 1 inc, 24 sc, 1 inc, 12 sc (52)
9-12: 1sc in each sc (52)
13: 1 inc, 25 sc, 1 inc, 1 inc, 25 sc (54)
14: 11 sc, 1 inc, 26 sc, 1 inc, 15 sc (56)
15: 5 sc, 1 inc, 27 sc, 1 inc, 22 sc (58)
16: * 1 inc, 28 sc * 2 times again (60)
17: 20 sc, 1 inc, 29 sc, 1 inc, 9 sc (62)
18: * 30 sc, 1 inc * 2 times again (64)
19: 15 sc, 1 inc, 31 sc, 1 inc, 16 sc (66)
20: * 1 inc, 32 sc * 2 times again (68)
21: 4 sc, 1 inc, 33 sc, 1 inc, 29 sc (70)
22: * 34 sc, 1 inc * 2 times again (72)
23: 10 sc, 1 inc, 35 sc, 1 inc, 25 sc, (74)
24-29: 1 sc in each sc (75)
30: 14 sc, 1 dec, * 16 sc, 1 dec * 3 times, 4 sc (70)
31: * 12 sc, 1 dec * all over again (65)
32: 6 sc, 1 dec, * 11 sc, 1 dec * 4 times over, 5 sc (60)
33: * 1 dec, 10 sc * repeat all over (55)
34: 3 sc, 1 dec, * 9 sc, 1 dec * 4 times over, 6 sc (50)
35: 4 sc, 1 dec, * 6 sc, 1 dec * 5 times again, 4 sc, 1 sl-st to finish.
Fill and sew to sew.
Head – Amigurumi Tasmanian Devil:
Make 8 chains with brown thread.
1: 6 sc, last chaine 5 sc (turn), 5 sc, last scye 4 sc, 1 sl-st (20)
2: 1 chain, 1 inc, 5 sc, 5 inc, 5 sc, 4 inc, 1 sl-st (30)
3: 1 chain, 9 sc, 1 inc, 4 sc, 1 inc, 9 sc, 1 inc, 4 sc, 1 inc, 1 sl-st (34)
4: 1 chain, 4 sc, 1 inc, 6 sc, 1 inc, 2 sc, 1 inc, * 6 sc, 1 inc * 2 times repeat, 2 sc, 1 inc, 2 sc, 1 sl-st (40)
5: 1 chain, 1 inc, 4 sc, * 1 inc, 4 sc * 7 times. (48)
6-9: 1 sc for each sc (48)
We are now working in order
Leave at 1: 18 sc, 30 thick. (18)
2: 1 chain, 18 sc (18)
Fill the part and sew.
Abdomen – Amigurumi Tasmanian Devil:
Beige or light brown, work in sequence, make 10 chains.
1: 9 sc (9)
2: 1 chain, 1 inc, 7 sc, 1 inc (11)
3: 1sc in each sc (11)
4: 1 chain, 1 inc, 9 sc, 1 inc (13)
5-22: Repeat steps 3 and 4 (9 sc in row 4 increase each time) (31)
23-28: 1 chain, 1 sc per loop (31)
Now we continue with our cheeks.
1: 1 chain, 1 dec, 11 sc, 1 dec (leave without total 16) (13)
2-4: 1 chain, 1 dec, 1 sc We will learn the rest of the sequence Finish 1 dec (7).
We go back to the points we have taken back to create sides and repeat these last lines.
Make a limit by making 1 sc on each side of the job.
Nose – Amigurumi Tasmanian Devil:
Beige or light brown rope;
1: Magic ring into 6sc (6)
2: 6 inc (6)
3: * 1 inc, 1 sc * Repeat all over (18)
4: * 1 inc, 2 sc * Repeat all over (24)
5 and 6: 1sc in each sc (24)
Now in order;
1: 1 inc, * 1 sc, 1 inc * 2 times again, 1 sl-st (total 18 without drop)
2: 1 chain, 8 sc, 1 sl-st (9)
3: 1 chain, 8 sc, 1 sl-st (cut the thread)
We continue the points we took back.
1: * 1 sc, 1 inc * 2 times again, 1 sl-st
2-3: Repeat lines 2 and 3.
Fill and sew between cheeks.
Teeth: (2 pieces)
with white color yarn;
1: 5 sc with magic ring (5)
2 and 3: 1sc in each sc (5)
Suture under the nose.
Nose: (black part)
Let’s start by making 4 chains with ziyah color yarn;
1: 2 sc, 3 sc to the end of the row, (turn) 1 sc, 1 inc (8)
2: 1 inc, 1 sc, 3 inc, 1 sc, 2 inc (14)
3: 1 inc, 3 sc, 1 inc, 2 sc, 1 inc, 3 sc, 1 inc, 2 sc (18)
4: 7 sc, 1 inc, 9 sc, 1 inc (20)
5: 1sc in each sc (20)
Fill it up and suture it.
Lower lip:
Let’s start by making 8 chains with beige or light brown yarn;
1: 1 sc, 5 inc, 1 sc (12)
2: 1 chain, 1sc in each sc until finished (12)
3: 1 chain, 1 sc, 5 dec, 1 sc (7)
4: 1 chain, 1 sc, 2 dec, 2 sc (5)
Fill it and sew it under the nose.
Muscles:
Let’s start by making 14 chains with black color yarn;
1: 6 sc, 1 inc, 6 sc Suture to the face.
Ears: (2pcs) – Amigurumi Tasmanian Devil
With brown yarn;
1: * 3 chain (take into account 1 DC), 6 DC * magic ring (7)
2: 3 chain, 1 DC at the same point, 2 DC at the remaining point (14)
3: 1 chain, 1 sc each DC (14)
In the ear: pink or peach.
1: * 3 chain (we will add 1 DC), 6 DC * magic ring (7)
2: 1 chain, 7 DC (14)
Double the railing outside, then sew it back to the head.
Horns: (2 pcs) – Amigurumi Tasmanian Devil
with brown thread.
1: Magic ring into 6sc (6)
2: * 1 sc, 1 inc * repeat all over (9)
3 and 4: 1sc in each sc (9)
5: 1 inc, * 3 sc, 1 inc * 2 times again (12)
6: 3 sc, release the remaining 8 loops.
7: 1 chain, 5 sc, 1 sl-st
Sew it on your head.
Legs: (2 pieces)
With brown thread, make 13 chains and start forming a circle at the end of 1 sl-st.
1: 1 chain, 13 sc, 1 sl-st (13)
Let’s work in rows;
2: 7 sc, 1 sl-st (we will leave the remaining 5 stitches) (8)
3: 1 chain, 7 sc, 1 sl-st (8)
Plays in a circle;
1: 1 chain, 7 sc, continue to the points we left sc (13)
2: 1sc in each sc (13)
Let’s work in rows;
1: 1 chain, turn, 6 sc, 1 sl-st (we will leave the remaining 5 stitches) (7)
2: 1 chain, * 1 sc, 1 inc * 3 times again 1 sl-st (10)
3: 1 chain, 2 sc, 1 inc, * 1 sc, 1 inc * 2 times, 2 sc, 1 sl-st (13)
4-6: 1 chain, 1sc in each sc (13)
7: 1 chain, * 1 inc, 3 sc * 3 times again, 1 sl-st (16)
8: 1 chain, * 1 inc, 4 sc * 3 times, 1 sl-st (19)
9: 1 chain, * 1 inc, 5 sc * 3 times again, 1 sl-st (22)
10: 1 chain, * 1 inc, 6 sc * 3 times, 3 sc (27)
Plays in a circle;
1: 1sc in each sc
2: 1sc in each sc
Sew the remaining holes, fill the body and sew.
Feet: (2 pieces)
brown yarn
1: Magic ring into 6sc (6)
2: 6 inc (12)
3: * 1 inc, 3 sc * 3 repeat (15)
4: * 1 inc, 4 sc * 3 repeat (18)
5-10: 1sc in each sc (18)
11: * 1 inc, 2 sc * 3 repeat (24)
12: * 1 inc, 3 sc * 3 repeat (30)
13: 1sc in each sc (30)
14: 10 sc, 1HDC, 2HDC to the bottom 3 loops, 1HDC (36)
15: 18 dec (18)
Fill and sew the parts.
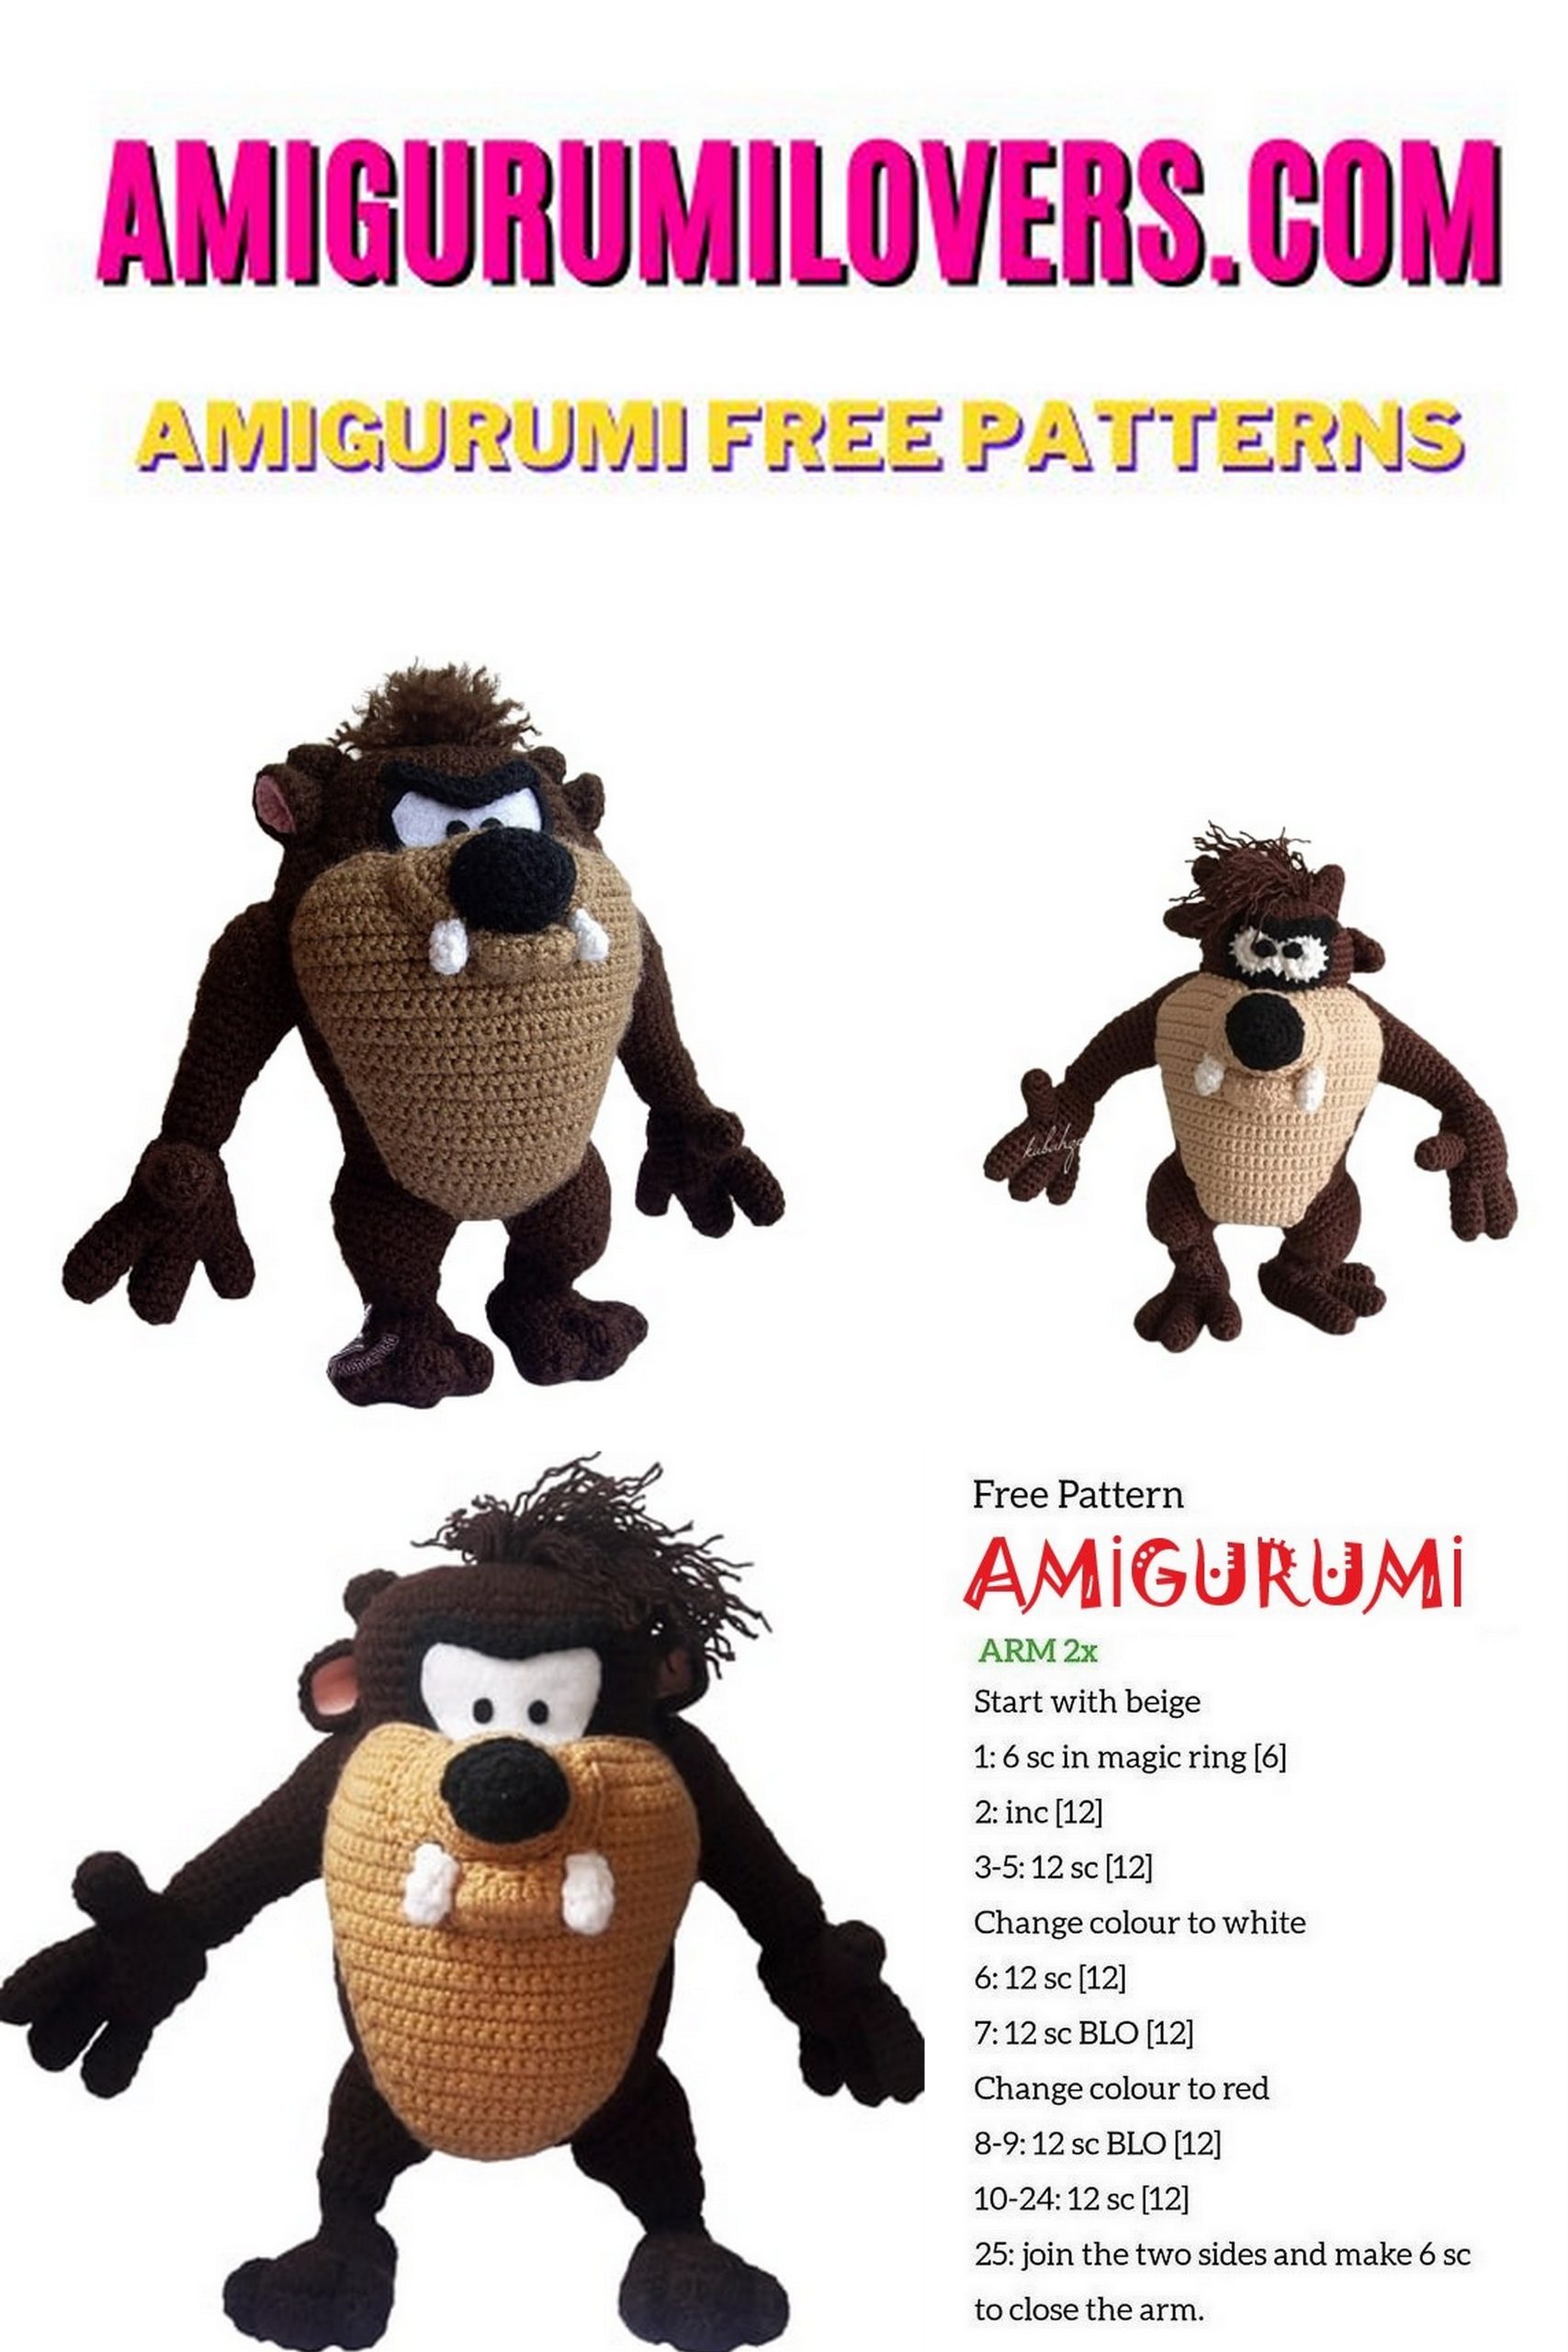
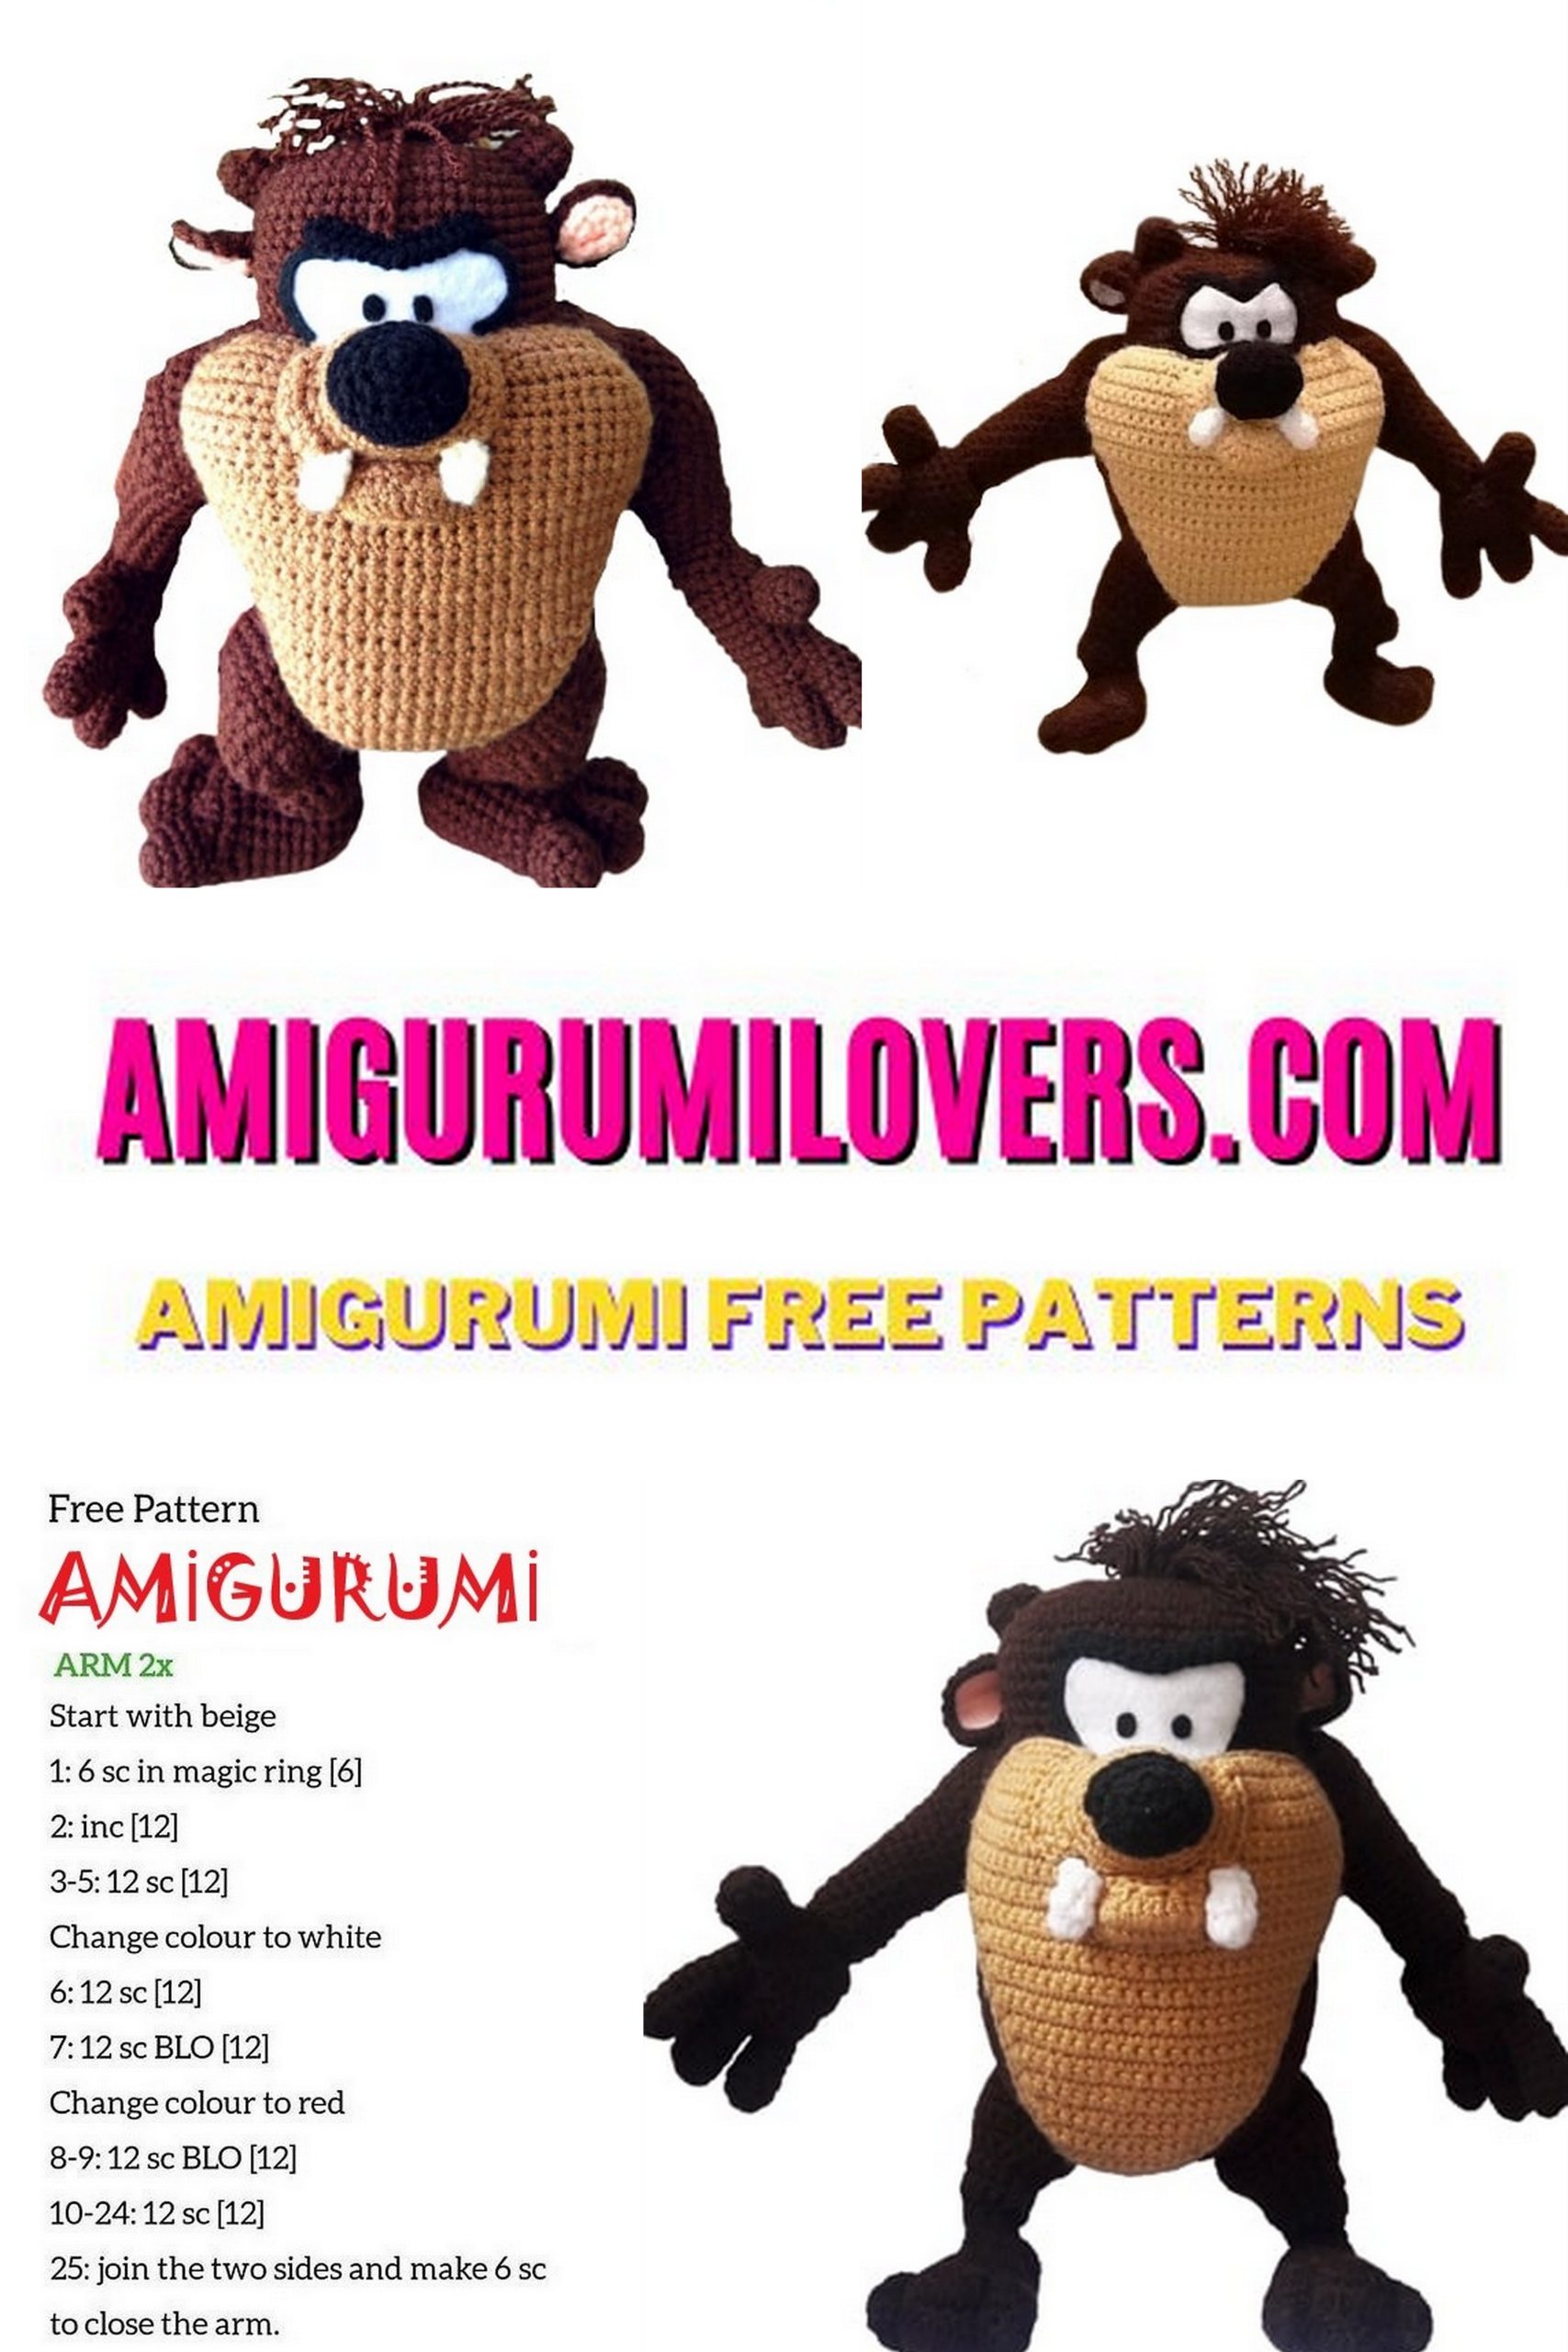
Handles: (2 pieces)
Start with a brown thread, make 13 stitches and finally make 1 sl-st;
1: 1 chain, 13 sc (13)
2-5: 1sc in each sc (13)
6: 1 inc, 12 sc (14)
7: 7 sc, 1 inc, 6 sc (15)
8: 3 sc, 1 inc, 11 sc (16)
9: 1 inc, 16 sc (17)
10: 8 sc, 1 inc, 9 sc (18)
11: 4 sc, 1 inc, 14 sc (19)
12: 1 inc, 18 sc (20)
13: 10 sc, 1 inc, 9 sc (21)
Work in rows;
14: 10 sc, 1 sl-st (drop when 10 stitches are formed)
15: 1 chain, 5 sc, 1 inc, 4 sc, 1 sl-st (12)
16: 1 chain, 5 sc, 1 inc, 5 sc, 1 sl-st (13)
17: 1 chain, 4 sc, 1 inc, 4 sc, 1 sl-st (15)
18: 1 chain, 7 sc, 1 inc, 6 sc, 1 sl-st (16)
19: 1 chain, 15 sc, 1 sl-st (16)
20: 1 sc
Fill all over and sew the body
Hands: (2 pcs)
with brown thread.
Finger part:
1: Magic ring into 6sc (6)
2: * 1 inc, 1 sc * 3 times again (9)
3-6: 1sc in each sc (9)
Cut the thread.
Middle finger:
1: Magic ring into 7sc (7)
2: 1 sc, * 1 inc, 1 sc * 3 times again (10)
3-6: 1sc in each sc (10)
Cut the thread.
The little finger;
1: Magic ring into 6sc (6)
2: * 1 inc, 2 sc * 3 times again (8)
3-5: 1sc in each sc (8)
Do not cut the thread, continue with the palm of your hand!
Palm part;
1: 27 sc around 3 fingers (27)
2: 1sc in each sc, 3 dec and 4 dec corners (20)
3: 1sc in each sc (20)
4: 1 dec, 18 sc (19)
5-9: 1sc in each sc (19)
Fill and sew to sew.
Thumb:
1: Magic ring into 7sc (6)
2: 1 sc, * 1 inc, 1 sc * 3 times again (9)
3-7: 1sc in each sc (9)
Cut thread
Fill all the pieces, sew them together and join the arm.
Tail:
with brown thread.
1: Magic ring into 4sc (4)
2 and 3: 1sc in each sc (4)
4: 1 inc, 4 sc (6)
5 and 6: 1sc in each sc (6)
7: 6sc (6)
8 and 9: 6sc (6)
10: 1 inc, 5 sc (7)
11-12: 1sc in each sc (7)
Fill the body and sew.
Finish and assembly:
• Cut and peel eyes from the felt or sew on the face.
• For example, add to the head and queue as shown in the diagram.
Before you leave, make sure to check out more free amigurumi crochet patterns and discover new ideas for your next project.
You can also browse our full amigurumi pattern archive for hundreds of beginner-friendly designs.