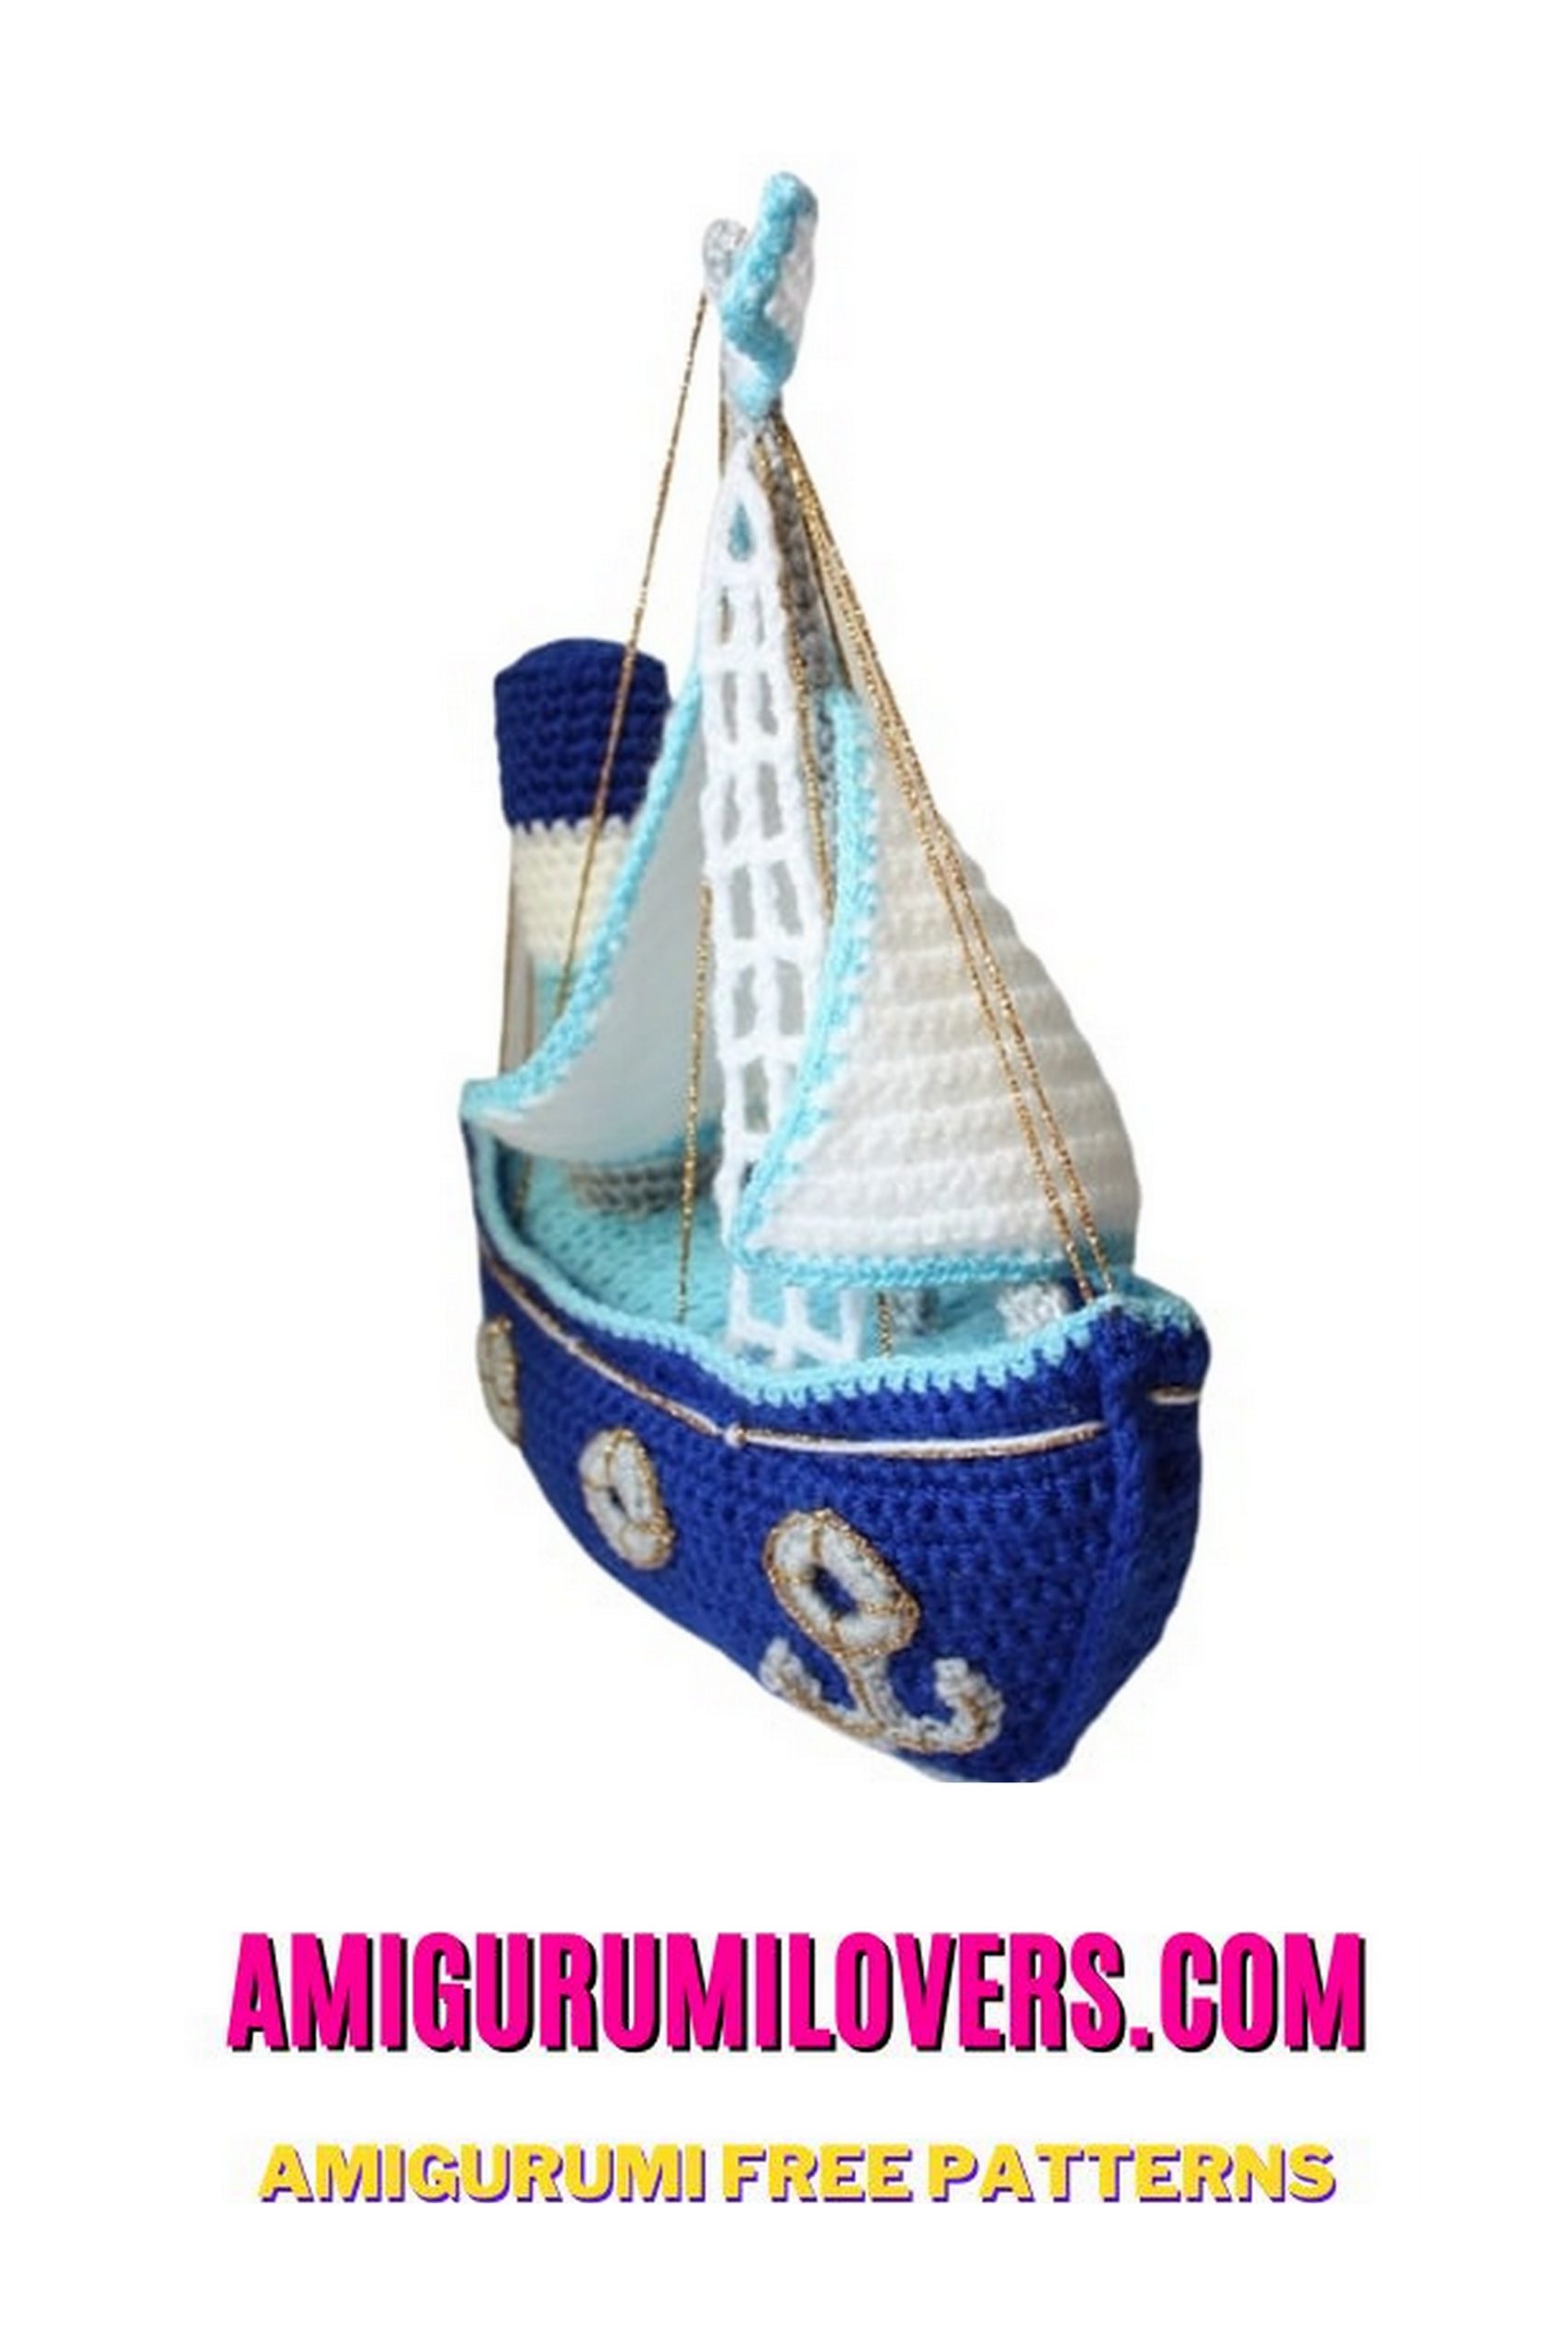
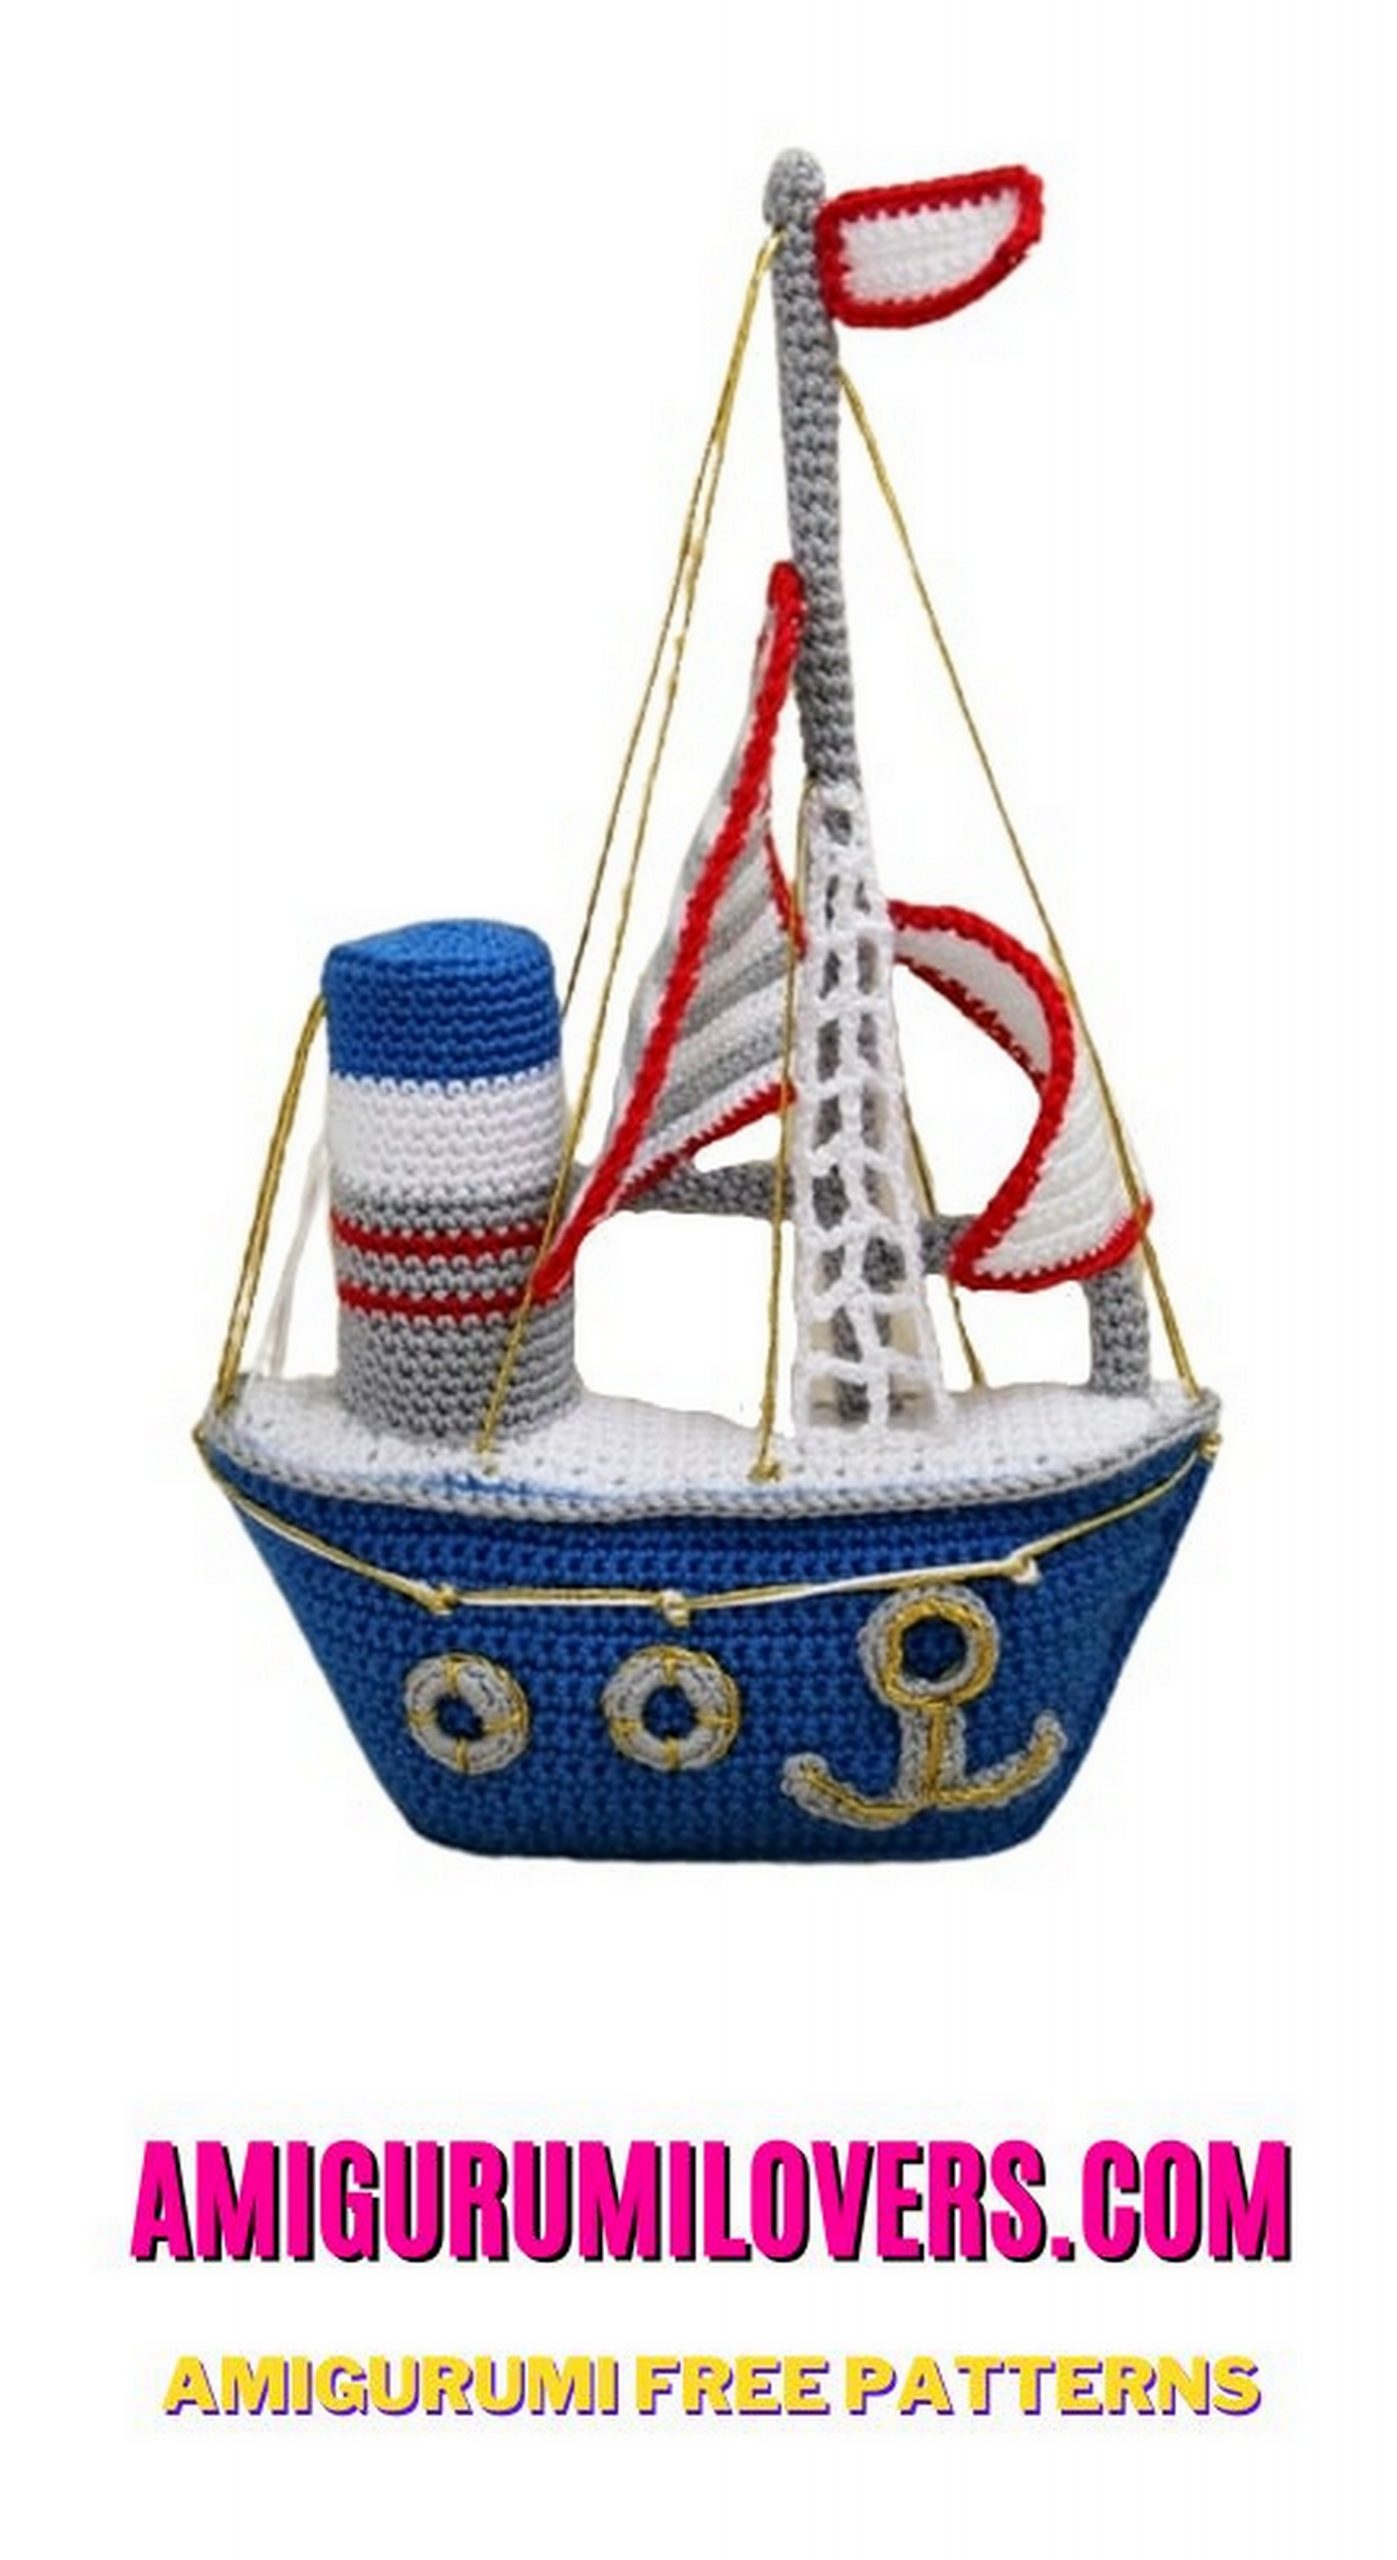
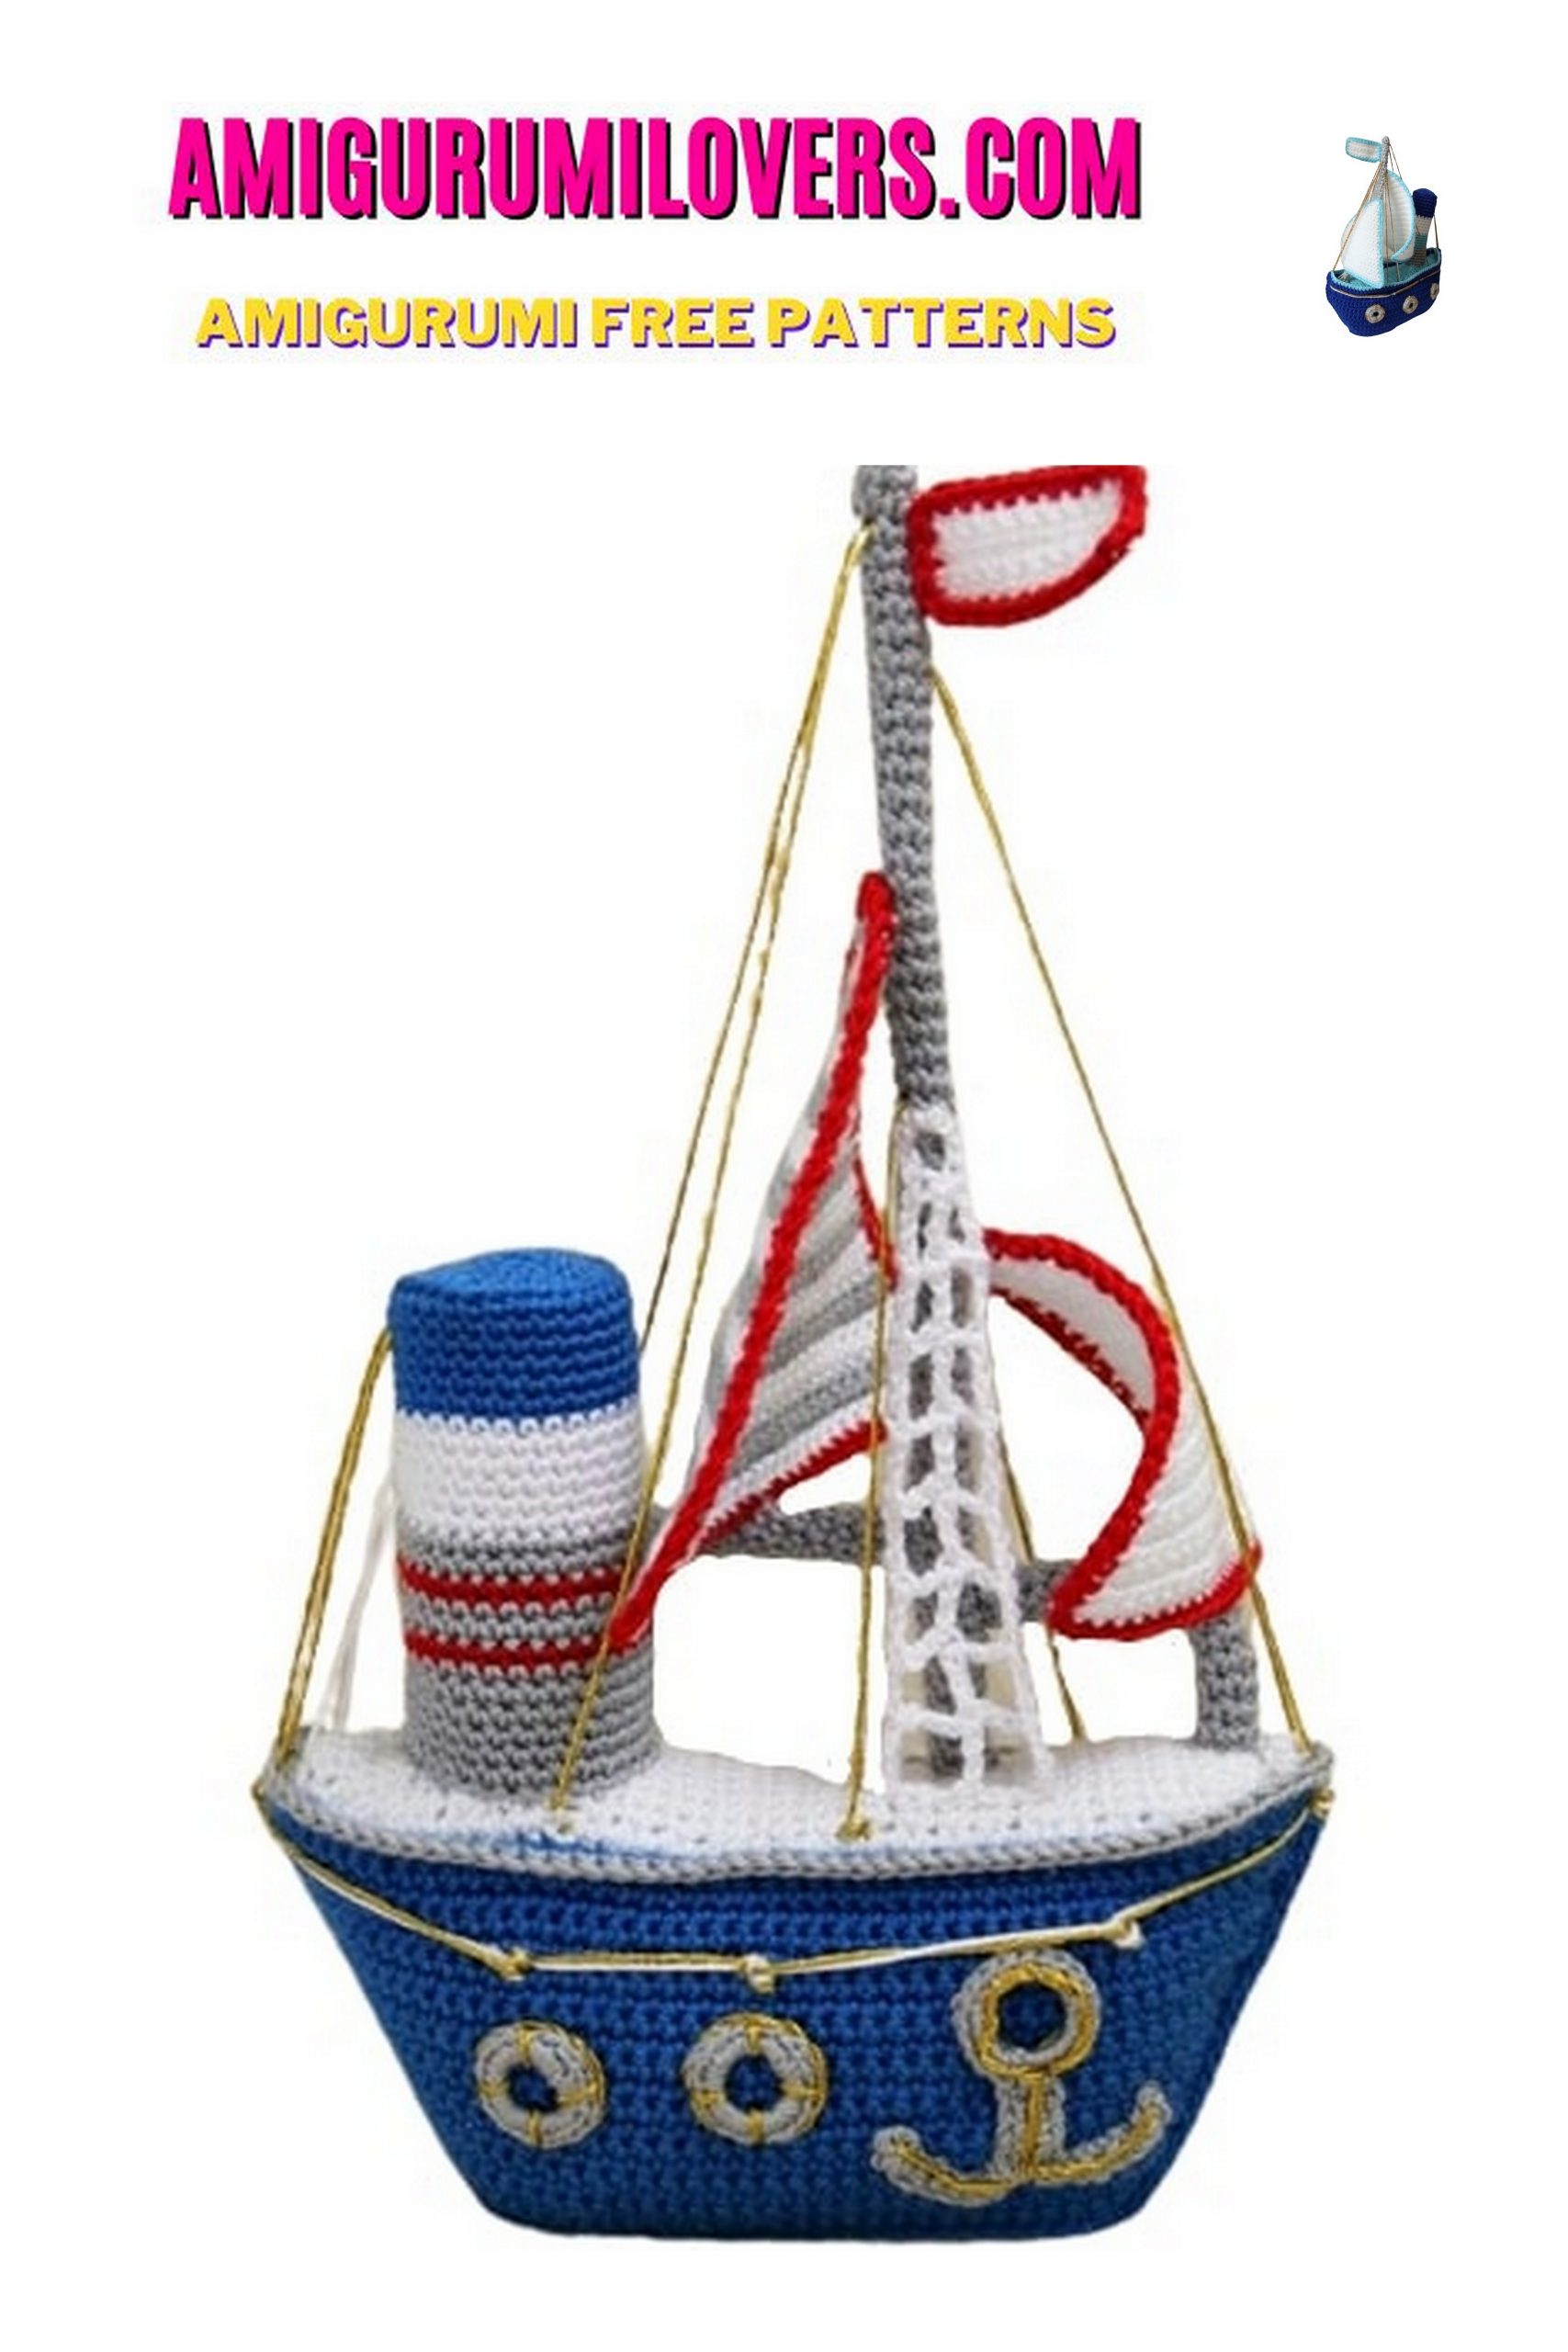
Free Crochet Pattern for Ship Amigurumi
You may also enjoy exploring our free amigurumi patterns and other popular amigurumi animal patterns available on our website.
Are you ready to set sail on a creative journey? If you’re looking for a delightful crochet project that is perfect for both beginners and experienced crafters, you’re in the right place! In this post, we’re excited to share a free crochet pattern for an adorable ship amigurumi. Amigurumi, the Japanese art of knitting or crocheting small, stuffed creatures, has captured the hearts of many. Its charm lies not only in the finished products but also in the joy of creating them. Whether you want to decorate a child’s room, gift a handmade treasure, or simply indulge in a relaxing craft session, this little ship will bring a wave of happiness into your life.
This pattern is designed to be straightforward and easy to follow, making it the perfect vehicle for beginners looking to build their crochet skills. As we guide you through each step of the process, you’ll quickly find that even the most intricate designs can be achieved with a little patience and practice. The materials needed for this project are minimal—some yarn, a crochet hook, and a bit of stuffing—which ensures that you can dive right into this craft without overwhelming costs or large time commitments.
As you work on this ship amigurumi, you’ll discover how satisfying it is to transform skeins of yarn into a charming creation. Amigurumi projects like this one are also great for honing your crochet techniques, including increasing, decreasing, and working in the round. Every stitch and every row will fill you with pride as you watch your ship come to life.
Furthermore, this ship amigurumi is not only a wonderful addition to your crochet arsenal but also adaptable for personal flair. Feel free to customize the colors or add details to make it your own. Perhaps you want to create a pirate ship adorned with skull and crossbones, or a whimsical sailboat with vibrant patterns. The possibilities are endless!
Crafting can be a wonderfully therapeutic experience—a chance to unwind while also producing something beautiful. With this free crochet pattern, you’re set to embark on a rewarding adventure. Grab your crochet hook, gather your yarn, and let’s navigate the seas of creativity together.
Whether you are looking to give a handmade gift, decorate your space, or simply make something fun, this ship amigurumi is the perfect project. Read on to discover the step-by-step instructions that will have you crocheting this adorable ship in no time. Set your creative sails and let the fun begin!
Ahoy there, crochet enthusiasts! If you’re looking for a fun and charming project to set sail on, you’ve come to the right place. Our free crochet pattern for a ship amigurumi is here to satisfy your nautical crafting cravings. Whether you’re a seasoned crocheter or just starting your yarn adventure, this project is perfect for all skill levels.
Amigurumi, the art of creating cute, stuffed, and often miniature creatures through crocheting or knitting, has gained immense popularity in recent years. And what’s more delightful than crafting your very own ship amigurumi? This adorable, ocean-themed plush toy is not only a joy to make but also a wonderful addition to your amigurumi collection.
In this tutorial, we’ll guide you through the process, from selecting the right yarn colors to stitching up every little detail. So, gather your materials, clear your workspace, and let’s embark on a creative journey to crochet a ship that’s ready to conquer the high seas of your imagination.
Grab your crochet hooks, and let’s get started with our step-by-step ship amigurumi pattern. Don’t forget to check back for more amigurumi adventures and other exciting crochet projects. Happy crocheting!
MATERIALS:
– hook # 2.5 (the boat will turn out to be 28 cm high and 21 cm long)
– yarn: dark blue, blue, gray, white and golden colors.
– thick cardboard for the bottom of the boat
– 40-50 cm of wire for the mast
– filler
– glue
– needle
ABBREVATİONS:
ch – chain
dc – double crochet
sc – single crochet
inc – increase (2sc knit in one loop)
dec – decrease (2sc knit together)
d2c – column with two crochets
sl-st – slip stitch

DESCRIPTION:
BOTTOM
(knit with gray yarn, 1 piece)
1) 4 ch; 3dc in the 4th loop from the hook; 1ch (for lifting) = 4; turn knit
2-25) 4sc; 1ch (for lifting) = 4; turn knit
26) 3ch; Knit 3dc together
27) we tie the whole part in a circle sc, fasten the thread, cut it off and hide it from thick cardboard to cut the shape of the day (slightly less than the connected part)
BORDERS
(we knit with dark blue yarn, 2 parts)
1) 31ch; 30sc in the 2nd loop from the hook; 1ch (for lifting) = 30; turn knit
2) inc; 28sc; inc; 1ch (for lifting) = 32; turn knit
3) 32sc; 1ch (for lifting); turn knit
4) inc; 30sc; inc; 1ch (for lifting) = 34; turn knit
5) 34sc; 1ch (for lifting); turn knit
6) inc; 32sc; inc; 1ch (for lifting) = 36; turn knit
7) 36sc; 1ch (for lifting); turn knit
8) inc; 34sc; inc; 1ch (for lifting) = 38; turn knit
9) 38sc; 1ch (for lifting); turn knit
10) inc; 36sc; inc; 1ch (for lifting) = 40; turn knit
11) 40sc; 1ch (for lifting); turn knit
12) inc; 38sc; inc; 1ch (for lifting) = 42; turn knit
13) 42sc; 1ch (for lifting); turn knit
14) inc; 40sc; inc; 1ch (for lifting) = 44; turn knit
15) 44sc; 1ch (for lifting); turn knit
16) inc; 42sc; inc; 1ch (for lifting) = 46; turn knit
17) 46sc; 1ch (for lifting); turn knit
18) inc; 44sc; inc; 1ch (for lifting) = 48; turn knit
19) 48sc; 1ch (for lifting); turn knit
20) inc; 46sc; inc; 1ch (for lifting) = 50
we fix the thread, cut it and hide it similarly knit the second part
DECK
(knit with blue yarn, 1 piece)
1) 4 ch; 3dc in the 4th loop from the hook; 1ch (for lifting) = 4; turn knit
2) inc; 2sc; inc; 1ch (for lifting) = 6; turn knit
3) inc; 4sc; inc; 1ch (for lifting) = 8; turn knit
4) inc; 6sc; inc; 1ch (for lifting) = 10; turn knit
5) inc; 8sc; inc; 1ch (for lifting) = 12; turn knit
6-43) 12sc; 1ch (for lifting); turn knit
44) dec; 8sc; dec; 1ch (for lifting) = 10; turn knit
45) dec; 6sc; dec; 1ch (for lifting) = 8; turn knit
46) dec; 4sc; dec; 1ch (for lifting) = 6; turn knit
47) dec; 2sc; dec; 1ch (for lifting) = 4; turn knit
48) 3ch; Knit 3dc together
49) we tie the whole piece in a circle sc
we fix the thread, cut it and hide it.
PIPE
(knit in a spiral using a marker to indicate the beginning of the row, 1 piece)
– we knit with dark blue yarn:
1) 2ch; 6sc in 2nd loop from hook = 6
2) inc x 6 = 12
3) (1sc, 1inc) x 6 = 18
4) (2sc, 1inc) x 6 = 24
5) (3sc, 1inc) x 6 = 30
6) 30sc for the back of the hinge
7-11) 30 sc
– change the color of the yarn to white
12-17) 30 sc
– change the color of the yarn to blue
18-23) 30sc
– change the color of the yarn to gray
24- 29) 30 sc
fasten the thread, leave the long end for sewing
SAIL
(small; knit with white yarn, 1 piece)
1) 4 ch; 2dc in the 4th loop from the hook; 1ch (for lifting) = 3; turn knit
2) inc; 1sc; inc; 1ch (for lifting) = 5; turn knit
3) 5sc; 1ch (for lifting); turn knit
4) inc; 3sc; inc; 1ch (for lifting) = 7; turn knit
5) 7sc; 1ch (for lifting); turn knit
6) inc; 5sc; inc; 1ch (for lifting) = 9; turn knit
7) 9sc; 1ch (for lifting); turn knit
8) inc; 7sc; inc; 1ch (for lifting) = 11; turn knit
9) 11sc; 1ch (for lifting); turn knit
10) inc; 9sc; inc; 1ch (for lifting) = 13; turn knit
11) 13sc; 1ch (for lifting); turn knit
12) inc; 11sc; inc; 1ch (for lifting) = 15; turn knit
13) 15sc; 1ch (for lifting); turn knit
14) inc; 13sc; inc; 1ch (for lifting) = 17; turn knit
15) 17sc; 1ch (for lifting); turn knit
16) inc; 15sc; inc; 1ch (for lifting) = 19; turn knit
17) 19sc; 1ch (for lifting); turn knit
18) inc; 17sc; inc; 1ch (for lifting) = 21; turn knit
19) 21sc; 1ch (for lifting); turn knit
20) inc; 19sc; inc; 1ch (for lifting) = 23; turn knit
21) 23sc; 1ch (for lifting); turn knit
22) inc; 21sc; inc; 1ch (for lifting) = 25; turn knit
– change the color of the yarn to blue
23) we tie the whole piece in a circle sc
we fix the thread, cut it and hide it.
SAIL
(large; knit with white yarn, 1 piece)
– we knit according to the description of a small sail from the 1st to the 22nd row
23) 25sc; 1ch (for lifting); turn knit
24) inc; 23sc; inc; 1ch (for lifting) = 27; turn knit
25) 27sc; 1ch (for lifting); turn knit
26) inc; 25sc; inc; 1ch (for lifting) = 29; turn knit
27-30) 29sc; 1ch (for lifting); turn knit
– change the color of the yarn to blue
31) tying the whole piece in a circle sc
we fix the thread, cut it and hide it
FLAG
(knit with white yarn, 1 piece)
1) 11ch; 10sc in the 2nd loop from the hook; 1ch (for lifting) = 10; turn knit
2-4) 10sc; 1ch (for lifting); turn knit
– change the color of the yarn to blue
5) we tie the whole piece in a circle sc
fasten the thread, leave the long end for sewing
MAST
(we knit with gray yarn, 3 parts: 1 long, 1 short, 1 bent)
long detail: we knit in a spiral
1) 2ch; 6sc in 2nd loop from hook = 6
2) 6sc
– repeat row nr 2 to a length of 20 cm fasten the thread, leave the long end for sewing
insert the wire into the inside along the entire length (for safety, bend the ends of the wire and wrap it with tape)
Short Detail:
1) 2ch; 6sc in 2nd loop from hook = 6
2) 6sc
– repeat row nr 2 to a length of 5 cm
insert the wire into the inside along the entire length (for safety, bend the ends of the wire and wrap it with tape)
Bent Part:
1) 2ch; 6sc in 2nd loop from hook = 6
2) 6sc
– repeat row nr 2 to a length of 5 cm
insert the wire into the inside along the entire length (for safety, the ends of the wire
bend and wrap with tape), bend the part so that parts of 3 and 2 cm are obtained
GUANTS
(“stairs”)
(knit with white yarn, 1 piece)
1) 7ch; 1d2c; turn knit
2- 3) 5ch; 1d2c; 1ch; 1d2c; turn knit
4-7) 6ch; 1d2c; 2ch; 1d2c; turn knit
8-9) 7ch; 1d2c; 3ch; 1d2c; turn knit
fasten the thread, leave the long end for sewing

ILLUMINATORS
(we knit with gray yarn, 5 parts)
1) 8ch close in a circle with sl-st
2) 1 ch for lifting; 20 sc; 1sl-st
fasten the thread, leave the long end for sewing
ANCHOR
(knit with gray yarn, 1 piece)
we knit with 1 piece, we do not break the thread
1) close 10ch in a circle with sl-st
2) 1 bp for lifting; 20 sc; 1sl-st
we knit the vertical part of the anchor:
3) 6ch; 5sc starting from the 2nd from the loop; 1sl-st to the edge of the circle; 1sl-st to the next column of the circle; turn knit
4) 5sc along sc of the previous row (in the vertical part of the anchor, not in a circle) we knit the side parts of the anchor:
5) 9ch; 8sc starting from the 2nd from the loop; 2sl-st (along the vertical part of the anchor); 9ch;
8sc starting from the 2nd from the loop; 1sl-st fasten the thread, leave the long end for sewing
ASSEMBLY
1) fold the sides together and join the sc side pieces
2) sc attach the bottom to the sides
3) from the inside to the bottom, glue the cardboard part
4) fill
5) sc attach the deck to the sides
6) tie the top with sc in 1 row: dark blue and light blue yarn
7) fill and sew on the pipe
8) sew a long mast to the deck
9) sew the bent part of the mast: part 3 cm to the mast, and part 2 cm to the deck
10) sew the short part of the mast to the long part, on the opposite side from the bent part, 1 cm higher than the bent part
11) sew a small sail in the middle at the bend of the bent part of the mast, and the upper part to the mast
12) sew a large sail in the middle to the end of the short part of the mast, and the upper part to the mast
13) sew the flag to the mast
14) sew the lower part of the shrouds to the deck, and the upper to the mast (pull a little)
15) sew portholes to the sides: on one side 3, on the second 2 and anchor
16) using white and gold yarn, fasten the mast vertically (so that it does not move
17) if desired, decorate the sides, portholes and anchor
Before you leave, make sure to check out more free amigurumi crochet patterns and discover new ideas for your next project.
You can also browse our full amigurumi pattern archive for hundreds of beginner-friendly designs.