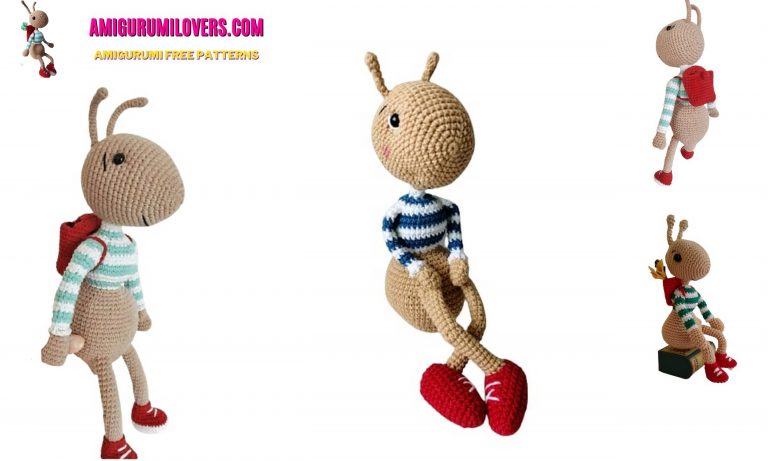
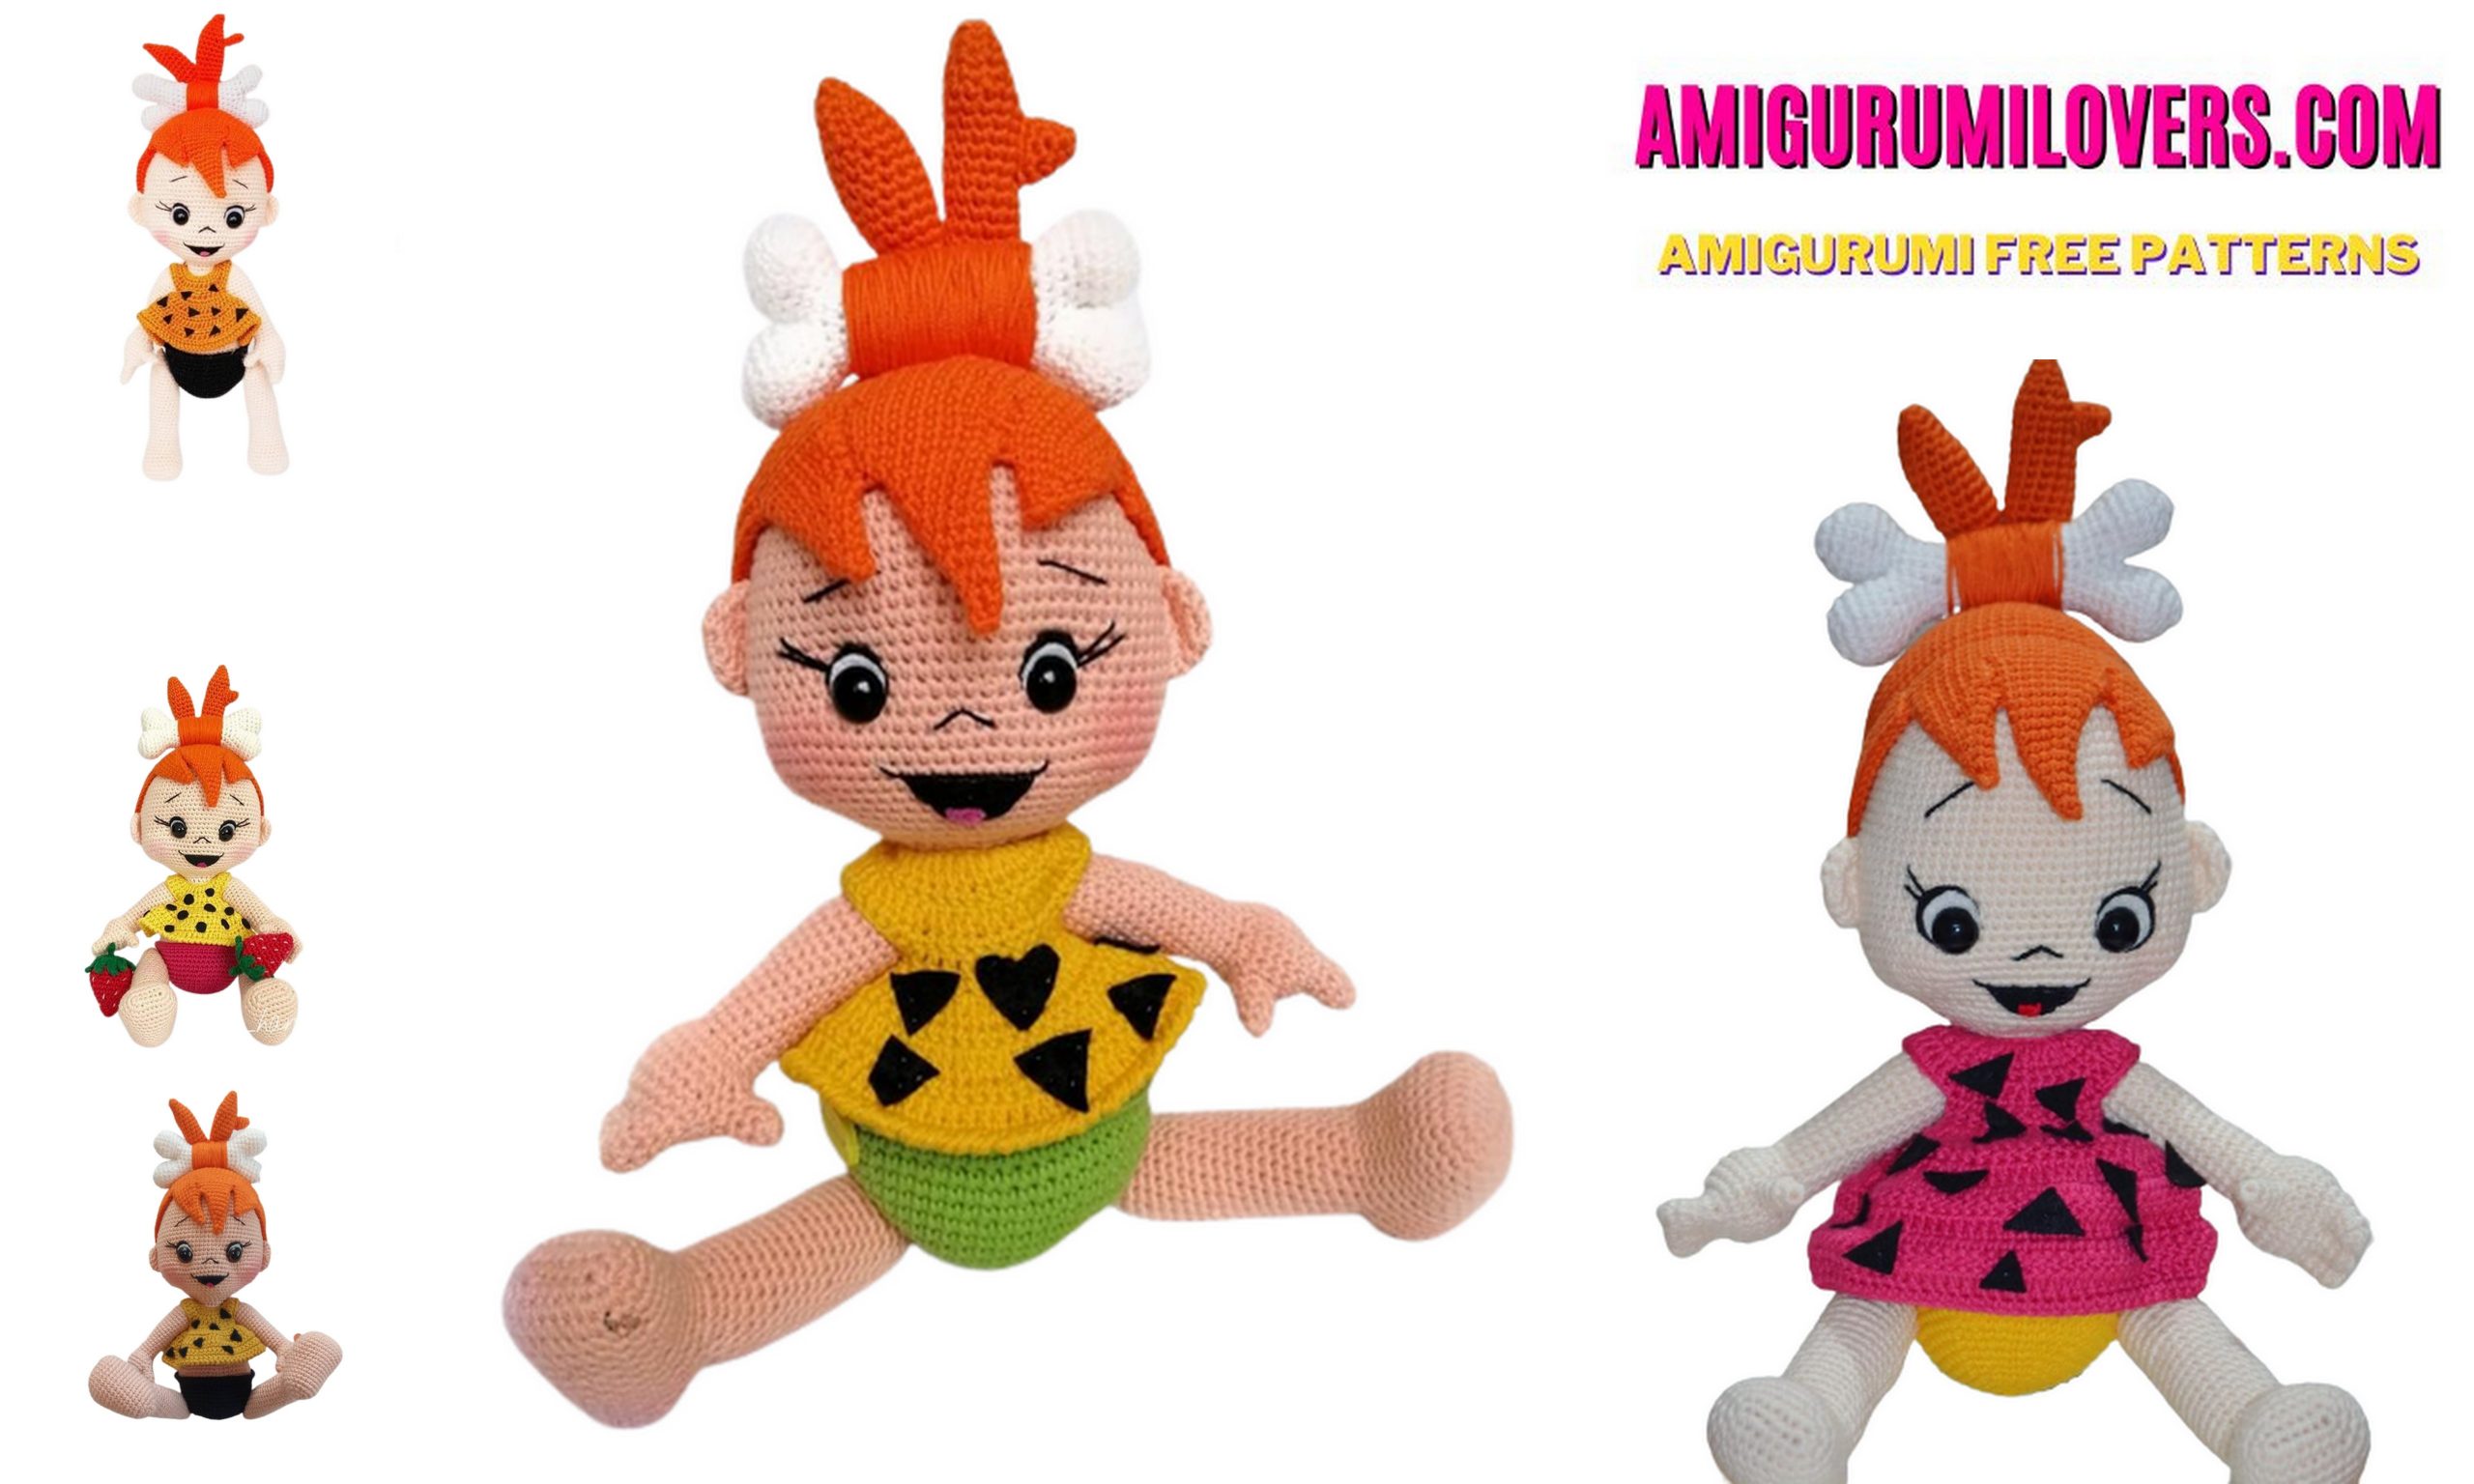
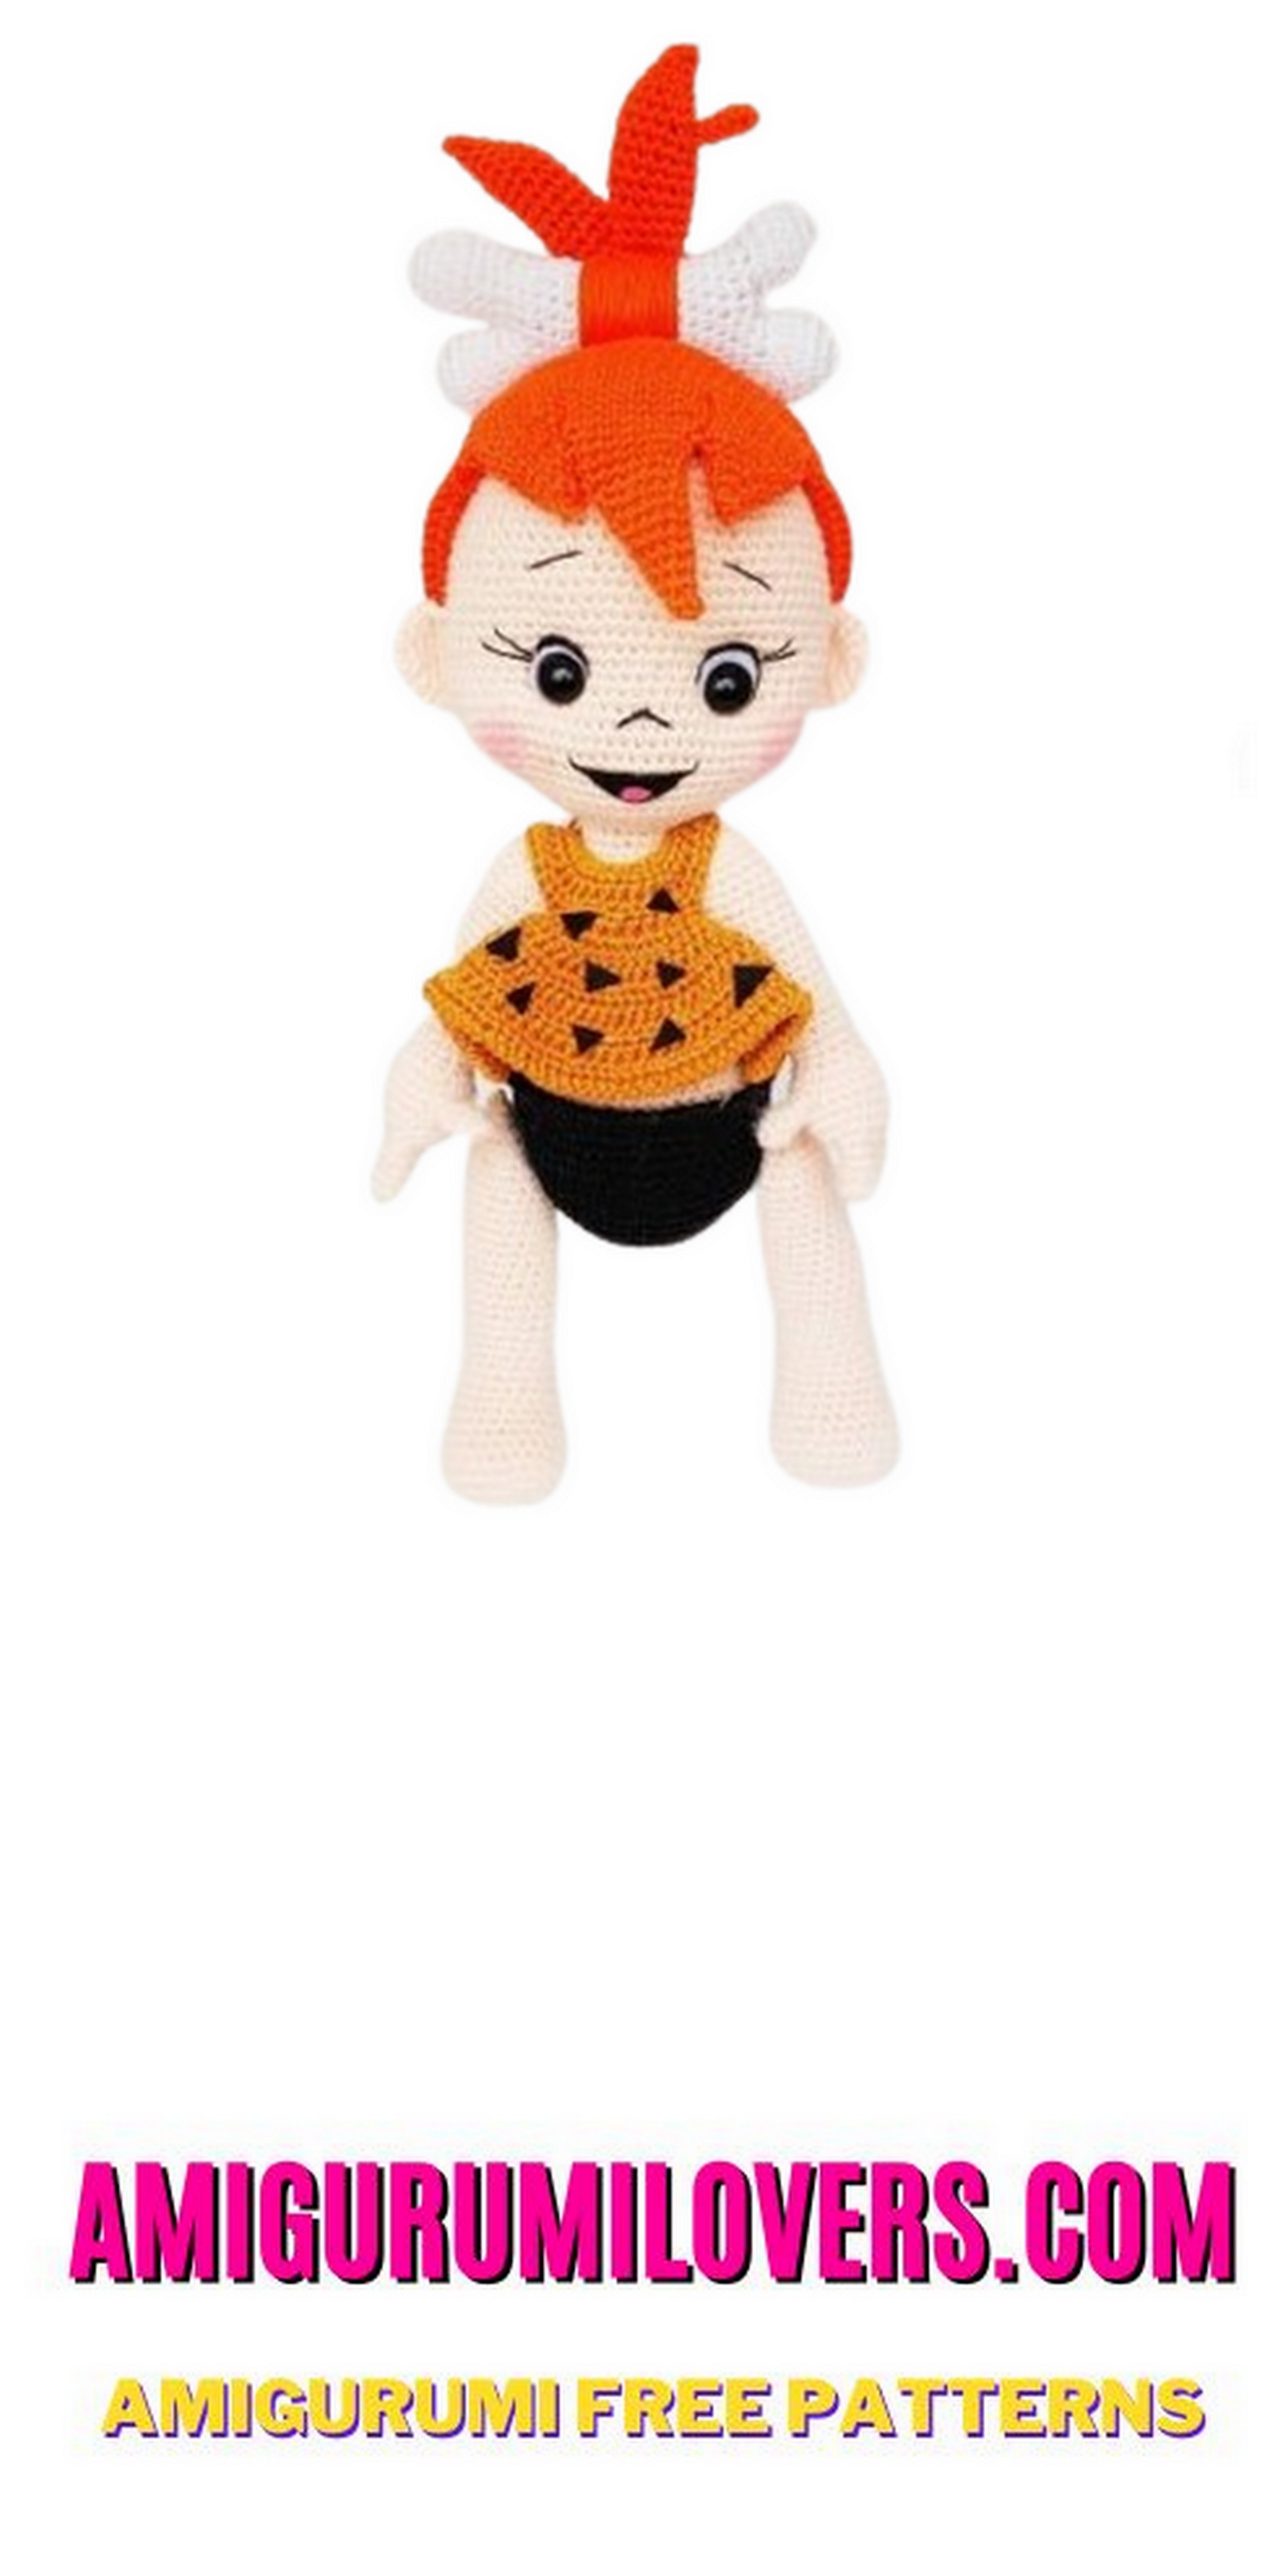
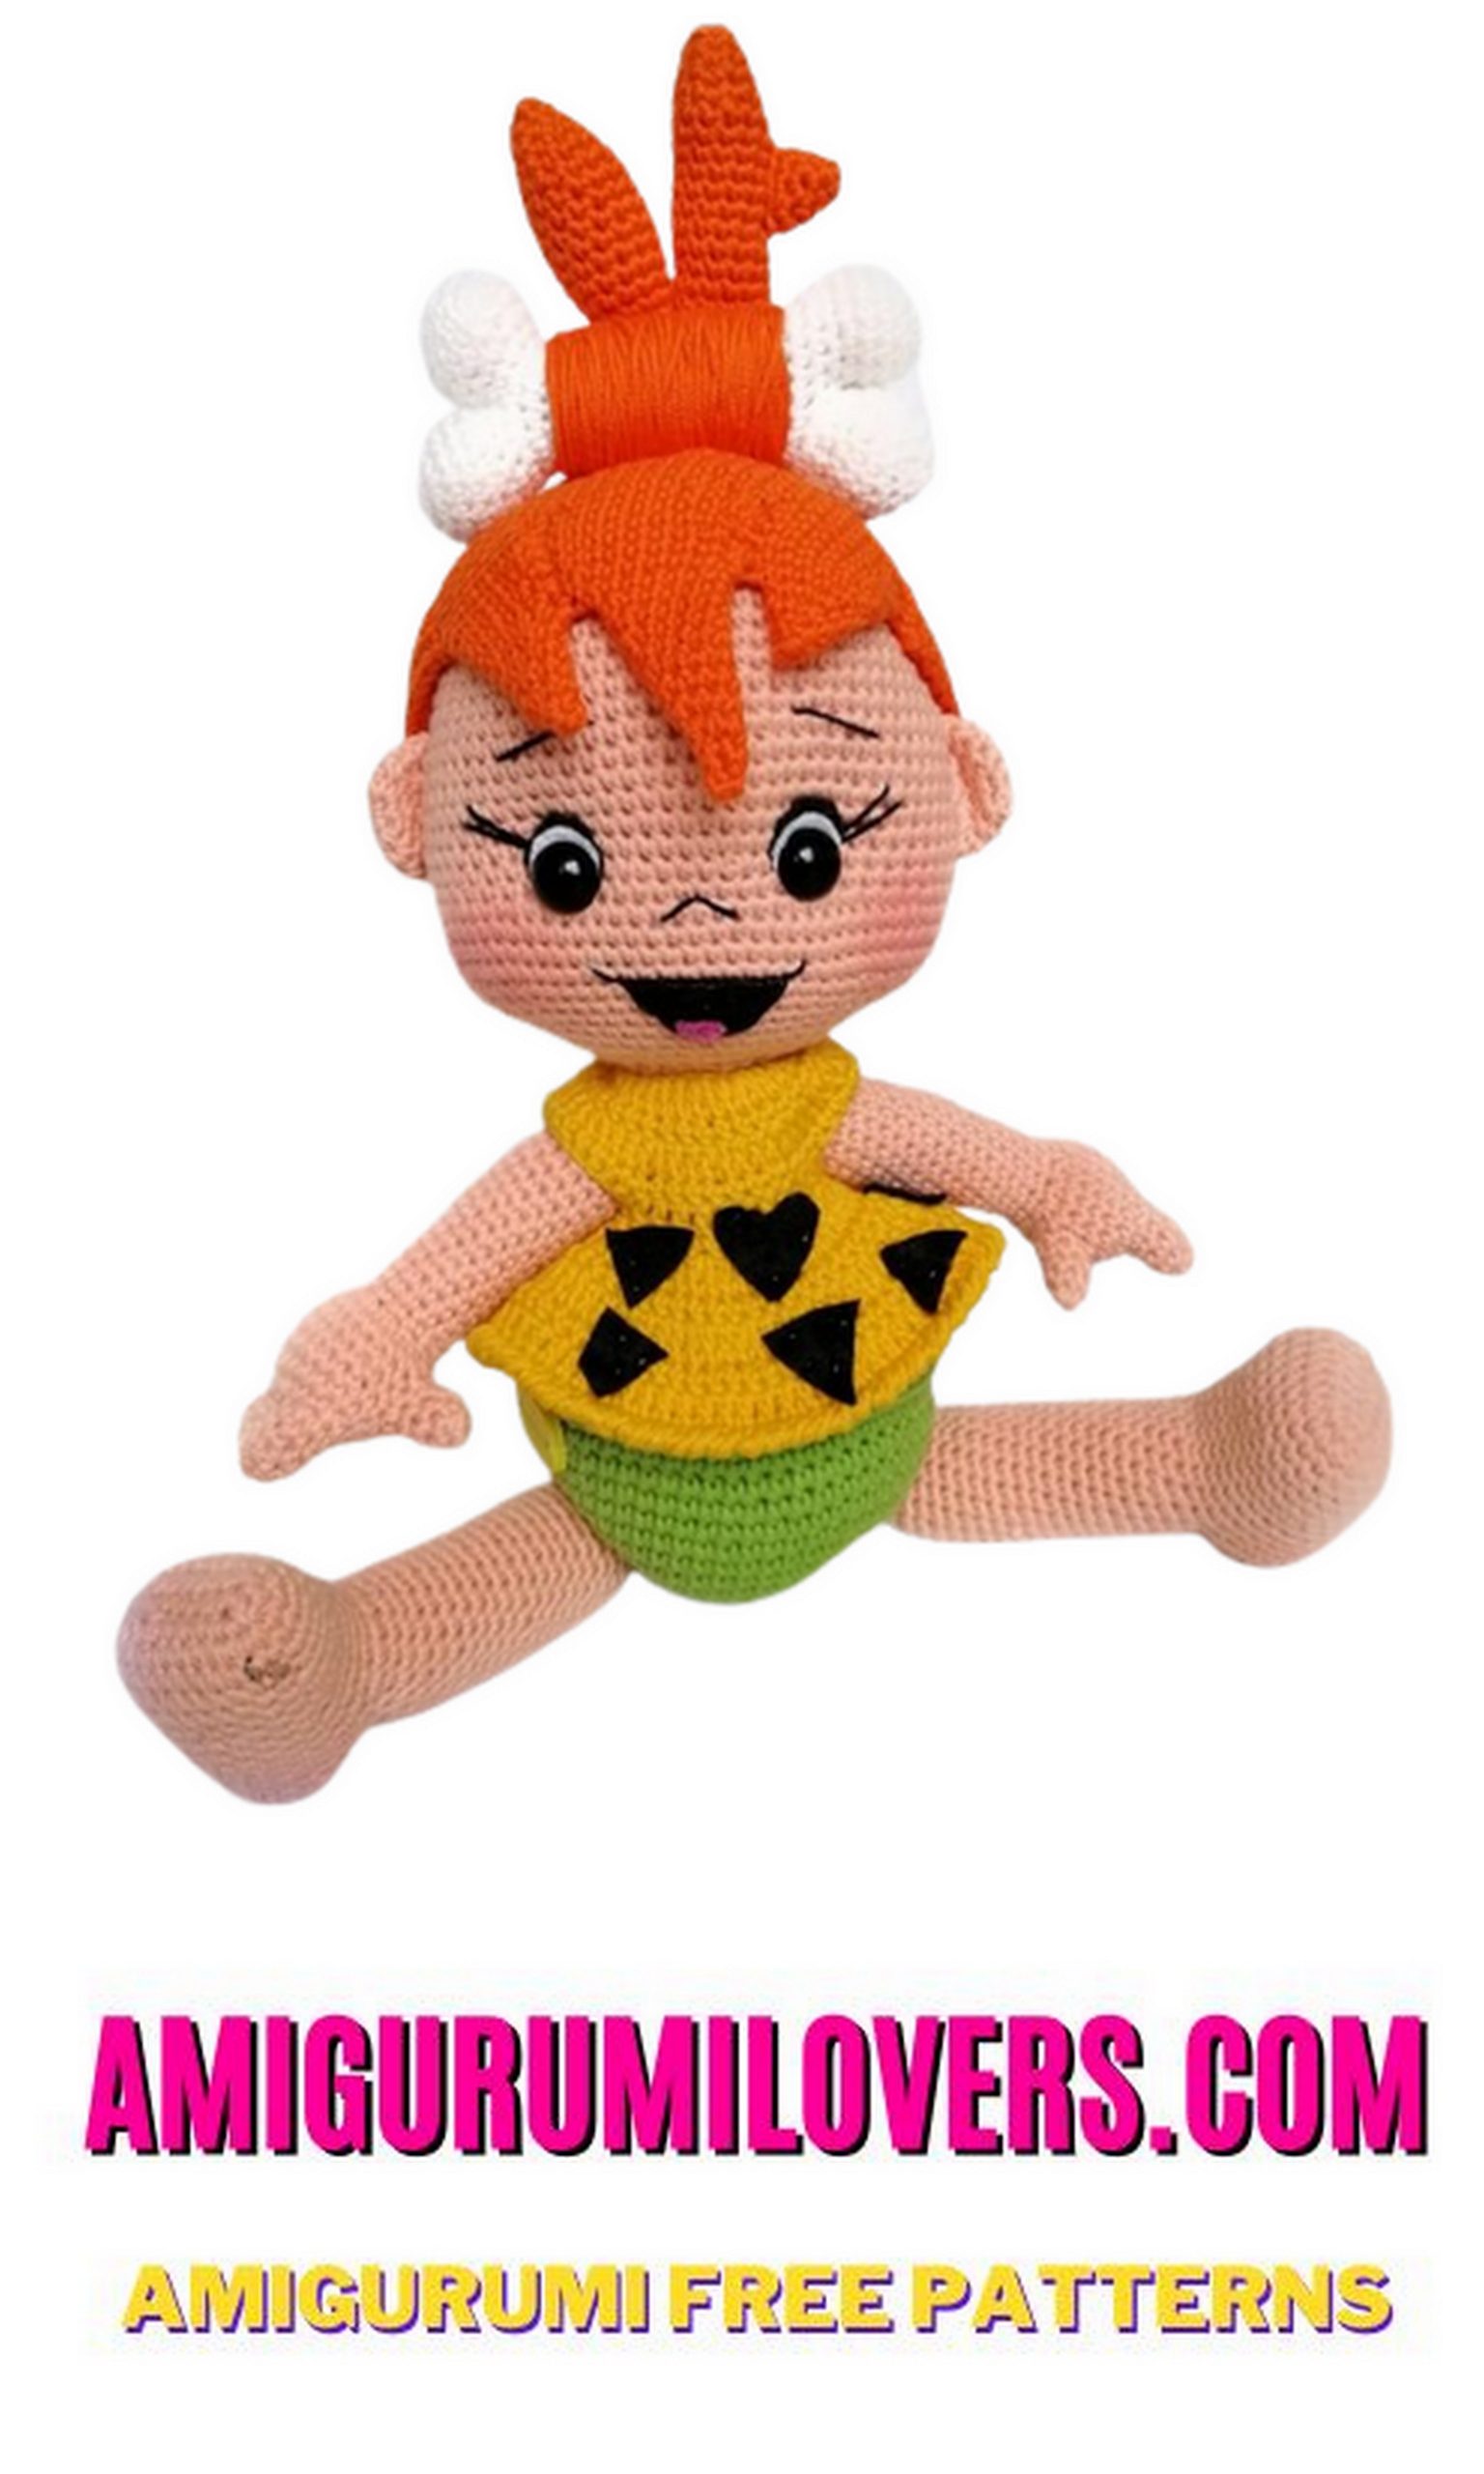
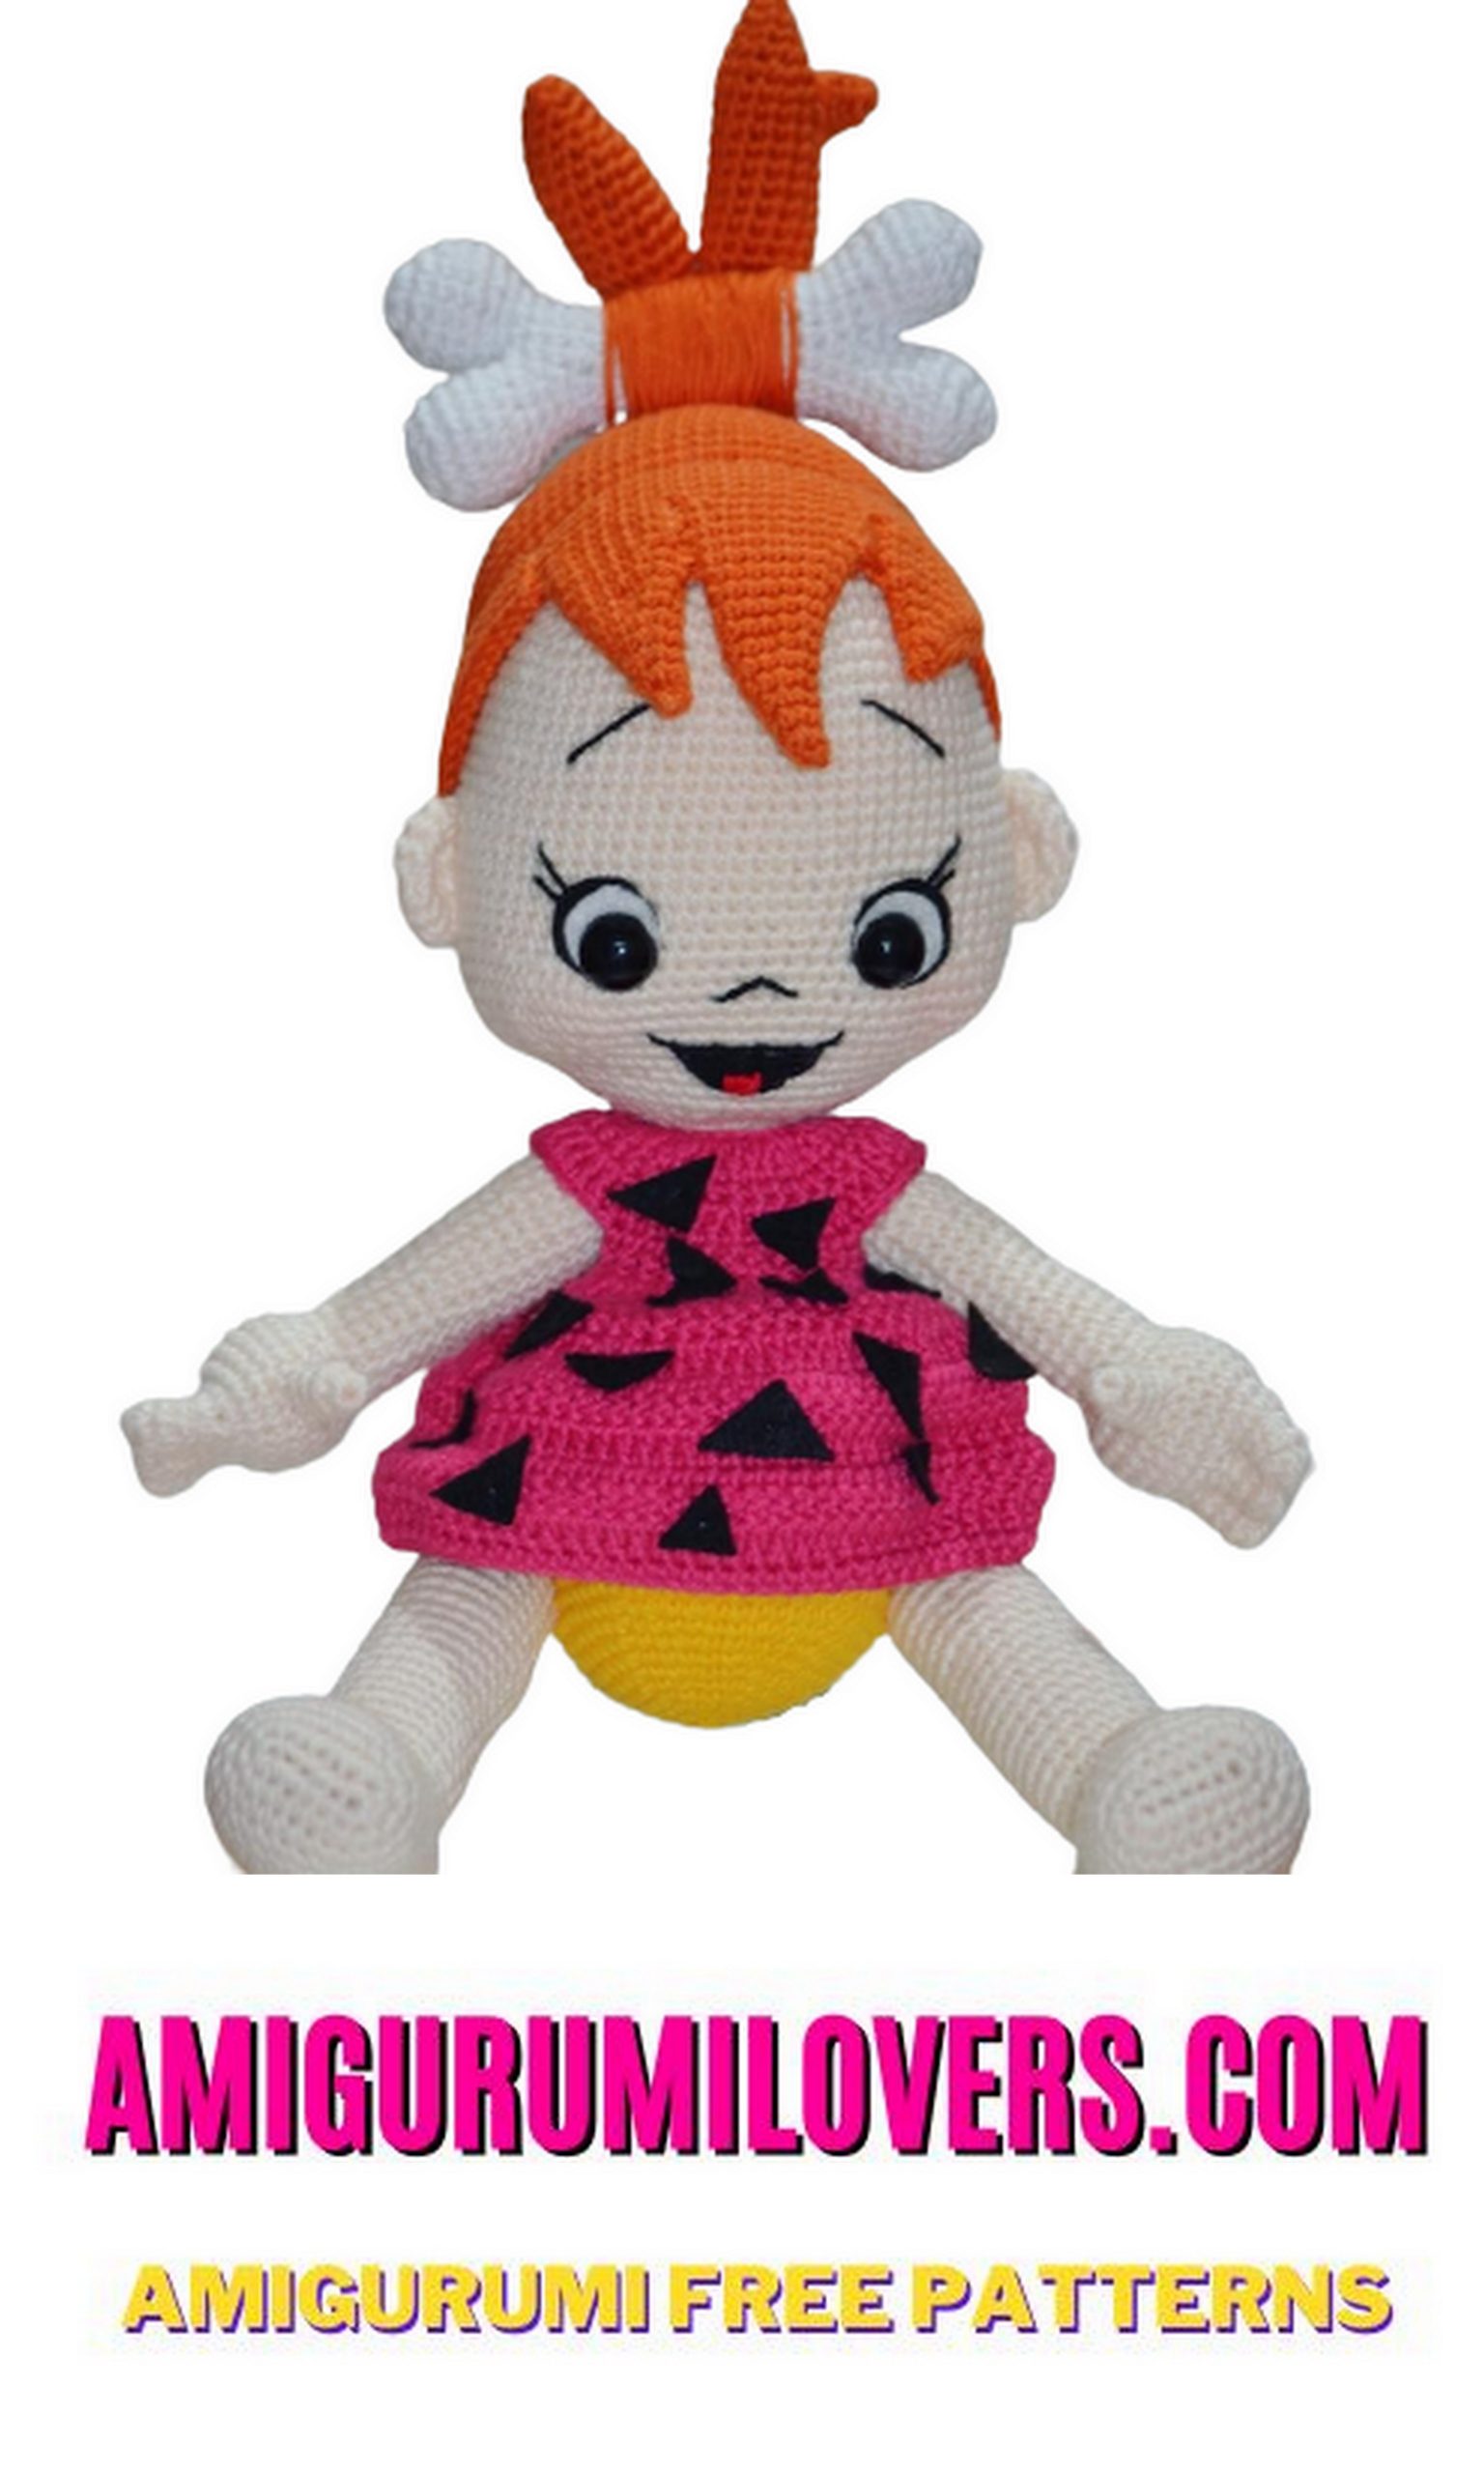
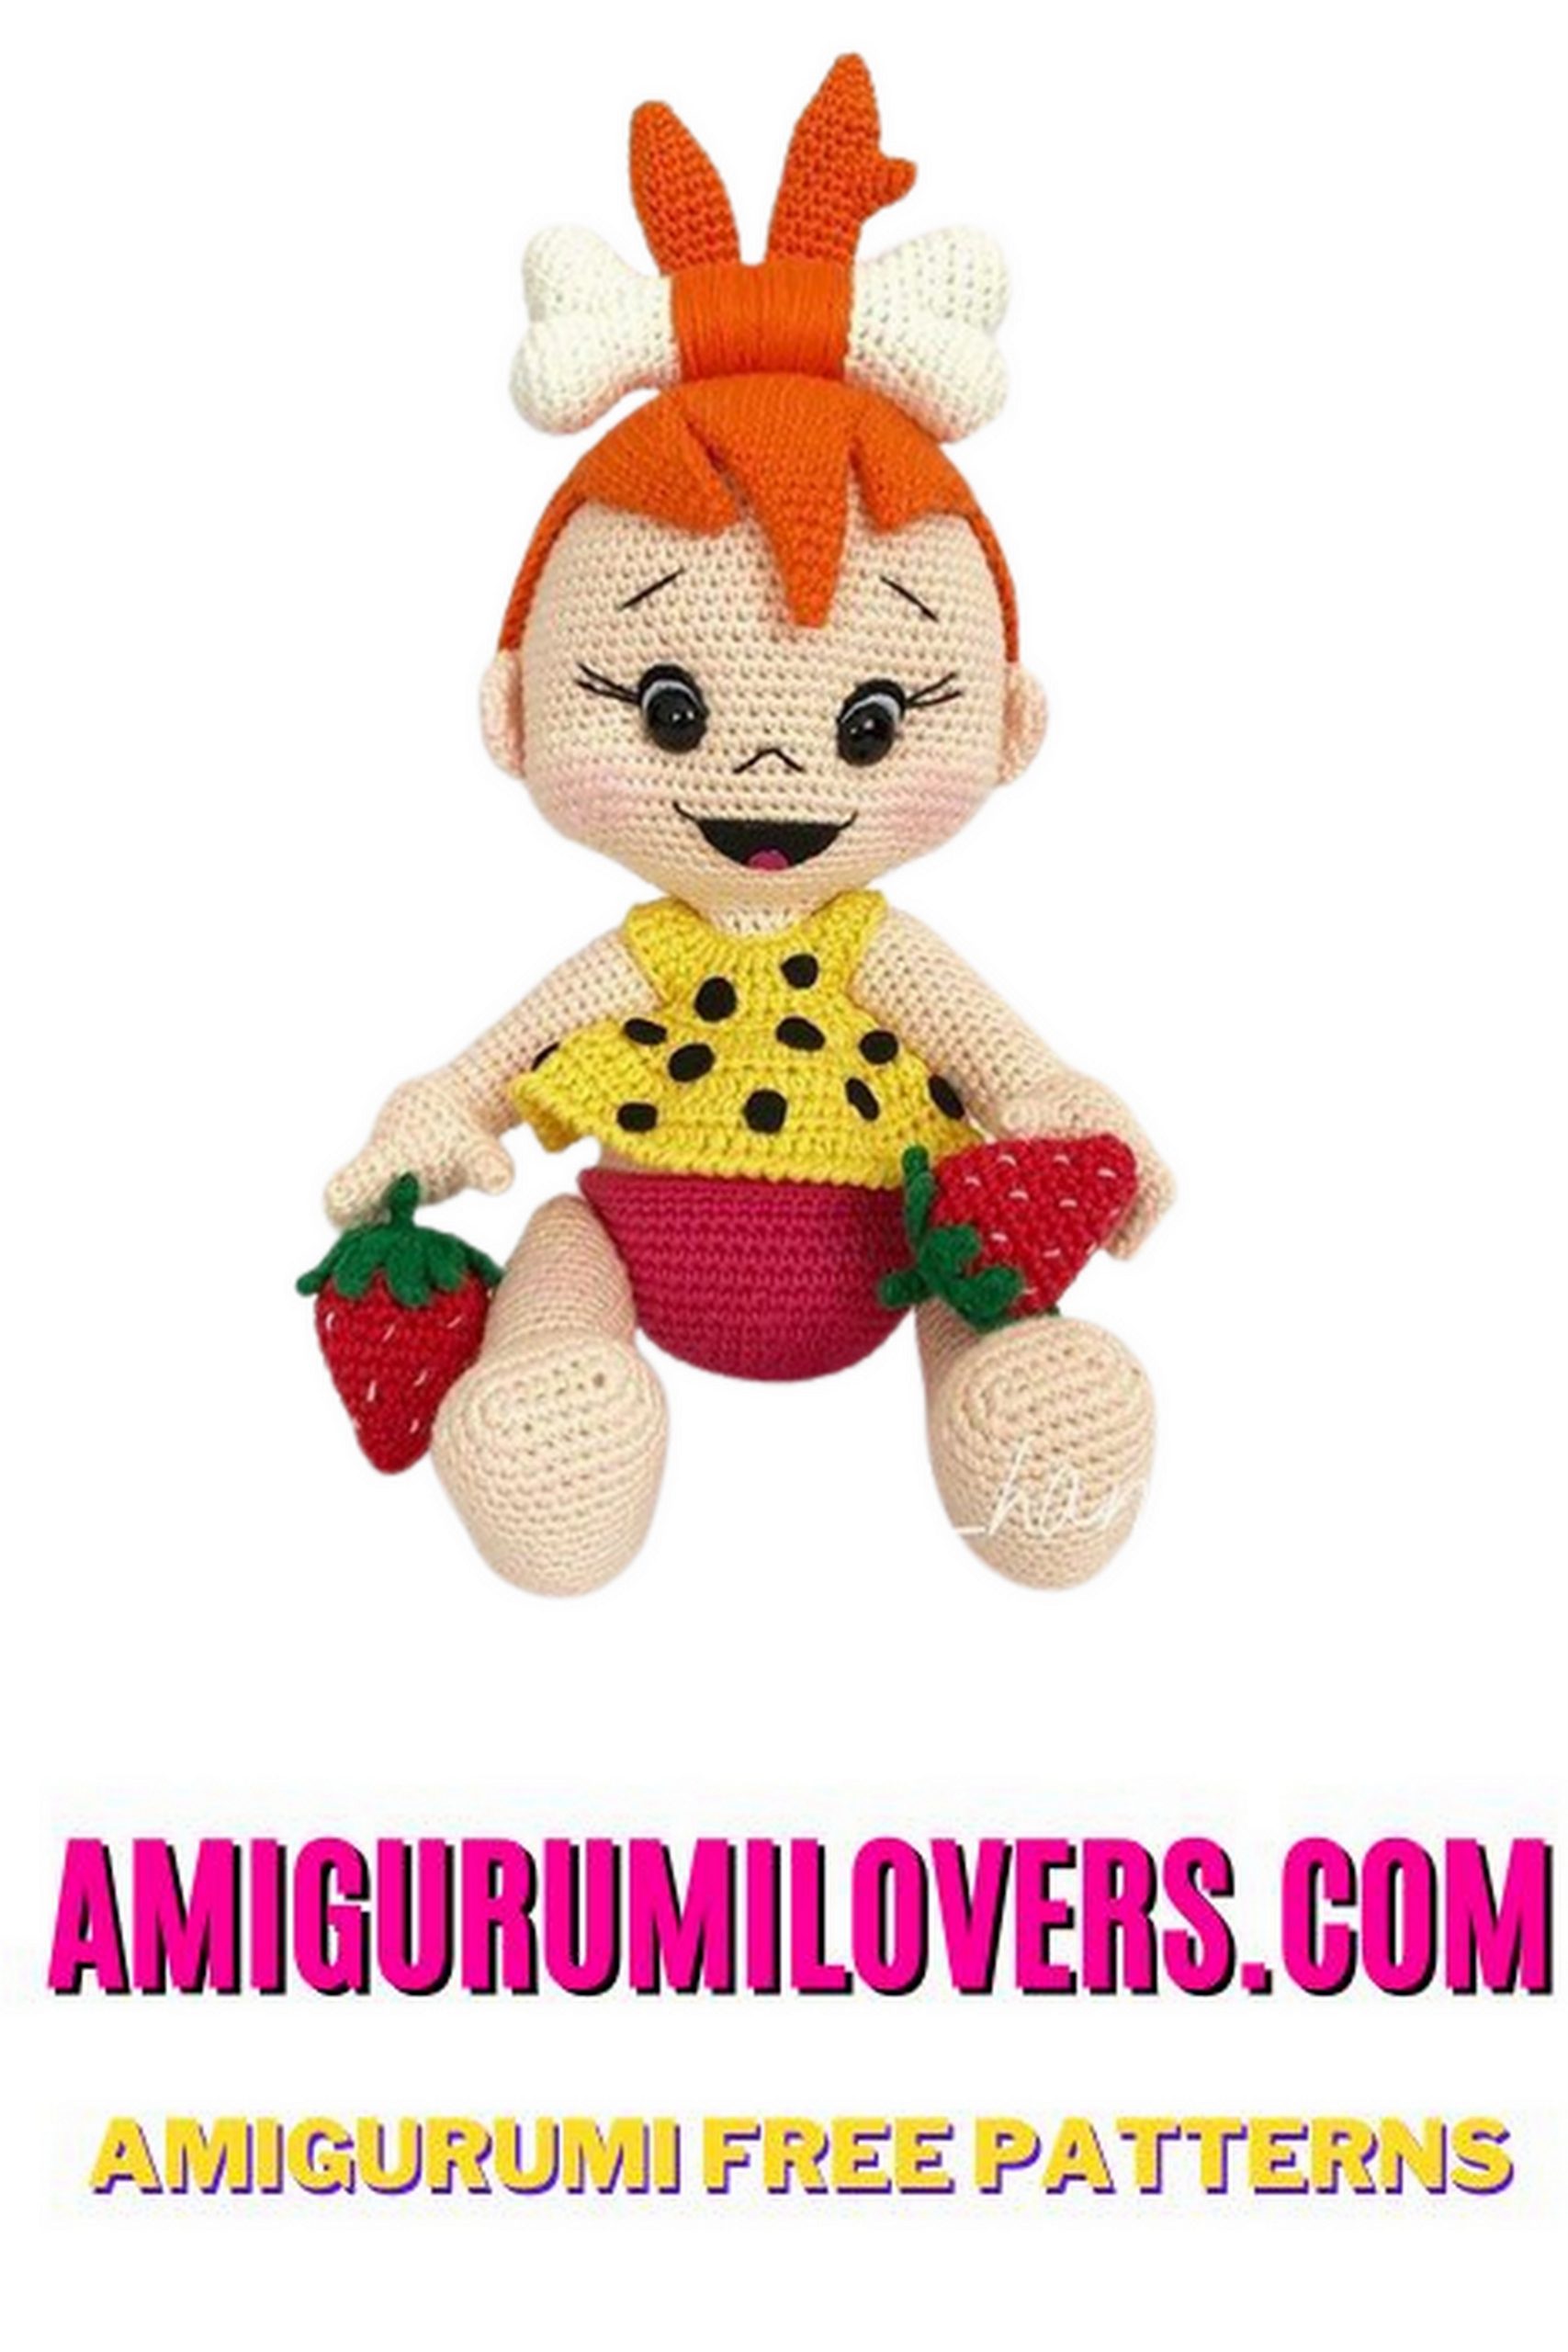
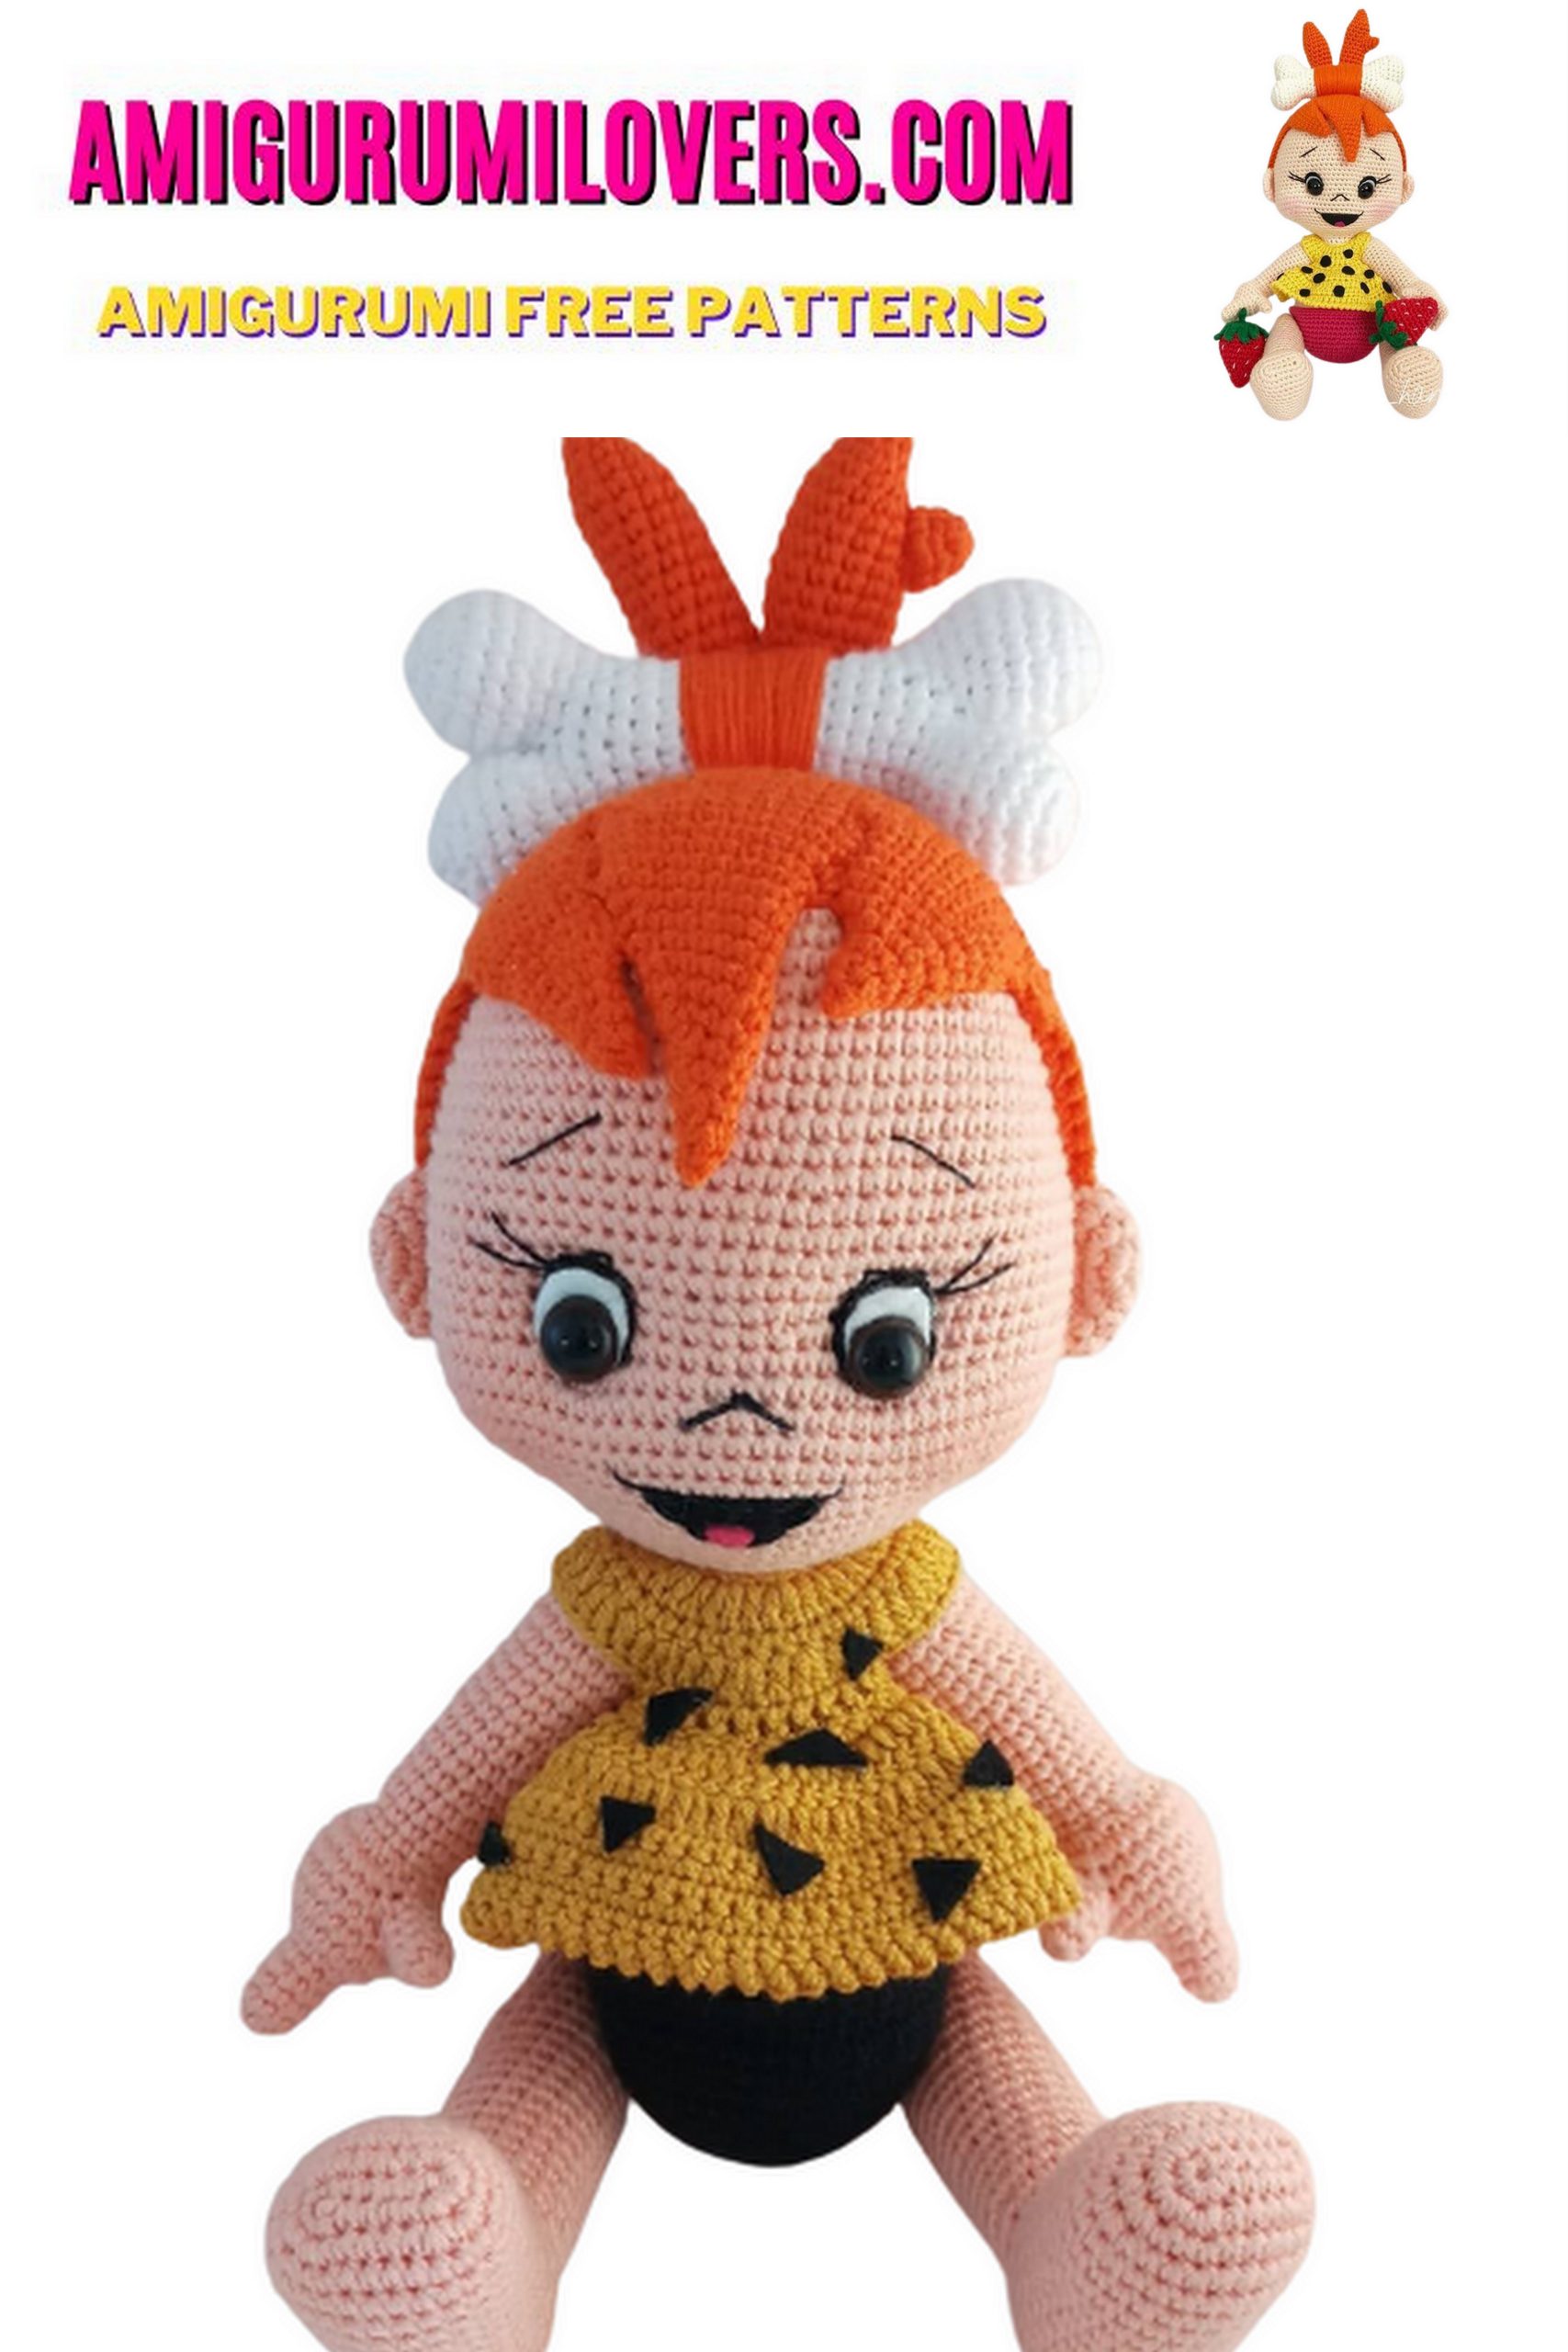
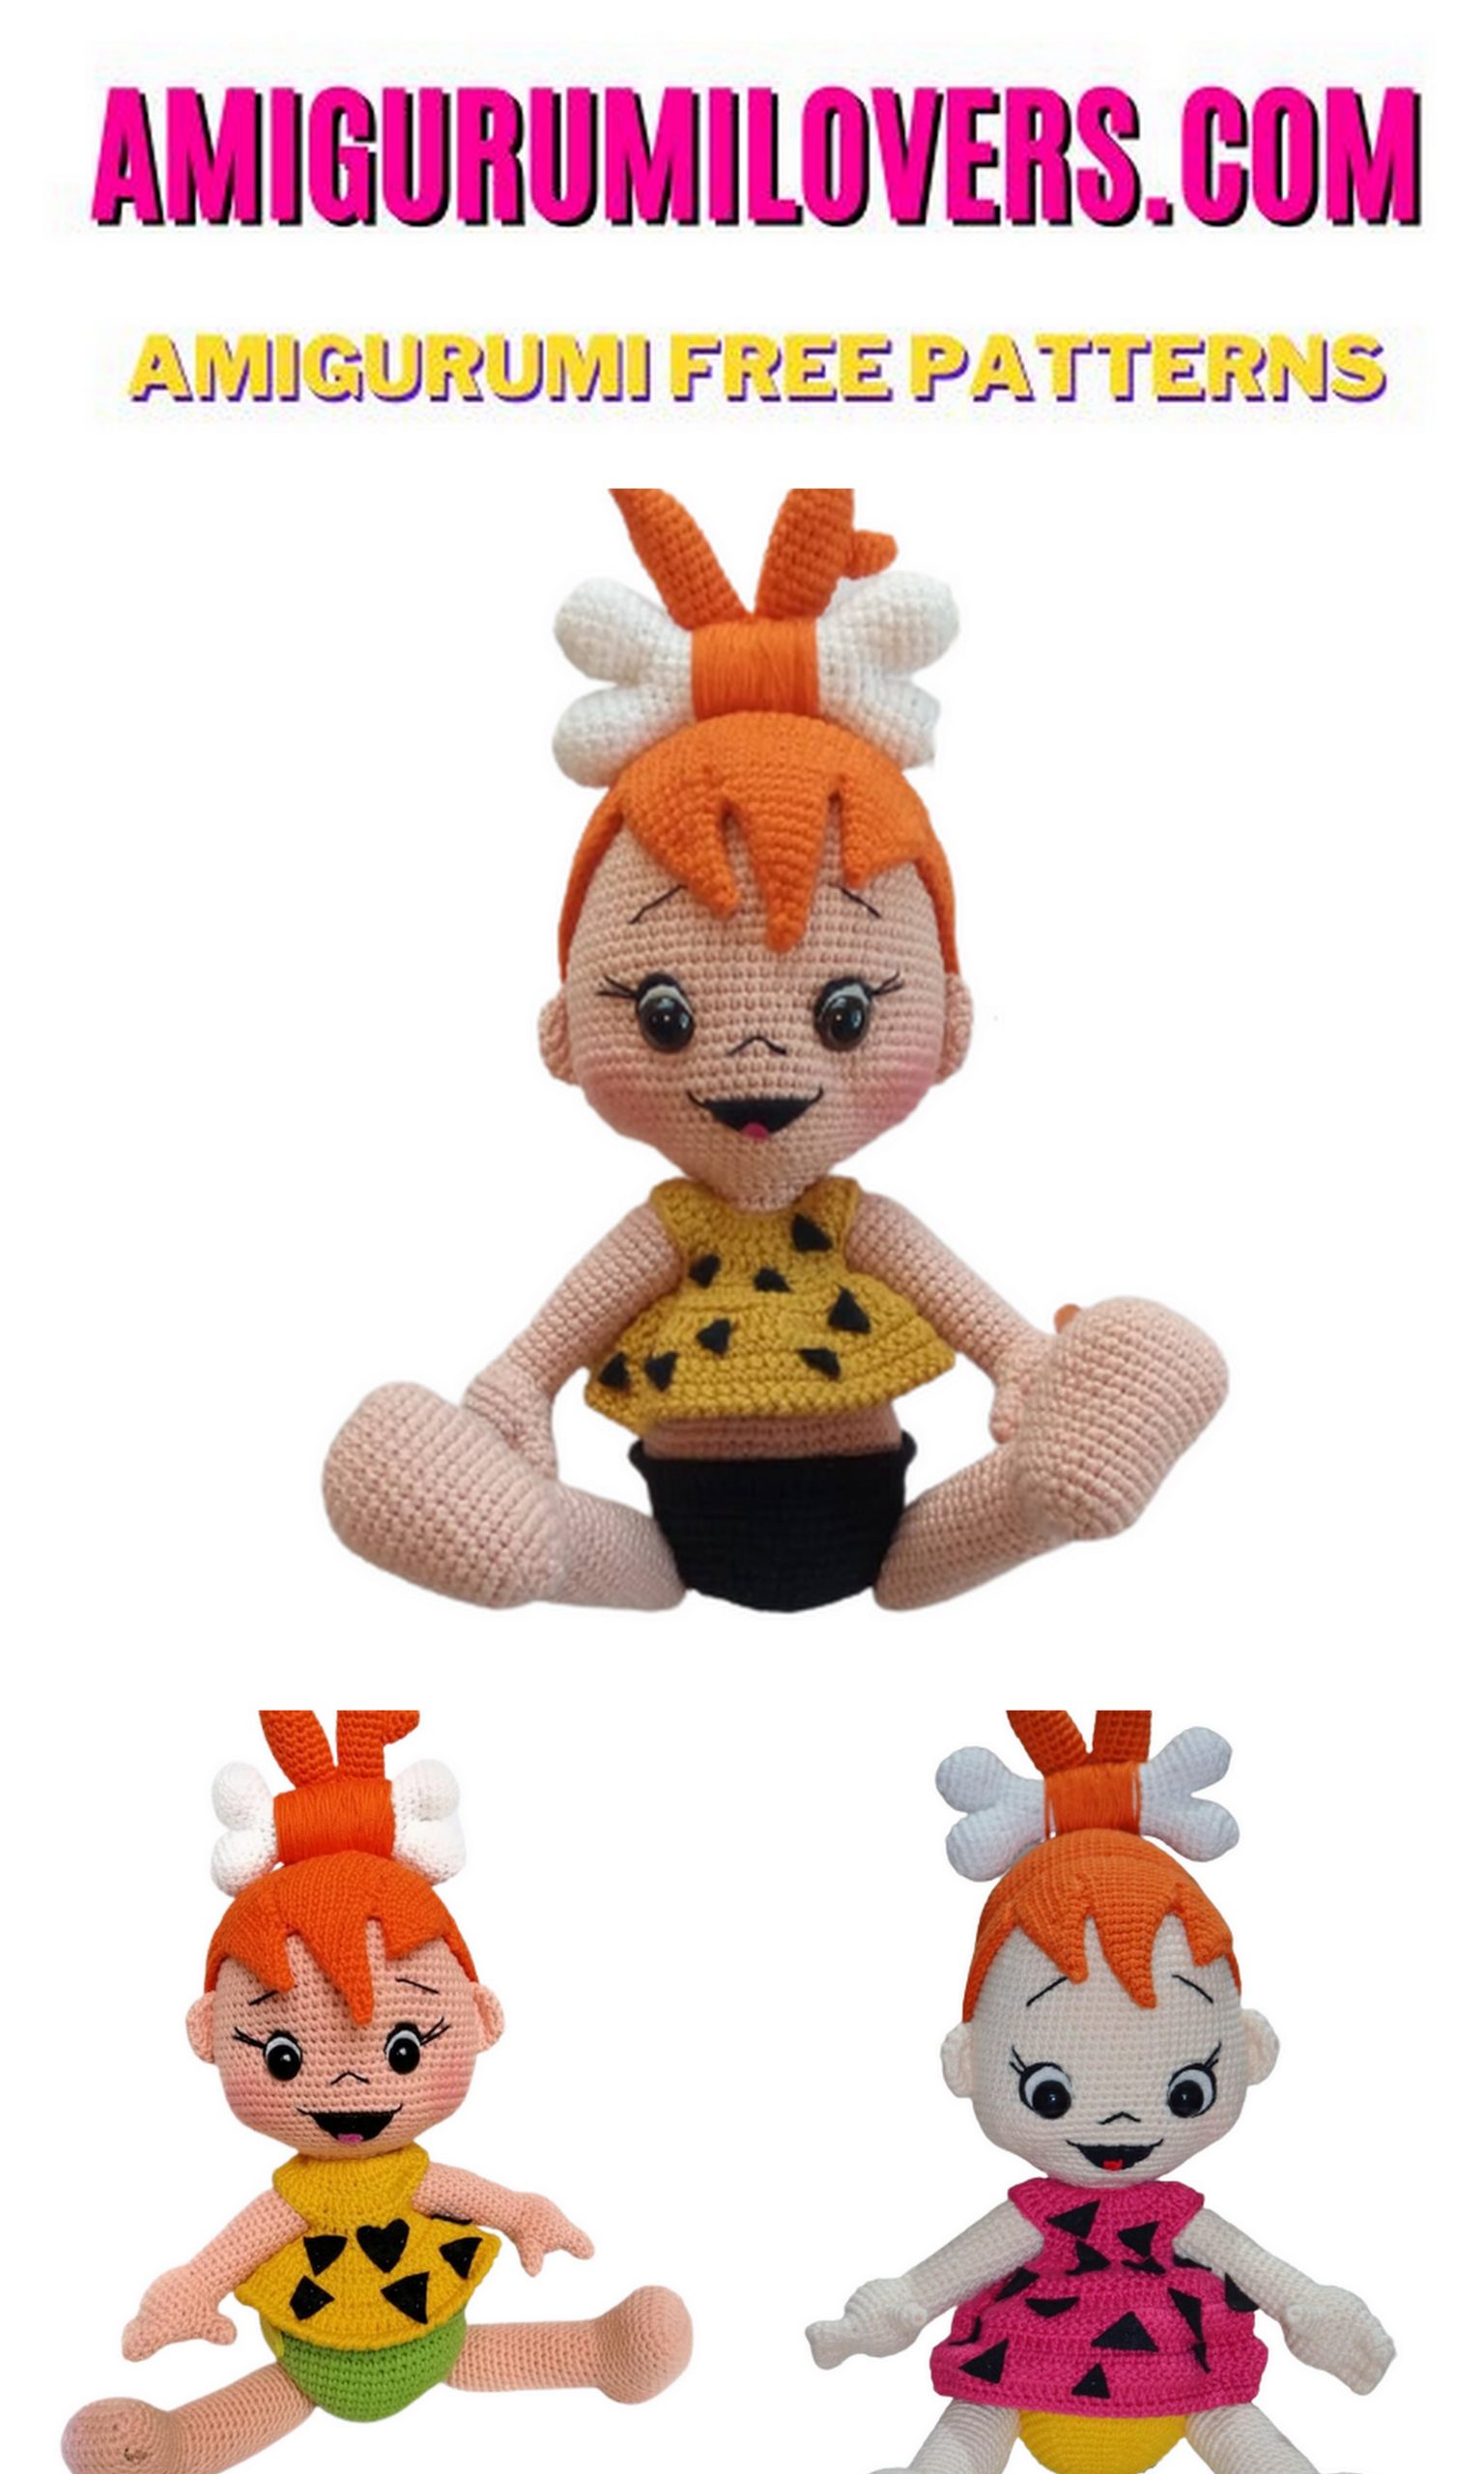
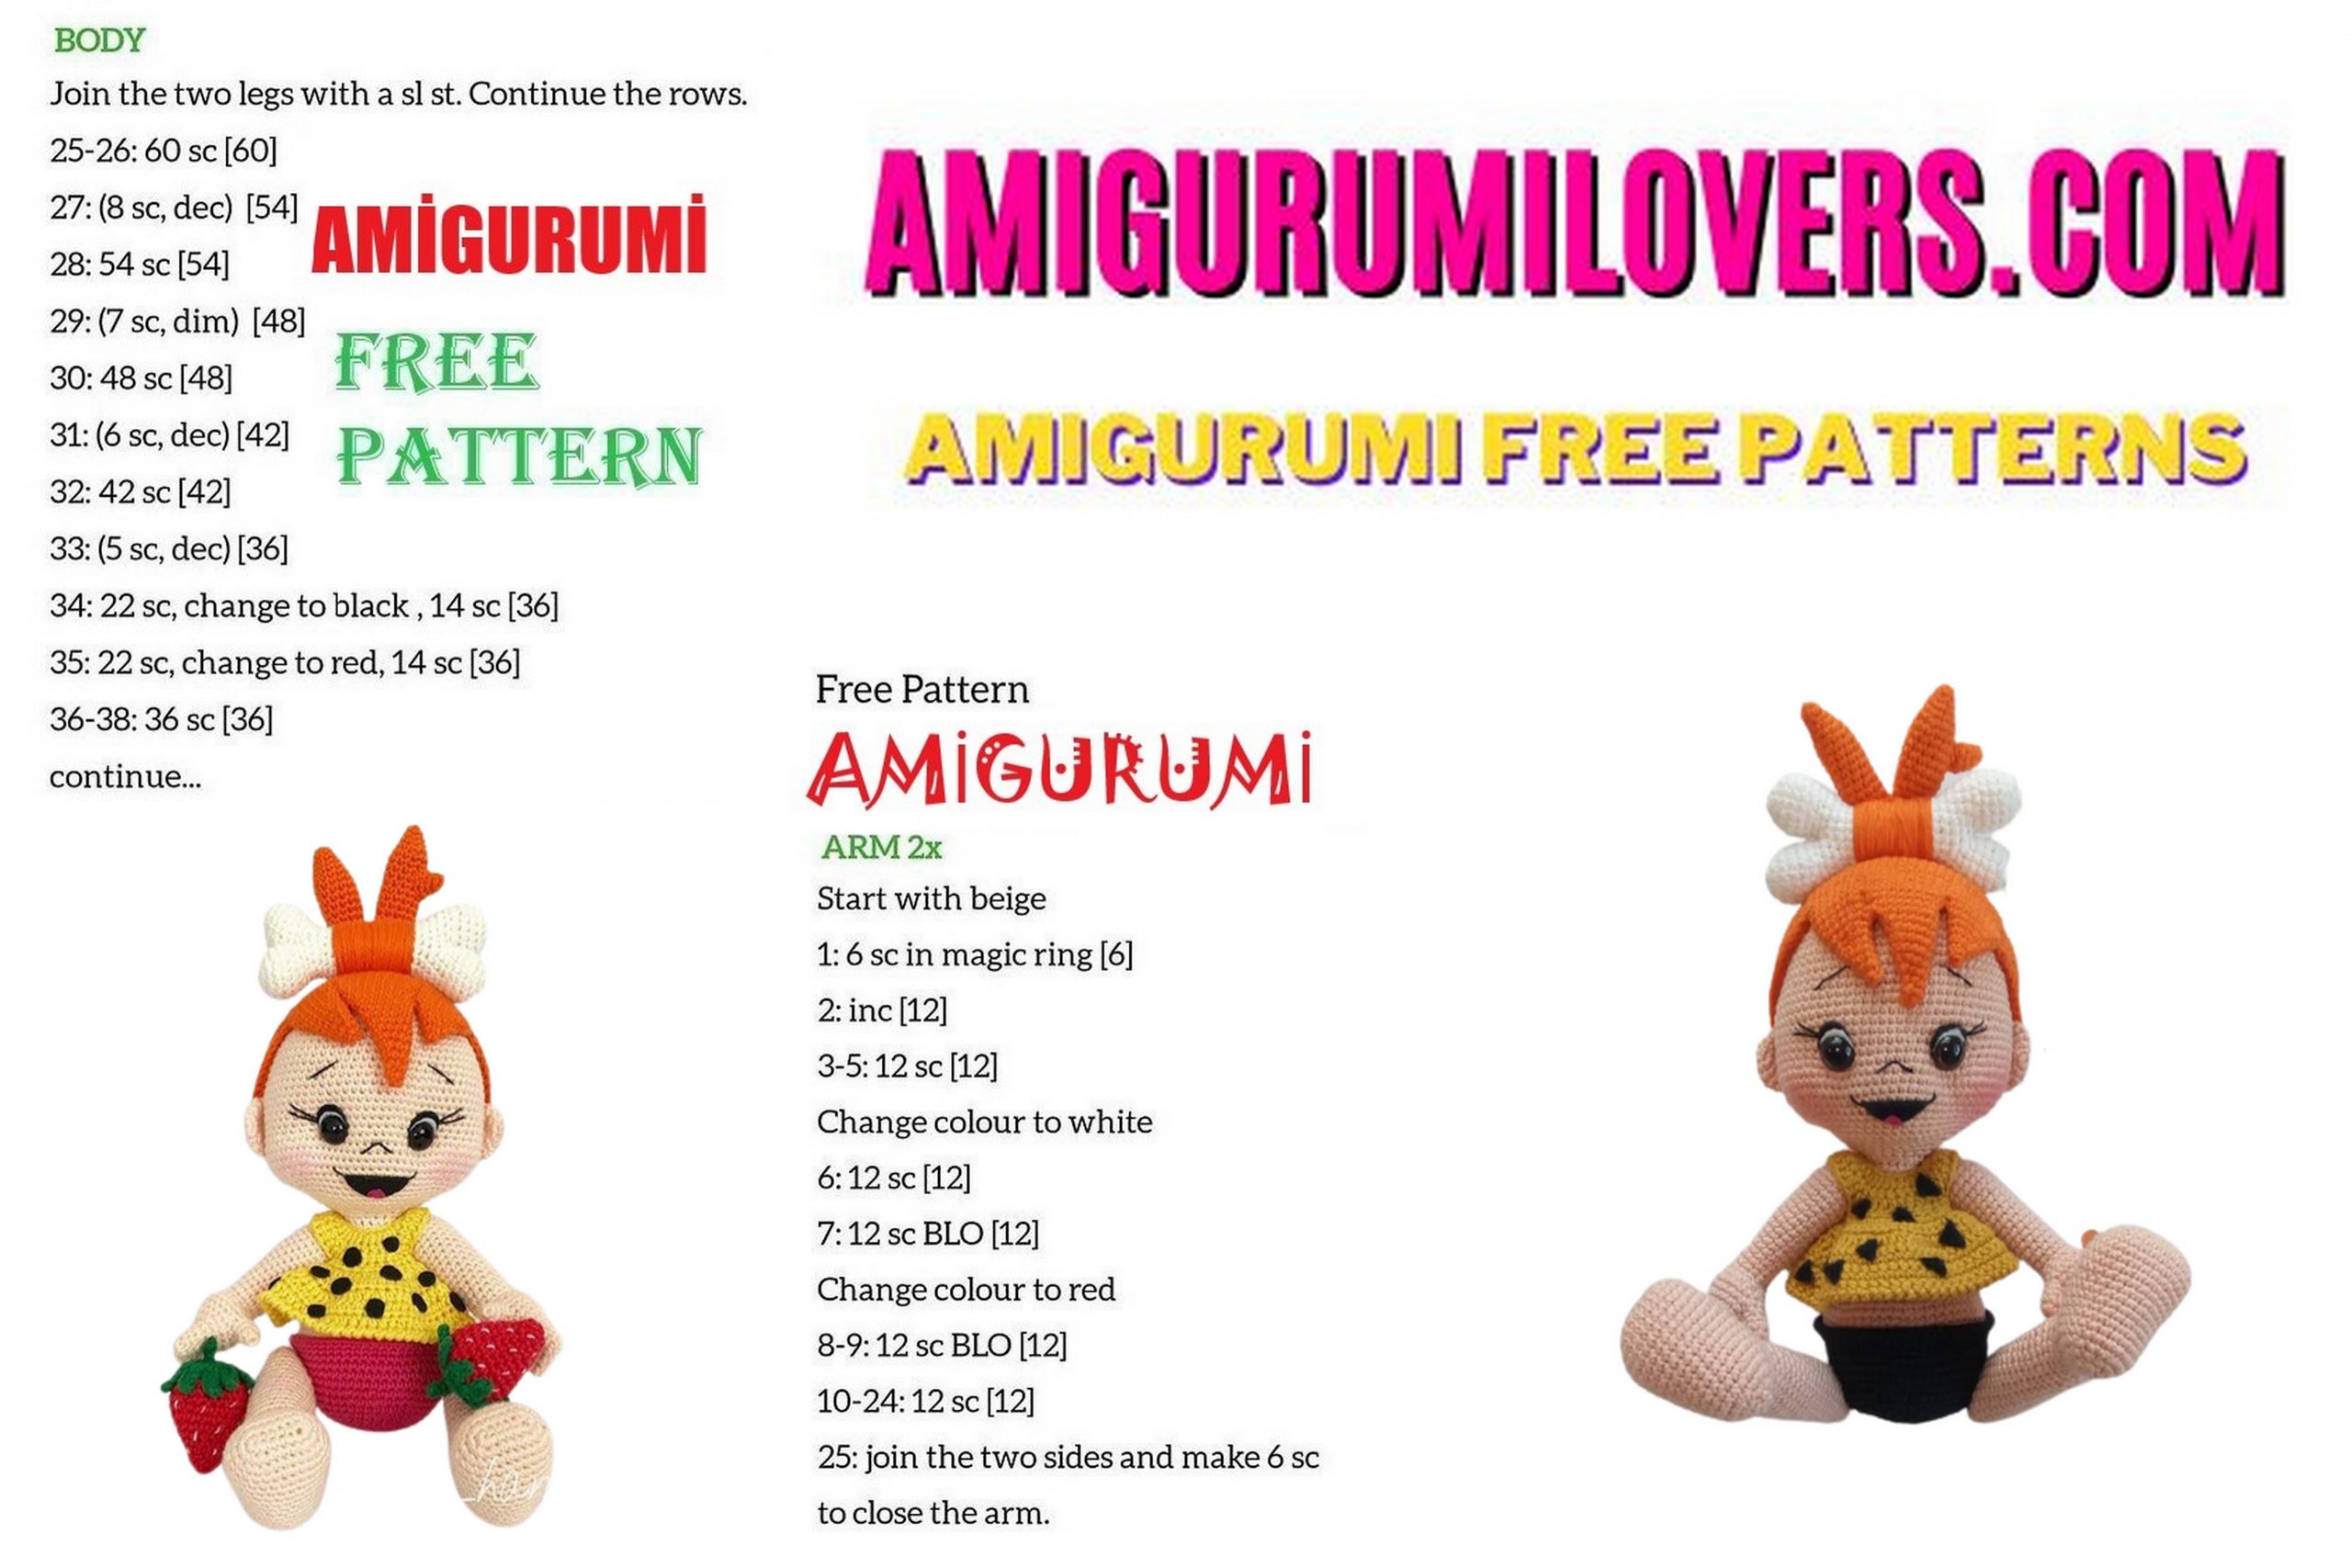
Crafting Nostalgia: Amigurumi Pebbles Flintstone Free Crochet Pattern
You may also enjoy exploring our free amigurumi patterns and other popular amigurumi animal patterns available on our website.
Welcome to our cozy corner of the crochet world, where creativity meets nostalgia! Today, we are diving into a delightful free crochet pattern that will transport you back to the colorful Stone Age—Amigurumi Pebbles Flintstone. If you’re a fan of the beloved animated series, The Flintstones, you’re in for a treat! Crafting this charming little character is not only a joyful project but also a fantastic way to hone your crochet skills.
Amigurumi, a Japanese art form of knitting or crocheting small, stuffed yarn creatures, has captured the hearts of crafters worldwide. With its simple techniques and endless possibilities, it’s perfect for crocheters of all skill levels, particularly beginners looking to create something fun and whimsical. In this post, we will guide you through each step of creating Pebbles, the spirited daughter of Fred and Wilma Flintstone, ensuring you have everything you need to bring her adorable personality to life.
What makes this amigurumi pattern special is not just the joy of crafting but the nostalgia it evokes. Many of us grew up watching Pebbles and her prehistoric adventures, making this project a perfect way to connect with happy childhood memories. As you crochet, you might find yourself reminiscing about the iconic scenes from the show, like family picnics and playful times in Bedrock. Plus, handmade items carry a unique charm and warmth, making Pebbles a perfect gift for anyone who appreciates a handmade touch.
This crochet pattern is designed with beginners in mind, featuring easy-to-follow instructions that will guide you from the first stitch to the final touches. You will learn essential amigurumi techniques such as working in the round, increasing and decreasing stitches, and attaching limbs and features. With a little bit of yarn and a few hours of your time, you will create a cherished piece that can be displayed proudly or gifted to a friend who shares your love for classic cartoons.
If you’re ready to embark on this delightful crochet journey, gather your favorite yarn colors and some crochet hooks, and let’s get started. Whether you are creating your very first amigurumi piece or adding to your collection of handmade treasures, this Pebbles Flintstone crochet pattern is sure to be a thrilling and fulfilling project. Stay tuned, as we will walk you through each step, ensuring that the process is as enjoyable as the finished product. Happy crocheting!
Step back in time to Bedrock with our Amigurumi Pebbles Flintstone Free Crochet Pattern. If you’re a fan of the classic Hanna-Barbera cartoon and love crafting, this project is tailor-made for you. Crochet enthusiasts of all levels can enjoy bringing the adorable daughter of Fred and Wilma Flintstone to life with this easy-to-follow pattern. Let’s embark on a creative journey to create a little piece of nostalgia and add a touch of prehistoric whimsy to your collection.
Abbreviations:
CH – chain
SC – single crochet
INC – increase (two columns are tied in one loop)
DEC – decrease (two columns are connected together)
SL-ST – slip-stitch
HDC – half double crochet
DC – double crochet
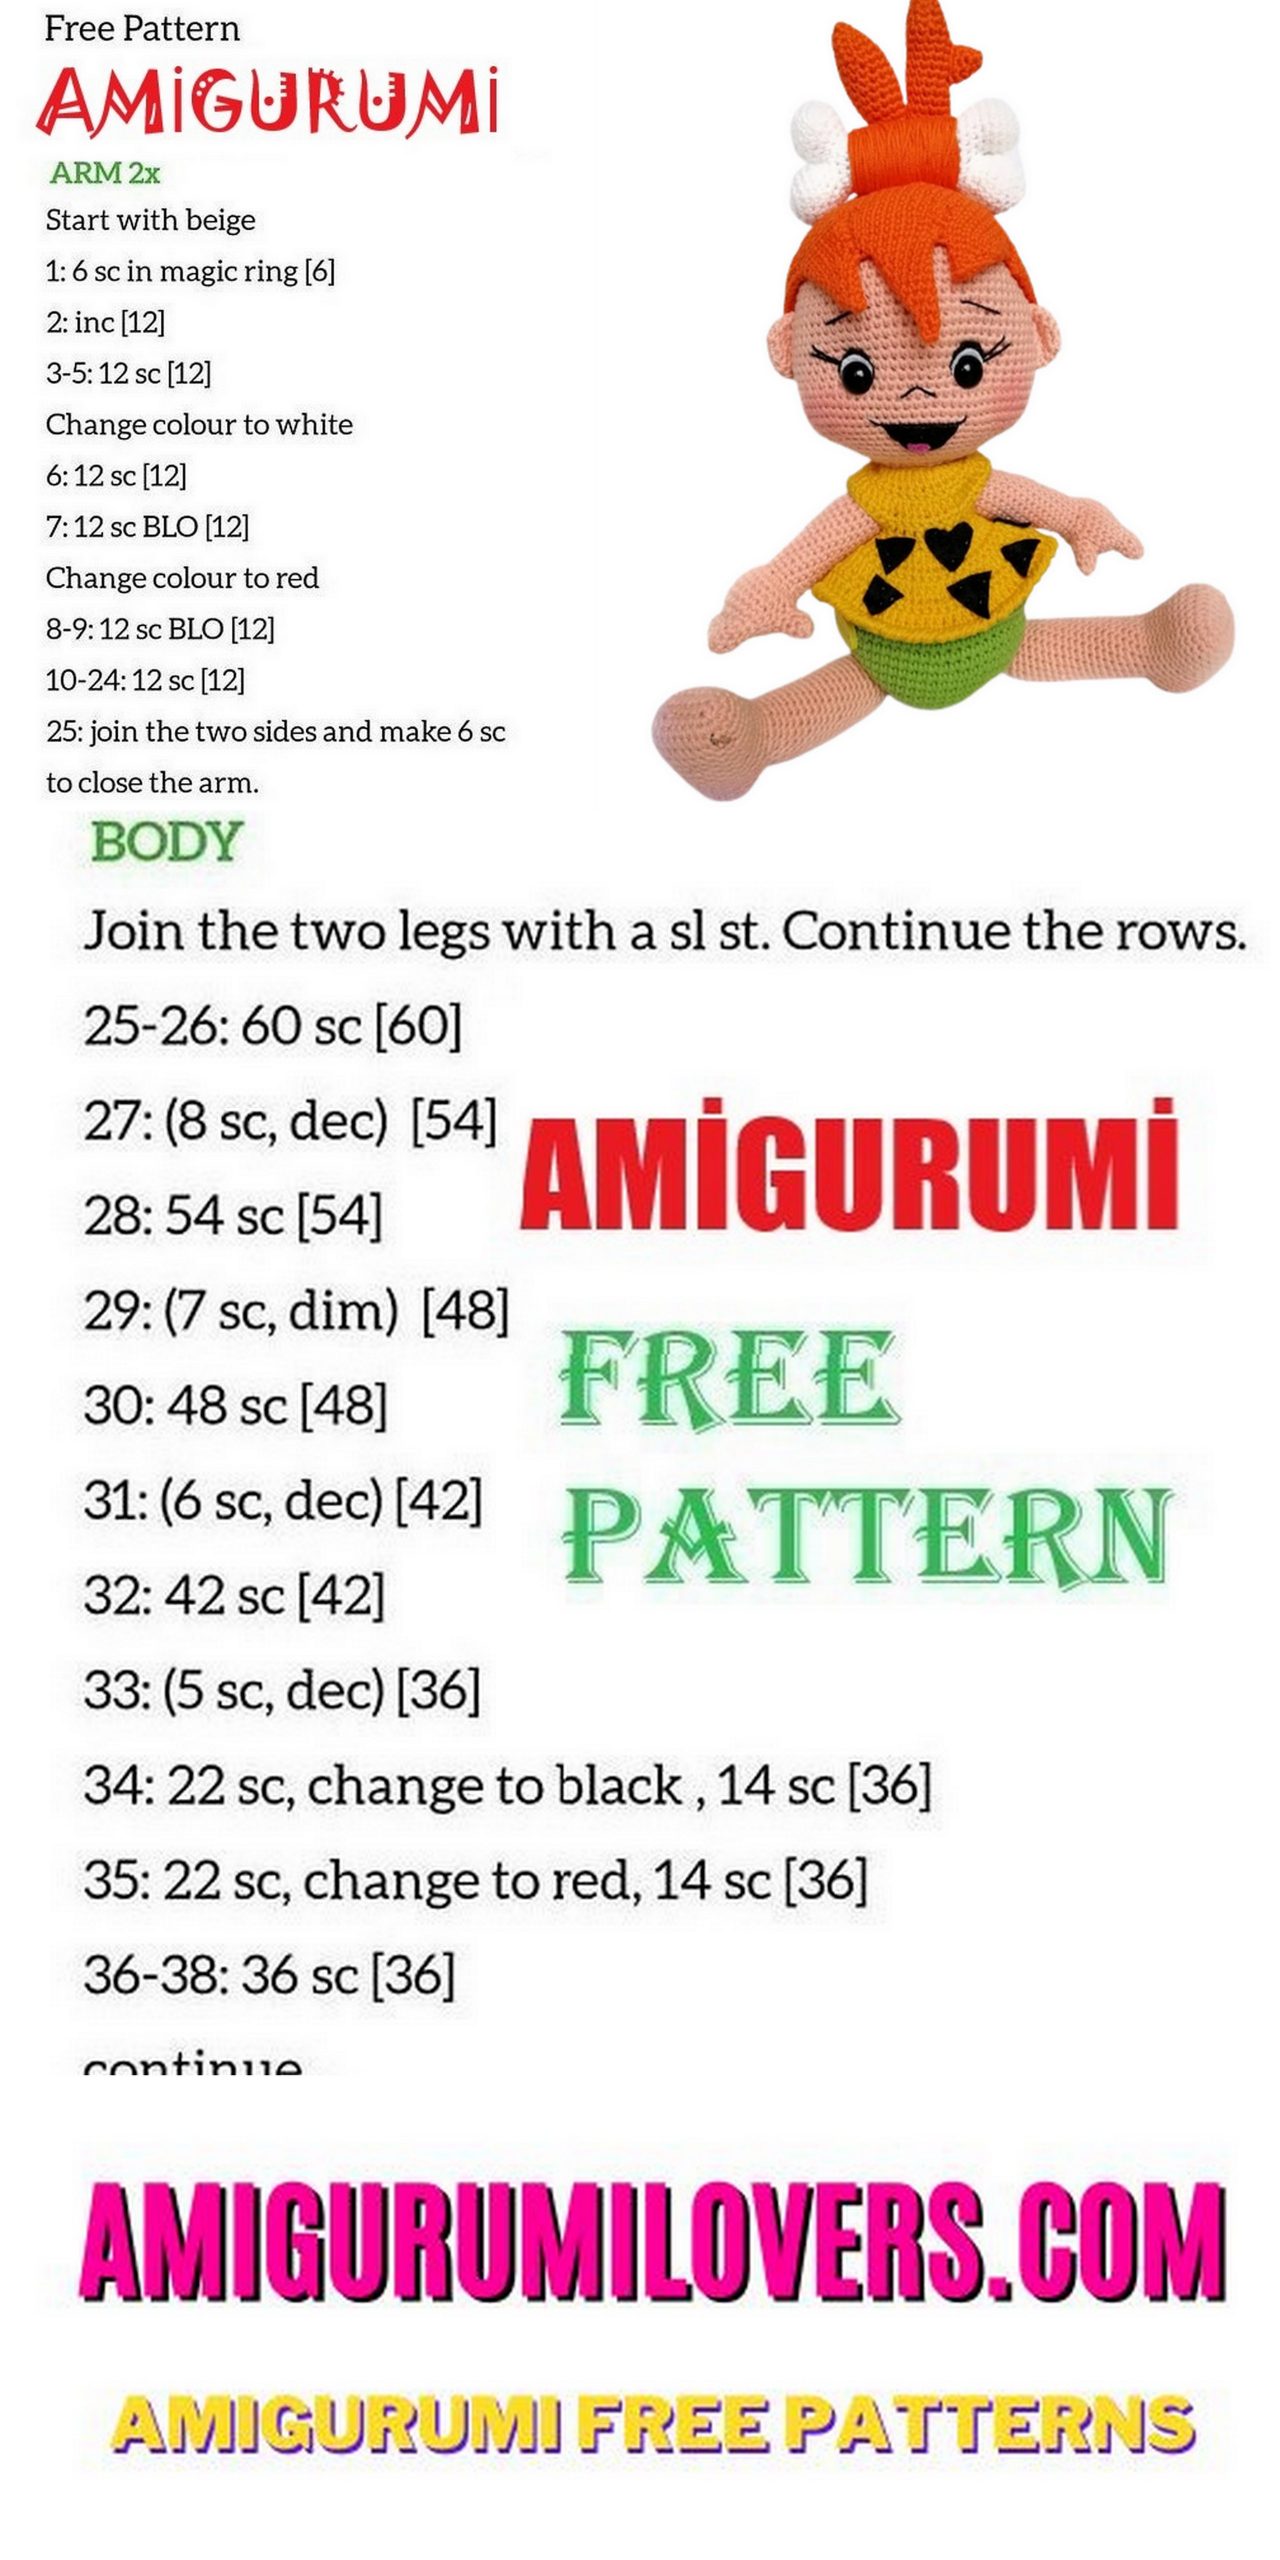
AMIGURUMI PEBBLES FLINSTONE
HEAD
1.:Magic ring 6sc
2 .: 6inc (12)
3)(1sc, 1inc) * 6 (18)
4 .: (2sc, 1inc) * 6 (24)
5.: (3sc, 1inc) * 6 (30)
6.: (4sc, 1inc) * 6 (36)
7.: (5SC, 1inc) * 6 (42)
8 .: (6sc, 1 inc) * 6 (48)
9.: (7sc, 1 inc) * 6 (54)
10.: (8sc, 1 inc) * 6 (60)
11.: 60 sc (60)
12.: (9sc, 1 inc) * 6 (66)
13.: 66 sc
14)(10sc.1inc) * 6 (72)
15-21. 72 sc
22:: (17sc, 1 inc) * 4 (76)
23-27 .: 76 sc
28: 17sc, 1dec) * 4 (72)
29 .: 26 sc, 2 chains, skip 2sc, 11sc, 2 chains ,. Skip, 31sc (68)
30.: 20sc (1inc, 1sc) * 3, 15 (1inc, 1sc) * 3, 25 sc (78)
31-33. : 78 sc (3 rows)
34 .: 21sc (1dec, 1sc) * 3,16sc (1dec, 1sc) * 3, 23sc (72)
35.: 21sc, 3dec, 16sc, 3dec, 23sc = (66)
36.: 9sc, 6dec, 22sc, 6dec, 1.1sc (54)
37 .: 8sc, 6dec, 16sc, 6dec, 68sc (42)
38-39. : 42sc
40 .: (4sc, 1 dec) * 7 (35)
41 .: (3sc, 1dec) * 7 (28)
42 .: (2,1dec) * 7 (21)
43 .: (5sc, 1dec) * 3 (18)
EYE: Eyes can be cut from felt.
EAR:
1.: Magic ring 6sc
2)6inc (12)
3 .: (1sc, 1inc) * 6 (18)
4.: 18sc is over.
HAIR
Orange with rope
1.: Magic ring 6sc
2.: 6inc (12)
3.: (1sc, 1 inc) * 6 (18)
4 .: (2sc, 1 inc) * 6 (24)
5.: (3sc, 1 inc) * 6 (30)
6.: (4sc, 1 inc) * 6 (36)
7.: (5sc, 1 inc) * 6 (42)
8 .: (6sc, 1 inc) * 6 (48)
9.: (7sc, 1 inc) * 6 (54)
10.: (8sc, 1 inc), * 6 (60)
11.: 60 sc (60)
12.: (9sc, 1 inc), (66)
13.: 66 sc
14.: (10sc, 1 inc) * 6 (72)
15 .: 72 sc
16)(11sc, 1 inc) * 6 (78)
17-21 .: 78 sc
HAIR TIP 1 GRAIN (with 25 sc)
1.: 25sc, 25 SC will remain as the BLO (50)
2-5. : We continue without breaking the 50sc rope. The next 14sc li recipe, 20sc recipe, 16sc recipe will be made.
HAIR TIP 1 GRAIN (with 14sc)
1 .: 7sc to the front, 7sc as BLO = 14
2-5. : 14sc
6 .: (5sc, 1dec) * 2 (12)
7.: 12sc
8: (4sc, 1dec) * 2 (10)
9 .: 10sc
10: (3sc, 1dec) * 2 (8)
11 .: 8sc
12: (2sc, 1dec) * 2 (6)
13 .: 6sc
14.: 3dec (3)
SHEET TIP 1 GRAIN (with 20 sc)
1.: 10 sc to the front, 10sc as BLO (20)
2-4. : 20sc
5.: (8sc, 1dec) * 2 (18)
6.: (7sc, 1dec) * 2 (16)
7.: 16sc
8: 1dec, 14sc (15)
9)1dec, 13 sc (14)
10: 1dec, 12sc (13)
11: 1dec, 11 sc (12)
12: 1dec, 10 sc (11)
13: 1dec, 9 sc (10)
14 .: 1dec, 8sc (9)
15: 1dec, 7sc (8)
16: 1dec, 6sc (7)
17.:1dec,5sc(6)
18 .: 1dec, 4sc (5)
19.:1dec,3sc (4) over.
SHEET TIP 1 GRAIN (with 16 sc)
1.: 8sc to the front, 8sc as the BLO (16)
2-4. : 16sc
3.: (6sc, 1dec) * 2 (14)
4 .: (5sc, 1dec) * 2 (12)
5 .: (4sc, 1dec) * 6 (10)
6 .: (3sc, 1dec) * 6 (8)
7 .: (2sc, 1dec) * 6 (6)
8)(3dec) (3)
Bone
We knit in two pieces.
1.: Magic ring 6sc
2.: 6inc = (12)
3 .: (1sc, 1inc) * 6 (18)
4-6 .: 18 sc
7 .: (1sc, 1dec) * 6 (12)
8 .: Now we are assembling 2 parts: 24sc
9 .: (6sc, 1dec) * 3 (21)
10: (5sc, 1dec) * 3 (18)
11: (7 sc, 1 dec) * 2 (16)
12-22. : 16 sc
23 .: (7sc, 1inc) * 2 (18)
24 .: (5sc, 1inc) * 3 (21)
25 .: (6sc, 1inc) * 3 (24)
26 .: Now we divide it in two. Connect the circles, from the back side of the 6sc, as the 6SC FLO one by one, we’ll learn two pieces separately.
27 .: (1sc, 1inc) * 6 (18)
28-30 .: 18 sc
31.:(1sc,1dec)*6(12)
32-34. : 12 sc
35 .: 1dec (6) Tighten the hole, cut the thread.Then, connect the second part with the remaining loops, repeat from line 26.
Bone Hair
First sheet tail
1.: Magic ring 4sc
2 .: 2 inc, 2 sc (6)
3: 1 sc, 1 sc, 1 sc, 1 sc, 2 sc (8)
4: 2sc, 1inc, 2sc, 1inc, 2 sc (10)
5.: 3 sc, 1inc, 3sc, 1inc, 2sc = (12)
6.: 4sc, 1inc, 4sc, 1inc, 2sc = (14)
7-12: 14 sc
13: (5sc, 1 inc) * 2 (12)
14: (4sc, 1dec) * 2 = (10)
15 .: (3sc, 1dec) * 2 = (8)
16 .: (2sc, 1dec) * 2 = (6)
Bone Hair
B) A small piece to be attached to the first strand
1.: Magic ring 4sc
2 .: (1sc, 1 inc) * 2 = (6)
3 .: (2sc, 1 inc) * 2 = (8)
4 .: (3sc, 1 inc) * 2 = (10)
C) The third attachment part of the hair
1.: Magic ring 4sc
2 .: (1sc, 1 inc) * 2 = (6)
3 .: (2sc, 1 inc) * 2 = (8)
4 .: (3sc, 1 inc) * 2 = (10)
5 .: (4sc, 1 inc) * 2 = (12)
6-17. : 12 sc
After that, tie the two threads together and tie them to the bone. Wind the yarn several times.
Body
Start knitting the bottom in green (panties).
1. : Magic ring 6sc
2.: 6inc = 12
3. : (1sc,1inc )*6(18)
4.: (2sc,1inc)*6(24)
5.: (3sc, 1inc)*6 = (30)
6.: (1sc, 1inc)*2 ,6sc,1inc,8sc,1inc,6sc,(1inc,1sc)*2 = (36)
7.:4sc,(1inc,8sc)*3,1inc,4sc=40
8.:1sc,1inc,2sc,1inc,11sc,1inc,1sc,1inc,2sc,1inc,1sc,1inc,11sc,1inc,2sc,1inc,1sc=(48)
9.:5,1inc,12sc,1inc,10,1inc,12,1inc,5sc = (52)
10.: (1sc,1inc)*3,15sc,1inc,(2sc,1inc)*3,15sc,(1inc,1sc)*3 (62)
11.: (29sc,1dec)*2=60
12-15.: : 60 sc (4 row)
16.: FLO 60sc
17. : 60 sc
Tie the skin rope to BLO 16. We continue to knit.
18.: 60 SC
19.: (8 sc, 1dec)*6 = (54)
20.: 54 sc
21. : (7sc, 1dec)*6=(48)
22.=48sc
23.=(6sc,1dec)=42
24-25. : 42 sc (2row)
26. : (5sc, 1dec)*5= (36)
27-28 .: 36 sc (2 row)
29. : (4sc, 1dec)*6 = (30)
30-32. : 30 sc (3 row)
33.: (3sc, 1dec)*6(24)
34.. : 24 sc
35. : (2sc,1dec)*6 (18)
36-37. : 18 sc (2 row)
over.
HAND FINGER
Forefinger
1: Magic ring 7sc
2-4 .: 7 sc
Middle finger
1: Magic ring 6sc
2-4 .: 6 sc
Little finger
1 .: Magic ring 5sc
2-4. 5 sc
Thumb
1: Magic ring 6sc
2-4 .: 6 sc
Finger Attachment
1 .: 2 sc to pinky finger, 3sc to middle finger, 7sc forefinger, 3sc to middle finger 3sc to serce finger (18)
2: (2sc, 1inc) * 6 = (24sc)
3-4: 24 sc
5: 8 sc for right hand, 3sc to thumb, 13sc with palm
6 .: 8 sc, 3sc to thumb, 13sc
7 .: 14 sc for left hand, 3sc to thumb, 7sc with palm
8 .: 14 sc, 3sc to thumb, 7sc with palm
9.: 24 sc
10.: 12 dec = (12)
11.:( 5sc,1inc)*2=(14)
11-15.: 14 sc
16.: (6sc,1inc)*2=(16)
17-21. : 16 sc
22.:(7sc,1inc)*2=(18)
23-25. : 18 sc
26.: (7 sc, 1dec)*2 =(16)
27.: (6 sc,1dec)*2 =(14)
28 .: (5sc, 1dec)*2 =(12)
29.: 1dec = (6)
FOOT
1: 7 chain, starting from the second ring of the chain: 1inc, 4 sc, we have passed to the opposite side of the chain, 4sc to the same hole 4sc, 1inc = 16
2.: 2 inc,4 sc,4 inc,4 sc,2inc = (24)
3.: 11sc, 2inc, 11sc= (26)
4. : 12 sc, 2 inc, 12sc = (28)
5-8. : 28 sc
9 . : 1dec, 12 sc, 1dec. 12 sc = (26)
10-13.: 26 sc
14.: 2 sc, 8 chains, 10sc skip, 14 sc = (24)
15.: 2 sc, 8sc over the chain, 14sc = (24)
16:( 2sc, 1dec) * 6 = (18)
17 .: (1sc, 1dec) * 6 = (12)
18.: 6dec = (6)
Cut the thread, and knit the other leg.
19 .: On the 8sc chain, 10 sc legs (18)
20.: 18 sc
21.: (8sc.1 inc) * 2 = (20)
22-39. : 20 sc
40 .: (8sc, 1dec) * 2 (18)
41.:(4sc,1dec)*3=15
42.:(1sc,1dec)*5=(10)
43 .: 5dec = (5)
Done.
Before you leave, make sure to check out more free amigurumi crochet patterns and discover new ideas for your next project.
You can also browse our full amigurumi pattern archive for hundreds of beginner-friendly designs.